This post may contain affiliate links for your convenience. If you make a purchase through one of my links I will earn a small commission at no additional cost to you.
Last Updated on August 12, 2023 by Chris Butler
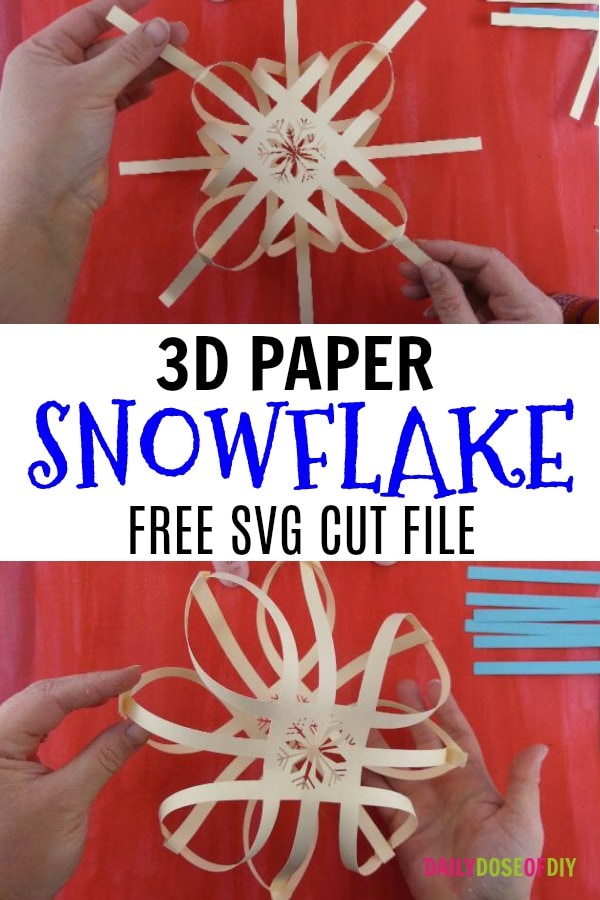
Hello and happy Winter my crafty friends! This is day 3 of the 12 days of free Christmas SVGs. And today we’re making 3D Paper Snowflakes.
This is a fun and easy craft to make. You can hang your paper snowflakes from your Christmas tree or line them up across your window.
I cut my paper snowflakes on my Cricut Explore and I’m freely sharing the SVG file with you. You can find the details at the bottom of this post.
Plus there’s a video at the end too so you can see one being made.
Let’s get to it.
Quick Links to Information in This Post
3D Paper Snowflake Supplies Needed
12×12 Cardstock
Cutting Machine (I use the Cricut Explore -fab deals this season)
Tacky Glue or Hot Glue
Free 3D Snowflake Cut File (available in my resource library, details below)
How to Make 3D Paper Snowflakes
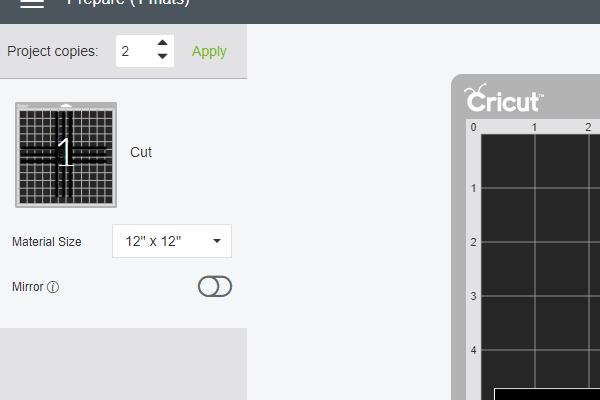
To get started download the 3D Paper snowflake SVG file from my free resource library and then upload it to Design Space.
The file is already sized and ready to cut, but you can adjust the sizing if needed. You will need to cut out two pages to make one snowflake. So be sure to change your project copies to two.
After they are cut grab your tacky glue or hot glue gun and let’s get the snowflakes put together.
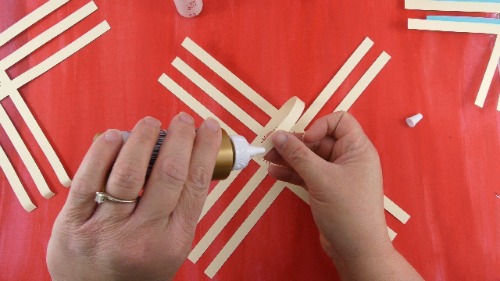
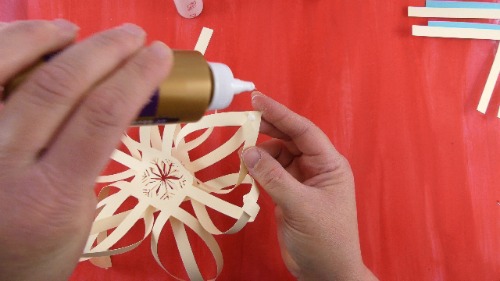
To start we are going to glue together the end strips that form the ninety-degree angles. Pull one end strip up and apply glue to the underside.
Pull the next strip up and glue it to the first one. Repeat this process for all four corners on both cutouts.
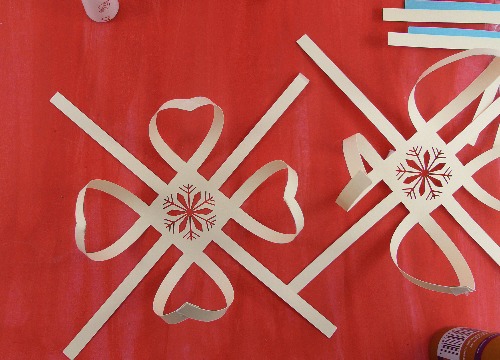
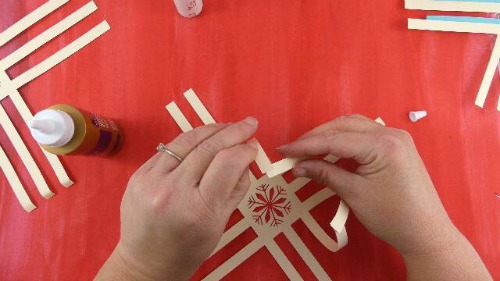
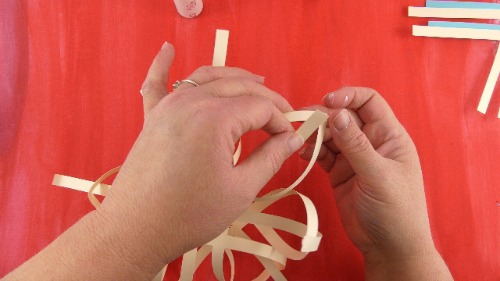
You will end up with four loops and four straight pieces on each cut-out. Now take one of your snowflake sides and flip it over and place it on top of the other one. Place the loops between each other.
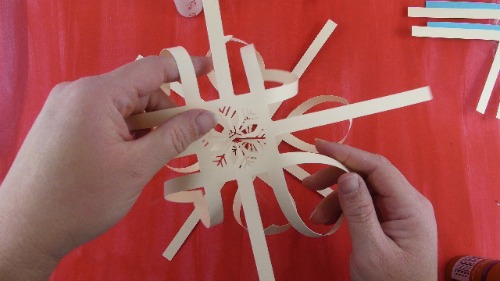
Next we are going to put each straight strip from the top piece through the loop on the bottom piece. And place each strait strip from the bottom piece through the loop from the top piece.
Next we’ll glue those straight pieces to the loops we placed them through.
Work your way around the snowflake until every strip is glued to every loop.
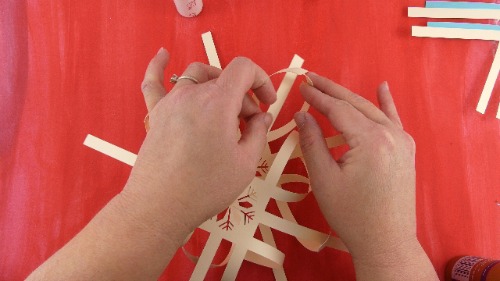
After that is done we are going to fold each of the strips to form a crease. The crease will help keep the two pieces of the snowflake apart.
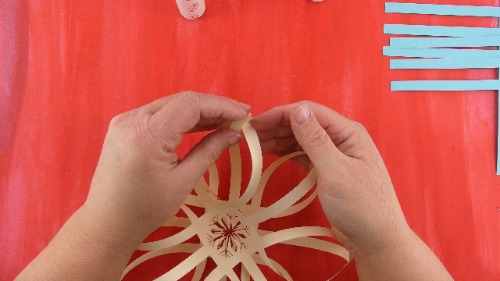
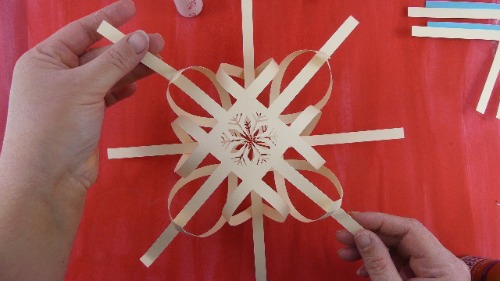
Fold each straight piece towards the loop and crease it. After you finish that, gently pull the two sides apart.
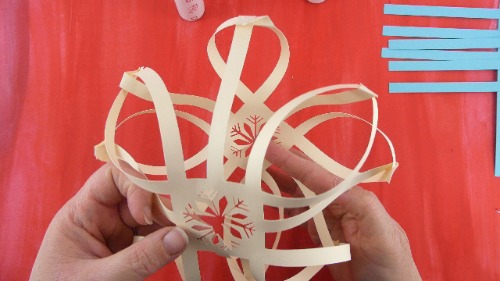
Stretch it apart a bit until it holds its form.
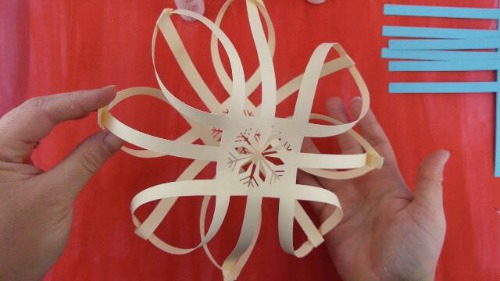
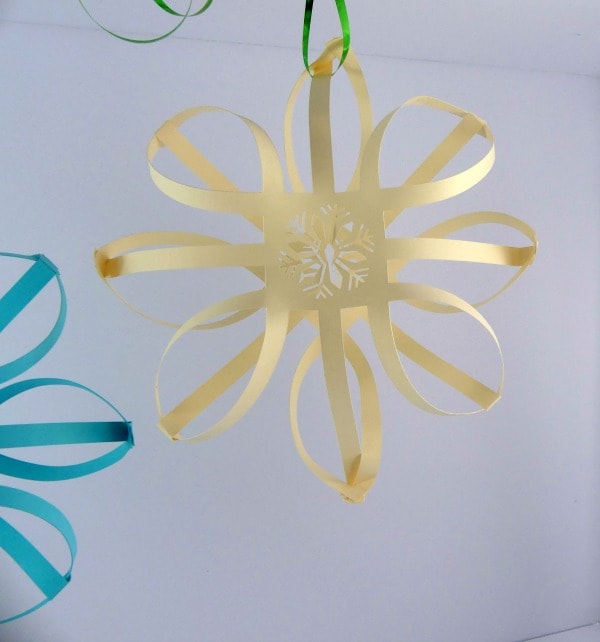
Finally add a ribbon or string to hang it from your Christmas tree or windows.
Get Your Free 3D Paper Snowflake SVG File
I keep all of my free SVG files in a resource library for your convenience. It’s like a one-stop shop that you can go to grab all the files, including the 3d paper snowflake.
The library is totally free to subscribers to my weekly newsletter. When you sign up the link and the password will be emailed to you immediately. And then about once a week I send an email letting you know about new free files available.
To sign up simply add your name and email below.
All of my free SVG files and Designs are kept in a library for your convenience. We will send you the link and password right away, and you’re free to use all the resources you want in the library.
Already have the password? (It’s at the bottom of every email) Enter the Library Here
3D Paper Snowflake Video
This is one of those crafts that watching a video will definitely help you understand the directions.

Chris Butler has helped thousands of crafters learn how to use their Cricut machine without feeling overwhelmed. She is a best selling author and an up and coming designer. For fun Chris enjoys designing SVG Files, hanging out with her family (preferably at the lake), traveling, and volunteering at her church. She is a wife and mom of two crazy fun kids.
Leave a Reply