This post may contain affiliate links for your convenience. If you make a purchase through one of my links I will earn a small commission at no additional cost to you.
Last Updated on August 14, 2023 by Chris Butler
Hey there crafty friend! You wouldn’t believe how many people tell me they bought a Cricut but……it’s still in the box, or setting on the shelf somewhere because they just got intimidated and they’re afraid to even try.
I know when you got your Cricut you were so full of excitement you could hardly wait to get home to use it. But somewhere during the first project or two, it became overwhelming and maybe even a little frustrating.
Don’t worry, I have taught thousands of people how to use their Cricut and I can teach you too. It’s not your fault there is so much to learn, you just need a little guidance.
In this article, you’ll learn about different things you can make with a Cricut Cutting Machine, how to set up your machine, download design space and more.
Plus I have a free quickstart guide for you that will teach you all of that AND everything you need to know about Cricut mats, blades, and how to upload images and SVG cut files.
Wanna jump straight to the free Cricut quickstart guide? Click here.
And when you’re ready to learn more, there are links to in-depth tutorials that will help you become a Cricut crafting expert.
Soon you’ll be making things that even your crafty-est of friends will turn green with envy over.
PIN IT
Ok -First let’s take a look at what a Cricut can do.
Quick Links to Information in This Post
What Can You Do With A Cricut Machine?
A Cricut is an at-home cutting machine and there are so many things you can make with it.
Cricut machines will cut vinyl, paper, poster board, cardstock, foam board, felt, fabrics, leather, and hundreds of more materials! Here
If you have a Cricut Maker cutting machine you can also cut balsa wood and thicker materials with the knife blade, And you’ll be able to cut more fabrics and crepe paper with the rotary cutter.
Plus with the new tools for the Cricut Maker, you can also do engraving, perforating, wany lines, and debossing.
The possibilities are endless.
A Cricut cutting machine can help you make things like:
- Custom T-Shirts
- Personalized Mugs and Tumblers
- Paper Flowers
- Banners
- Earrings + other Jewelry
- Cards
- Stencils
- Decals
- Wood Cutouts
- Stickers
- Keychains
- +more!
How To Use a Cricut
How To Set Up Your Cricut
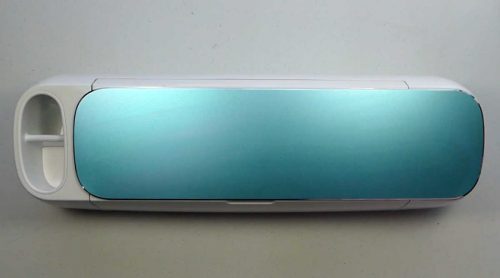
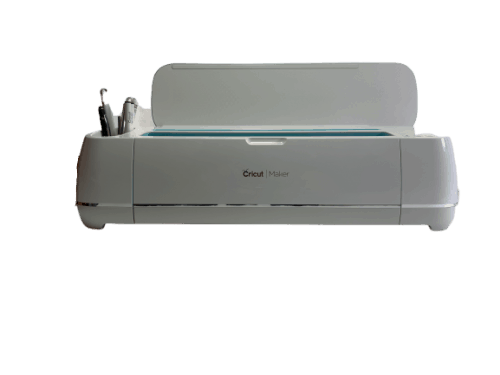
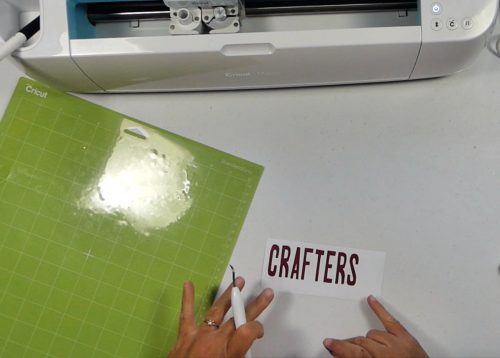
When you take your Cricut out of the box it will be all closed up similar to the above picture of a Cricut Maker. Cricut Explores will look slightly different but most of the operations are the same on both machines.
Choose a location for your Cricut that is near an outlet so that you can easily plug it in.

Also, be sure to leave enough clearance in the front and back of your Cricut machine for the cut mats as the mats pass through the machine when Cricut is cutting your project.
The mats are 12″ long or 24″ long for bigger projects. So depending on which mat you’re using, you’ll need 10-20″ of clearance for the back of your Cricut.
In the box you will also have two cords.
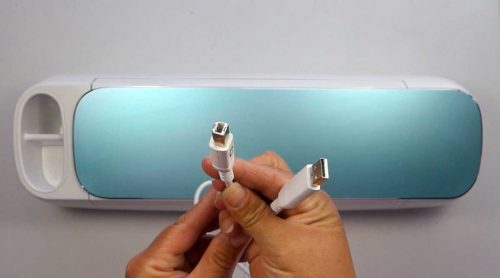
One cord will have a square end and a USB end. This is the cord to connect your Cricut to your computer. If you plan on connecting via BlueTooth just keep this cord in the box or another safe place in case you need it.
If using this cord plug the square end into the back right of your Cricut Machine and the USB end into your computer.
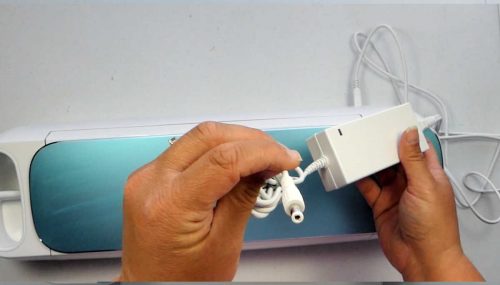
Next is the power cord. The circle end will also plug into the back of your Cricut on the right side and the plug end into an outlet.
Now that your Cricut is set up and ready to go, let’s set up Design Space and see how to use your Cricut.
Do You Need a Computer to use a Cricut?
To use your Cricut cutting machine you will need to download the software called Design Space. You can use design space on your computer, Mac, iPhone, iPad or Android devices.
So you do not have to have a computer to use a Cricut, it will work with mobile devices too.
Once your Cricut Machine is set up you’ll need to get Design Space loaded to your computer, tablet or phone -whichever you are using.
This is the software that you will use to upload and edit your projects in preparation for cutting them with the Cricut.
To download Design Space for your Mac or PC, IOS or Android follow this link here. Click on the download link for your device and follow the on-screen instructions. Cricut just recently came out with an offline version of design space which is super exciting. It will be fully ready to go by the beginning of 2020.
You will need to create a log in for Design Space and that is usually your email and a password. Once you’re all signed in and your Cricut is connected you’ll be prompted to complete your beginner project that is included with your Cricut.
If you wish to make it just go ahead and follow the on-screen instructions. If it doesn’t turn out don’t be upset, all hope is not lost. I messed up my very first project too.
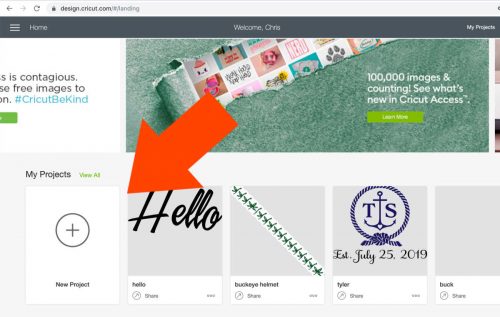
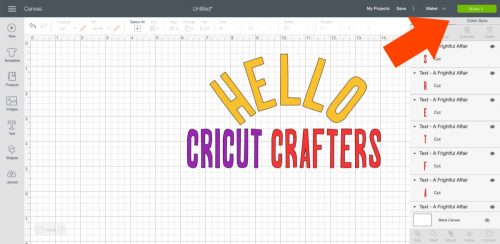
After you make it through the set up prompts when you visit Design Space you’ll be on the home page. Click ‘New Project’ to enter design space.
And here’s what the inside of design space looks like on a Mac or PC
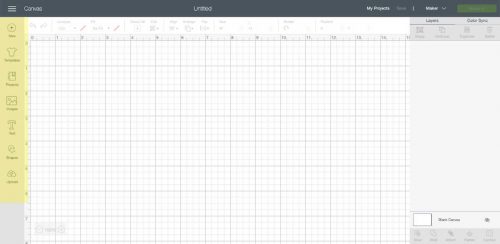
You’ll see the canvas where you can upload and edit pre-made designs or make designs from scratch right in design space.
Learning everything you can do in design space is too much to put here, but I’ll link you up to some more tutorials to help you out at the bottom of this post.
Wanna jump straight to the free Cricut quickstart guide? Click here.
How Do You Cut Vinyl With Cricut?
So after you have a design that you want to cut in design space you’re going to click the make it button on the top right of the screen.
The next screen you’re going to come to is on how to prepare your cut mats. All of the materials that Cricut cuts need to be placed on the cut mat that was included with your Cricut.
You may have gotten more than one color cut mat with your purchase, for the most part, you will be using the green standard grip mat. Other choices include
- Purple – strong grip
- Blue – light grip
- Pink – fabrics
In the Cricut Quick-Start Guide you’ll learn more about what materials should go on what mat plus tips on how to care for your cut mats. You can grab the quick-start guide here.
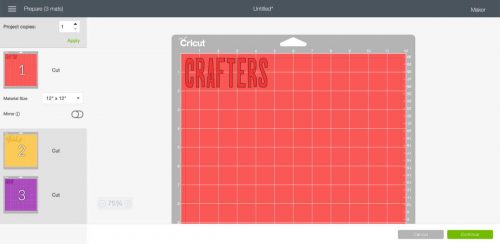
The colors Cricut shows on the screen is not the color of mat you need to use, it’s showing you the color of vinyl you need to place on the mat for your design.
And even then it doesn’t really matter if I put black vinyl on the mat when Cricut is showing red. They are just being helpful and showing you the color of your original design.
Cricut is also showing us that for this red color I will need a piece of vinyl at least 2 inches tall and 5 inches wide. Cricut is going to cut the vinyl just as you see it on the screen. One big beginner mistake is not putting the vinyl on the mat where Cricut will cut it.
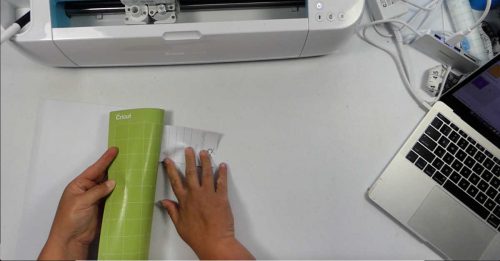
So cut the vinyl the size you need and place it on the cut mat with the vinyl side up in the position it’s shown in design space.
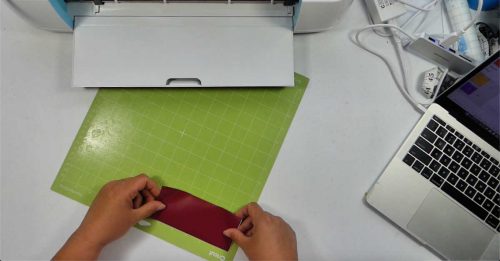
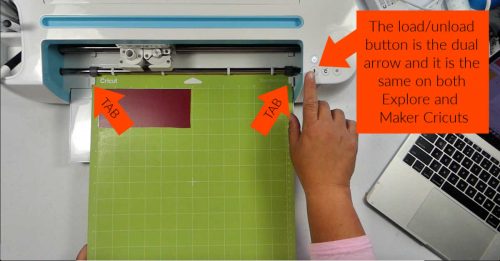
Next you’re going to load the cut mat into the Cricut by placing the mat under the two tabs on the side. Hold the mat against the roller bar and press the load/unload button.
Back in design space click the continue button. It will check to make sure your Cricut is connected. If you have a Cricut Maker this is where you will select what material you are cutting. Select your vinyl type from the list.
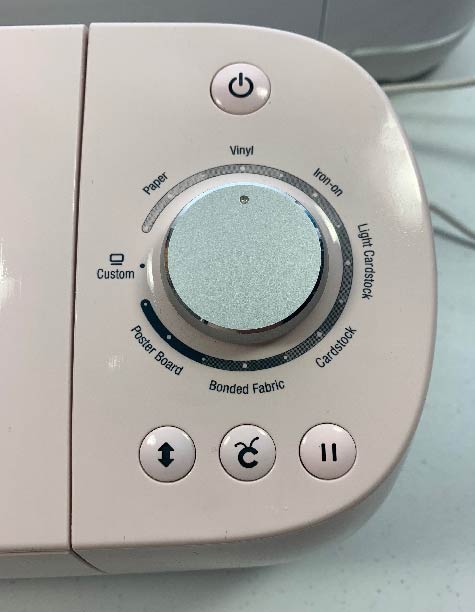
If you have an Explore series Cricut make sure the dial on the machine is turned to vinyl.
Now you can press the go button on your Cricut machine which is the ‘C’ It will be flashing when it’s ready.
And that’s it, Cricut will cut the vinyl -you don’t have to touch anything until it’s done.
How To Remove Vinyl From The Cut Mat
When Cricut is done cutting the load/unload button will begin flashing. Press the button to release the mat.
To get the vinyl off the mat it’s best to flip the mat upside down and remove the mat from the vinyl like so. . .
After you remove your vinyl, be sure to put the protective cellophane back on to your cut mat. This will keep dust and dirt off of your mat so that it remains sticky.
How to Weed Vinyl
The next thing you will need to do is weed your vinyl. Weeding is removing the excess vinyl from your design. The easiest way to do this is with a weeding tool. Cricut makes a kit that is pretty reasonable on Amazon here, plus there are several knock-offs available too.
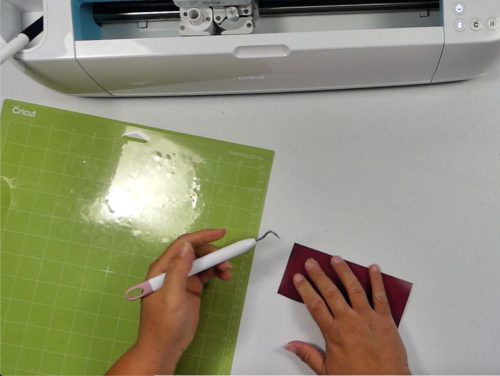
Poke the vinyl that’s not part of your design and pull up. The background will be your largest chunk of vinyl to remove. Be careful not to remove any pieces that are part of your design.
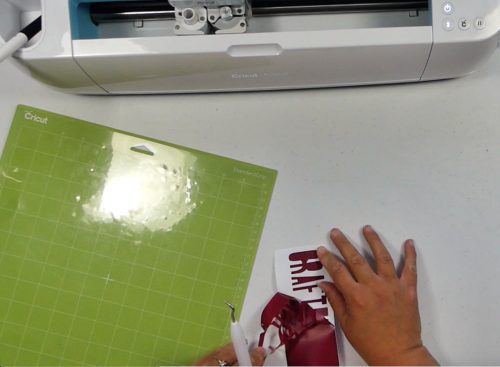
After the background scrap vinyl is removed, poke the centers of your letters with your weeding tool and remove them.
Keep weeding until all that’s left is the vinyl design that Cricut cut for you. Next you would transfer the vinyl to your final project with transfer paper
How to Load Paper into Your Cricut
Loading paper into your Cricut cutting machine is much like loading vinyl. Align your paper on the top left of your Cricut cut mat. For thinner paper, you’ll want to use the blue light grip cut mat.

The cut mat is going to keep your paper sturdy and in place so Cricut can cut it accurately. Slide the mat under the guides of the Cricut machine. Hold it against the roller bar as you press the load/unload button (arrow button). Cricut will load the mat and prepare to cut your design.
Just like with vinyl, after the design is cut be sure to flip the mat over and remove the mat from the paper to help reduce curl. If the paper becomes stuck use the spatula that comes in the tool kit to lif it off of the mat.
How to Change Cricut Blades
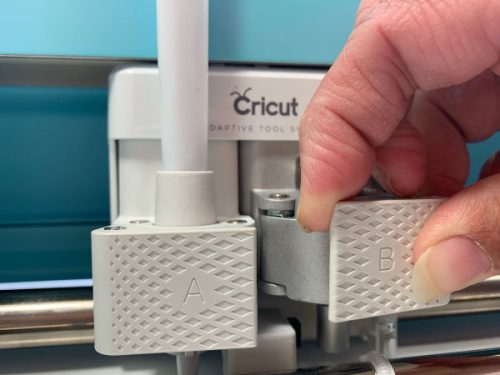
The cutting blades are in clamp ‘B’ of the housing. Clamp ‘A’ is for pens and the scoring stylus.
To remove the blade and housing open clamp ‘B’
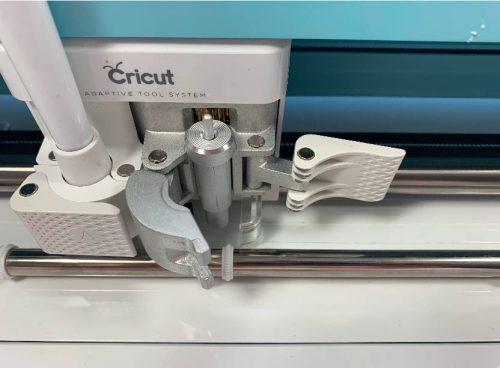
Cricut explore machines won’t open completely up, but will open enough to pull the blade housing straight up. The Cricut Maker housing will open completely so you can pull the blade housing out.
One of the common reasons you’ll be pulling the blade out is to clean it off. Bits of vinyl and paper can get stuck to it (especially glitter!) and make your next cut not turn out great.
So you may think you need to replace your blade when it really just needs to be cleaned. To clean it, depress the plunger on top of the housing and stab the blade into a ball of tin foil. Be sure not to stab yourself. Do this several times (like 20+) and your blade will be good as new.

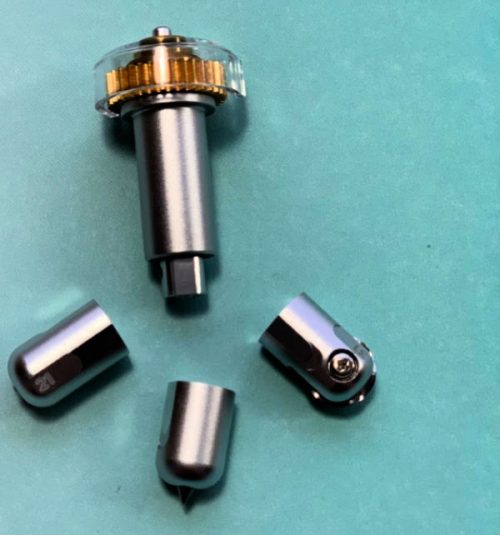
If you’ve cleaned your blade and it’s still not working right it may be time to change it. For the fine point blade (the one your Cricut comes with) and the deep point blade, you can change just the blade and not have to buy a whole new housing.
Depress the plunger on the top of the housing and use a pair of needle-nose plyers to gently pull the blade out. It’s held in by a magnet so it comes out fairly easily. With the plunger still depressed insert your new blade and then release the plunger.
How to use Your Cricut -Free Quick-Start Guide
Wow you’ve learned a lot about your Cricut already! Learning how to use your Cricut is not hard, but it’s a lot to remember. And until you’ve done it a few times it’s easy to forget what you’ve learned.
That’s why I’ve put together a free Quick Start Guide for you. It will show you how to set up your Cricut, Design Space, upload SVG Cut Files and Images, How to Take care of your Cut Mats and Blades, an overview of the layers menu plus more.
To grab your free copy of the Cricut Quick Start Guide just click here and fill out the simple form. The guide will be instantly emailed to you.
More Cricut Tutorials For You
How to Edit Text in Cricut Design Space
How to Make Monograms with Your Cricut -Three Ways
How to Upload SVG Cut Files to Cricut
How to Make a Stencil with your Cricut The Easy Way
How to Layer Adhesive Vinyl with Cricut Design Space
How to Cut Reusable Stencils with your Cricut

Chris Butler has helped thousands of crafters learn how to use their Cricut machine without feeling overwhelmed. She is a best selling author and an up and coming designer. For fun Chris enjoys designing SVG Files, hanging out with her family (preferably at the lake), traveling, and volunteering at her church. She is a wife and mom of two crazy fun kids.
Thankyou so much for your information and tutorials on using a Cricut machine. I recently bought one as I loved the idea of all the things you could make. Then it sat in the box and I nearly sold it as was feeling discouraged as I couldn’t get my head around Design Space etc. But yesterday I found your website and made the large wall flowers and I had so much fun and was wrapped up in the whole crafting experience. It also helped me learn some things about Design Space too. So thankyou for making me begin to love my Cricut and I am excited about what I can learn to make in the future.
Aww Sonia! I’m so happy to hear that =) . You just made my day! Enjoy your crafting
I got a Cricut Explore Air 2, Easy Press 9×9, and Cinch for Christmas. This ULTIMATE GUIDE is going to help me so much. Many of my questiins were answered just reading this article. Thank you so much. God bless and keep you.
Thanks Janell! so excited for you, can’t wait to see what you make =)
I recently watched a YouTube video of the Home Sweet Home Sign that was done when the hinge method.I would love the svg but I’m not able to find it on your website.
I have an I pad not a coumpter how do i get the templates to show?
How can I get a copy of your heat guide for heat press?
Hi Diana! It’s in the free resource library at the top under cheat sheets
How do I get a copy of your Easy Press guide