This post may contain affiliate links for your convenience. If you make a purchase through one of my links I will earn a small commission at no additional cost to you.
Last Updated on August 11, 2023 by Chris Butler
Are you struggling to find room for all of your crafting vinyl? With every Cricut Project I do, more vinyl gets added to my ever-growing pile. It was definitely time to tackle this mountain and do something about it.
There’s one little problem, I don’t have a lot of extra space on a table, on a shelf, or for a floor rack. So what’s a girl to do? Build a solution. Which is exactly what I did.
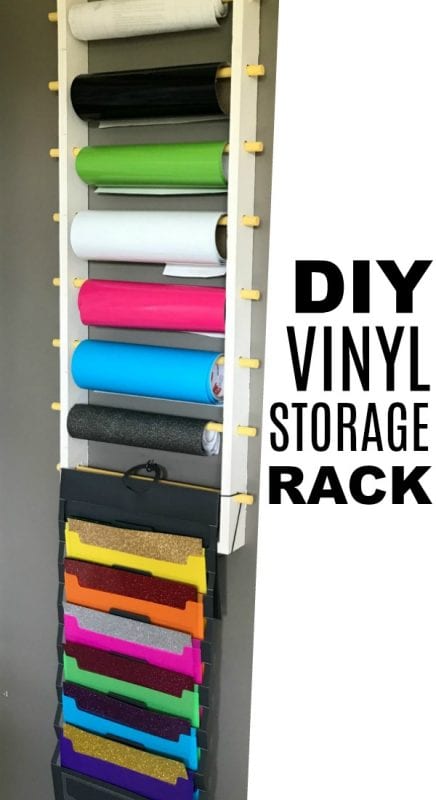
This storage rack will hold seven rolls of vinyl and has six pockets that will hold all of your vinyl sheets. And it’s super compact, so you can place it behind a door, or even on the door itself.
Plus it’s quick and easy to make. Which is a very good thing because I have a feeling I’m going to need more 😉
Let’s get started.
Quick Links to Information in This Post
Tools and Supplies Needed
- 1×3 Pine Boards (2) 14″ long and (2) 43″ long
- Cascading Wall Organizer from Amazon
- (8) 3/8″ Wood Dowels 18″ Long
- Screw Hook or ‘S’ Hook
- Pocket Hole Screw System and 1 1/2″ Screws
- OR Hammer and Nails
- 3/4″ Wood Flat Bit + Drill
- Wood Glue
- Sand Paper
- Paint
Building The Frame
First, cut your pine boards, you will need (2) 14″ long and (2) 43″ long. Sand them down to remove any splinters or rough areas.
Next, we need to drill out the holes for the wood dowels.
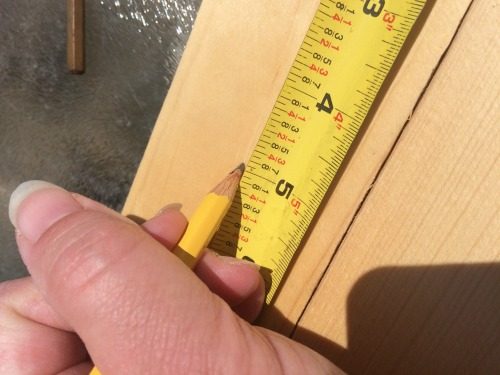
We need to mark where we will drill the holes on the two long boards. Measure in 1 1/4″ to find the center of the width (the boards are actually 2 1/2″ wide). I placed my wood dowels 5″ apart. So after I found the center I marked every five inches from top to bottom.
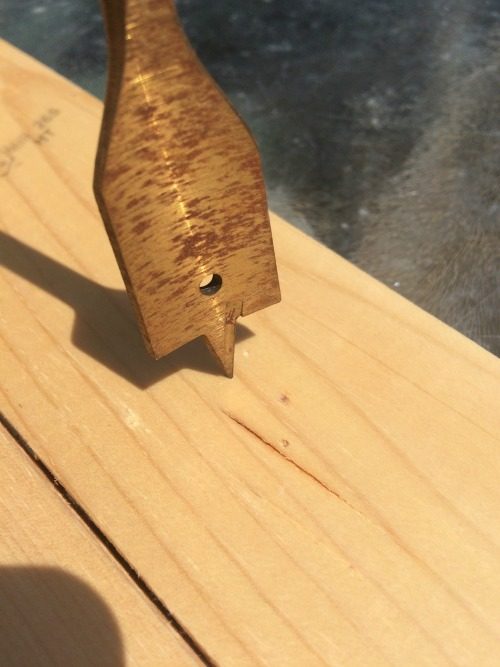
Now that we have the placement of our dowels marked we need to drill the holes for them. Use a 3/4″ wood flat bit or bore to drill out the holes for each dowel. After I drilled out two of them I got smart and clamped the two boards together so I could drill all the way through both at the same time.
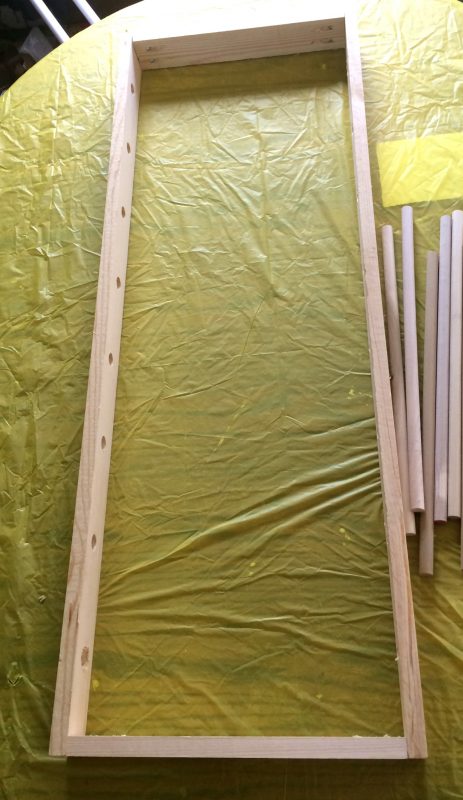
After the drilling is done, it’s time to put it together. It’s just a basic frame. The smaller pieces go on the inside. If you are using a pocket hole drill system drill out both ends of the shorter boards.
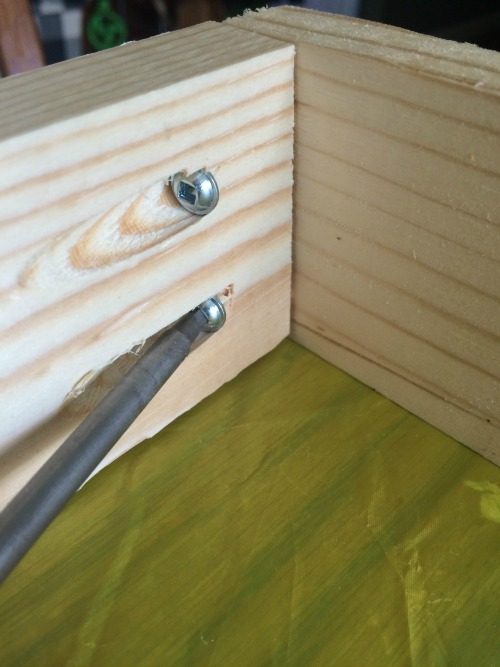
I love how easy it is to build things using a Kreg Jig to make pocket holes. This project is simple enough though a hammer and nails will do the trick. Be sure to add wood glue first.
Now that the frame is built it’s time to make it look pretty. You will most likely need to do some more sanding where your holes were drilled. When all of your sanding is done be sure to remove all of the sawdust and get it cleaned up for paint.
I painted my frame white and the wood dowels yellow.
Hanging The Vinyl Storage Rack
After the paint is dry it’s time to hang it up! I hung mine behind the door. It fits perfectly and it’s out of the way yet still easy to access.
You can add a sawtooth hanger to the back of the rack if you wish. I just hung mine from the frame.
If you have a level handy its a good idea to grab it to make sure it gets hung up straight. The nails/screws in the wall need to be approximately 77″ up from the floor and 12″ apart.
After your nails/screws are in the wall hang the frame on them.
Attach the Wall Organizer
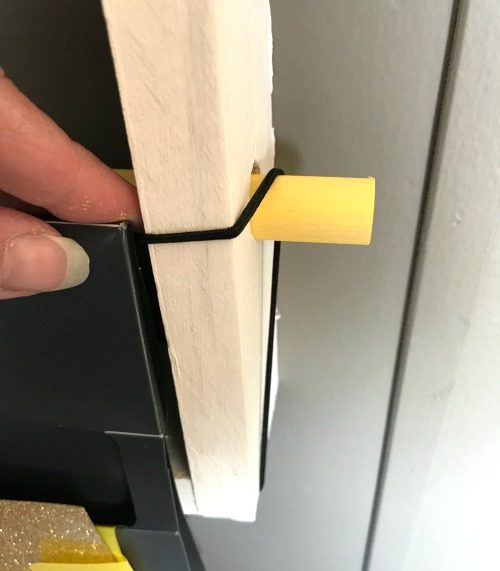
Place a wood dowel in the bottom slot to hang the wall organizer from. The organizer has elastic on the back that you can use to wrap around either end of the dowel. Pretty handy!
The center of the wall organizer will also need to be secured. I used a screw in hook for this, but if you don’t want another hole in your wall you can use an ‘S’ hook to hook it to the dowel.
After the wall organizer is attached you can go ahead and load it up with your vinyl sheets.
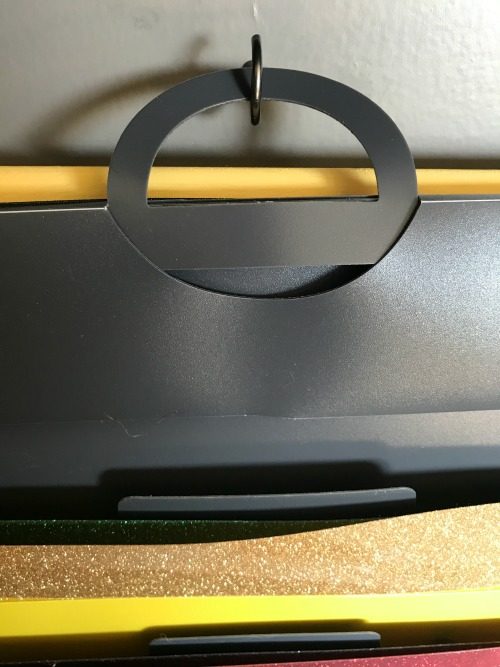
I really love this wall organizer, it holds the 12×12 sheets beautifully. Plus the bottom pocket is clear and makes a great place to stick scrap pieces.
However, the Cricut cut mats will not fit in the pockets. I’m planning on adding a couple more screw in hooks by my vinyl rack to hang the cut mats.
Add Your Vinyl Rolls
Now you can work your way up adding your vinyl rolls. This rack will hold 7 rolls. Slide the dowel through the first hole, then through your vinyl roll and finally through the last hole on the rack.
Now the million dollar question……….
Do you hang your roll so it goes under or over? That may be a big debate for toilet paper lol, but I’m going to show you why I think vinyl should go under.
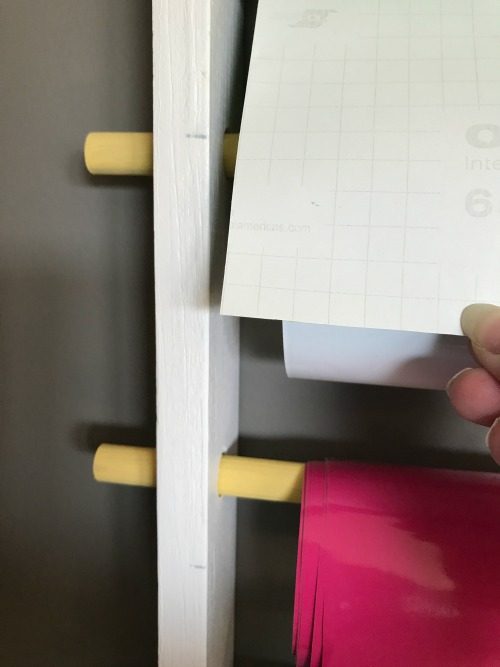
I placed little marks on the side of my vinyl rack every six inches, so it’s easy to pull down, measure and cut without removing the roll from the rack.
With the rolls placed on the rack so that they are ‘under’ you can easily see the cut guides and you won’t have to remove the roll until it’s empty.
You can place measurements in whatever increments you need. Most of the time I need a 6″ or 12″ piece so I went with every 6″.
All done! It’s a good thing these are quick and easy to make, because I may need a few more before it’s all said and done lol.
And the best part is it’s compact, so you can easily store your vinyl behind a door, or even on a door if you have to. It’s a great vinyl storage solution for small spaces. I’m thrilled with mine!
If you decide to make it be sure to snap a pic and add it to ‘tried it’ on Pinterest! I love seeing what everyone made! And I do look at every one =)
Don’t Forget to PIN IT


Chris Butler has helped thousands of crafters learn how to use their Cricut machine without feeling overwhelmed. She is a best selling author and an up and coming designer. For fun Chris enjoys designing SVG Files, hanging out with her family (preferably at the lake), traveling, and volunteering at her church. She is a wife and mom of two crazy fun kids.
how do I order your booklet of how to on the cricut maker? and how much
Hi Stacey! Here is the link https://dailydoseofdiy.com/cricut-guide/