This post may contain affiliate links for your convenience. If you make a purchase through one of my links I will earn a small commission at no additional cost to you.
Last Updated on June 22, 2019 by Chris Butler
I was compensated for this post. All ideas and thoughts are 100% my own.
I hit up my local Dollar Tree this week for some Christmas crafting supplies! My favorite purchase is the rolls of Burlap Ribbon they sell. Many you have probably seen the adorable deco mesh angels everyone is making, but I am going for more of a rustic look this year. So I decided to try a Burlap Angel Ornament!
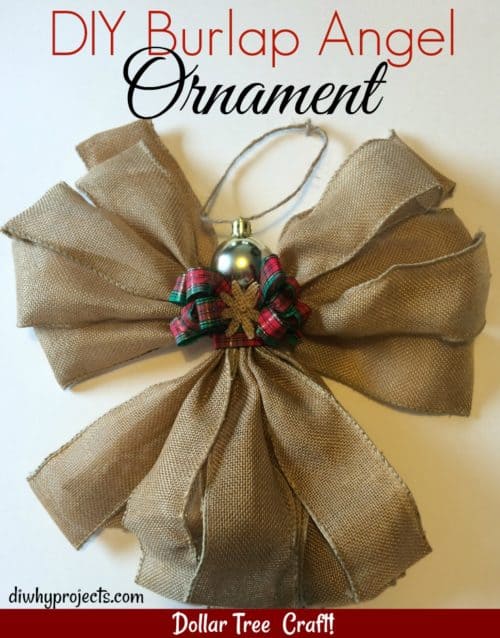
I really like how it turned out and it is quick and easy to make! Plus, I bought enough supplies to make six of them, which brings the cost to just $1.50 each! I think I am going to order a case of the burlap and make more for gifts and maybe even sell a few!
I’m listing the supplies for just one, if you want to do six, buy 5 spools of burlap and some extra ribbon. (They have colored burlap too!)
Burlap Angel Ornament Supplies
- 2 Spools of Burlap (2″x9′)
- Ribbon
- Jute Twine
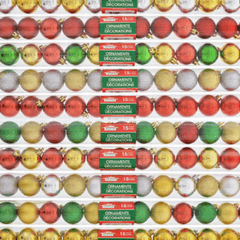
- Mini Ornaments (sold as a pack of 15)
- Hot Glue Gun
- Scissors
- Measuring Tape

Tip: If you are going to make the angels in bulk, place an online order at Dollar Tree for the burlap and get it shipped to your store FREE!
Burlap Angel Ornament Instructions

We are going to start by cutting 12 strips of the burlap 12 inches long. And two pieces of twine about 6 inches long. After they are cut, gather the burlap at the center and bunch them all together.
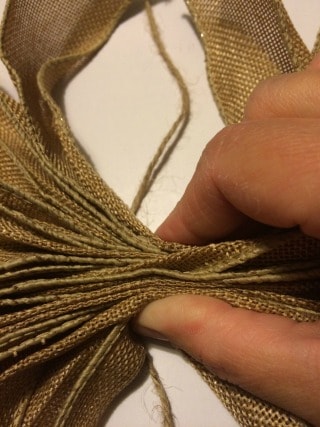
Place a piece of twine under your gathered burlap pieces and tie tightly! Trim the excess twine off.
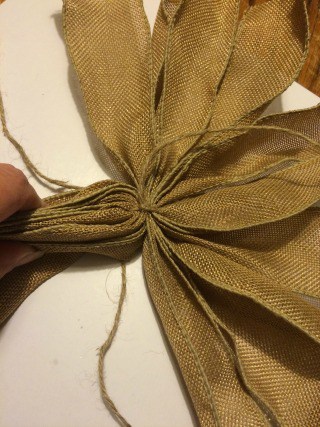
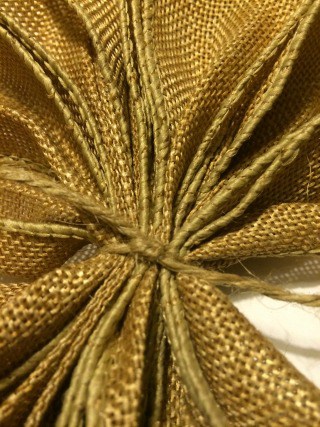
Next, we are going to pull down 7 of the burlap strips from each side. Tie them tightly with another piece of twine about 1 inch below the first tie and trim the excess. That leaves 5 burlap strips on the top for the angel wings. Twist the burlap so the wide part is facing out and fan them out for the wings. Do the same for the bottom. Work with the natural curl of the burlap to fluff it up.
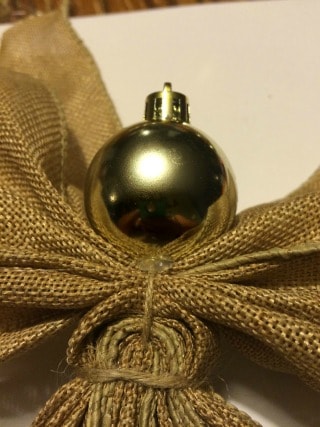
Flip the angel over so your ties are in the back. Apply some hot glue to the top and adhere the mini ball ornament for the angel head. This picture also shows the ties made with the twine really well. Next, we are going to cover up that horizontal tie with some ribbon.

Wrap a piece of your ribbon around your angel where the horizontal twine tie is. Cut the ribbon a little longer than needed for an overlap to apply glue. Hot glue together in the back. Now use your ribbon to make a bow that will cover the vertical twine tie. There are about 101 ways to make a bow. I did the loop back and forth method to get a bigger bow.
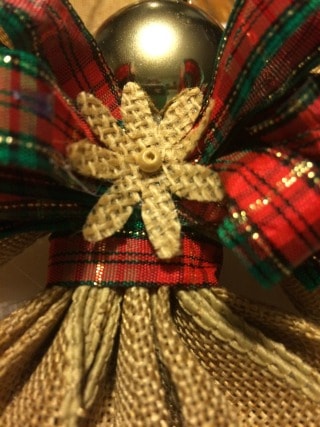
For the center of my bow, I added a burlap flower embellishment from my scrapbook stash. Beads or buttons would be pretty here too! Finally cut another piece of twine to loop through the top of the ornament and tie off so you can hang it on your tree!
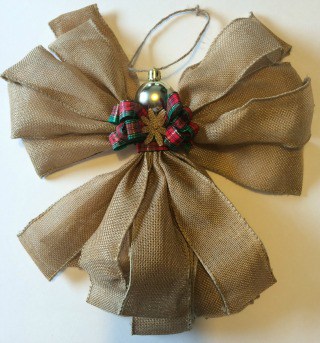
I’m toying with the idea of adding more embellishments to the bottom dress part of the angel. But I also like the simple look. Comment down below and let me know what you think!

Chris Butler has helped thousands of crafters learn how to use their Cricut machine without feeling overwhelmed. She is a best selling author and an up and coming designer. For fun Chris enjoys designing SVG Files, hanging out with her family (preferably at the lake), traveling, and volunteering at her church. She is a wife and mom of two crazy fun kids.
These are great, thanks for the detailed explanations and photos. I plan on making a few for gifts. I also like the simple look best.
This is so cute! We’re trying to do more homemade gifts and decor this year so this is perfect!