This post may contain affiliate links for your convenience. If you make a purchase through one of my links I will earn a small commission at no additional cost to you.
Last Updated on December 19, 2023 by Chris Butler
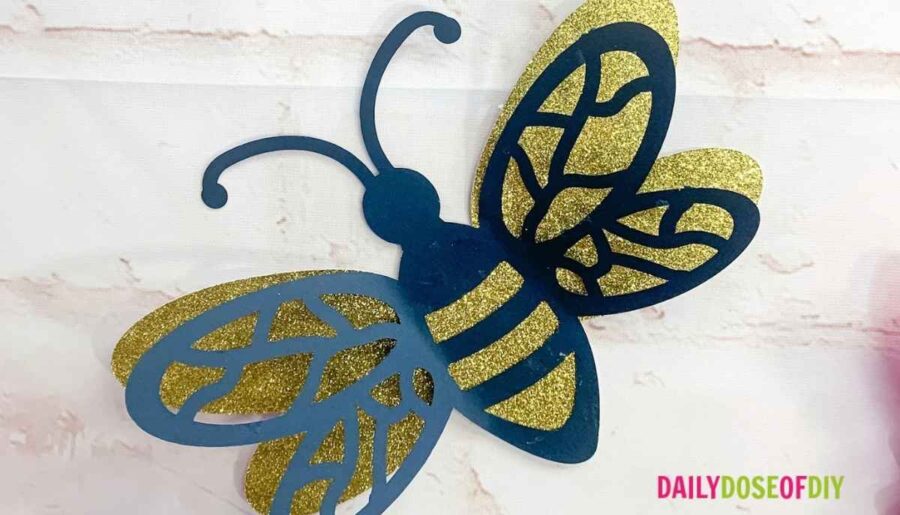
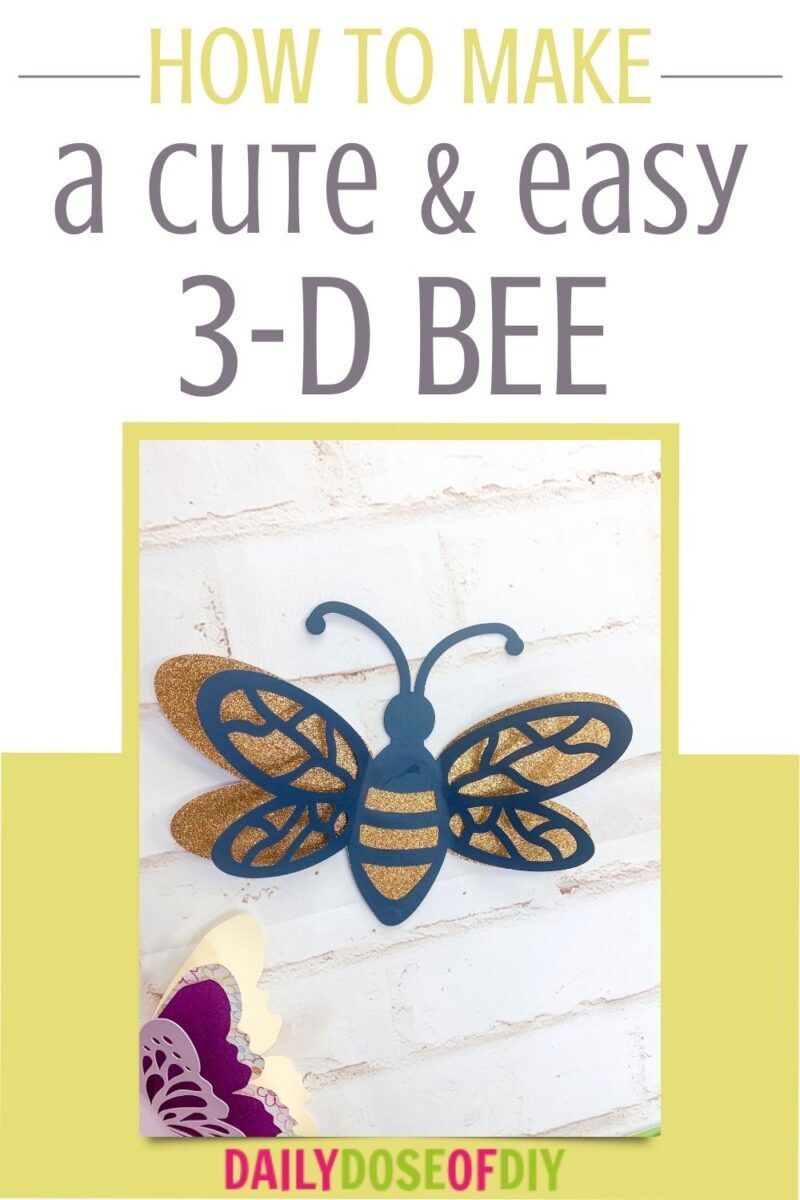
Are you ready to learn how to make a 3D paper bee? This craft is so easy, and super cute for a quick springtime craft! The best part is that I’ve made a free SVG file that you can download. All you need to do is re-size the design to be the perfect size to hang on your wall or put in a card and you’re ready to get started!
These paper bees make a cute pair with the paper butterflies from this tutorial!
Watch how to make this 3d Bee in the video below. Find the supply list and written instructions just below the video.
All of our free SVGs and Designs are kept in a library for your convenience. Fill out the simple form and we’ll send you the link and password to access the SVG files right away.
Already have the password? Enter the Library HERE
Quick Links to Information in This Post
3D Paper Bee Supplies Needed
To make a 3D Paper Bee you will need:
- The Free 3D Bee SVG File – All of my free SVG files are in a library for your convenience. The SVGs are listed in alphabetical order with a picture making them easy to find. Click here for access to the library. You;ll find this SVG under the “b”‘s for bee
- Solid Core Cardstock or Pattern Paper in yellow & black (or two coordinating colors). For extra fun add Glitter Cardstock found here – https://amzn.to/3vsL4iA
- Craft Glue or a Glue Stick
- Cricut or other Cutting Machine that uses SVG files

Step 1: Upload Your 3D Paper Bee
First, we need to download the free 3D bee SVG File and upload it to Design Space. If you need extra help with the downloading please see this post
Once you’ve uploaded your design, add it to your canvas in Design Space. The bee will be ready to go, so the only thing you need to do is resize the design to be however big or however small you’d like. Keep in mind that you can only make this design as big as your sheet of cardstock.
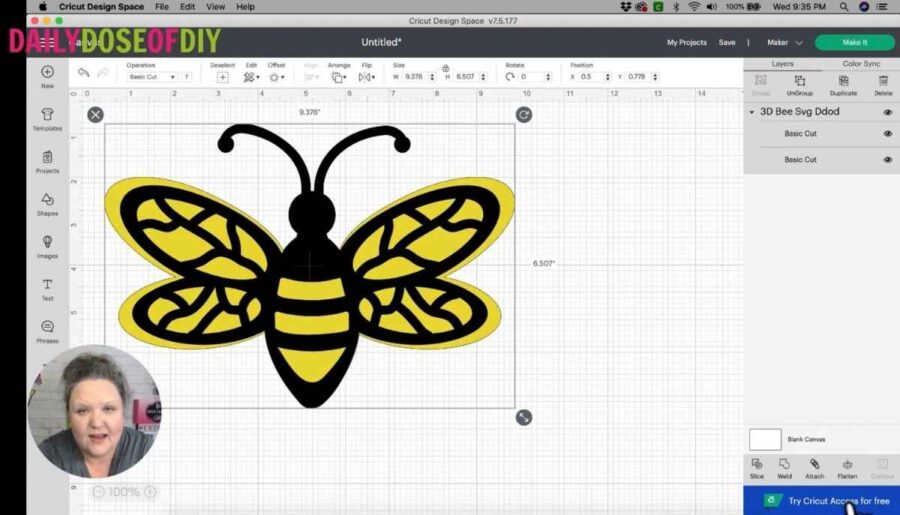
Next, click ‘Make It’ in the top right corner.
Once you’re on the mat screen you’ll need to look at the material size you’re using and the orientation of the cardstock on the mat. For my bee I’m using 8.5″x11″ cardstock, so I’ll need to change my material size from the dropdown menu on the left.
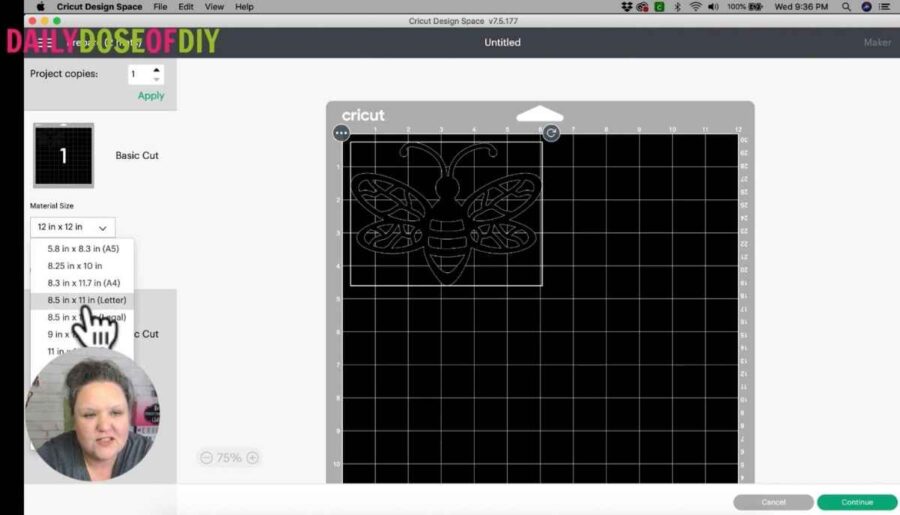
Do this step for all of your mats, but don’t forget to click mat #1 when you’re done! If you don’t do that your Cricut will start cutting on the highlighted mat and you might have the wrong color paper loaded.
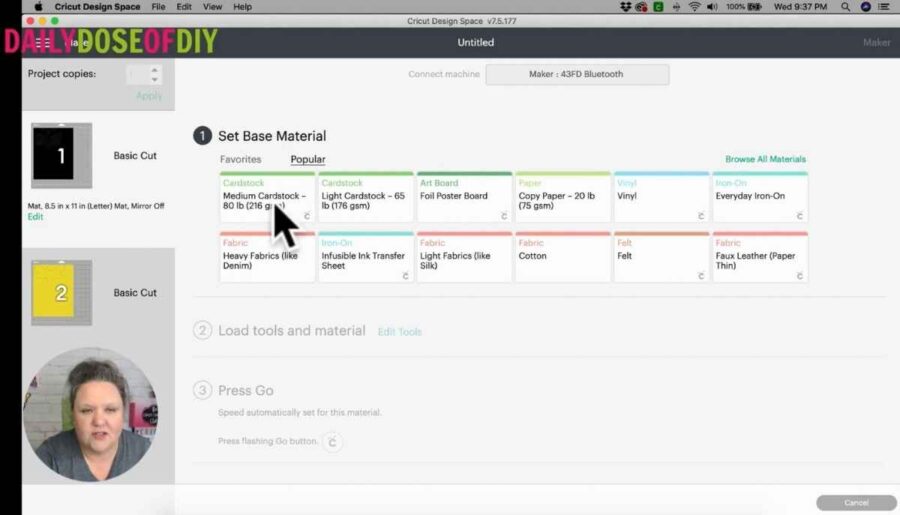
Next, click continue. If you have a Cricut Explore, set your dial to cardstock. If you have a Cricut Maker, select medium cardstock from the materials list (or whichever setting you need for the cardstock you’ve chosen).
Now you’re ready to prepare your mats!
Step 2: Cut Your Paper Bees
Your Cricut is ready to cut now, so next we need to put the cardstock down onto your Cricut mat. Remember to place the paper onto your mat in the way it shows on the mat in Design Space.
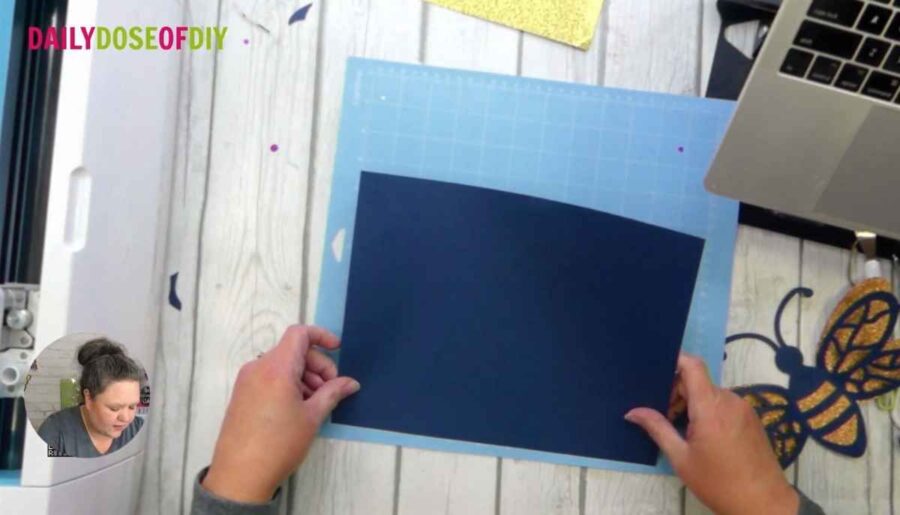
Next, load the mat into your Cricut and wait a few moments while it cuts out the design.
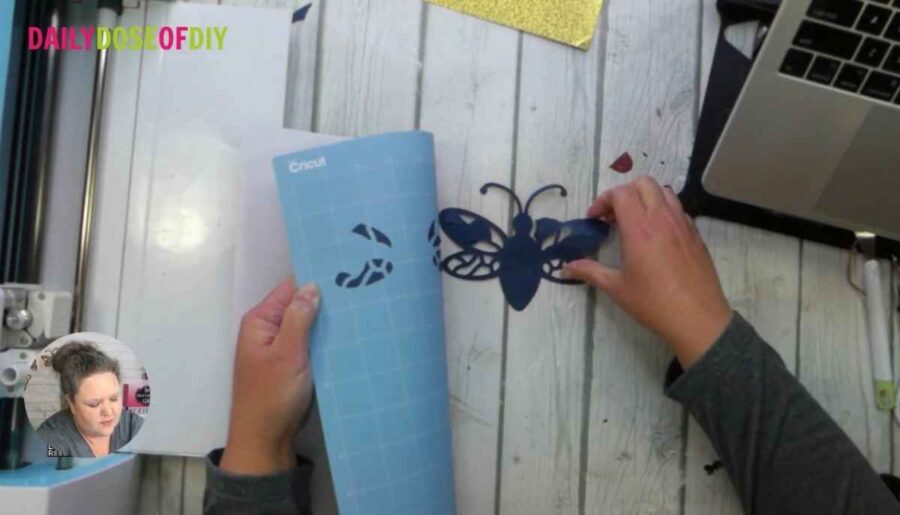
When it’s done, unload the mat. To get your design off, flip the mat over and pull it away from the cardstock. This will keep your bee from curling.
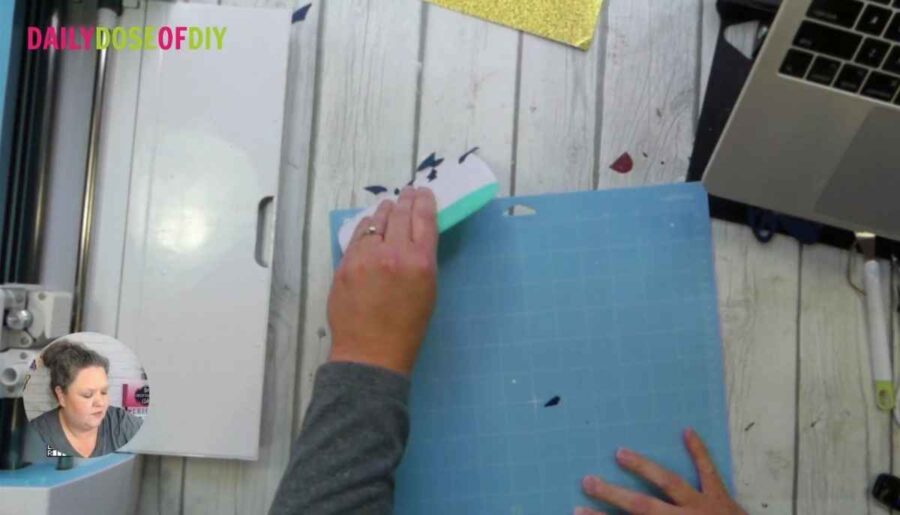
Before cutting your second layer, you may have some excess pieces of cardstock stuck to your mat. A quick and easy way to get rid of the small pieces is to use your scraping tool on the mat.
You want to make sure your mat is nice and clean. If there are any bumps or bits left on the mat, it could mess up your cut. When you’re sure you’ve gotten everything off of the mat, load your second piece of cardstock.
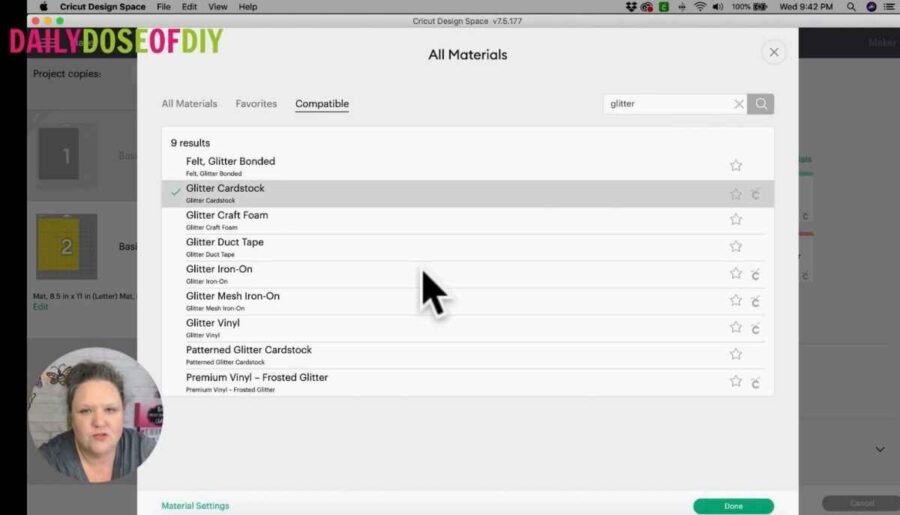
Now, I’m a big fan of glitter, so for my second layer I used glitter cardstock. Glitter cardstock is a bit thicker than the medium duty cardstock I used for my first layer, so before I cut, I needed to change the material I was using in Design Space.
To change your material, use the arrow on the right side of the screen. This will give you the option to browse all materials. From the browsing screen, type in glitter and select glitter cardstock.
Now, load your mat and wait for the cut to finish. Once your second layer is finished cutting, get it off the mat and you’re ready to put your bee together.
Step 3: Put Your Bee Together
Now that your layers have been cut, it’s time to attach them. Start by turning the top layer over and placing a thin layer of glue on the body and stripes. DO NOT put glue on the head or wings.
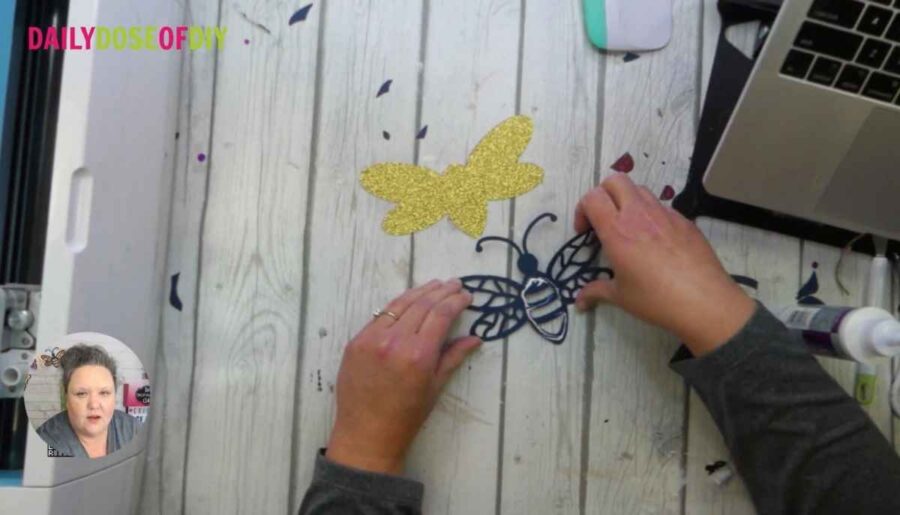
Now flip your bee over, line up the bottom of the layers, and press the layers together. Hold the top layer down, fold the top wing up and that’s it!
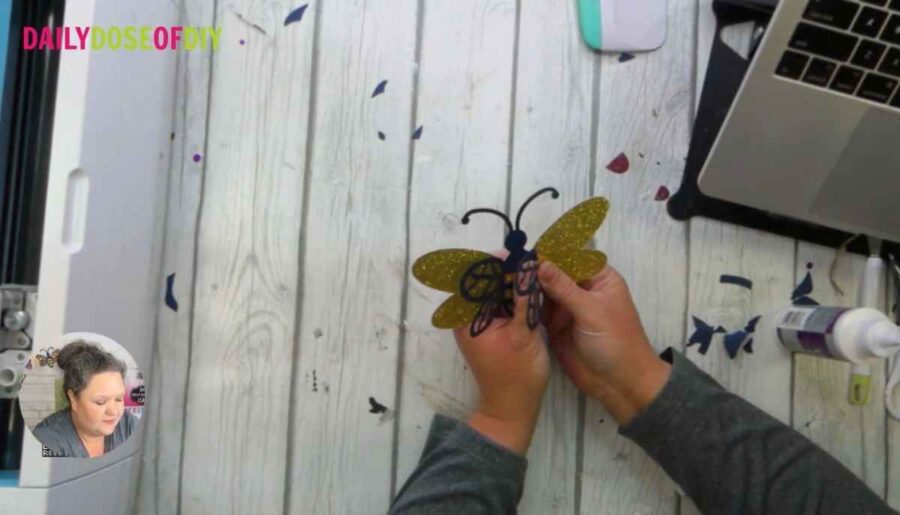
It’s that easy! Now you’ve got a gorgeous little 3D bumblebee. Thanks for crafting with me today!

Chris Butler has helped thousands of crafters learn how to use their Cricut machine without feeling overwhelmed. She is a best selling author and an up and coming designer. For fun Chris enjoys designing SVG Files, hanging out with her family (preferably at the lake), traveling, and volunteering at her church. She is a wife and mom of two crazy fun kids.
Love, love, love your Bumble Bee! It is so darn cute! Thanks so much for sharing it!
I made your bee and loved how it turned out! Thank you!