This post may contain affiliate links for your convenience. If you make a purchase through one of my links I will earn a small commission at no additional cost to you.
Last Updated on January 15, 2024 by Chris Butler
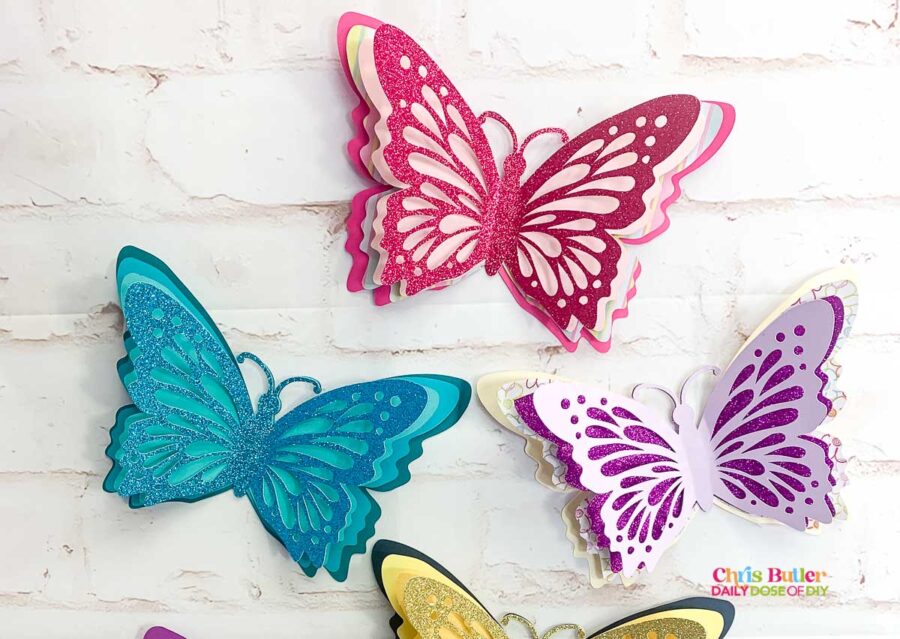
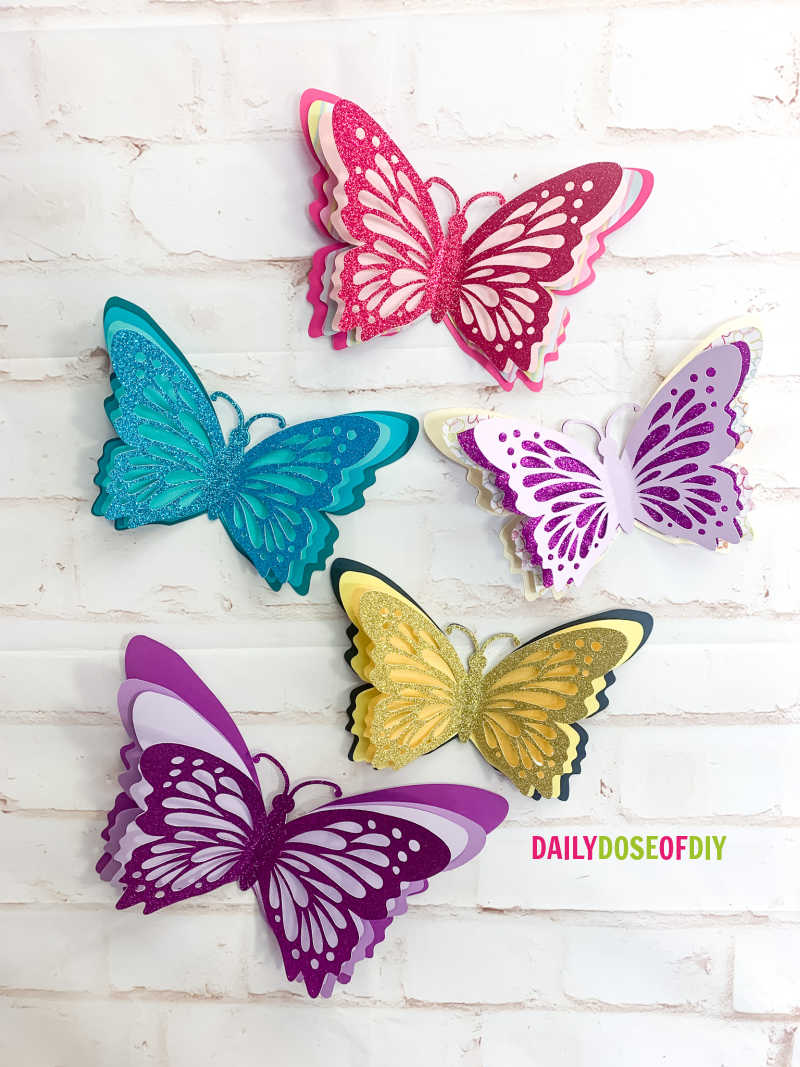
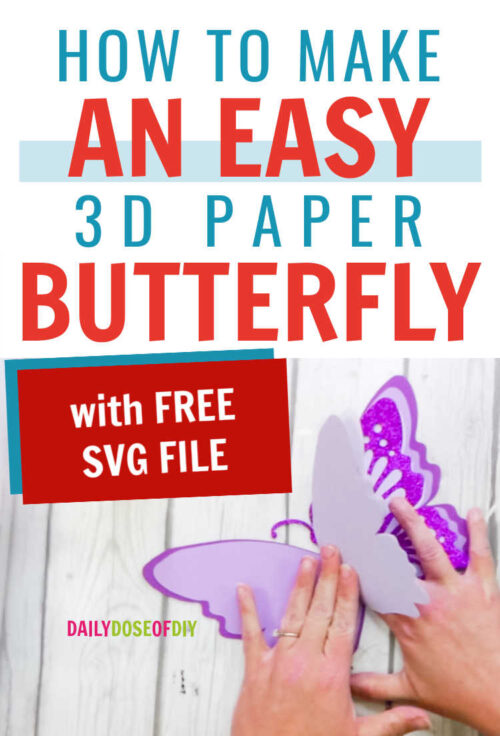
Do you want to learn how to make a 3d paper butterfly? It’s really easy, and you can use my SVG file to help you get started. In this post, we will show you how to create a beautiful paper butterfly that you can hang on your walls or use on cards. You can also use my free SVG file so that you can get started right away!
The 3d butterflies will look great alongside a paper flower display like this one. And you can add in 3d Bumblebees for a stunning display. (tutorial coming soon!)
Watch how to make this 3d Butterfly in the video below. Find the supply list and written instructions just below the video.
All of our free SVGs and Designs are kept in a library for your convenience. Fill out the simple form and we’ll send you the link and password to access the SVG files right away.
Already have the password? Enter the Library HERE
Quick Links to Information in This Post
3D Paper Butterfly Supplies Needed
To make a 3D Paper Butterfly you will need:
- The Free 3D Butterfly SVG File – All of my free SVG files are in a library for your convenience. The SVGs are listed in alphabetical order with a picture making them easy to find. Click here for access to the library.
- Solid Core Cardstock or Pattern Paper in four coordinating colors. For extra fun add Glitter Cardstock –https://amzn.to/3EbHqhj
- Craft Glue or a Glue Stick
- Cricut or other Cutting Machine that uses SVG files

How to Make a 3D Butterfly
The first step is to download the free 3D butterfly SVG File and upload it to Design Space. If you need extra help with the downloading please see this post
Once you have the SVG into Design Space you can re-size it to whatever size you’d like up to the maximum width Cricut will cut which is 11.5 inches. To resize simply click on the arrow on the bottom right of the image and drag it to make it bigger or smaller.
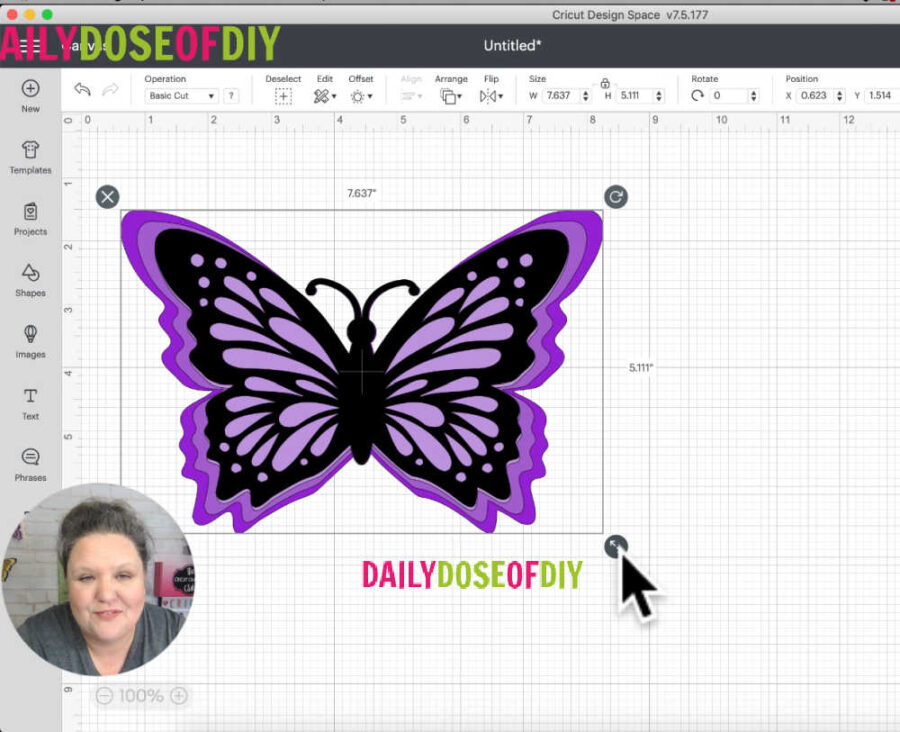
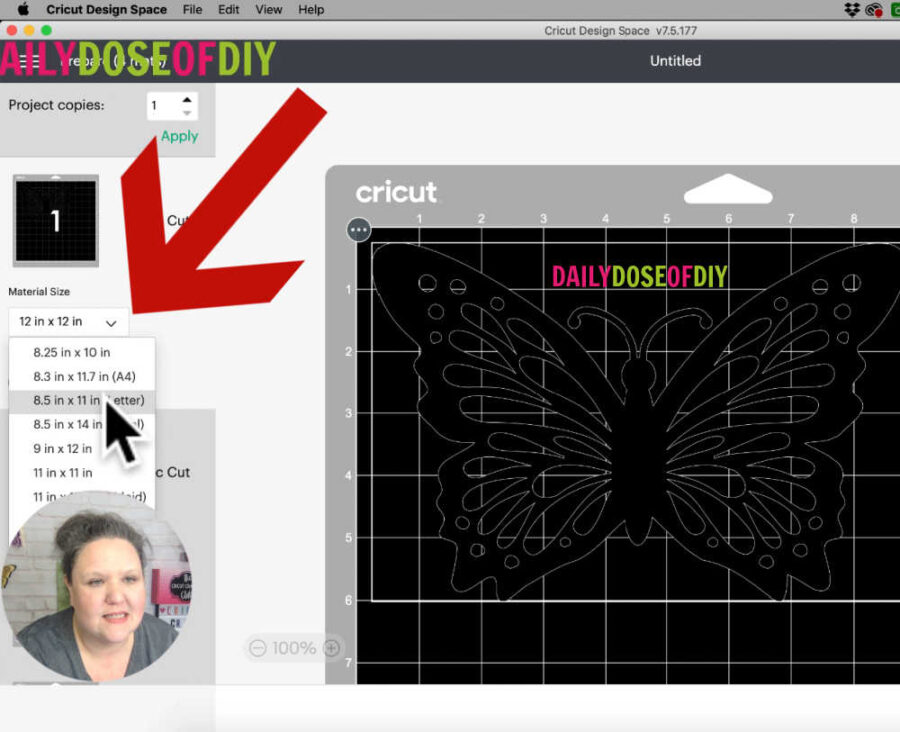
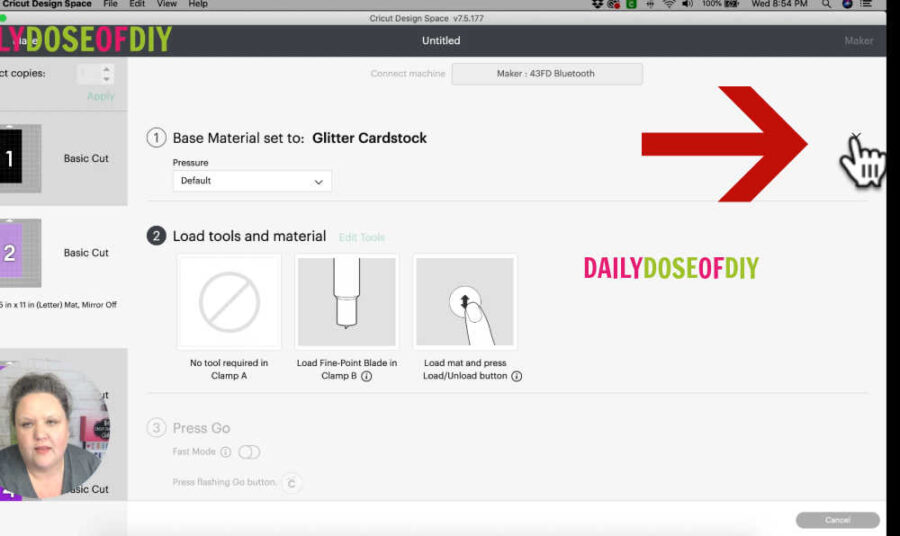
Once you’re happy with the size click the make it button. If you are using 8.5×11 cardstock you’ll want to switch your material size on the next screen. If you watched the video you saw I forgot to do that and loaded my paper the wrong way 🤦🏽♀️. Learn from my mistakes!
If you’re using glitter cardstock for the top layer set your dial to custom if you have a Cricut Explore. Then you will see the browse materials on your screen like the Cricut Maker and Joy. Click browse all materials and type in Glitter. Choose the Glitter Cardstock option.
If you’re using regular cardstock turn your dial to cardstock or choose medium cardstock from the materials list if using a Maker.
Step 2: Cut Your 3D Paper Butterfly
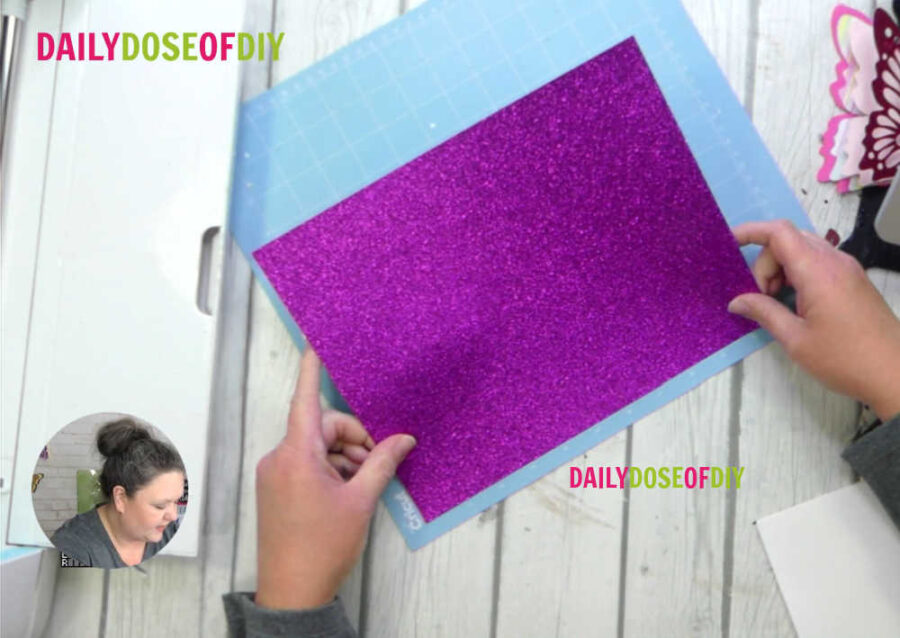
Line your paper up on your cut mat. Make sure glitter or pattern paper is facing up. And if using 8.5×11 make sure your paper orientation matches what’s on your screen in Design Space.
TIP: Use your scraper tool to remove any bits that might be stuck to your mat before you place your paper on the mat. Small bits on your mat may cause your paper to tear or not cut correctly.
When your cut is finished unload your mat and flip it over to remove your mat from the paper. Do not bend your mat back super tight or it might crack. Just peel it back gently. This helps keep your paper from tearing or curling.
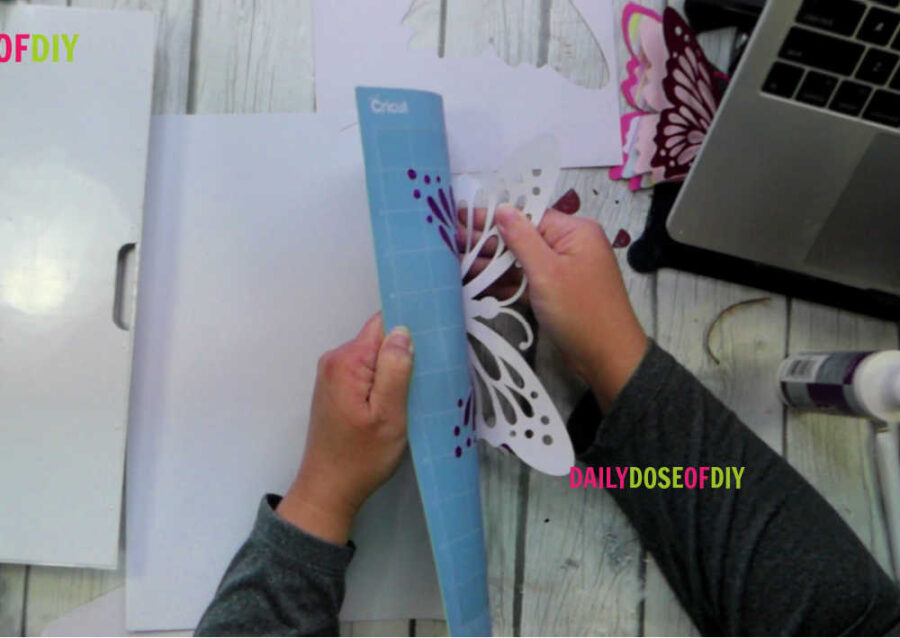
Take your time with the top layer as it has some intricate cuts. After it’s off the mat scrape the leftover bits off with your scraper tool. Repeat this process for each of the four colors of your butterfly.
If you cut the top layer out of glitter or a heavier material you can change the cut settings for the remainder of the cuts to regular cardstock. On an Explore simply turn your dial back to cardstock. On a Maker or Joy click the down arrow to the right of your material setting and change it to regular cardstock.
Each layer of the design is a different size so keep that in mind as you are loading your colored paper. Cricut should put them in order from smallest to largest. However, when I cut multiple butterflies at once the order got jumbled up.
Step 3: Assemble the 3D Butterfly
After all of your layers are cut it’s time to assemble your butterfly. Start with the largest piece and add glue down the center. Be sure to add glue to the head and antennas as well.
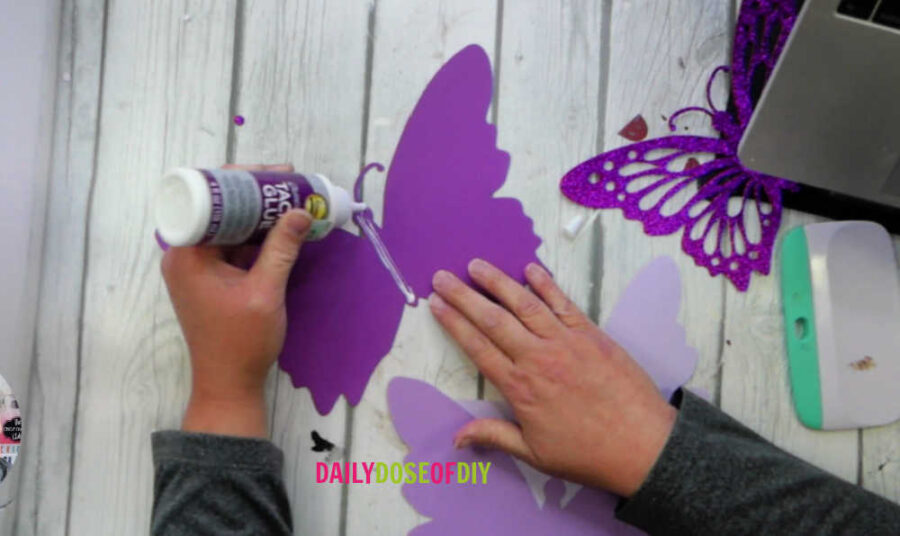
Line up the next size butterfly layer from the bottom center of the body and press all down the center. Line up the antennas and press them together also.
If you’re using craft glue you’ll be able to move it around a little bit to line it up. DO NOT glue the wings, just the center.
Repeat this process for the remaining layers of the butterfly. Add glue down the center and to the antennas and glue the next size smaller layer on top. The body size of all of the layers of the butterfly is the same. It’s the wings that are different sizes.
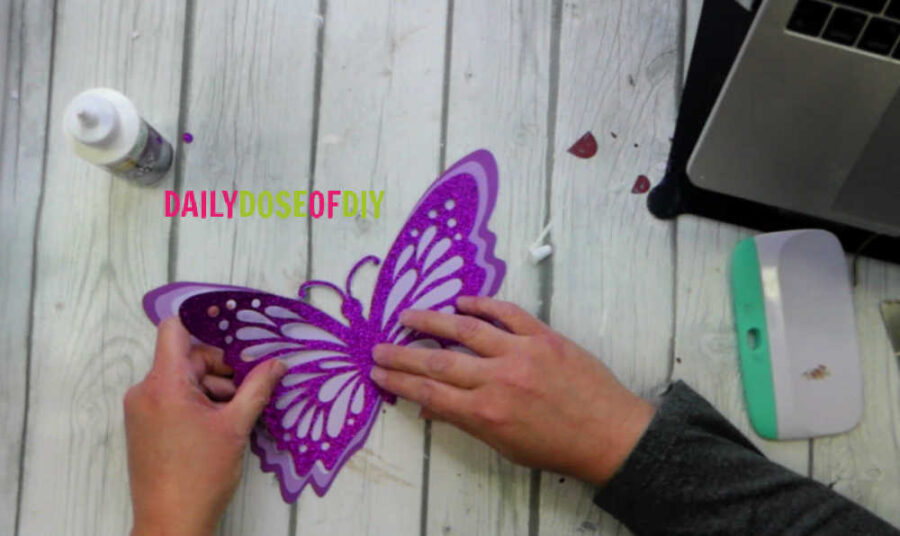
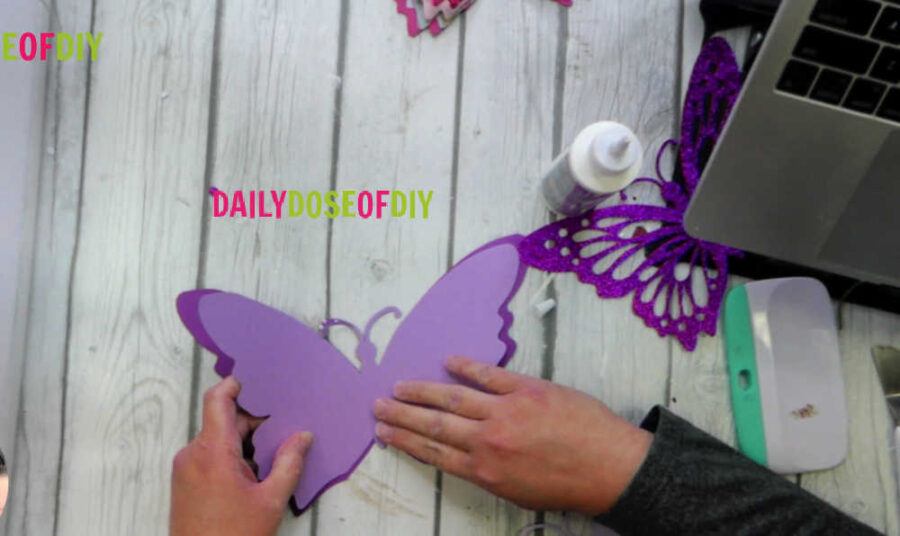
After the top layer is on let it sit for a few moments so the glue will set and the layers won’t move around on you. Then place your index finger over the body of the butterfly to hold it down and begin to fold up each layer of the wings.
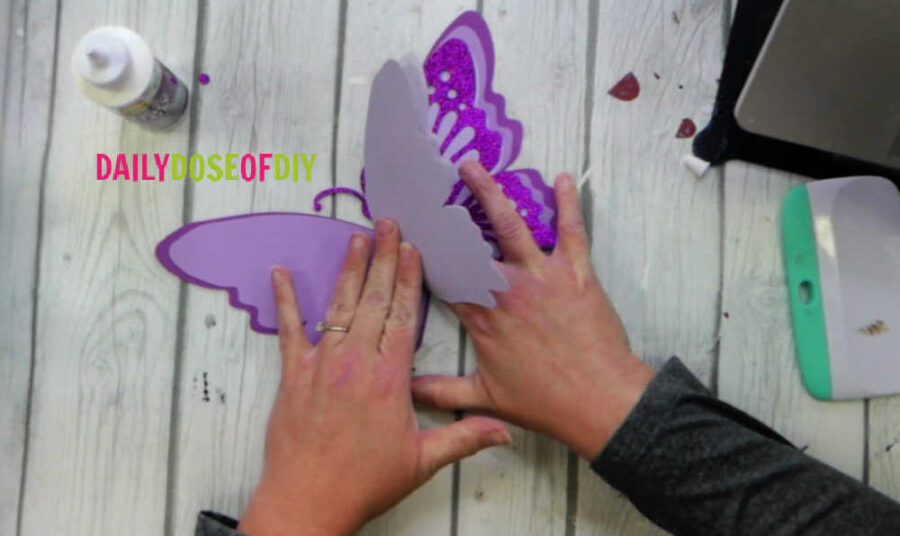
Fold up the wings on both sides and your 3D paper butterfly is complete! You can glue it from the backside to cards or signs. Use painter’s tape or poster putty to place the butterflies on your walls.

Chris Butler has helped thousands of crafters learn how to use their Cricut machine without feeling overwhelmed. She is a best selling author and an up and coming designer. For fun Chris enjoys designing SVG Files, hanging out with her family (preferably at the lake), traveling, and volunteering at her church. She is a wife and mom of two crazy fun kids.
i am having a hard time finding the butterfly svg. can you help?
Hi Billie! It’s in the library everything is in alphabetical order, you’ll bind it in the ‘B”s for butterfly and numerically 3D Butterfly.
Thank you
I have to let you know that I made my first card stock cut out!!! I made the 3d butterfly, it is amazing and so easy to do. You have made this idiot proof for some of us. The directions were great, even an elementary student could follow it. Thank you, I wish you were able to do more projects, but I know that in this time it is hard you to find the time for projects. I can’t wait to try some of your other projects. ❤️🦋
Just tried to download the svg for butterfly and bee but just get a bunch of nonsense could you help just new at this thank you love your site
Once it’s downloaded you’ll need to unzip the file and then upload the SVG to design space (or your cutting machine software) to see the design