This post may contain affiliate links for your convenience. If you make a purchase through one of my links I will earn a small commission at no additional cost to you.
Last Updated on August 12, 2023 by Chris Butler
Does Cricut Design Space make your head spin? There’s a learning curve for sure, so don’t call yourself dumb. But I can break it down for you so it’s easier to understand.
In this Cricut Design Space for Dummies post I’ll show you how to download Design Space, plus give you a tour of all the functions available. When you’re done you’ll have a better understanding of how to use Design Space and you’ll be well on your way to making your first great crafts with Cricut.
Let’s get to it.
Quick Links to Information in This Post
How to Download Cricut Design Space PC/Mac
First off go to design.cricut.com And the first thing they will ask you to do is log in or create a username and password. Be sure to write your log in down and keep it safe in case you ever get logged out.
After that is done click on new project on the top right of your screen.

This will prompt you to download the Design Space plugin. After the download is complete you may need to open the download depending on your computer or browser.
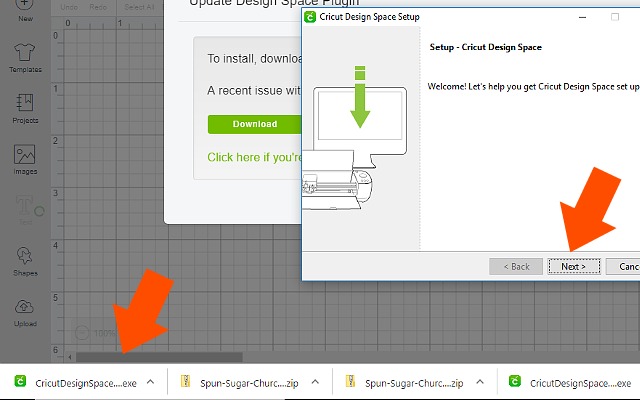
In Chrome you will see it on your download bar at the bottom. Click to open and then you will be prompted to click run or next.
Continue to follow the download prompts. You’ll need to accept the terms of use and click install, but the prompts will walk you through the rest of it.
Now that Design Space is downloaded, we can start learning how to use it.
Cricut Design Space for Dummies
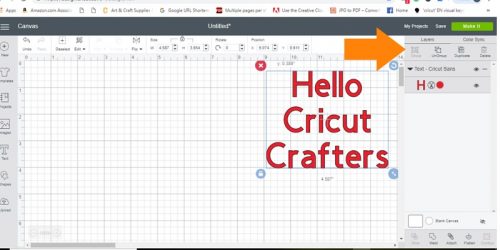
So the canvas or inside Design Space is where you will create your designs for your machine to cut.

The menu on the left side is where you will start with your designs.
1 – Click upload to upload images or SVG files that you want to cut. SVG stands for Scalable Vector Graphic and that is the preferred file to use for cutting designs because it is so precise.
You can find SVG files everywhere! I have some free ones in my resource library, you can also find them on Etsy and many other blogs.
To learn how to download SVG files to your PC/Mac and upload them into design space so you san cut them, see this post.
2 – Next on the left menu is shapes. You can use circles, squares, stars and many other shapes in your design. You will also find score lines here if you want to score cards or other paper projects.
3- Third up on the left Menu is text. You do a lot of things with text including using your own fonts, making monograms and curving text. I explain how to do all of the text things in design space on this post here.
4 – Next up on the design menu is Images. When you click on images you are taken to all of the designs you can purchase from Cricut or use if you have paid for an access account.
5 – Fifth up is projects. After you click on projects you will again be shown different projects you can buy. But there is also a dropdown menu that you can use to choose your projects. And that is where you will find any projects that you’ve saved.
6 – After projects is templates. I don’t use these hardly ever, but they can be handy to figure out what size of design you need to cut and how it will look on a shirt or apron. The actual template will not be cut out, it’s just there for a guide.
7 – Last but not least is the New+ button. You can click on this to start a new project. Remember to save your current project if you want to keep it before you start a new one. The save button is on the top right corner.
Cricut Design Space Top Menu
Working our way around let’s take a look at the top menu.
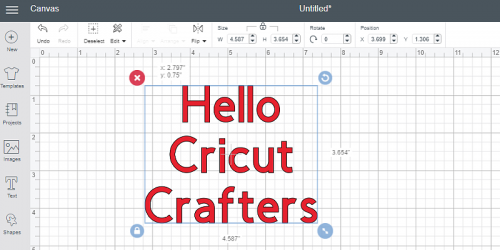
After you have a design uploaded or text typed out, most of the top menu will become available to use.
Starting at the left is an undo button in case you ever make a mistake. And right next to that is the redo button if you want to repeat an action.
Next over is the deselect button. I honestly have never used that. You can see the text above is selected because there is a blue box around it. To deselect the text just click anywhere outside of that box.
The edit button has a drop down where you can choose cut copy or paste.
Moving down, you can click on flip to flip your design horizontally or vertically.
Next is the size. You can change the size of your design in that top menu or use the two way directional arrow on the bottom right of the design.

On the bottom left you can click the unlock button. That will give you a four way directional arrow to make your design wider without making it taller or to make it taller without making it wider.
Next down on the menu you can rotate your design and enter the degrees you would like it rotated. Or you can use the arrow on the top right of your design when it is selected to rotate it.
Last on the top menu is the x and y coordinates that will give you the position of your design on the canvas.
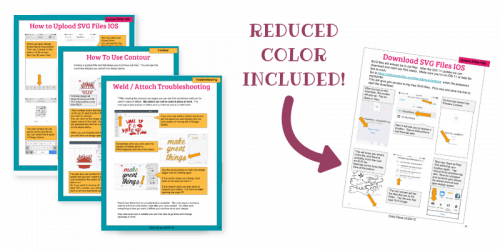
Don’t forget you can grab your own cheat sheets to keep by your side and help you make all of the great things! Click here and use code SAVEFIVE to save an additional $5.00
Using the Layers Menu in Design Space
Finally on the right-hand side is the layers menu, and here’s where things get fun.
Across the top of the layers menu you will see group, ungroup, duplicate, and delete.
Group – You can select multiple parts of your design and then click the group button to keep them together. This will allow you to move and resize them as one. Most designs uploaded into design space are already grouped together.
Ungroup – If you want to change part of your design you can click the ungroup button. You can also use ungroup to separate letters in a word and resize each individual letter. Once things are separated they can be resized and moved around individually.
Duplicate – When you have a design or part of a design selected you can click duplicate to get an exact duplicate of that item.
Delete – You can delete any part of the design by selecting it and clicking the delete button.
Layer Attributes
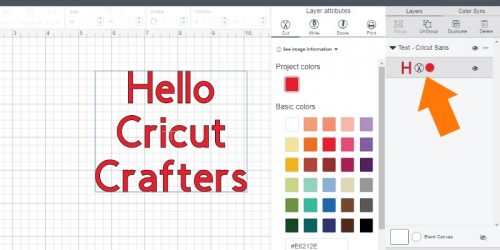
Moving down in the layers menu you will see any designs you have on the canvas listed. The circle indicates the color you would like to cut the design in and the scissors show that this design is to be cut.
Click on either of those and the layers attributes menu will open up.
Here you can change the color – note colors in design space just indicate that you would like different parts of the design cut in different colors. You can load whatever color of paper or vinyl that you want into the Cricut to be cut. It doesn’t have to match.
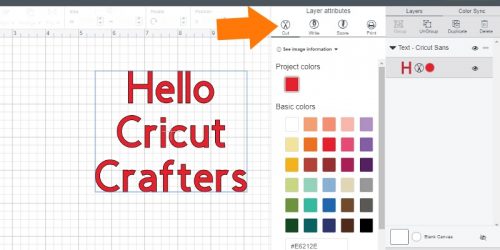
At the top of the layers attributes menu you can change what you want Cricut to do with your design.
The options are cut, write (with pens), score, or print. If you choose print you’ll need a separate printer, Cricut doesn’t actually print.
Guides will be added around your design when it is printed so that you can then load it into the Cricut to be cut.
Slice, Weld, Attach, and Flatten
This brings us to the bottom of the layers menu where you will find slice, weld, attach, and flatten.
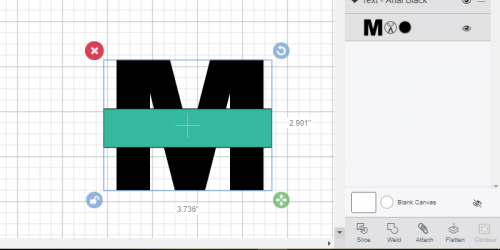
Slice is used to cut one design out of another. It only works for single layer designs (think one color). You will use it to do things like making monograms or knockout designs. To see how to make monograms see this post.
And for more on making knockout designs see this post.
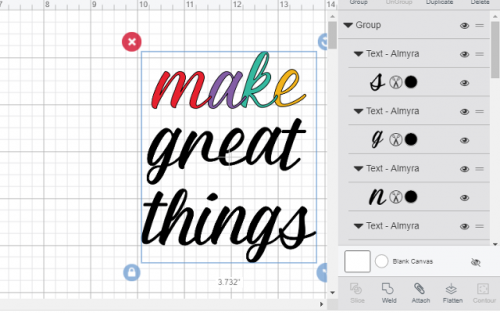
Weld is needed to join shapes or letters together into one continuous cut. You can see in the word ‘make’ each individual letter will be cut. The same is true for the words great things even though you can’t see it since it’s one color.
When you select everything and click weld it will cut as one word instead of individual letters.
When your design is finished you will need to select it and click attach before you click the ‘make it’ button.
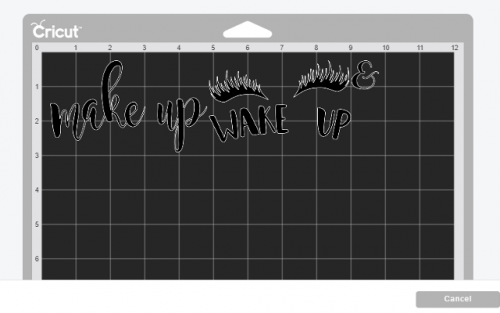
Otherwise Cricut will arrange everything on the cut mat to use the least amount of materials possible. Which is great for saving money, but not so great if you want your words in order.
Select everything and click attach for everything to be cut as you see it in design space.
Next over on the menu is flatten. Use flatten when you have made a design that you want to print and then cut. Cricut will automatically change your design to print.
And last but not least is Contour. Contour allows you to remove cut lines to customize designs you’ve uploaded to Design Space.
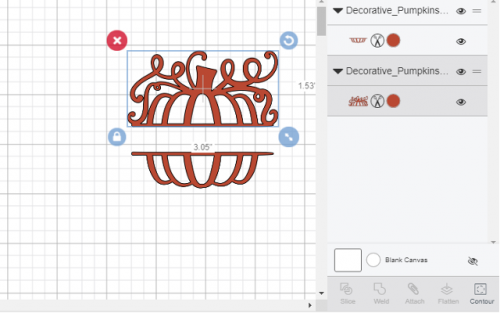
In the case of this pumpkin, you can click on contour and remove all of those center cutlines and make it a solid pumpkin.
Understanding Cricut Design Space for Beginners
That wraps up the brief tour of Cricut Design Space, and this post still ended up quite long!
There are so many great things you can make with your Cricut but it will take a little time to learn all that you can do in Design Space.
I recommend playing around with it, you can’t break it. And the more you use it the faster and more experienced you’ll get!
If you want to fast track your learning I recommend getting the cheat sheets. They are so handy to have and you won’t have to waste time looking up how to do every little thing on the internet. Everything you need will be right at your fingertips!
Click here to grab your copy and remember to use code SAVEFIVE for an additional $5 savings!

Chris Butler has helped thousands of crafters learn how to use their Cricut machine without feeling overwhelmed. She is a best selling author and an up and coming designer. For fun Chris enjoys designing SVG Files, hanging out with her family (preferably at the lake), traveling, and volunteering at her church. She is a wife and mom of two crazy fun kids.
Hello. Your Cheat Sheets look great. I’m wondering how many pages there are. Thanks.
Thanks Debbie! There are like 106 pages total.
I order a copy of you cheat sheets and was wondering when it will ship?
Thanks Faye! Per the description, the book is a digital download only at this time. I didn’t find an order for you at the email you have listed here. Please shoot me an email at [email protected] and we’ll get everything squared away for you.
I bought you book.is it getting mail? I can not find a down load.
Hi Linda! I’m showing the download was sent, but I just had it resent to you. So if you don’t see it, check your SPAM folder. If you have any other questions or issues don’t hesitate to shoot me an email [email protected]
Thanks!
Chris,
Can Design Space be used on the original. Cricut Expression ?
Hi Kathy, Unfortunately, it can’t
Hi Tina! Send us an email [email protected] and we’ll get it figured out for you. Thanks!
I am a beginner, does this book show you how to do everything? I am trying to do a logo on a shirt and I am not doing so good with it.
Do you have the cricut design for dummies help that use a tablet instead of a computer? Because on a tablet the screen doesn’t look like on a computer. I don’t have a computer.