This post may contain affiliate links for your convenience. If you make a purchase through one of my links I will earn a small commission at no additional cost to you.
Last Updated on April 24, 2022 by Chris Butler
How Do You Do a Knockout on Cricut?
Hi crafty friends! In this tutorial, I’m going to show you how to make knockout designs in Cricut design space with the 2022 update. I didn’t write about knockout designs in my recent post about how to edit text in design space because they take a little more explanation. But I’ve had a lot of questions about it since then, so it’s time to get them answered.
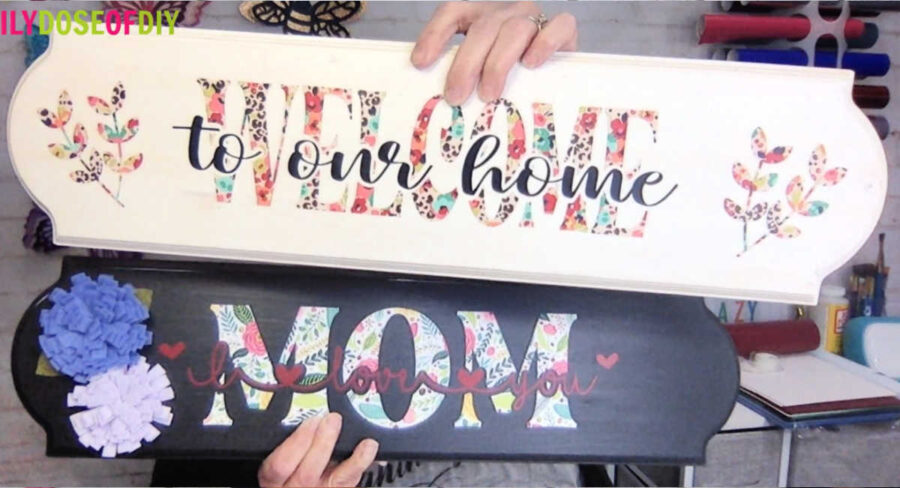
You’ll learn how to knockout text in design space to make your own designs. For this tutorial, I am making a knockout sign with pattern vinyl which makes great gifts for Mother’s Day, Birthdays and Christmas. You can also use this technique to make shirts.
Quick Links to Information in This Post
What are Knockout Designs?
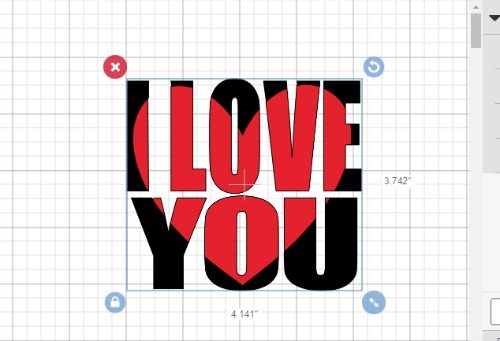
Knockout designs are where you combine two different designs into one. You can knockout an image to form parts of the text like this….
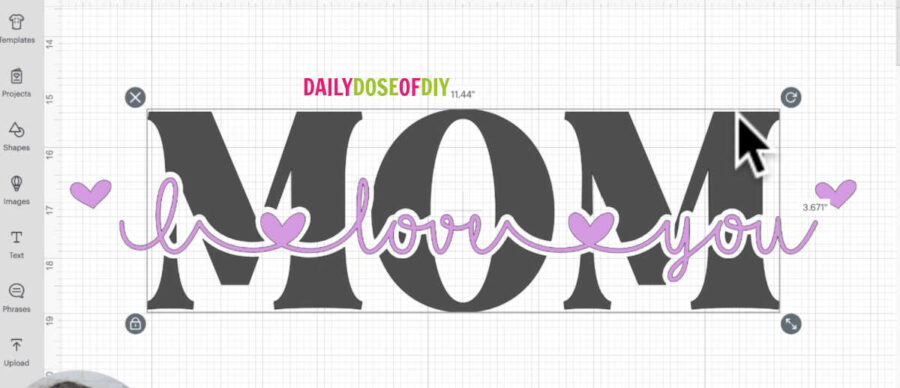
Or you can knockout text and place text inside of different text like this.
So let’s get to it.
Make Knockout Text in Design Space
The video below shows you step-by-step how to make knockout text in Design Space and how to use your design to make a sign. In the tutorial, I use pattern vinyl and the wax paper method to line up the design before transferring it to the sign. Scroll past the video for the complete supply list and the written instructions for knockout designs. Plus a detailed video and instructions for knocking out images into text.
Knockout Sign Supply List
Sign Blank – I used an innkeeper sign found here
Pattern Vinyl Blossom – https://shrsl.com/3hquc
Pattern Vinyl Floral Leopard – https://shrsl.com/3hqu8
Paint and brushes for your sign
Solid Color Vinyl to match Your Pattern
Transfer Tape
Embellishments like Ribbon, Bows, or Flowers
Fonts – I Love Glitter on Dafont
Wax or Parchment Paper
Fonts – Malibu (Used for Mom and Welcome) –
Fonts – Europia (used for to our home)
Need help downloading fonts and getting them into Design Space? Check out this tutorial here. You’ll also learn the top seven places to find free fonts.
How To Knockout Text with Cricut
Step One Prepare Your Text To Knockout
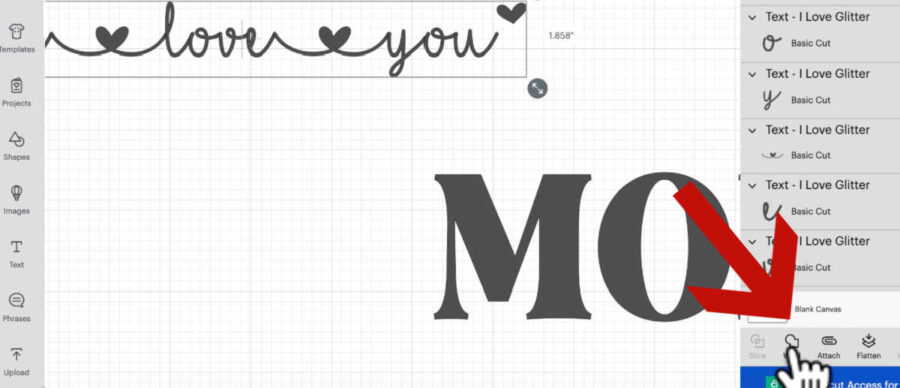
To knockout text from text, we’re going to start with typing in your background text. You’ll want a big chunky font that is a single layer. This font is called Malibu (found here) Impact Font also works well and is already installed on most devices.
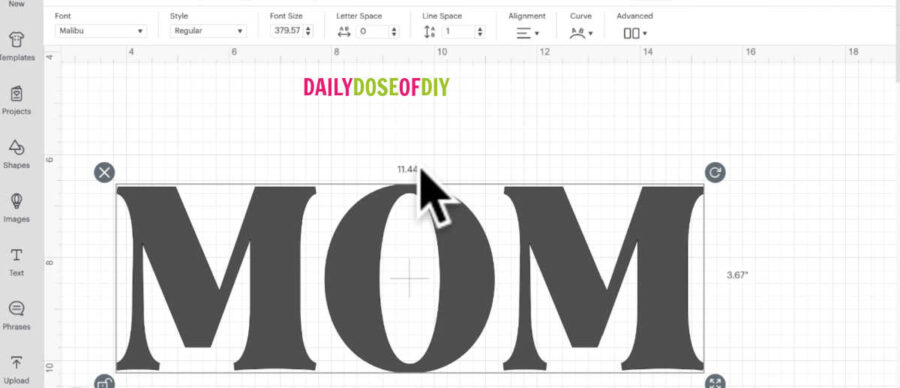
Size it fairly big so we can see what we are doing. Use the letter space on the top menu bar to move your letters closer together. Or you could ungroup your letters and move them individually and then regroup them. After you have the spacing set select everything and click the weld button on the bottom right toolbar.
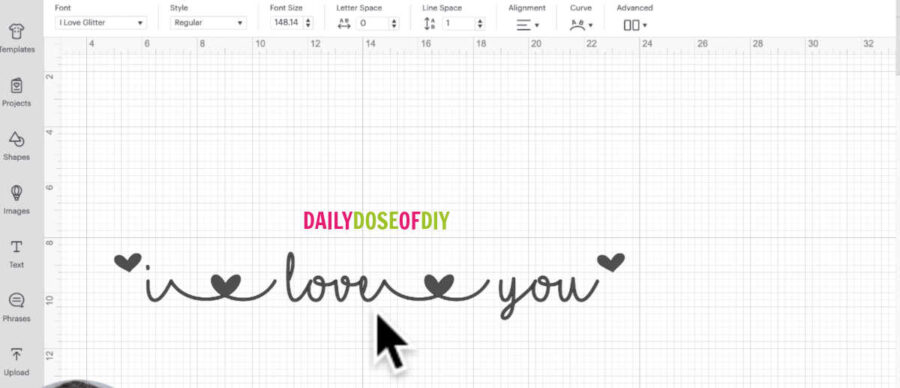
Now we need to pick a single-layer script font. The most common one everyone is using with the hearts in the middle is called I love Glitter and you can find it free here.
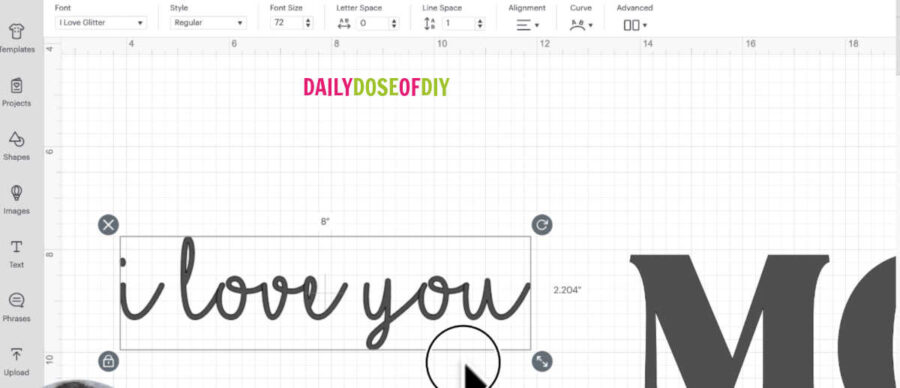
The great thing about I love Glitter font is the extra hearts it comes with. To get the filled-in heart between the words hold down the shift and \ key. To get the hearts at the end hold down the shift and 8
As you can see there are some spacing issues you might need to fix. To do that select the text and then ungroup it. This will allow you to move the letters closer together. If you need more help with fonts or script text, see my editing text in design space post.
So after you have your script text moved together, don’t forget to select it all and weld it together so it stays together and cuts as one continuous shape and we can use it to knock out the text in the word mom.
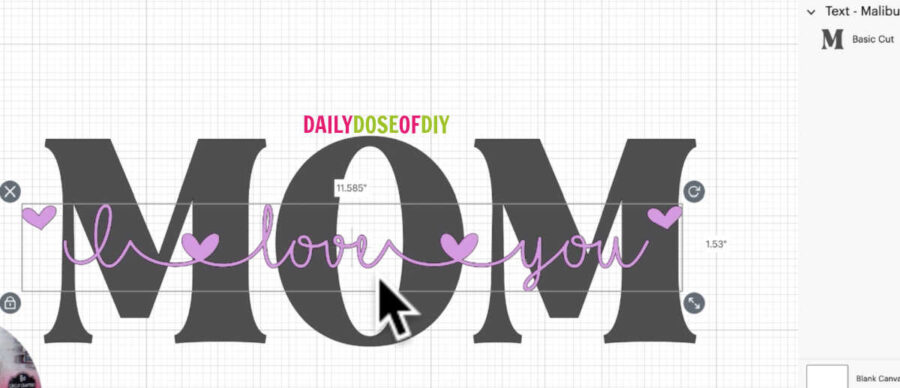
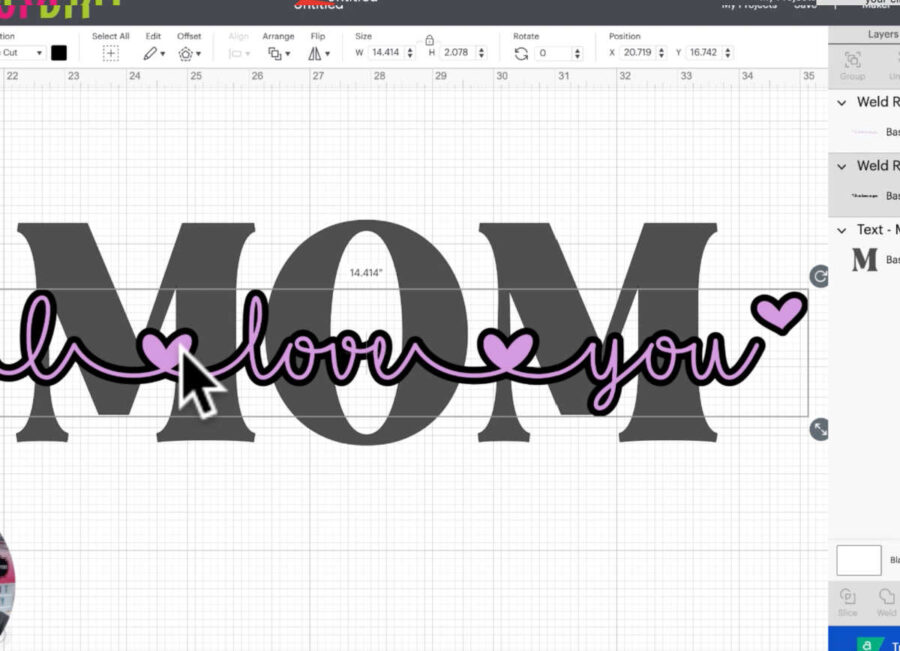
I like to change the color of the script knockout text so that it’s easier to see for the next step.
Then you can drag your script over the print text and size it up how you want it. I had to hit the unlock button on the bottom left of the text box so I could stretch mine longer.
Once you’re happy with the placement of your script text over your base word you’re going to add an offset to the script text.
Step Two: Offset the Script Text to Make a Knockout Design
To make an offset select your script text and then click the offset option on the top menu.
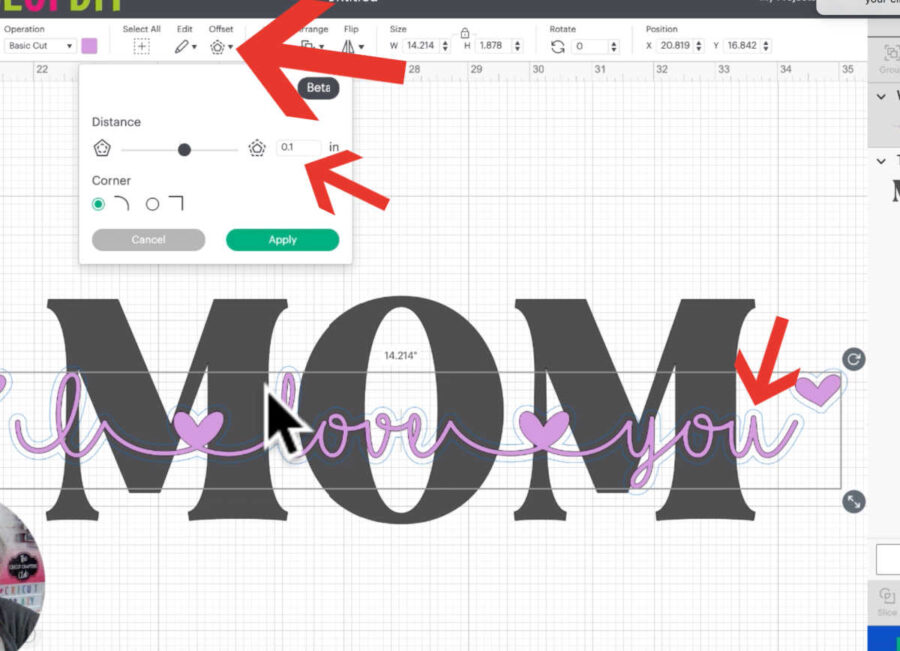
I like to set my offset to .1. You’ll see a faint blue line around the script font indicating where the offset will go. If you want yours bigger or smaller just play around with the offset distance until you’re happy with it. Make sure rounded corners are selected and then hit apply.
For More information on OFFSETTING TEXT in Design Space see this post.
Once the offset is applied you’ll see the black outline around your script text. That is a whole other layer, so now you can pull the purple script text down to move it out of your way for the next step.
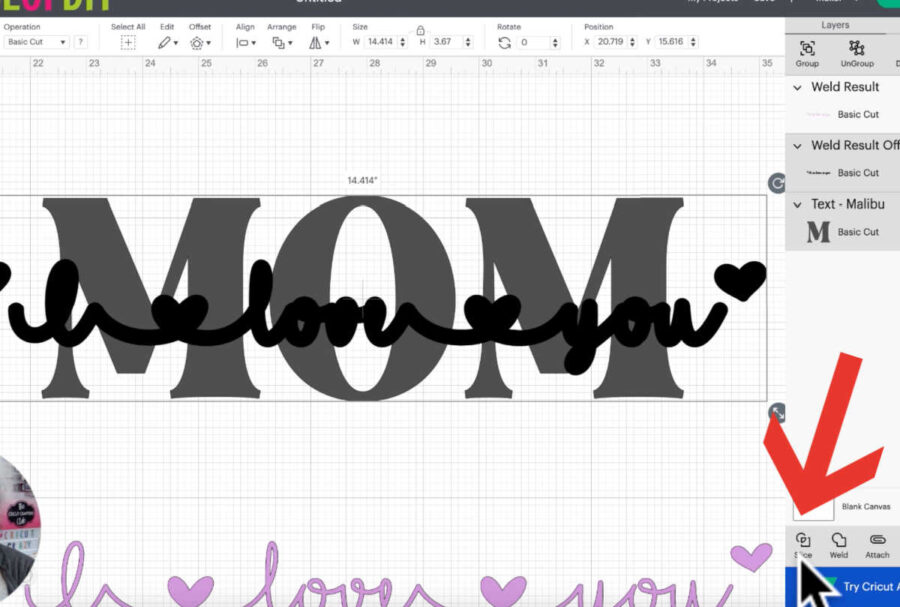
Step Three: Slice the Offset to Create a Knockout
Select both the black offset layer and your background word and then click SLICE on the bottom of the layers menu. Slice will only work if two layers are selected, so it’s important to move your original text (in purple) out of the way.
Slice will cut out or ‘knockout’ our offset from the base text. Once the slice has finished (it could take a few seconds)pull your base word (Mom) out of the way.
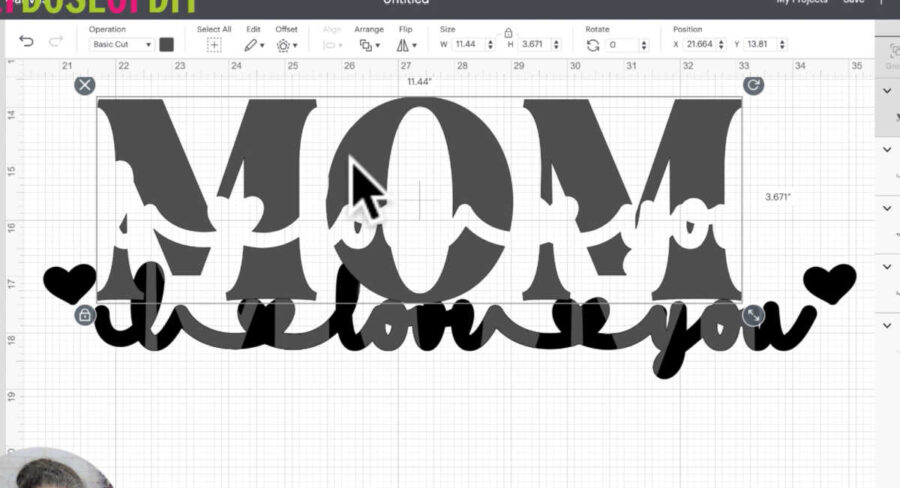
Once you move it you’ll be able to see the words have been cut out of it. Select and delete the rest of the words and pieces that were created from Slicing. Remember to keep your original script text that we made purple.
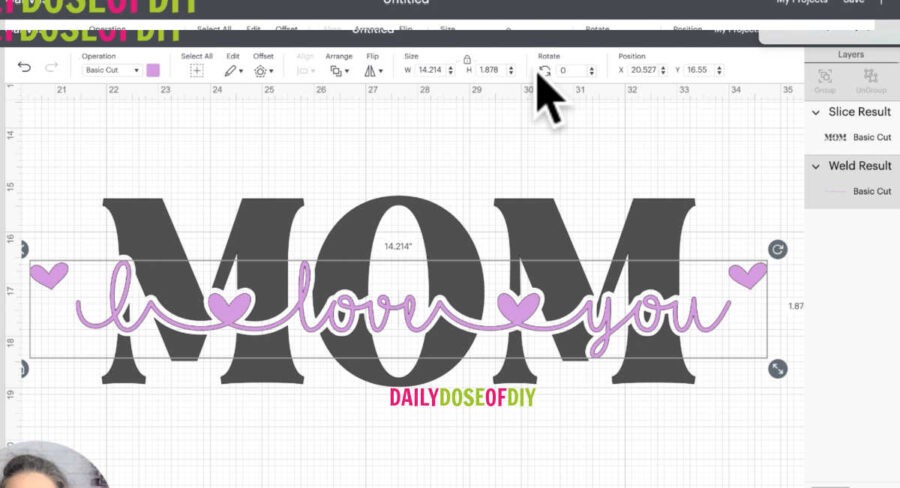
Now that you have everything deleted you can place the script text inside of your base word and make sure everything looks ok. Now you’re ready to cut your design out and in the next steps, I’ll show you how to use wax or parchment paper to line up your knockout design perfectly on a sign.
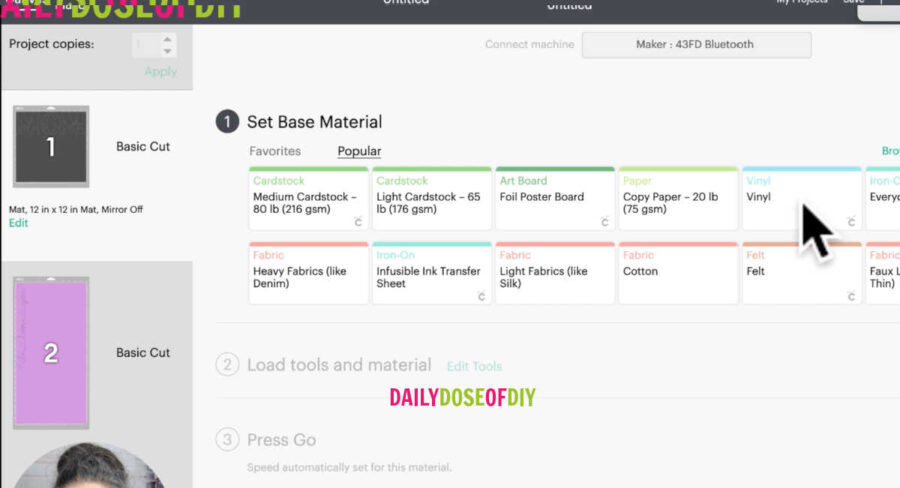
Step Four: Cut Your Knockout Design
Now we’re ready to cut the knockout design with our Cricut. I’m cutting the word mom out of pattern vinyl and the words I love you out of maroon-colored vinyl. Once you’re happy with your design click the make it button. On the next screen you’ll see the layout of the cut mats.
There is no need to mirror your design if you’re making a sign, but if you’re making a shirt don’t forget to mirror.
Since I’m making a larger sign the I love you text will need to be cut on a 24″ cut mat. Keep that in mind when you are purchasing a sign blank and sizing the design to fit.
If you have an Explore you can turn your dial to vinyl and with a Maker select vinyl from the list of materials.
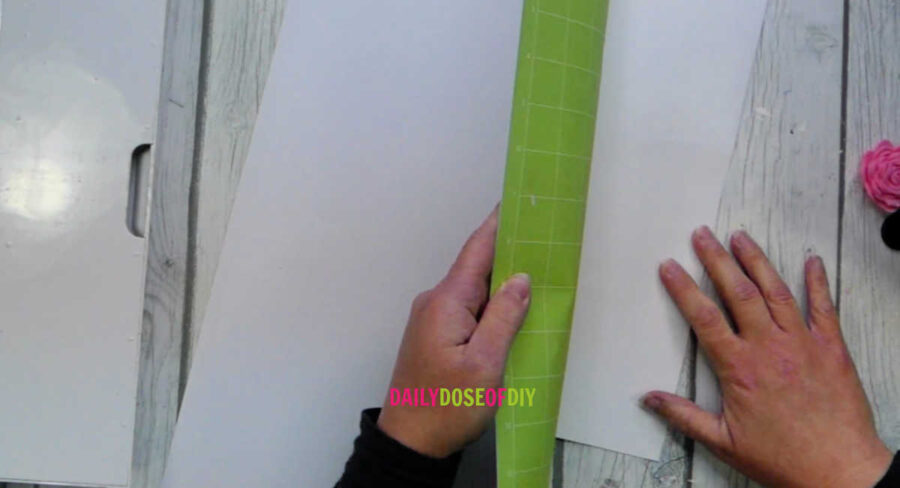
Place the vinyl onto your cut mat starting in the upper left-hand corner and smooth it down. Place the cut mat under the two tabs and press it against the roller bar and then press the flashing arrow button on your Cricut to load the mat. Next press the start button and Cricut will begin cutting your design.
After the first mat is finished repeat the process for your second cut mat.
To remove the vinyl from your cut mat flip your mat over and gently peel the mat off of the vinyl. This helps keep it from curling and getting warped.
Layer Your Knockout Design
Now that we have our design cut we need to layer our vinyl so the script words line up perfectly with the base word. One of the easiest ways I’ve found to do that is to use wax or parchment paper.
Weed both of your designs first with your weeding tool
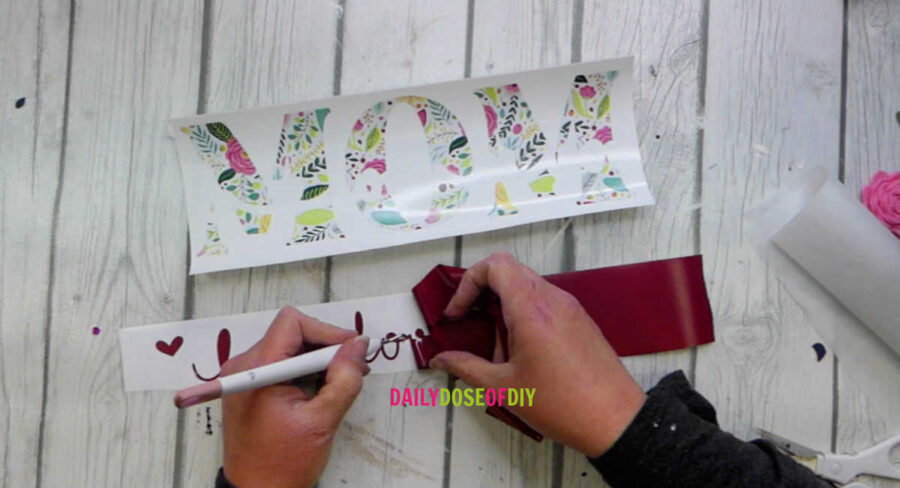
Step One: Apply Transfer Tape
Next, we’re going to cut a piece of transfer tape that is slightly larger than the base word. And it should cover all of the script text too. I didn’t make mine quite long enough but it still worked out.
Once you have the transfer tape cut, apply it to the script text. (See How to Easily Apply Transfer Tape Without Wrinkles or Bubbles Here) and then remove the backing from the vinyl.
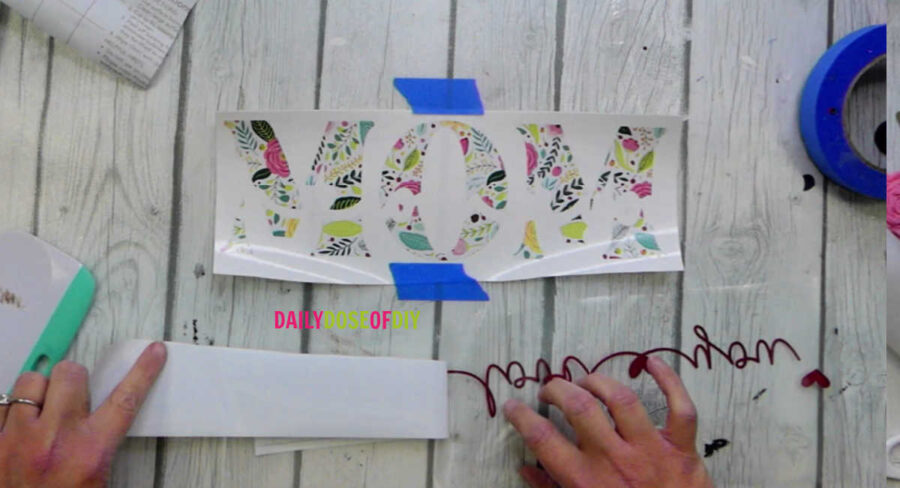
At some point, you’ll also want to tape down your base word. We don’t want it to move for this next step.
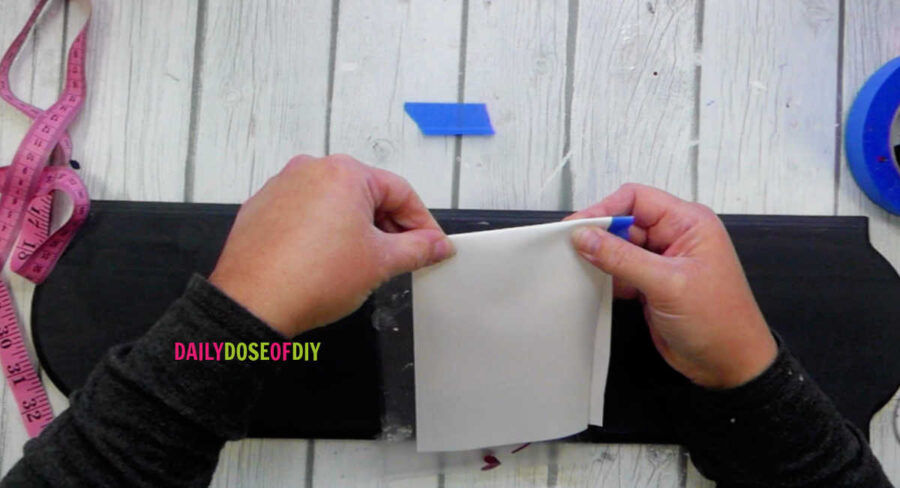
Step Two: Use Wax or Parchment Paper
Next place a piece of wax or parchment paper over your base word keeping the top of the paper fairly even with the vinyl. And technically this step doesn’t matter much, it’s just the way I always do it.
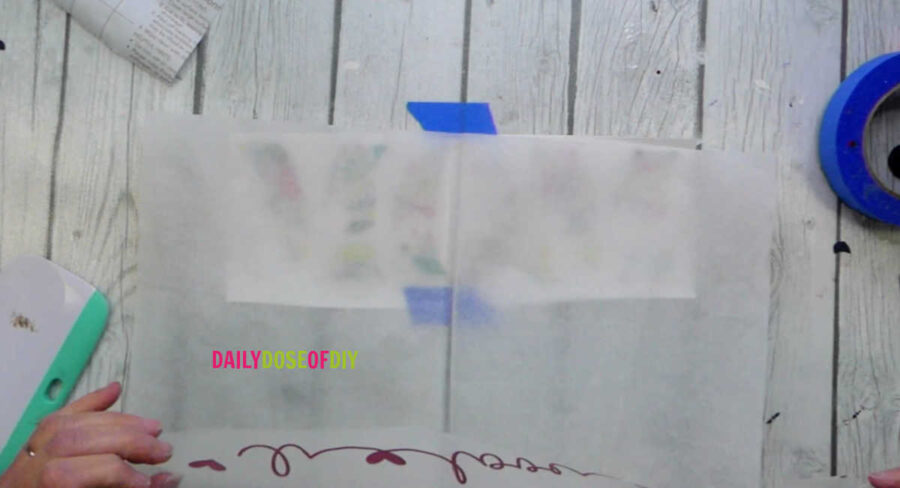
Place your script text on the parchment paper and smooth it down. BE SURE to leave an overhang of the stick transfer tape over the parchment paper so we can stick it to the table when we’re ready.
Now the parent or wax paper is see-through and our script text is stuck to it with a slight overhang. Move the parchment paper around until you can see that your script text is lined up and fits perfectly into the knockout we made in the base word.
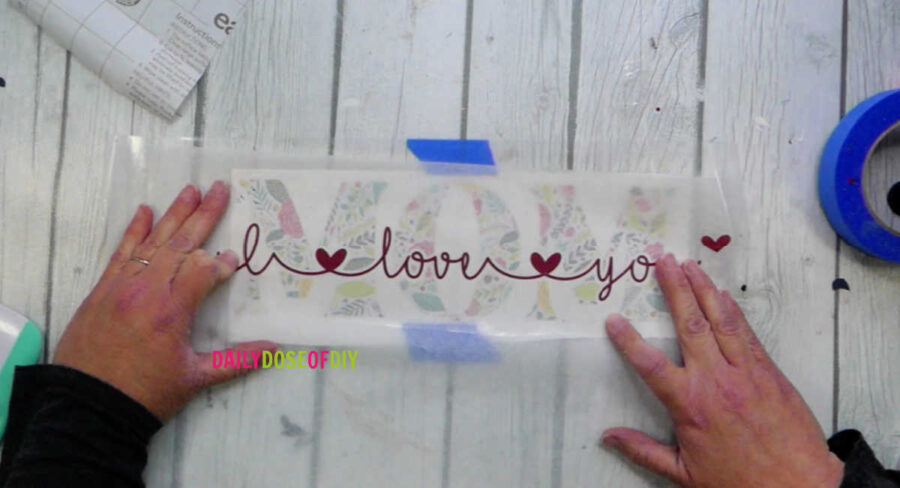
Once you’re happy with the placement – use that little bit of overhang we left on the transfer tape and smooth it down to stick it to the table. Now your base word is taped to the table, your script text is stuck to the table and they should be lined up.
Depending on your table surface you may have to hold down where the transfer tape is stuck so it doesn’t move. Flip-up the parchment paper and begin removing it from the transfer tape. Parchment paper will be a little more stuck than wax paper, but it should still come off easily.
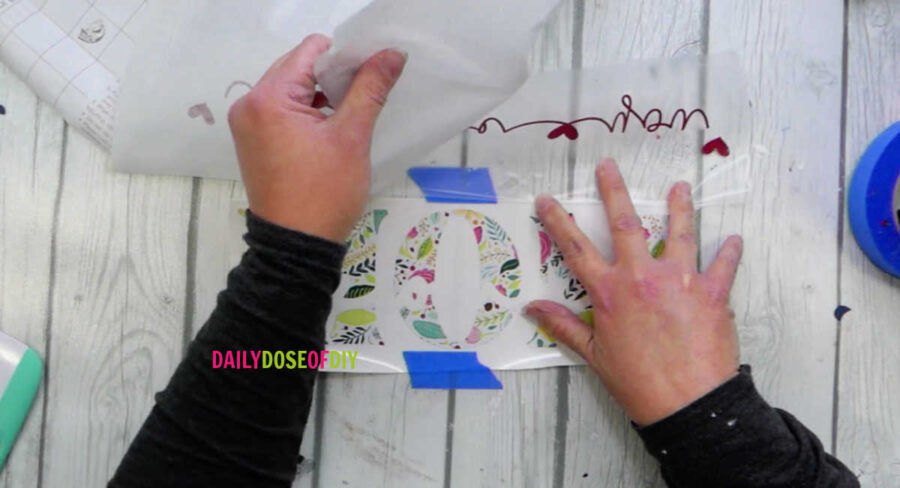
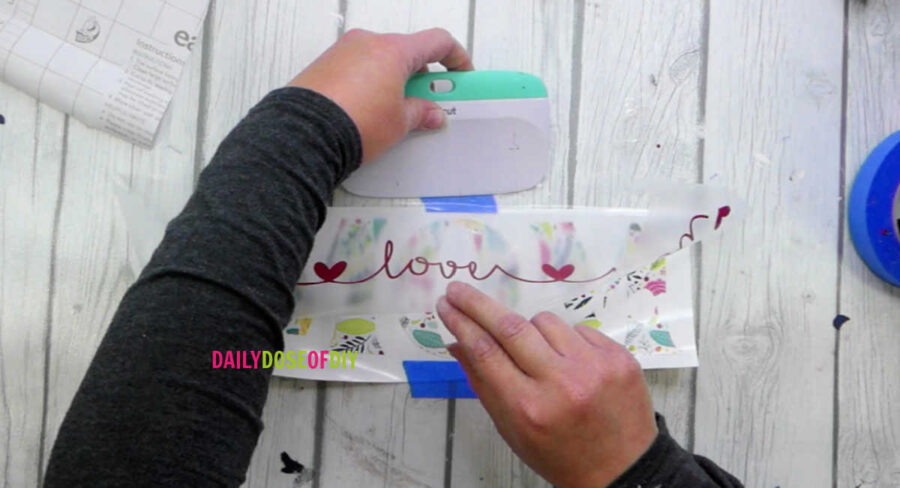
Keep the script text and transfer tape up while you’re removing the paper. Once all of the paper is off grab the opposite end of the transfer tape from what is stuck to the table and hold it at about a 45-degree angle from the table. Use your scraper tool starting in the center and working your way out to stick the transfer tape and script text to your base word.
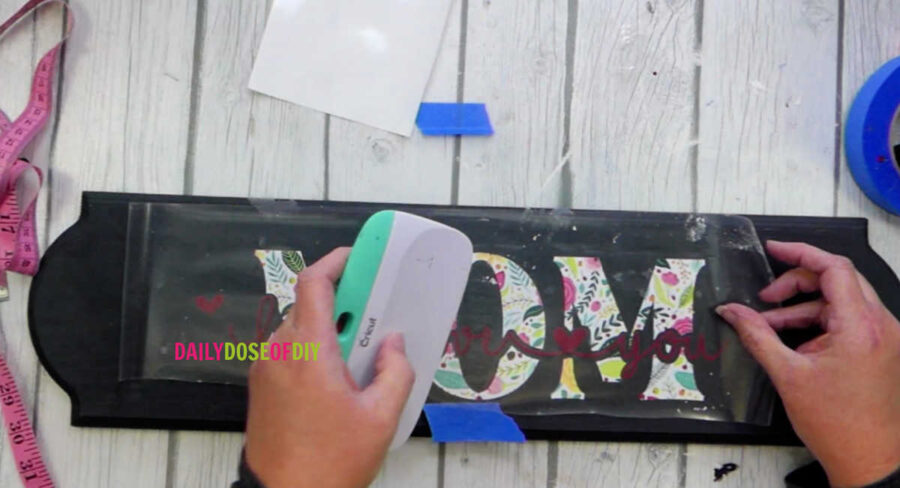
Step Three: Transfer Your Design to Your Sign
Now your knock-out design is ready to transfer to your sign. Measure your sign blank and make a mark in the middle of your sign. You can fold your knockout design in half to crease the center so it will be easier to center on your sign.
Next, remove the paper backing from your design and line your crease mark up with the mark you made on the center of your board. Hold it taught at the ends so it doesn’t stick to the sign before you want it to. Once you have it centered you can lay it on top of the sign. You should still be able to pick it up and reposition it if needed.
Once you’re happy with the placement start at the center of the design with your scraper tool and work your way to the edges. Scrape down each section really well and then remove your transfer tape.
Next remove your transfer tape from the sign. I added Mod Podge to the sign to seal and protect it. You do not need to seal the vinyl, and most manufacturers don’t recommend you do. But I’ve never had a problem with it and I did want to seal the paint to give it a nice matte finish.
You can also add a bow, ribbon, or other embellishments to your sign if you wish.
Make a Knockout Design With an Image
Knockout Images Video
The first thing you need to do is choose your font and choose your image. The most common font and the one I used in the ‘I Love You’ knockout design is called Impact. It is loaded in Cricut design space and it’s FREE! Any chunky bold font will work as long as it’s a single layer font.
So now that we have our font, type your text into Design Space.
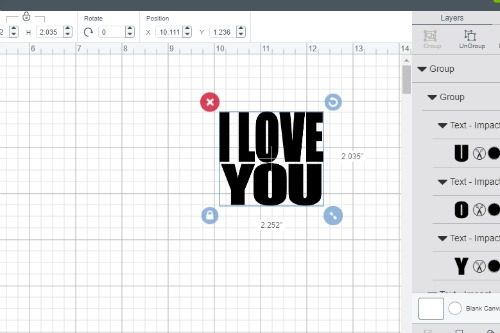
Keep your image in mind while you are putting together your text. A square shaped image will require multiple lines of text.
I prefer to put each line of text in a separate text box. That way I can stretch out a word if I need to and I can put the lines close together.
Your letters will also need to be spaced closer together. You can either do that by clicking the ungroup button and moving each letter individually, or by lowering the letter space on the top toolbar.
After you have your text the way you want, select everything and click the weld button on the right toolbar.
Can you unweld in Cricut?NO – There is not an unweld button at this time. However, if you see a mistake as soon as you weld YOU CAN click the undo button on the top left menu. This will un-do the weld.
Adding The Image for Knockout
For the image part of my knockout design, I just used the heart shape from the shapes menu in Design Space. You can also upload your own image.
An important note on images: Knockout designs only work with single-layer fonts and single-layer images. Think one color like silhouettes.
After your image is uploaded, size it to fit your text. You may have to right-click and then click move to front to get the image on the top layer.
How to Slice the Words
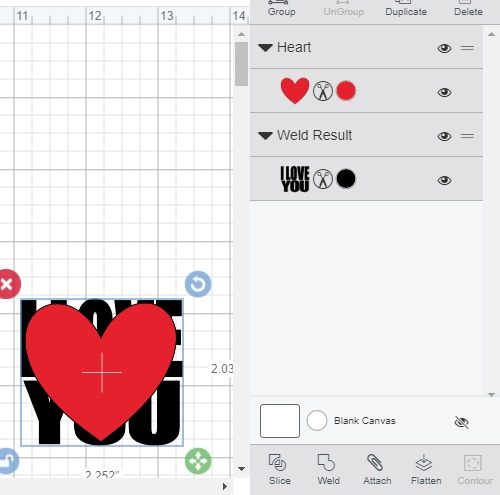
So when you have everything lined up how you want you’re going to select everything and click the slice button on the bottom right toolbar. You will see the results of the slice in the layers menu.
By using slice we are cutting the image of the heart out of the words ‘I love you’
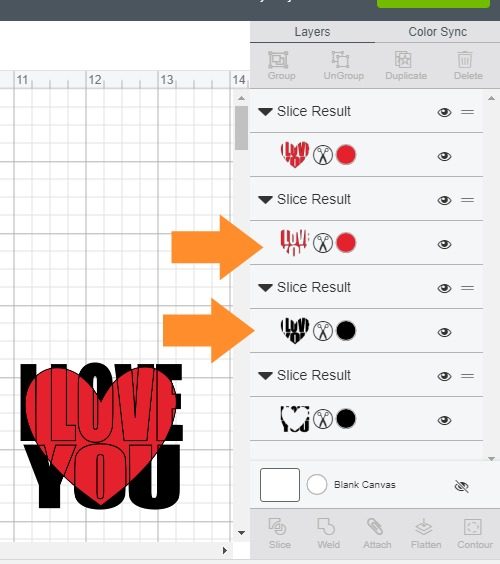
Depending on what you plan on doing with your design, you may not want to move it just yet. Click on the two center slice results in the layers menu and then hit the backspace or delete button to get rid of them.
Your design should look like this after deleting those two middle layers. If you’re using HTV (heat transfer vinyl) you are good to go and can click the make it button.
If you are using adhesive sticky vinyl you may want to see my tips for layering vinyl here.
That covers just about everything you need to know about making Knockout Designs! If you have any further questions please leave me a comment down below.
If you love Cricut tutorials and free SVG files- be sure to join my weekly newsletter. I offer subscribers free access to my resource library where I keep all of my files, printable, and plans. Simply fill out the form below to join.
Knockout Text Design with Cricut
DON’T FORGET TO PIN IT


Chris Butler has helped thousands of crafters learn how to use their Cricut machine without feeling overwhelmed. She is a best selling author and an up and coming designer. For fun Chris enjoys designing SVG Files, hanging out with her family (preferably at the lake), traveling, and volunteering at her church. She is a wife and mom of two crazy fun kids.
You said you can go ahead and make it if using HTV…does HTV not need to be layered if using separate colours?
Yes it’s layered, but it’s not layered on the transfer sheet. To layer HTV I position the first color and press for 5 seconds, remove the transfer paper and then position my second color press for 5 seconds….and continue on. HTV isn’t sticky like adhesive vinyl so you’re able to easily move it around to get it in the correct position on your project before you press.
I have a chromebook and it says it’s not compatible with the cricut design space. But I have a cricut design space on there. I don’t have the one that has the shirt on it.
Thank you for this, however only my bleed out is slicing and I have them both highlighted,.
Hi Jessica! I’m not sure I understand. The bleed out should be on top of the chunky text. Select both and slice. That will leave a hole in the chunky text where the bleed out was. Can you send a screenshot to [email protected] so I can see what you mean?
You gave wonderful instructions ! Thank you so much for teaching me something new!!
You are a great teacher. I made mine in the first try! Thank you!
Great to hear Lynne, Thank You!!
Wow. I love it. This was a very well-written tutorial. Although it looks like some Design Space updates/changes have occurred since you wrote this, it was still easy to follow along. I will be pinning your page.
Thanks Denise!
ON MY CRICUT DESIGN, I DON’T HAVE “PRINT”
I ONLY HAVE CUT, DRAW, SCORE.
I’M AT THE STEP WHERE I’VE WELDED IT AND I WANT TO PRINT TO SAVE IMAGE. HOW ELSE CAN I DO THIS IF I DON’T HAVE THE PRINT OPTION?
Hi Megan! Yes this is on my list to update since design space changed. You still have a print option. It’s on the top menu under ‘FILL’ which is right next to line type.
Hope this helps!
Chris
I got to this point too, but my computer only let’s me save the image as a .txt file and nothing else….why is this happening?
What kind of computer do you have? On my mac I now have the option to save as text or as all files. If you choose all files it will save as an image.
Make sure you are over the image when you right click to save it.
I have right clicked over image but nothing happens it won’t save image.
I am having the same issue Misty so lost 🙁
When I position my mouse over the image and right click, nothing happens. I have followed the instructions verbatim up to now. What do I do?
I have tried my laptop and pc and when I right click, nothing pops up. What can I do?
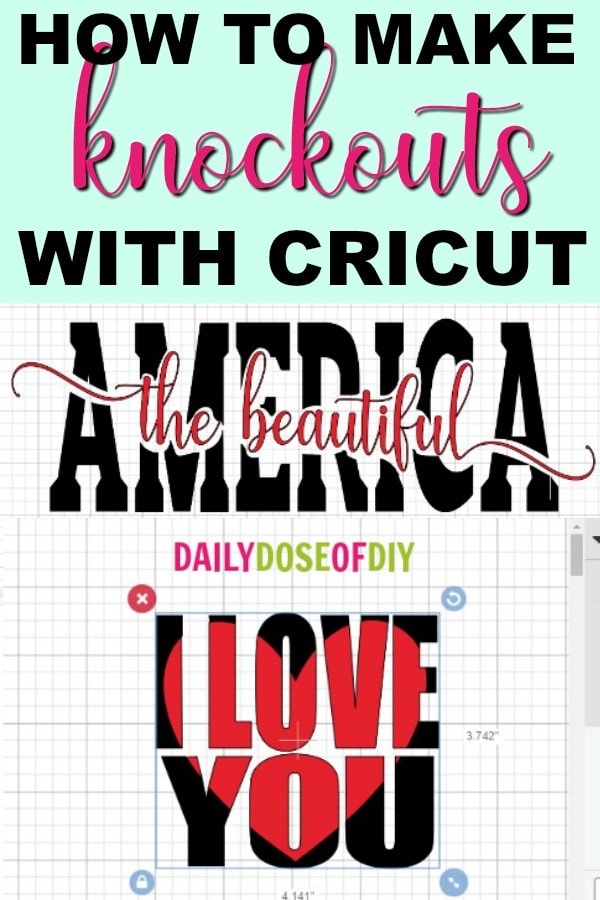
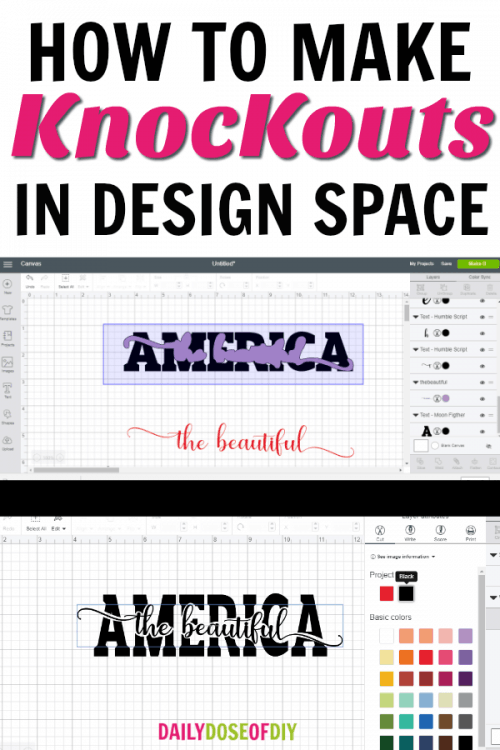
What font is used for “the beautiful” in that knockout sign?
Hi Cathy! That one is called Humble Script
You are the best at explaining Step by step I wish I had you with me all the time lol
Thank you
I got as far as be sure to change your script text from print to cut. Couldn’t figure out how to do that??
You can change it on the top menu where it says line type
I’m @ the point where I save image as and when I open it only comes up as a text documet and if I change it to all files then another pop up ask how do you want to open this file internet explorer, works word processor, photoviewer, word pad media player , paint , I’m completely lost at the point and ready to give up so all help appreciate I’m also working with a hp Microsoft computer
I ran into the same issue. Once the dialog box opens asking how you want to open the file, choose Paint, then click on Menu (top lefthand corner), save as, and you can choose image.
We are trying to duplicate your AMERICA design, but cant find a flag file to work because most are not single layer. What did you use?
Super helpful! Thank you. I tried calling Cricut customer service for the same information but only ended up on hold for 45 minutes because I’m not an access member. Terrible customer service! Thank you for saving me!
I made ONE of these and now I can’t make another Knockout design. I’m not getting that “blob” look to slice after saving the lettering.
During Cricuts multiple updates recently, they changed how print and cut works AGAIN. One rep said they didn’t realize how many people used that function. So it may not hurt to contact them and tell them you miss it. I’m thinking they’ll bring it back soon, but we’ll have to see.
So glad I read this!! I’m not happy with the ‘blob’ I’m getting! I’ve followed your instructions step-by-step. Your explanation explains a lot to me. Never had this much trouble before. Thanks so much!
I have tried so many times to save the image of the scripted words, and when I try to upload the image it says that the file isn’t supported. I cannot figure this out and am getting way too frustrated. Please help!
Cricut has made some updates, we’re waiting to see if they bring this feature back
I see others are having the same problem with saving the blob image from print screen. Has anyone figured this out yet????
Oh no… so there’s no other way to make this image work right now? That’s too bad…. I’m still going to make a shirt, just put the scripted words overtop in a different colour, hopefully it still looks good
Hey! So I’m running into the issue of my bleeded text not being “blob” ish enough looking if that makes sense? It is too exact to the outline of my lettering so my font just basically fills the space that I slice out and then I don’t have enough white space for you to actually be able to read what the knockout font says. Any suggestions?
thanks!
This tutorial is AWESOME – thank you! You really have a talent for explaining things simply but completely! I’m having the same ‘no blob’ issue but it appears from comments above that it’s something CDS has changed – again. .:( I wish they would listen to their users, I feel like I send feedback all the time time and it falls on deaf ears. If I’m ever able to search my own projects I’ll feel like I’ve won the lottery!
If you have any fixes to the issue before they (hopefully) reverse this change please let us know. Thank you again!
When I slice, my cutout is barely big enough to make my script readable. Help!
This was a great tutorial! However, I too am running
Into the issue of my saved text not being supported.
Everyone needs some support! LOL.
Thank you for the step by step instructions!! 😊
I also am running into the issue of saving the file . My only option says “save as” not “save image as” and only saves as an html and I can’t bring my image to upload.
I am having the same issue. Did you get this to work?
I cannot get my bleed image to upload.
Hello. I have been trying to get help on this for 2 weeks and getting no response from anyone. I hope you can help me. I can do the whole tutorial no problem except that when I get to send to printer, I right click to save my text and I get no menu to save it. It is very frustrating. Can you help me?
Hi Jane! Cricut made some changes again, we are hoping they will bring this option back, I’ll keep you posted!
Thank you so much for the quick reply. Do you have any other way that I can create a knockout text, save it as an svg and use it in Cricut? 🙂
Thanks
Jane
LOVE the tutorial but for some reason I can’t right click and or save the image. Is there another way to save the image?
My computer or Design Space will not allow me to right click on the image to print/cut. I have a Dell, is there another option???
Neither does mine – I purposefully came back to this tutorial because I successfully used it in the past (about a year ago) so I know any of the difficulties must be because of Design Space updates. Not sure how to proceed…but am determined to figure it out!
I’m having the same problem. Have you figured it out?
Hi there! I have a question. I am very new to this and stumbled across your tutorial- it was great! My only question is how to print it out ? Do I now use two diff htv to print ? I would appreciate any and all help!!!
Thank you
Christen
Hi Chris,
I am so excited to learn how to do a knock out like the “Home sweet home”. I followed all the steps and everything worked well until I got to the print screen in Cricut. I cannot right click on the design and save it. Nothing happens when I right click. Do you know what I can do?
Thank you.
Hiltrud
I’m having a hard time with saving the bleed part to my iPad. Please help!!
So I have followed all of the steps but when i get to the section to hit make it, it keeps saying that this project is incompatible with my machine. do you have any idea how to fix this problem? i have the explore 2. i tried changing to the maker just to see if it would let me save it and it still says its incompatible.
never mind. i figured it out!
Thank you for sharing this tutorial. You explained the whole process in such a clear way. Good job!
This is brilliant! Your skills are outstanding. Thank you for the step-by-step for a really interesting project!