This post may contain affiliate links for your convenience. If you make a purchase through one of my links I will earn a small commission at no additional cost to you.
Last Updated on August 12, 2023 by Chris Butler
MOOooooOOOM! What’s for dinner? If I had a nickel for every time I answered that question we could eat out and I wouldn’t have to cook. Amen?
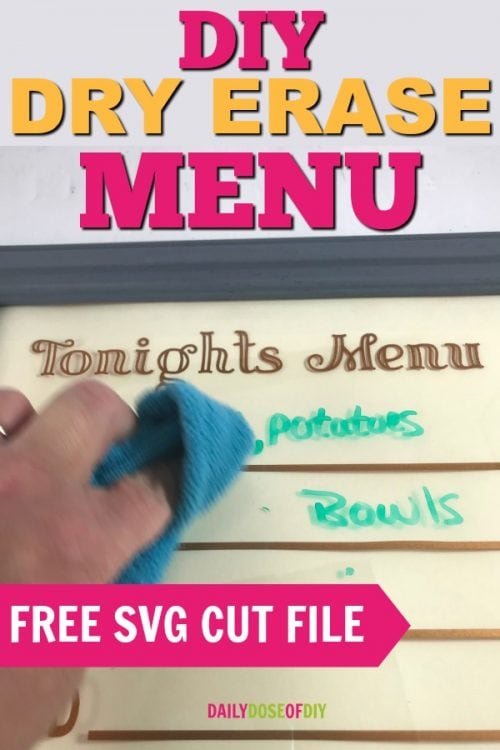
So I decided to make a dry erase menu board so everyone could easily see what’s for dinner. Warning – this doesn’t stop them from complaining about what you’re making. ?
A dry erase menu board is super easy to make. I used an old picture frame for mine, which you can find a gazillion of at thrift stores. Glass is dry erasable so it works perfectly.
I made an SVG cut file for the weekly menu that I’ll happily share with you. You can find all the details about it at the end of the post.
Let’s get started.
PIN IT
Quick Links to Information in This Post
DIY Dry Erase Menu Board Supplies Needed
- Picture Frame (I used 11×14)
- Adhesive Vinyl (I used Oracle 651 Copper)
- Transfer Tape
- Dry Erase Markers
- Tape (Masking or clear)
- Cardstock / Scrapbook Paper
- A Cutting Machine like the Cricut Explore
Start with taking your picture frame apart. I decided to paint my frame dark gray to better match my decor.
The backing to your frame is probably a brown cardboard color. And that’s not really attractive. I covered my frame backing with cream colored card stock. You could also use a pretty design from scrapbook paper.
But you’ll definitely want to cover it with something since you’ll be able to see it once your dry erase menu board is hung up.
Applying the Weekly Menu SVG to the Glass
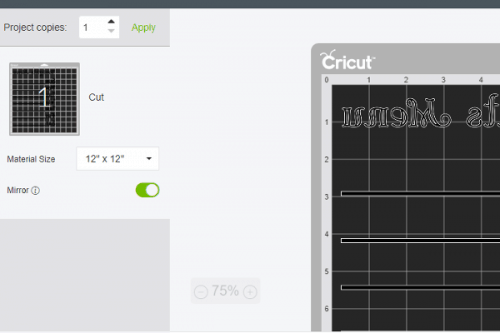
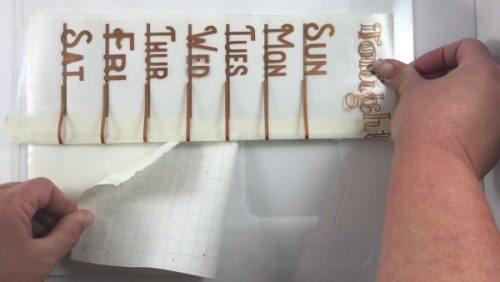
The first step is to grab the free weekly menu SVG from the resource library. I applied the weekly menu to the inside of the glass so that the dry erase markers wouldn’t mess it up. I really recommend this.
So if you are applying the vinyl to the inside of the glass you will need to turn on the Mirror in your design software so the design cuts backward.
After the design is cut and weeded, you’ll need to apply the transfer tape. For larger vinyl cuts like this, it’s easier to start the transfer tape at one end.
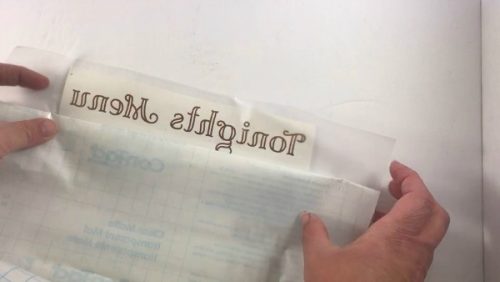
Peel back just one edge of the backing and get it stuck down. Then while you remove the rest of the backing smooth down the transfer paper with your other hand.
It usually goes on without wrinkles that way.
Next clean the glass really well with alcohol to remove any residue.
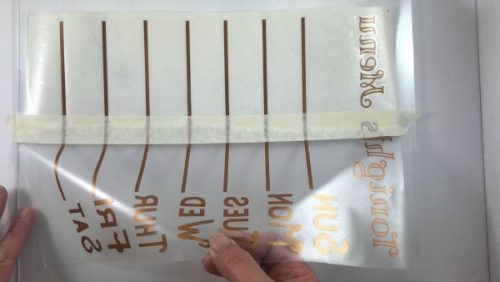
To get the vinyl on the glass we are going to use the hinge method so we don’t end up with a giant sticky mess. A big mistake people make is trying to apply the vinyl all at once and that doesn’t end up well.
Hinge Method
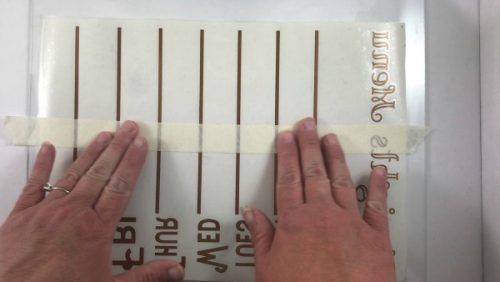
With the hinge method, you’ll want to center the design on the glass. And then place a piece of masking tape down the center to hold it to the glass.
Next, pull the backing off of one side until the tape stops you. You can either cut or rip the backing of that side off, but don’t let the vinyl or transfer paper touch the glass.
Hold the transfer paper tightly about 45 degrees off the glass. Start at the center and press down out to the edge.
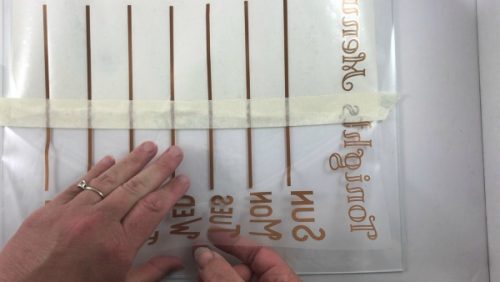
After the center is stuck, move out to the sides and smooth each one down as you are holding the corner.

Once one side is applied you can remove the masking tape. Next, remove the backing from the second side and repeat the same process. Starting at the center and moving out to the corners.
Then use your scraper to burnish (rub really hard) the vinyl down and remove your transfer paper.
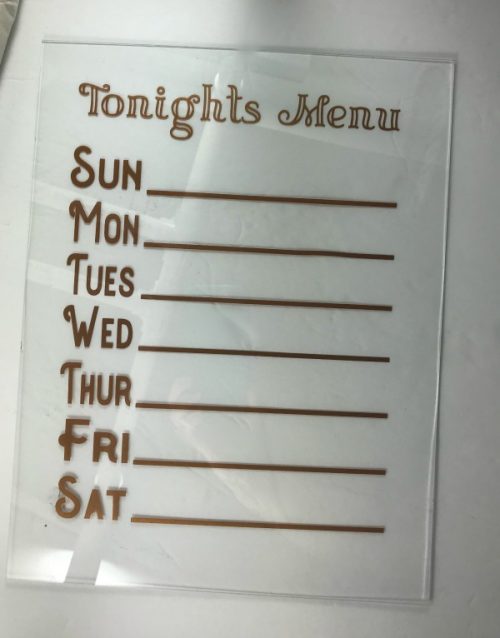
Flip the glass over and see how it looks.
Finishing Your Dry Erase Menu Board
Once the weekly menu is on the glass, you’re ready to reassemble the frame. Put the glass back in the frame first followed by the backing that you covered. Then fold down the tabs in the frame to hold everything in place.
Flip it over again and admire your work.
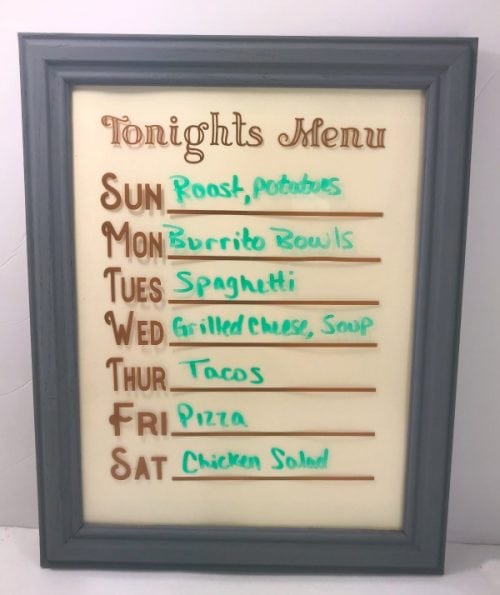
I love the Oracle copper colored vinyl from Amazon, don’t you?
You can use any dry erase marker on the glass, and since we put the vinyl on the inside, you won’t have to worry about it getting messed up.
To erase your menu at the end of the week you can use a paper towel or a clean dry cloth.
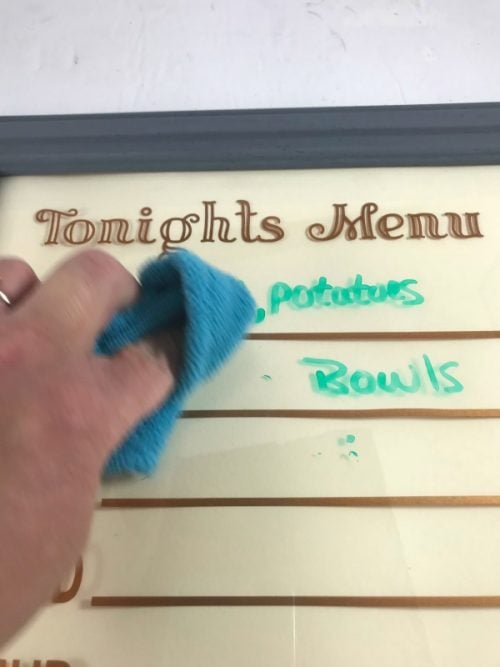
Then start again with your new menu. Quick and easy!
Swipe my Weekly Menu SVG File
You can totally use my SVG file for your own menu board. I keep my files and printable in a free resource library that I made for subscribers to my weekly newsletter.
When you sign up the link and password to the library will be immediately emailed to you. Plus you’ll get more freebies and cool tips in my newsletter.
All of my free SVG files and Designs are kept in a library for your convenience. We will send you the link and password right away, and you’re free to use all the resources you want in the library.
Already have the password? (It’s at the bottom of every email) Enter the Library Here

Chris Butler has helped thousands of crafters learn how to use their Cricut machine without feeling overwhelmed. She is a best selling author and an up and coming designer. For fun Chris enjoys designing SVG Files, hanging out with her family (preferably at the lake), traveling, and volunteering at her church. She is a wife and mom of two crazy fun kids.
Thank you so much for the idea, SVG and instructions! I just made mine and love it!