This post may contain affiliate links for your convenience. If you make a purchase through one of my links I will earn a small commission at no additional cost to you.
Last Updated on August 12, 2023 by Chris Butler
*Updated June 2020
Quick Links to Information in This Post
How To Layer Vinyl
Hello fellow crafters! Today I’m going to show you how to layer vinyl an easy way. It can be a little tricky to get multiple colors perfectly lined up. When I first started I ended up with a big ball of sticky vinyl mess. But I’ve learned a few things along the way to get multiple colors of vinyl layered quickly.
So today you’re going to learn how to create guides to make the layering process easy. Next you’ll learn how to cut the layers with your Cricut. And finally, we’ll apply the layered vinyl to a cup so you can see the full process.
With the SVG I’m using we’ll be layering vinyl on top of vinyl, making it super important to get it right. But with this process you’re about to learn and a little practice, you’ll be able to easily layer and transfer vinyl every time.
I’m using my Cricut machine to cut the vinyl, but this process will work for any cutting machine.
And finally, this tutorial is for adhesive vinyl, like the kind you stick to cups, cars or any other hard surface. If you need help layering Iron-on vinyl or HTV see this post on How to Make Shirts with Cricut
Alright Let’s get to it.
This post contains affiliate links for your convenience. Please see our disclosure policy.
Layering Vinyl Supplies Needed
- Transfer Paper -I prefer to use clear contact paper
- Adhesive Vinyl -If you want your project to last it’s best to use Oracle 651 Permanent Adhesive Vinyl, you can find a great price on a starter pack here.
- Cutting Machine – I’m using my Cricut Explore
- Fun SVG Cut Files (I’m using Wine Time – you can use it too, it’s located in my free resource library, details at the bottom of this post)
If you also want to make the stemless wine glass, you can find them at places like the Dollar Tree or Walmart. I bought the unbreakable kind (because I’m a clutz) at Walmart for a little over $2.00
If you’re putting the vinyl on a mug or anywhere you want it to stay forever, be sure to use Oracal 651 Vinyl like found here.
Layer and Apply Vinyl Video
How to Cut Layers on Cricut
This part is shown step-by-step using Cricut Design Space. However, the concept will work for any cutting machine.
The first trick to layering vinyl happens before you even cut your design.
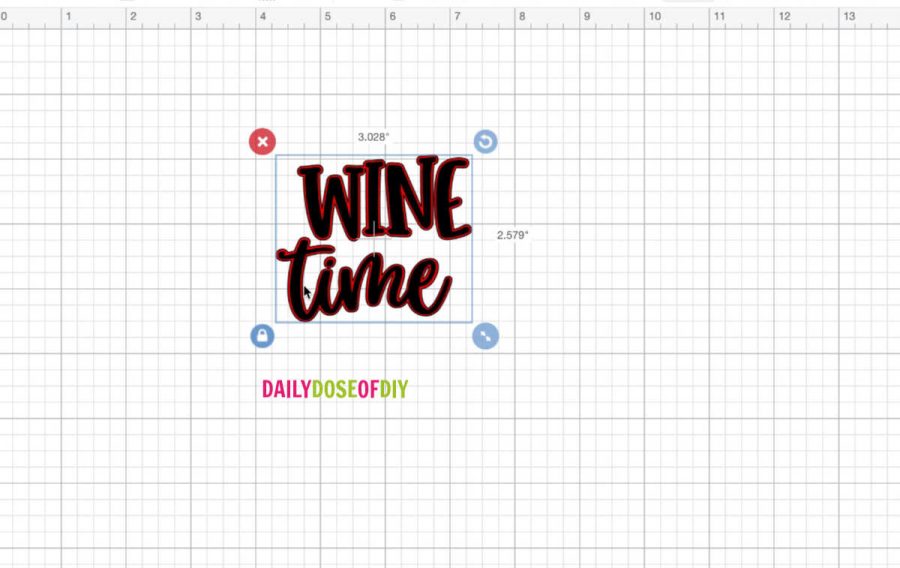
So start with your multi-colored design in Design Space. If you need help uploading SVG files to Design Space see this post.
I’m using this wine time design with two colors, I’ll be layering one color on top of the other.
After you have your design uploaded to design space we are going to add some guides to make the layering easy.
So go to the left menu and select shapes and then the square. Reduce the size of the square and place it on the top left of your design. By default the squares are grey. Go over to the top menu and change the color to black, or the main color of your design.

After the color is changed right click on the square and select duplicate. Now you have two squares exactly the same. Move the second square to the top right of your design.
From this point- we have two options.
One – You can select everything and click attach on the bottom right menu. And then cut the whole design twice, once in each color.
After the design is cut in each color you just weed out all of the parts you don’t need for that color. Be sure to leave the squares though. I usually have to look at the picture to keep from messing this up and weeding the wrong things lol.
The second option is the one I prefer to use, I find it much easier and less wasteful in the long run.
Making Guides For Each Color
So to do the second option we need another set of squares for our second color. Select one of the black squares and right click and duplicate it again. You can also click duplicate on the top of the layers menu.
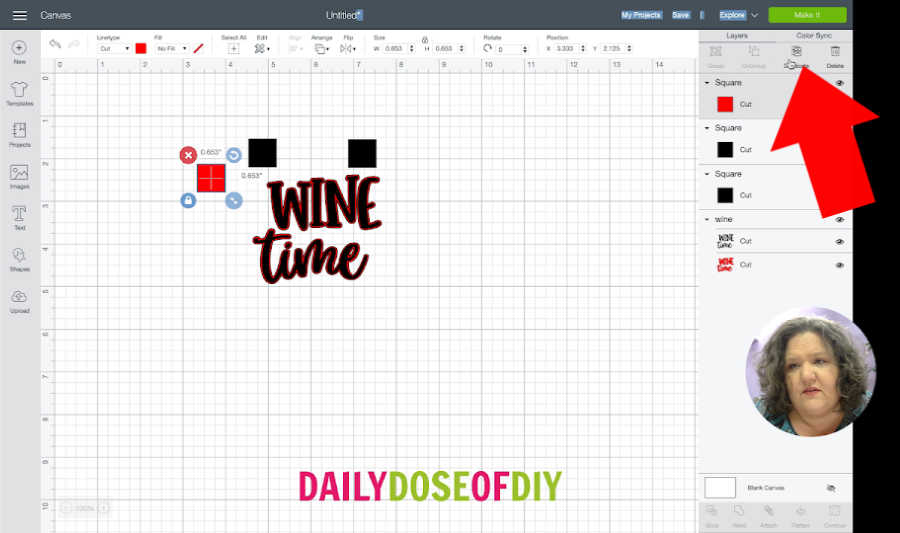
Change the color to red or the same shade as your second color. And then duplicate the red square. So now you have two black squares and two red squares.
If you have a design that is 3 colors or more, make two squares for each color.
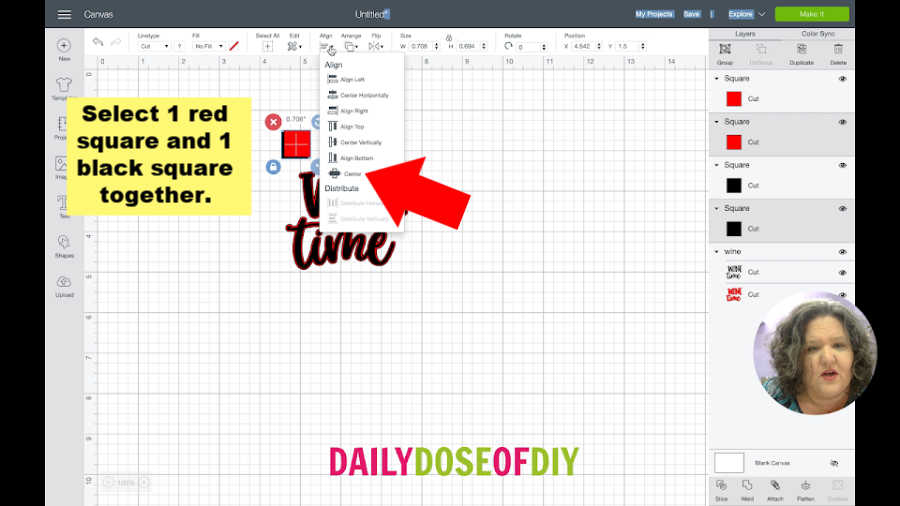
Next place your red squares close to your back squares. Select one set of squares (1 red and 1 black). Then on the top menu select ALIGN and from the drop-down select CENTER.
This will automatically move your red square to the top of your black square.
Repeat that same process for the set of squares on the right. When you’re done, both red squares should be directly above both black squares.
Now we have our guides in place, but if we click the make it button -it will all go to the cut mats in a jumbled mess. Because that’s the way Cricut rolls.
So next we’re going to fix it so everything stays exactly where we want it when the design is cut.
Preparing to Cut the Vinyl for Layers
To make sure everything cuts together, we are going to use the layers menu on the right. You can select parts of your design right in the layers menu.
What we want to do is have the black part of the design stay with the black squares. And the red part of the design stay with the red squares.
So in the layers menus select the red part of your design first. And while holding down the shift key, select each of the red squares. All three parts should be that darker shade of gray.
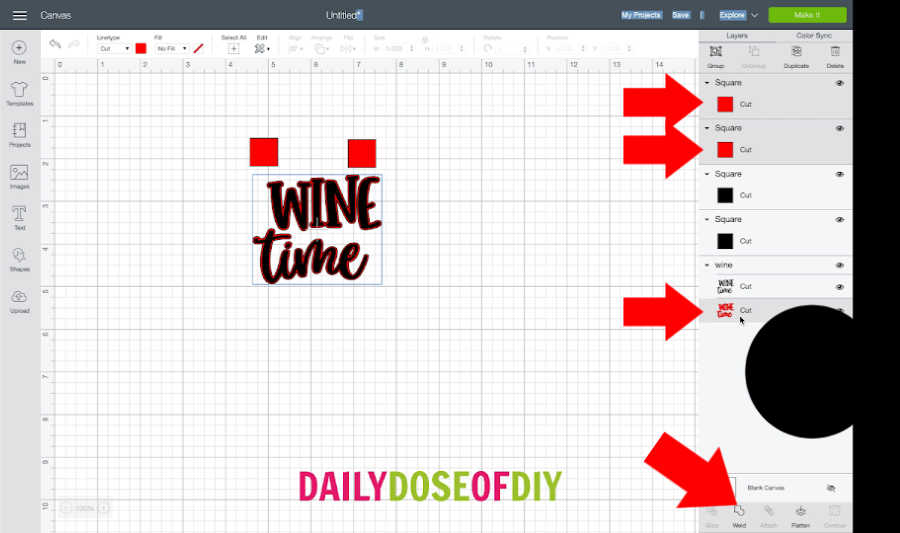
Once all three parts are selected click the weld button on the bottom of the layers menu. This will keep everything together when it’s cut.
Repeat the same process for the three parts of your second color. Select them all by holding down the shift key and weld them together. If your design has more than two colors keep going until all of the colors are welded or attached together.
After you are done your layers menu should look like this. … …
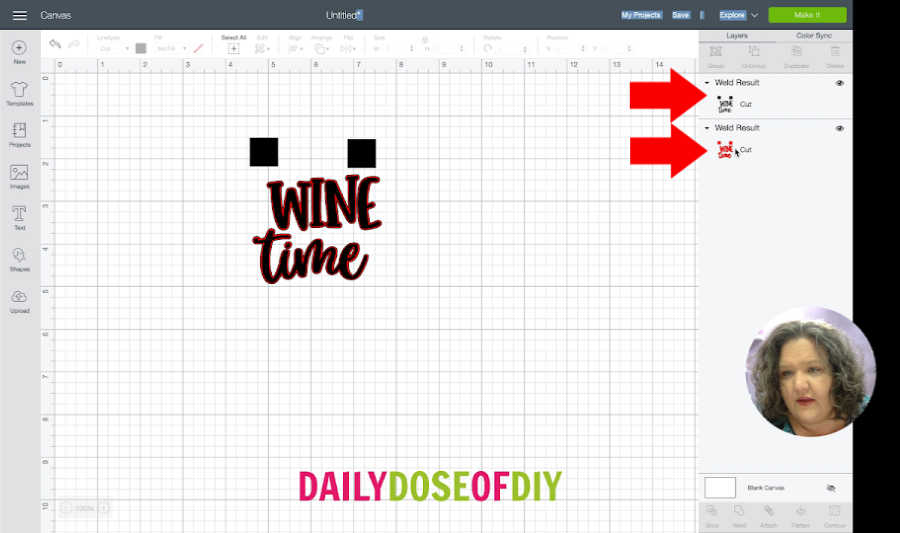
Each color should all be in one group. Now your squares will stay in place so you can use them as guides after it’s cut.
Go ahead and click the make it button and cut both of your colors. When you’re weeding the vinyl after it’s cut be sure to keep the squares.
Next we actually get to layer the adhesive vinyl for our project
Layering Adhesive Vinyl with Transfer Tape
Ok so your vinyl is cut, you have it weeded and now we’re going to put it all together.
Start with adding your transfer tape to the vinyl that will be the top layer of your design. Burnish (rub real hard so it sticks) it well.
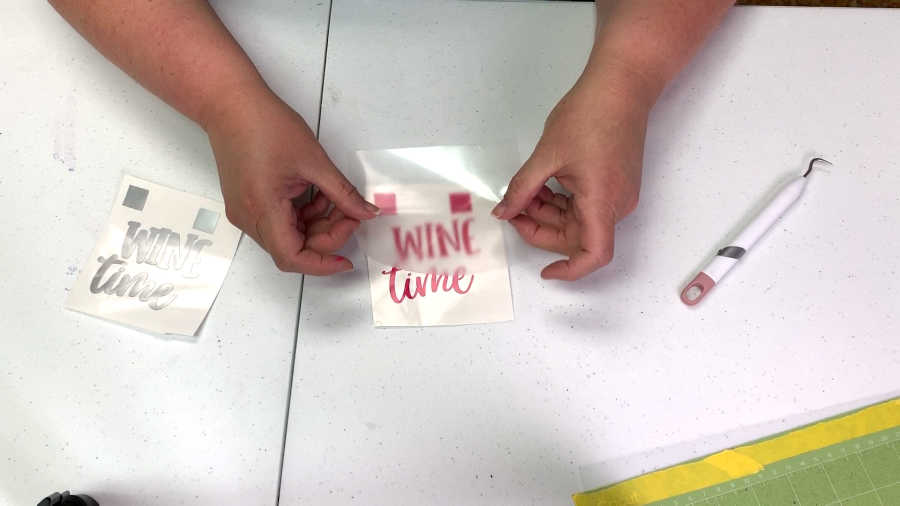
Next you’ll want to remove one corner of the backing under one of the squares.
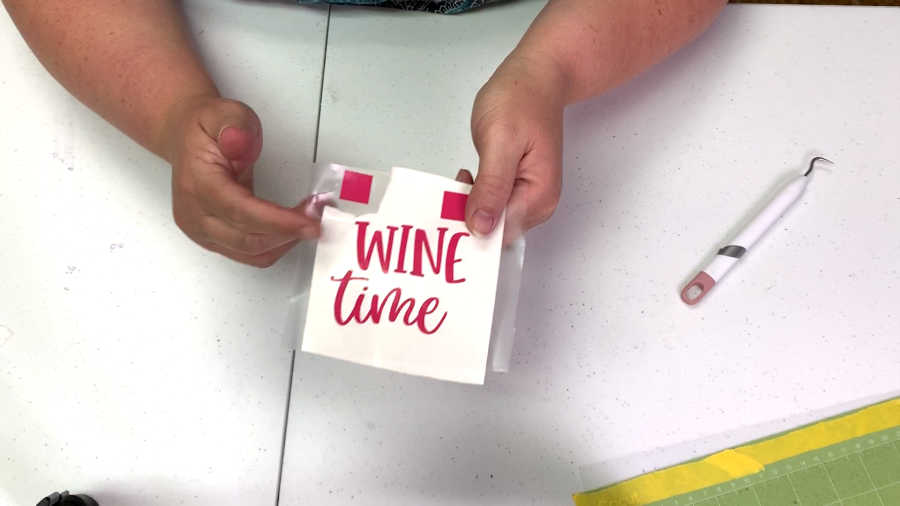
Removing just one corner will allow us to easily line it up. Otherwise you might end of with a big ball of sticky vinyl mess.
Now grab your second color of vinyl so we can put them together.
You need to place the squares directly on top of each other. Take your time and get it as close as you can. Typically once the vinyl touches, it’s stuck.
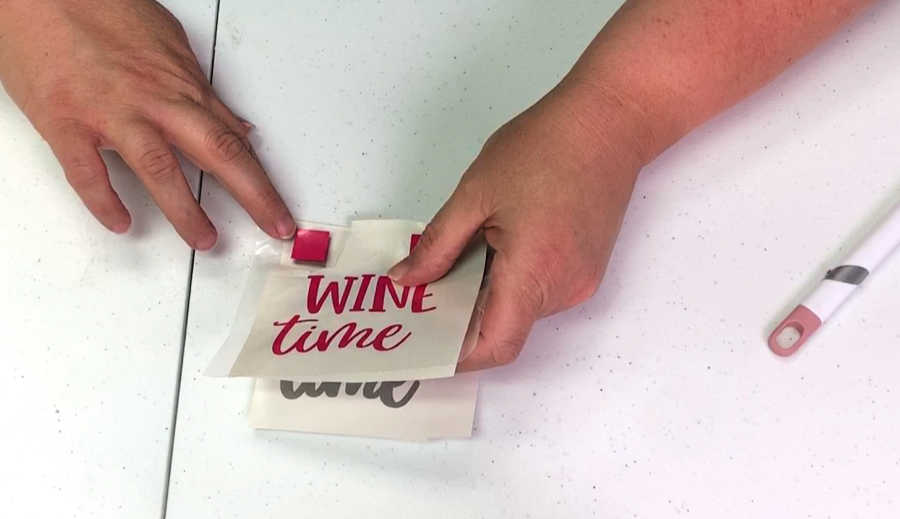
But since you only have one little corner of the stickiness exposed, you’ll have a much easier time concentrating on lining up your squares.
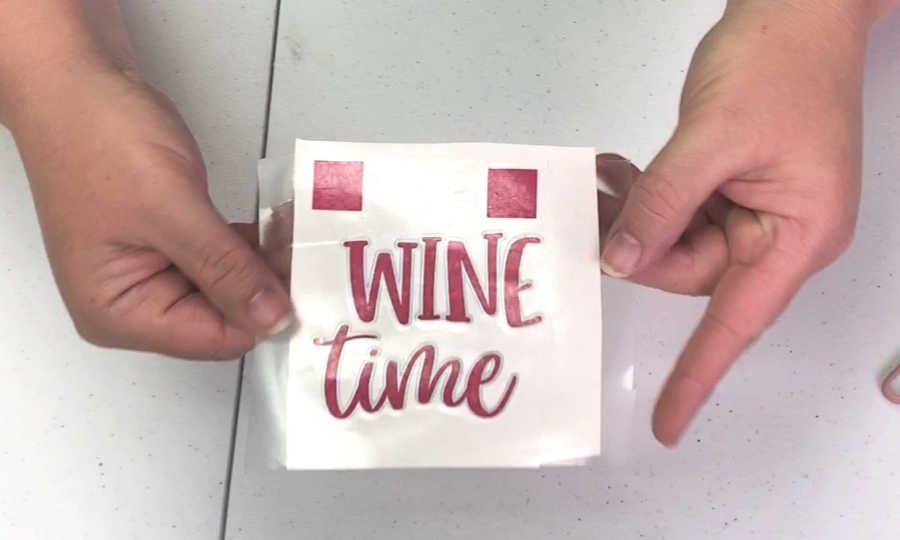
After your first square is lined up, pull the backing back just enough to expose your second square guide.
Line those squares up directly on top of each other. This one will be slightly easier to line up. When I’m lining up the guides I like to start with one corner of the square
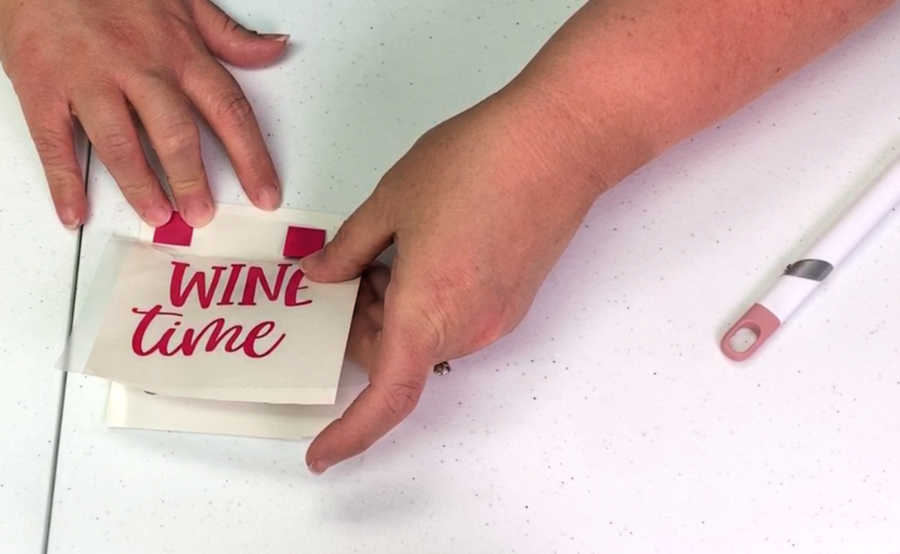
After you have the second set of squares lined up you’re gonna remove the rest of the backing.
As you’re pulling the backing off with one hand, hold down the squares with your other hand so they don’t pop off that backing.

Next smooth the top layer of vinyl down over the bottom layer.
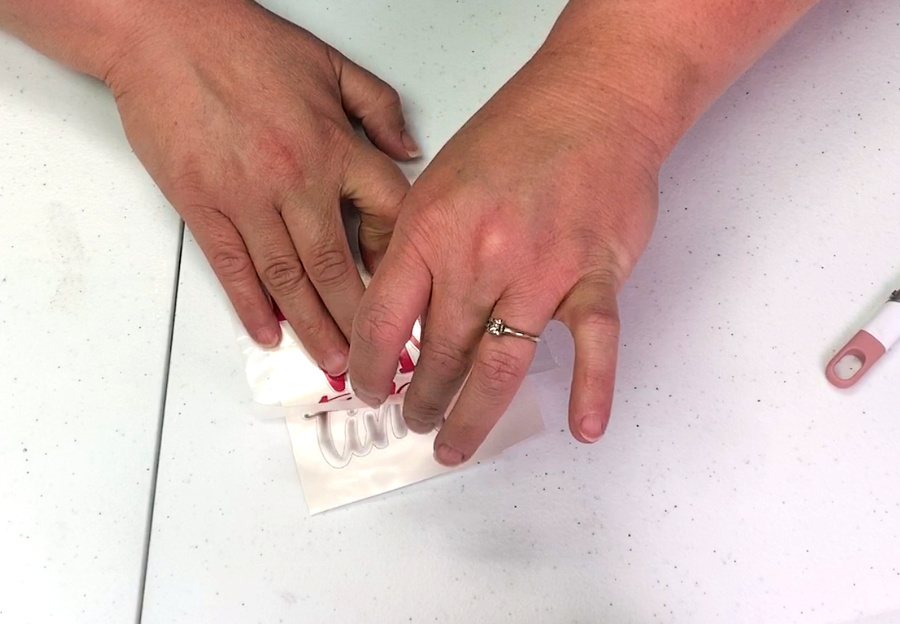
And then rub everything down really hard with your Cricut scraper to get it ready to transfer. You can go ahead and cut the squares off now too as you don’t want to transfer those to your project.
Layering Adhesive Vinyl Tips
I’m leaving this in to show it’s not always as easy as it looks. I’ve done this successfully dozens of times, but every once in a while you get a screw-up. It just happens.
This one I did a while back is off by a fraction of a millimeter, but that gap sticks out like a sore thumb.
So here are some tips to try to avoid that:
- Start with smaller designs. They’re easier to work with and you won’t cry so many tears over ruined vinyl if it doesn’t turn out.
- Really take your time lining up those squares -try to have a distraction-free zone. My kids kept pestering me when I was doing this which caused me to try to get it done faster.
- If you can –avoid designs like this where one color has to match up exactly to another color. It’s much more evident when they don’t line up.
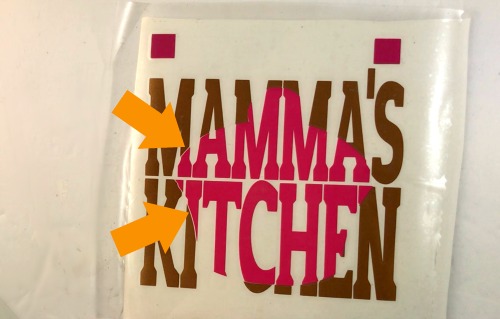
Here is another design I did using the same technique for someone who ordered a mug. I could be off by a millimeter here too.
But if I am you’ll never be able to tell.

There are a few different mistakes I could point out on this mug. But fixing them is for another post.
How To Layer Vinyl FAQs
Now you know the trick to layering vinyl and some extra tips, let’s take a look at those frequently asked questions when it comes to layering vinyl.
How many layers of vinyl can you layer
If you’re layering vinyl on top of each other I would probably stop at 3, maybe 4 colors. You can use the layering technique to line up colors next to each other too, for that there would be no limit.
Can you layer adhesive vinyl
Yes you can! That’s what this tutorial covers
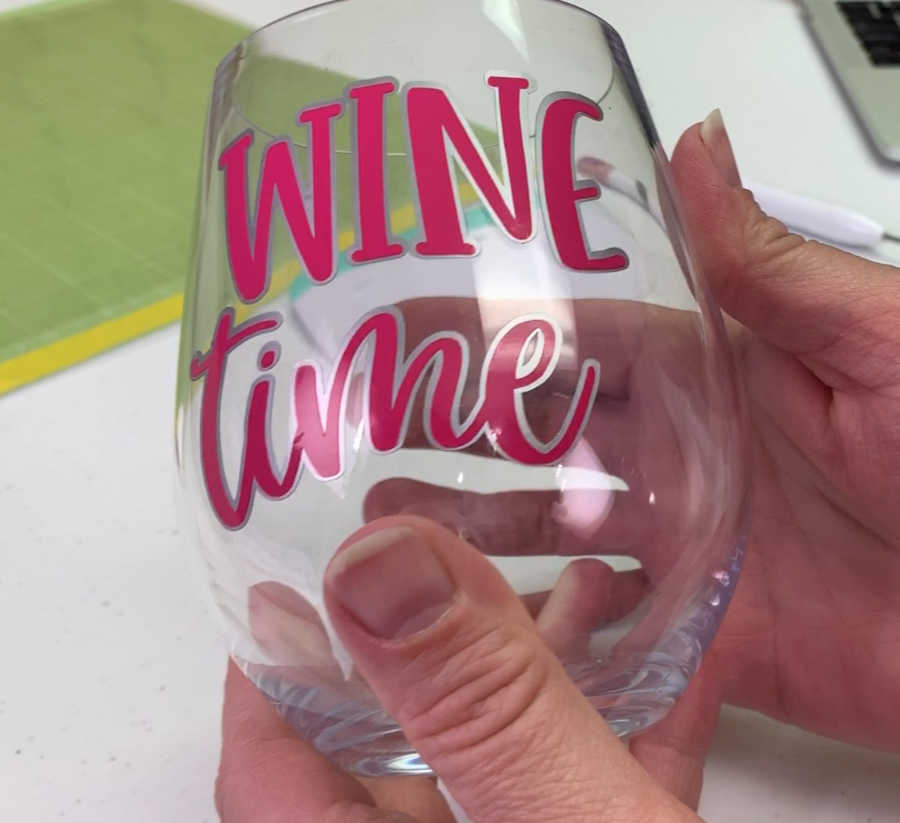
How do you layer a vinyl cup
For a cup you’ll use adhesive vinyl and you’ll use the guides as described in this tutorial to line your vinyl up before you transfer it to the cup. Once your vinyl is layered, transfer it to the cup as normal.
In the video above I also show how to prep a cup and apply the layered vinyl decal too it.
How do you apply multiple layers of vinyl
To apply multiple layers of vinyl you’ll use the same technique as applying a single layer of vinyl as the vinyl is layered with the transfer sheet before you apply it to another surface.
Can you layer vinyl on top of vinyl
Yes you can, I also showed how to that above using guides so that one layer of vinyl will go on top of the second layer of vinyl evenly.
Now you know how to layer adhesive vinyl like the pros. You can make so many great things with this technique. Just remember to go slow, start small, and choose easier designs in the beginning.
Grab the FREE Wine Time SVG
All of the free SVG files are in my Resource Library for your convenience. It’s like a one-stop shop for all of the files. To get access simply fill out the form below and the link and password will be emailed right away.
All of my free SVG files and Designs are kept in a library for your convenience. We will send you the link and password right away, and you’re free to use all the resources you want in the library.
Already have the password? (It’s at the bottom of every email) Enter the Library Here
Once you’re in the library all files are in alphabetical order, so scroll on down to ‘W’ where you’ll find this Wine Time SVG
Thanks so much for crafting with me today =)

Chris Butler has helped thousands of crafters learn how to use their Cricut machine without feeling overwhelmed. She is a best selling author and an up and coming designer. For fun Chris enjoys designing SVG Files, hanging out with her family (preferably at the lake), traveling, and volunteering at her church. She is a wife and mom of two crazy fun kids.
Can you do this same concept with HTV vinyl? I’m new to this so still learning. But I’m so glad you posted above I wanna test it out ?.
Hi Leslie!
You can use the same concept to get all the colors attached together so it cuts as you see it. Getting the HTV onto your shirt is a bit different, you don’t need the guide marks because HTV isn’t sticky. So you would press your bottom color for 5 seconds and then remove the carrier sheet. And then since it’s not sticky you can take your time and line up the next color -and remove and reposition if you have to.
Im a bit confused… i understand the process for design space, but what about laying out the vinyl…
Hi Carly! I’m not sure what you mean by that. Actually putting the vinyl together is where you remove just a part of the backing so you can line up the squares of the different colors and stick them together.
If you weld in Design Space there is no going back to change something. Weld is too permanent. Next time select everything and use attach, and you can do it multiple times for as many different colors you have. Attach keeps everything in place when going to cut. If you want to change something later in a saved design you can unattach and change as needed, but if you weld and save or do something else there is no unweld or going back, once its done its done. Thank you for the awesome tutorial. I learnt a lot with layering.
Would this work with Infusible Ink? I want to make an item with multiple colors but the pen drawings just aren’t coming out as bold as i would like. I could try cutting out the Infusible Ink And Layering those…..?
I have a post I’m editing on that, the process is a little different.
What type of vinyl do you use on your mugs? Is it handwash only?
Technically all vinyl is hand wash only, but I’ve never had a problem with permanent vinyl (Oracle 651) on the top rack of a dishwasher
Hi. I want to make that heart with the paw prints inside of it. There are like 50 pieces in that one. How the heck do I put those back together to look like the original picture? Thanks!
Hi! So I was doing some etching on a wine glass this weekend. Used my vinyl to make the stencil and weeded out the middles. My issue was the curve of the stemless wine glass. My vinyl came up in a few places and so there were a few ‘oops’ spots. How do you handle that when doing curved edges like that?
Thank you!
Thanks for the great tutorial. I haven’t tried layering yet but now want to because of your video. So helpful – thanks so much.
Hi,
I am new to this and was trying to do some vinyl layering and can not work out how to get it to do multiple cut mats, can anyone help me with this? I have tried lots of times and it just seems to want to do it in one cut.
Chris I was wondering if you have to use a cricut press to heat it up so it stays on better
Thank you for all your help..
Not with adhesive vinyl. Adhesive vinyl already has sticky on the back, heating it up might melt it. With heat transfer vinyl you need heat to activate the glue to make it stick. Hope that helps.
I need a tutorial on getting an SVG to my canvas>to my vinyl
I have had my cricut for a year and a half and barely ever used it because I don’t understand it. Found this video and successfully made my first sticker. Now I’m in charge of stickers for the baseball helmets for the team. Thanks so much!!