This post may contain affiliate links for your convenience. If you make a purchase through one of my links I will earn a small commission at no additional cost to you.
Last Updated on June 22, 2019 by Chris Butler
Mother nature was all over the place this past weekend. From rain and freezing temperatures to 70 degrees and severe storms. It was the perfect time to stay in my workshop and make some more rustic Christmas decor.
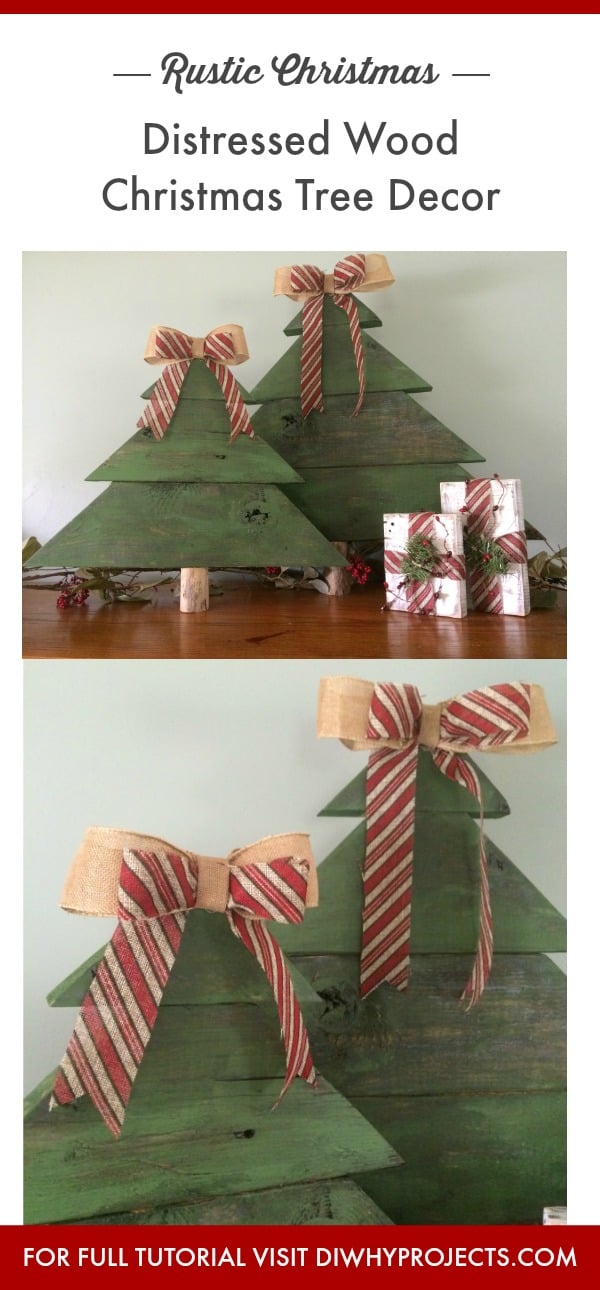
This time I made some Christmas Trees to go with my Rustic Gift Boxes. If you want to see the tutorial for those just head over here.
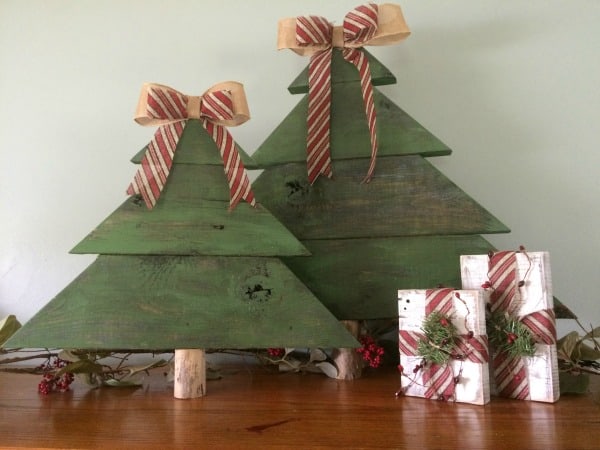
In my mind, I was going to use 2×4’s for these trees. But we’re building a pole barn, so I used the 2×6 scraps from that. I’m kinda glad I did because they turned out being 18″ and 24″ tall. They are quite stunning as a Christmas Mantle centerpiece.
If you have 2×4’s that will work too. The cuts will still be the same.
Quick Links to Information in This Post
DIY Rustic Christmas Tree Supplies
- 2×6 Wood 10 Feet in length
- Green Paint
- Dark Paint (Brown, Dark Grey, or Black)
- Paint Brush
- Wood Glue
- Sand Paper
- Wood Log approximately 2″ Wide
- Burlap Ribbon (or other embellishments)
- Hot Glue Gun
- Miter Saw
- Antiquing Glaze (optional)
DIY Rustic Christmas Tree Tutorial
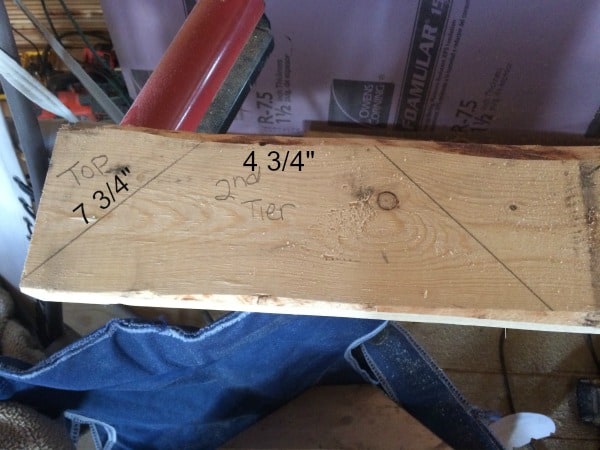
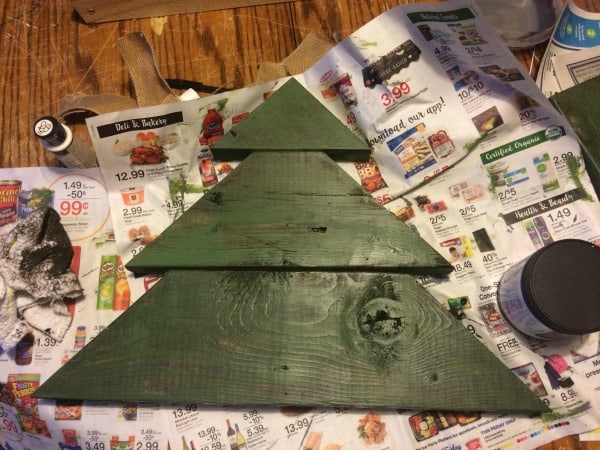
Cut your wood.
The picture below shows how I cut my board. All cuts are at a 45° angle. So I cut one corner off and that becomes the top. There is a 2 inch overhang on each side of the rows. The long side of your top piece should measure close to 7 ¾ inches if you are using a 2×6. So subtract 4 inches from that and you get 4 ¾ inches. Measure 4¾ down the board and make your next 45° cut.
Keep going down the board alternating your 45° cuts. Subtract 4 inches from the longest side of your previous cut for the next cut. If you are using a 2×4 I would probably reduce the overhang to 1½ inches on each side, therefore you would subtract 3 inches on each cut.

The 18″ tree has three rows or tiers and the 24″ tree has four.
While I was at the saw I cut a small log from my wood pile for the base. I grabbed a scrap 2×6 and picked a log that was close to the same size in diameter as the depth of the board.
Prep and paint.
After everything is cut you want to give the edges and corners a good sanding. It doesn’t have to be perfectly smooth. When going for the rustic look, the more beat up the better. But you don’t want splinters either.
Since I was using scrap from our barn build my boards weren’t already weathered.
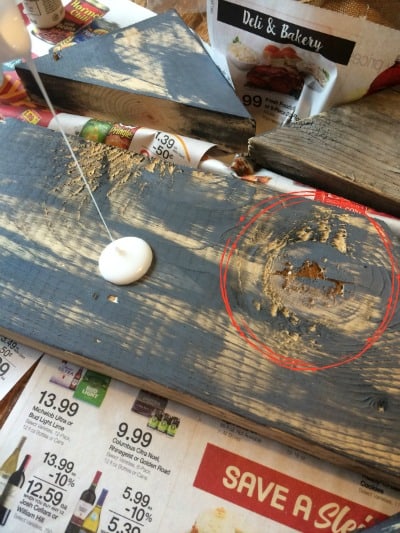
I went over them quick with my dark grey paint to help the weathering effect. In fact, I went too quick. The red circle shows the knot and some divets I missed. When you are weathering wood you want those to be dark.
I am pouring Elmer’s glue on the dried grey paint in the pic. As I explained in the tutorial for the Christmas Gift Boxes, the glue will give your top layer of paint a nice crackled look. Brush the glue all over the wood and wait until it’s almost, but not completely dry.
Then paint on the green as normal. You don’t have to go full coverage on the green, let some of that grey and natural wood show through. After the green is completely dry you will be able to see the crackling effect.
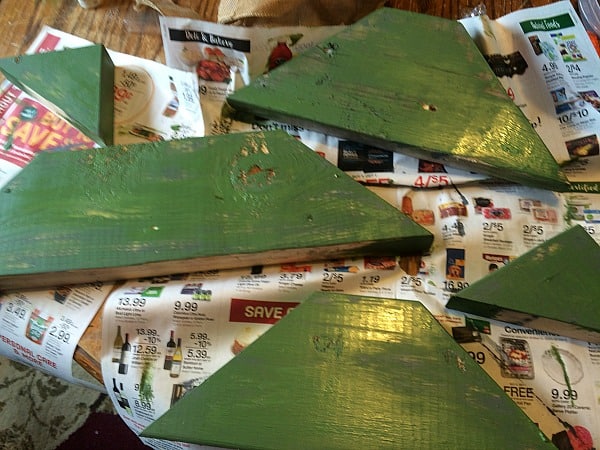
It was around this time I realized the little dings and the knot was not dark. The beautiful thing about rustic crafts is there’s always a fix. I grabbed my antiquing glaze and went over all of the pieces.
Much Better. After everything is dry, you may want to hit it with the sander again on the edges and corners.
Putting it all together.
I used Gorilla Wood Glue to glue all of the pieces together. If you have a large clamp you can clamp them all together. I just stacked them up and let the weight of the wood keep them together.

After the glue is dry, measure the bottom to locate the center. Apply wood glue to your log and place the tree on top. Make sure it’s centered or you will lean to one side. I was thinking I would have to add a wider wood block base to the bottom of the log to keep it stable. But the log works surprisingly well.
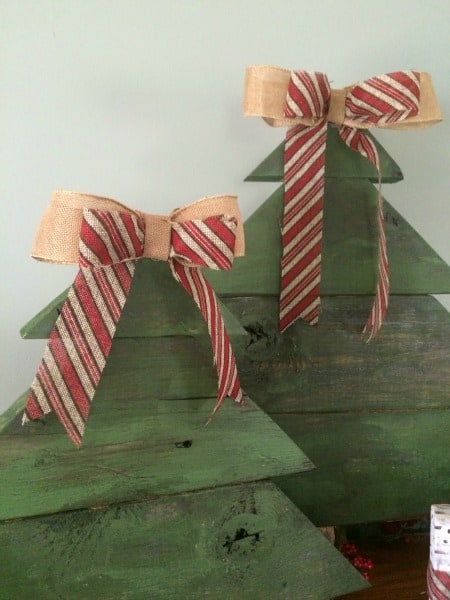
I added burlap bows to the top of my tree. They are super simple to make, and I can’t explain it any better than the Youtube tutorial I watched by Practically Functional. For the bigger tree, I made the bow 2″ wider and added 4″ to the tail.
You’re going to love how these turn out. I already have five friends asking me to make them some. It’s a good thing they don’t take long to do!

Chris Butler has helped thousands of crafters learn how to use their Cricut machine without feeling overwhelmed. She is a best selling author and an up and coming designer. For fun Chris enjoys designing SVG Files, hanging out with her family (preferably at the lake), traveling, and volunteering at her church. She is a wife and mom of two crazy fun kids.
I love these trees!!! So cute!!!