This post may contain affiliate links for your convenience. If you make a purchase through one of my links I will earn a small commission at no additional cost to you.
Last Updated on June 21, 2023 by Chris Butler
The Wavy text effect is all the rage for making shirts and signs. Today you will learn how to make wavy text in Cricut Design Space. With the new feature warp tool you can create fun text designs and open up a whole new world of possibilities by making your own designs.
You will learn:
- How to make wavy text with one click
- How to make other fun text designs
- Fun Retro Fonts to Use
- Limitations with Making Wavy Text.
Let’s jump right in with four simple steps to make wavy text.
Quick Links to Information in This Post
Making Wavy Text with Cricut
First, you will need Cricut Access to cut any projects you design using the warp tool. You can still play around with the warp feature without Cricut Access, but if you want to cut out your unique design you’ll need to have it. You can sign up for Cricut Access here.
If you don’t have Cricut Access, and do not plan on getting it jump down to How to Make Wavy Text with the curve tool.
How to Make Wavy Text in Cricut
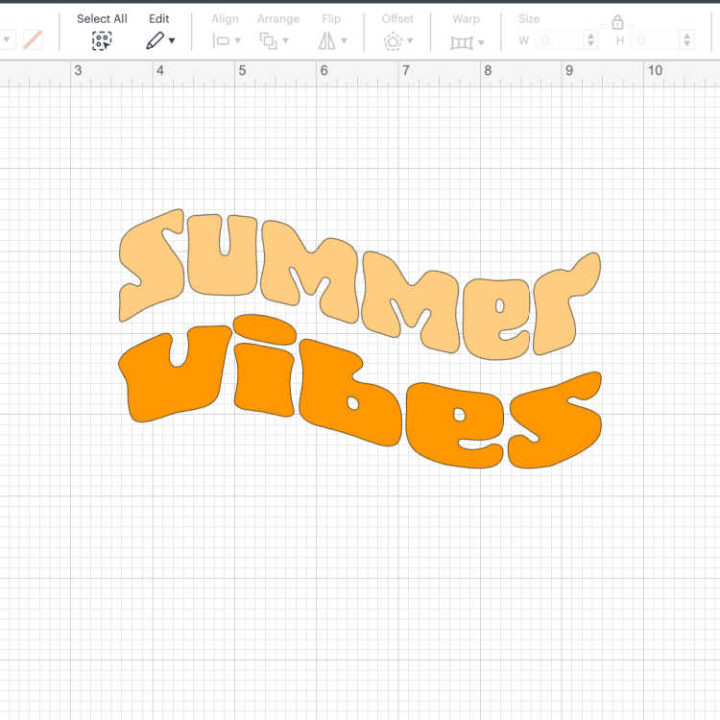
How to make wavy text in Cricut using the new warp tool or the curve tool.
Materials
- Cricut Access
- Cricut Design Space
Instructions
Type the Text
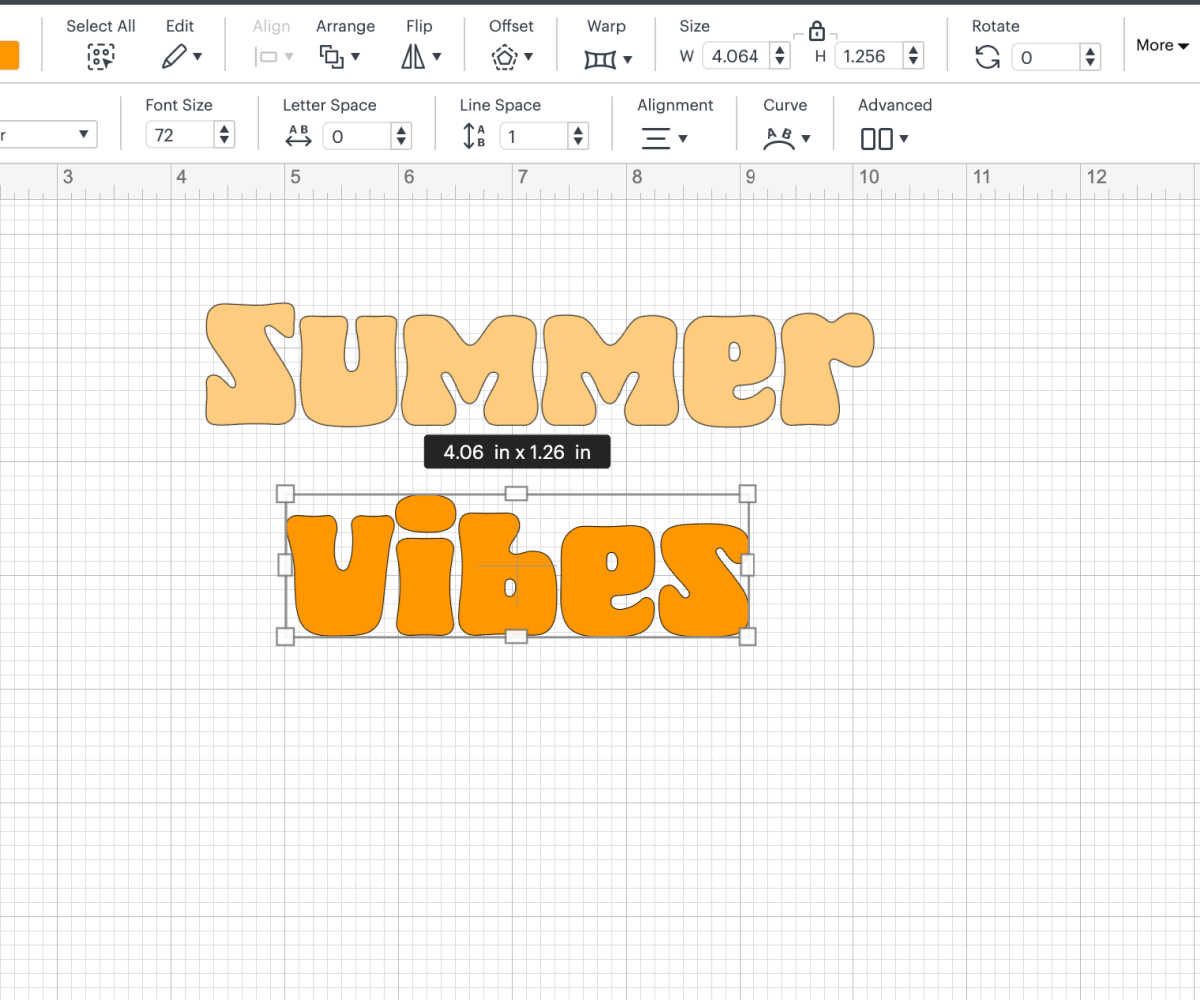
- Ok first we will click on the text tool on the left menu. In the text box, type out the word(s) you want to make wavy. I recommend typing one line at a time so you can make adjustments and not worry about line space. For example, the word Summer is in one text box and the word vibes is in another text box.
This will also allow you to change the colors of each line. Once text is warped, that text box will change to one color. So you cannot have each letter in different colors.
On the top Menu choose the font for your text. With Cricut Access you can use any of the Cricut Fonts. I am using the font Fat Kat found on Font Bundles here.
Make Your Text Wavy
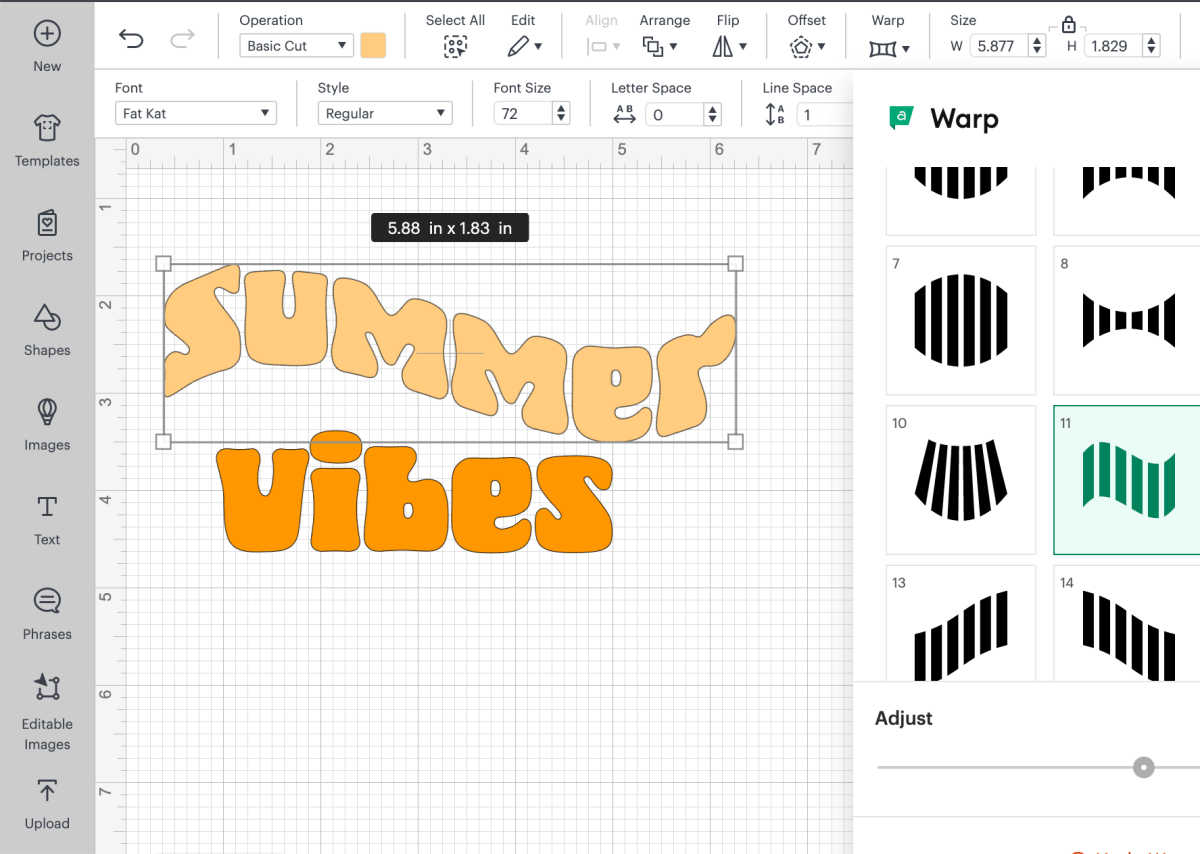
- Select your first text box and then on the top menu select the Warp Tool.
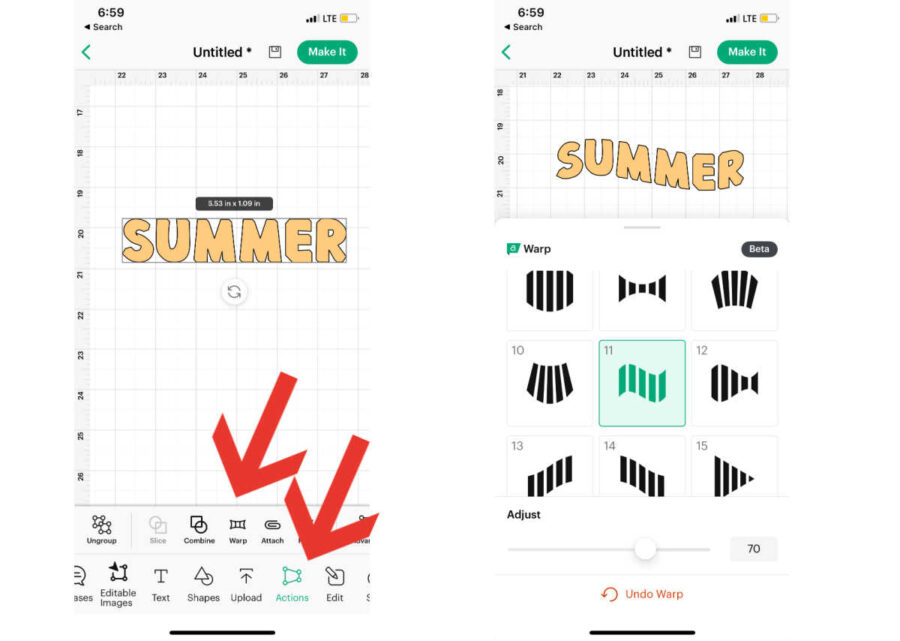
- You will see all sorts of fun ways you can warp your text, The one to make it wavy is number 11, which looks like a flag. Select number 11 and your first line of text will become wavy.
Make Additional Lines of Text Wavy
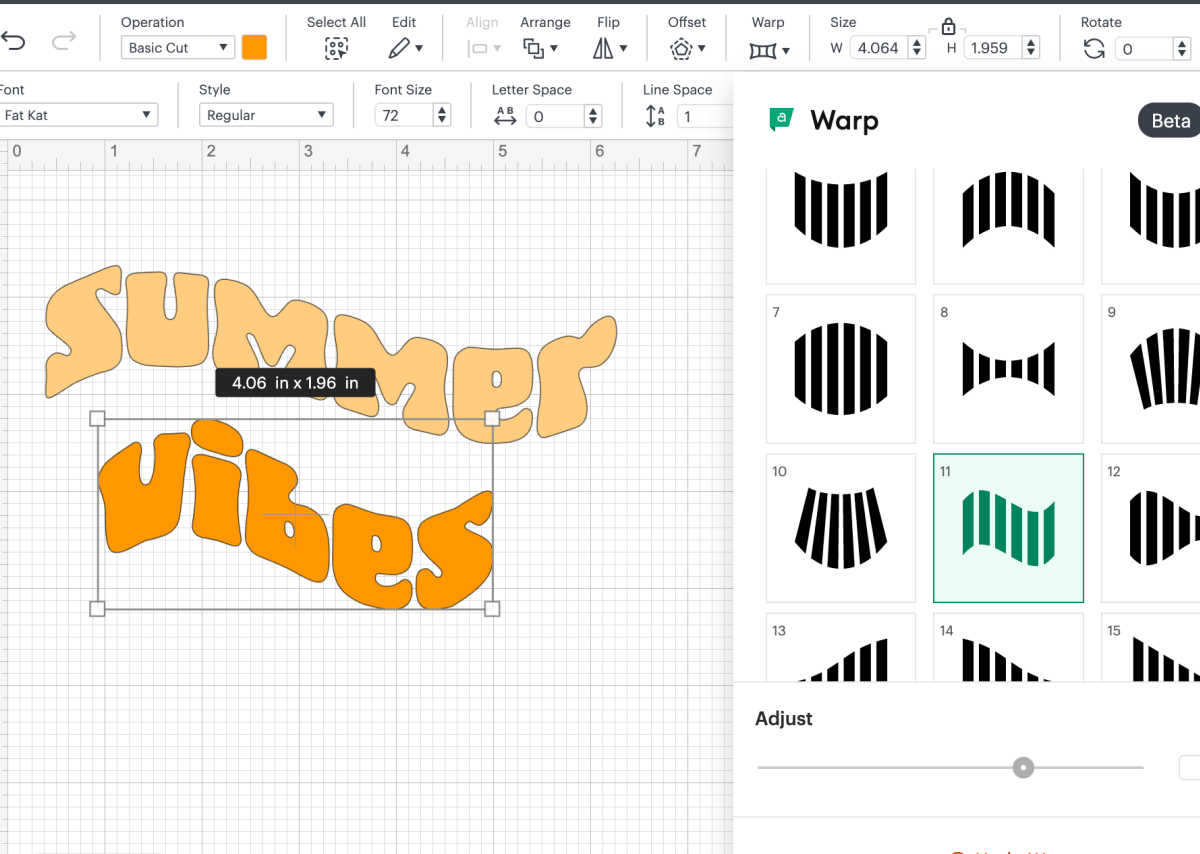
- Make any additional lines of text wavy. I've selected the text box Vibes and added the wave effect to it as well. You'll notice since the word vibes don't have as many letters as Summer that it doesn't line up perfectly. We'll fix that in the next step.
Adjust the Lines of Wavy Text into a Stack
- Select the text "Vibes: text box. On the top menu click the lock icon under size. This will allow us to stretch the word out so it's the same size as Summer.
- Place your cursor over any of the squares on the corner and stretch out the word vibes to be just as long as the word Summer.
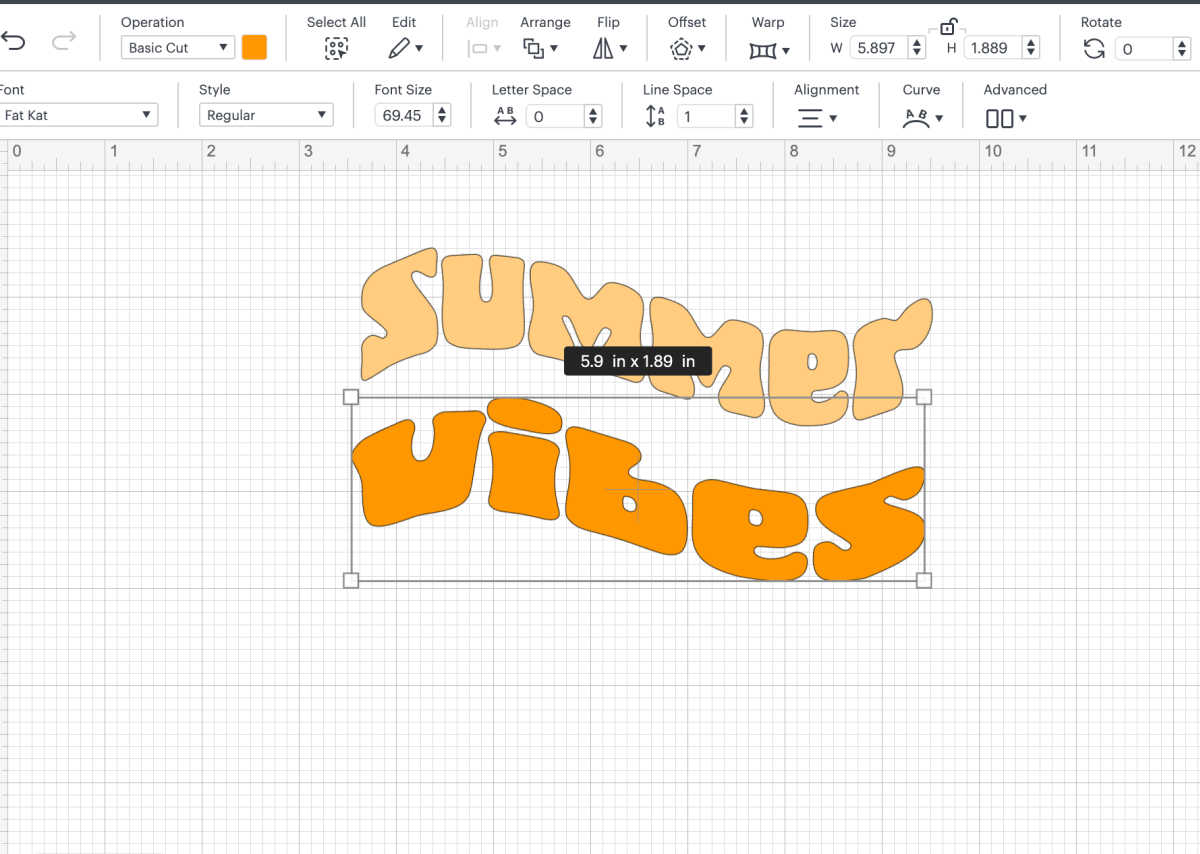
- Once they are close to the same size, stack them together. You can select both of the words and then on the top menu select align and then center horizontally to center them.
- With all of your words still selected adjust them to the size you need to cut with your Cricut machine.
Notes
The font I am using is called Fat Kat, you can find it on Font Bundles here.
For help downloading and using fonts in Cricut Design Space see this post.
Creating Wavy Text on the Mobile App
Good news the warp tool is also available on the mobile app! Go to the canvas and tap text on the bottom menu. Change the font and the color by tapping Edit. To make your text wavy tap on Actions and then tap Warp. Choose your warp effect, Wavy is number 11.
More Fun Warped Text
Using the warp tool is a great way to make fun designs. Play around with the effects and see how many different ways you can design text.
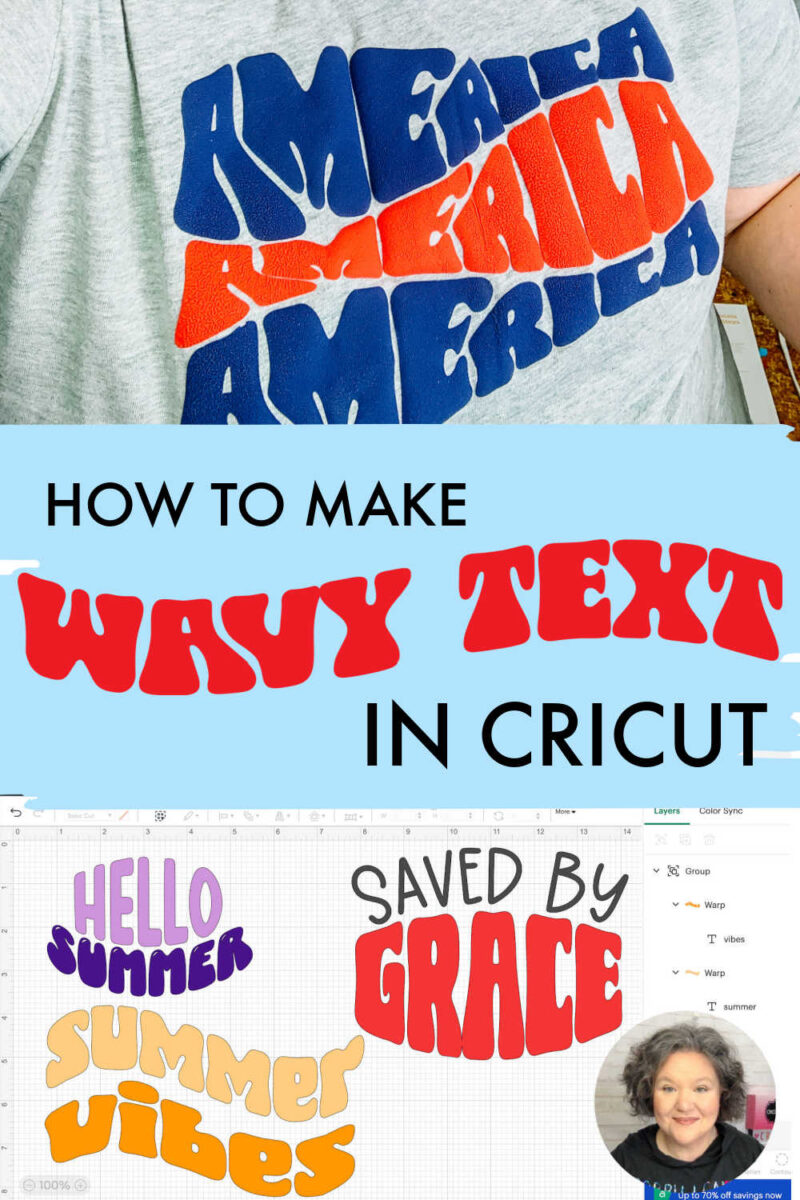
Below you’ll see the saved by Grace Design was created by using warp effect number seven for Grace and number one to get the arc for the words “Saved By”
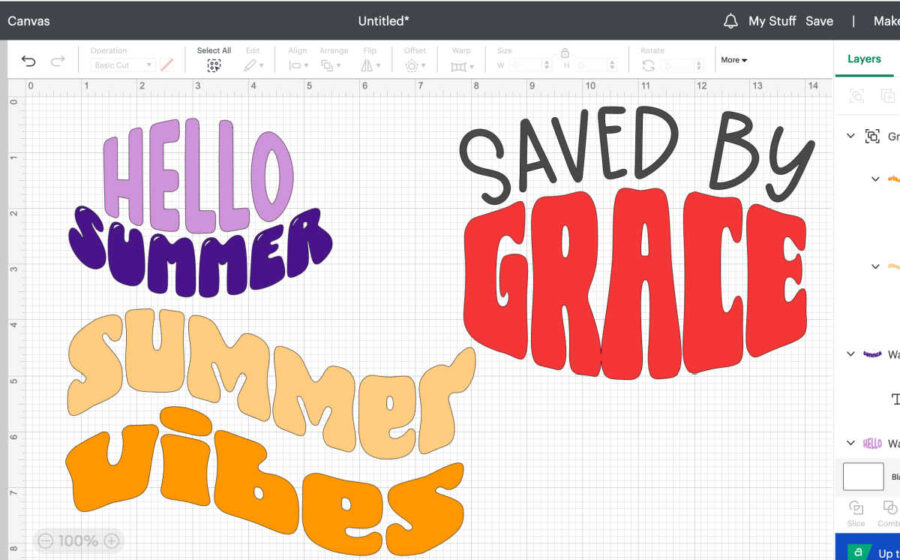
You can even create concave curves as I did with the phrase Hello Summer by using warp effect number seven and number two.
How to Make Wavy Text in Design Space for Free
If you don’t have Cricut Access and you don’t want to pay for it, there is a workaround. You can still make wavy text, but it will require a few extra steps. The good news is you can change the color of the individual letters with this method.
I’m going to use the words Summer Vibes.
The first step is to count the letters in your word and then divide by two. Summer has 6 letters, divide that in two and we have three letters.
Click the text box on the left side menu and type out SUM. Change your font and color on the top menu.
Next select your text box and then click curve on the top menu. Adjust the bar until you like the look of your curved letters. I usually go somewhere between 50-60. Whatever number you choose, commit it to memory.
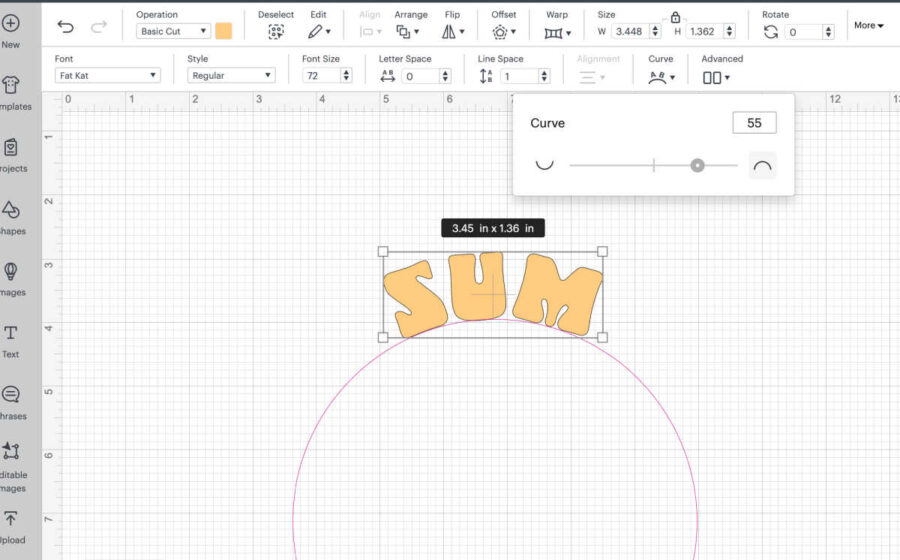
Then we’re going to click tet on the left menu again and type out the second part of our word “MER”. Select the text box and the curve tool again. This time we’re going to slide the curve to the left. The first half of my word was curved at 55, so the second half of my word I’m going to curve at negative 55.
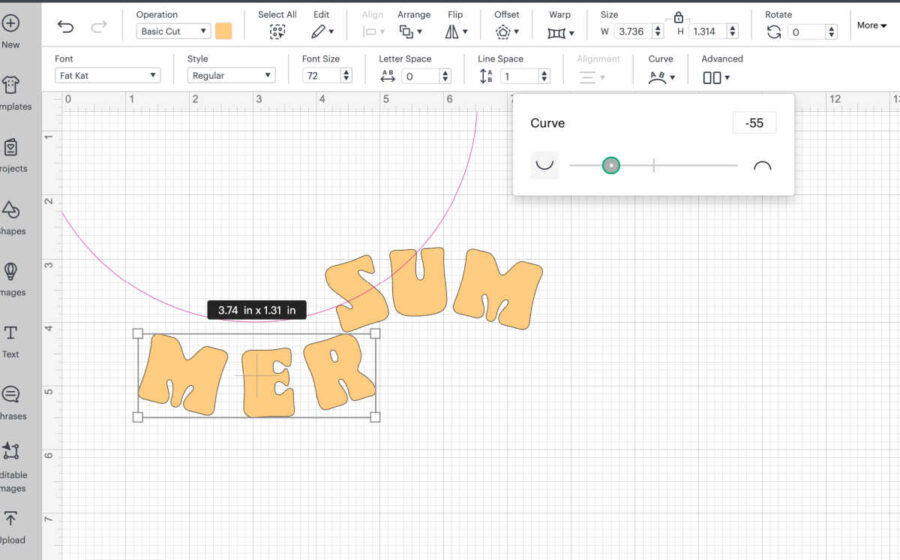
After you have it curved, line up the second half of your word with the first half and you have wavy text!
You can see on this example that the letter space is a little wonky. I’m going to adjust the spacing of “MER” by clicking on the text and then on the top menu reducing the letter space until it looks right. I went to -0.5 and I think that looks much better.
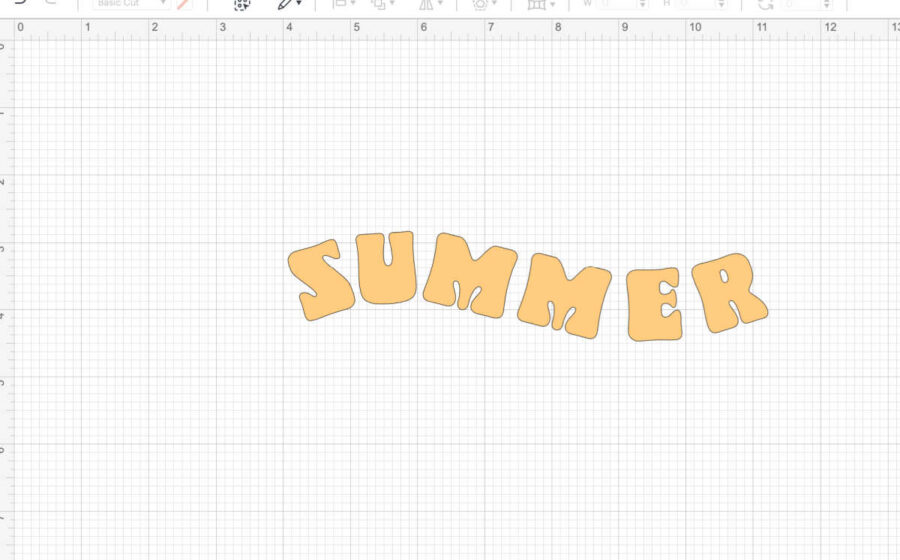
Repeat the process for your next word. In this case “vibes” only has 5 letters, so you may have to play around with how many letters you put in each text box. I ended up putting “VI” in one box and “BES” in another.
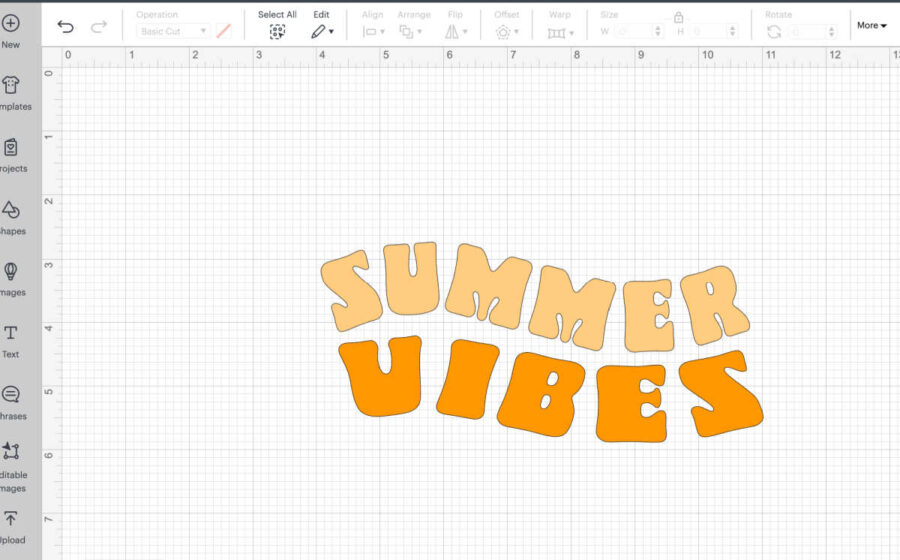
Once you’re finished and happy with the placement of your letters select both halves of your word and then on the bottom menu click combine and then unite.
That’s all there is to it!
Enjoy making wavy text with your Cricut, I can’t wait to see what you design!

Chris Butler has helped thousands of crafters learn how to use their Cricut machine without feeling overwhelmed. She is a best selling author and an up and coming designer. For fun Chris enjoys designing SVG Files, hanging out with her family (preferably at the lake), traveling, and volunteering at her church. She is a wife and mom of two crazy fun kids.
Thanks so much Chris. I don’t have a Cricut but a Brother ScanNCut and the work around should work perfectly in the SnC software. I hope you won’t mind if I steal it. Thanks again for all the great ideas you share.
This is so fun! Thanks for the information. I love the retro look and now I don’t have to buy the svgs.