This post may contain affiliate links for your convenience. If you make a purchase through one of my links I will earn a small commission at no additional cost to you.
Last Updated on November 23, 2021 by Chris Butler
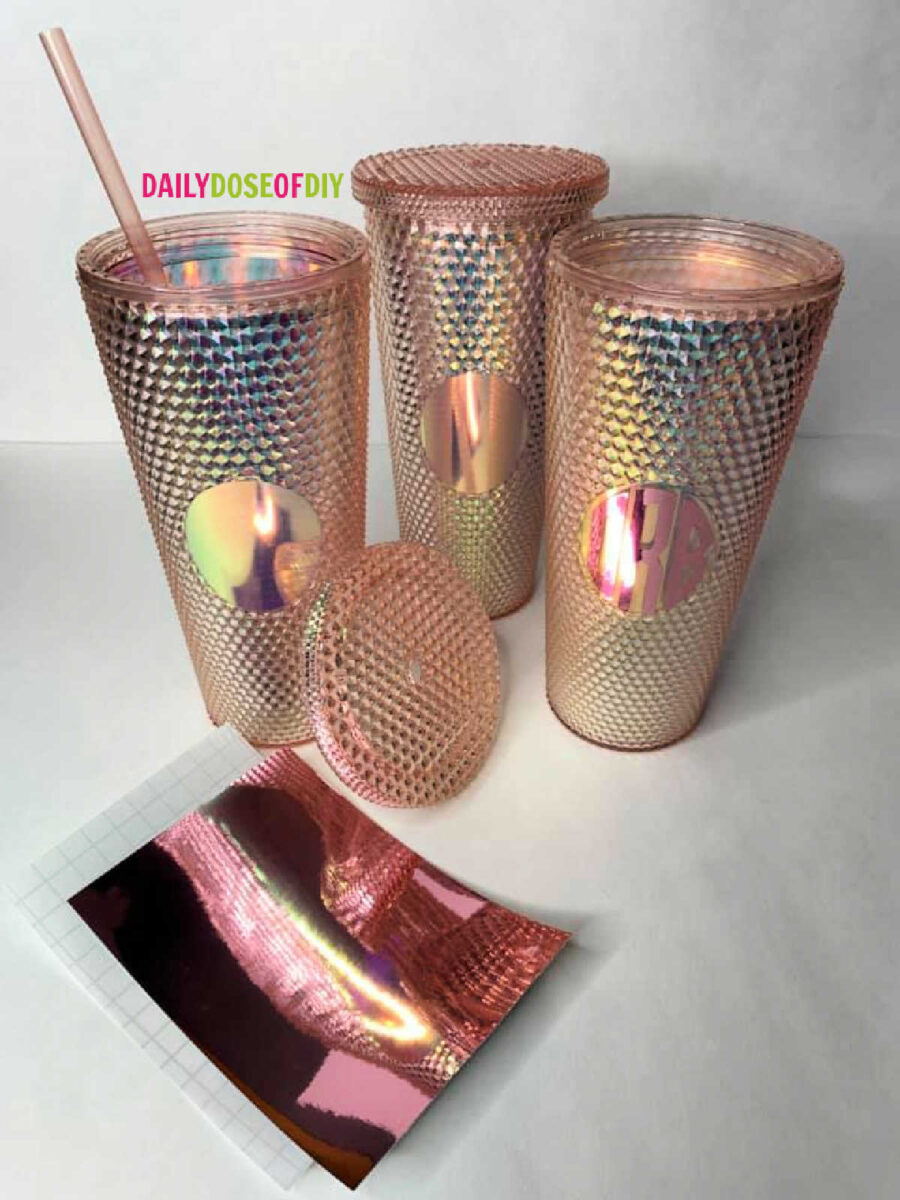
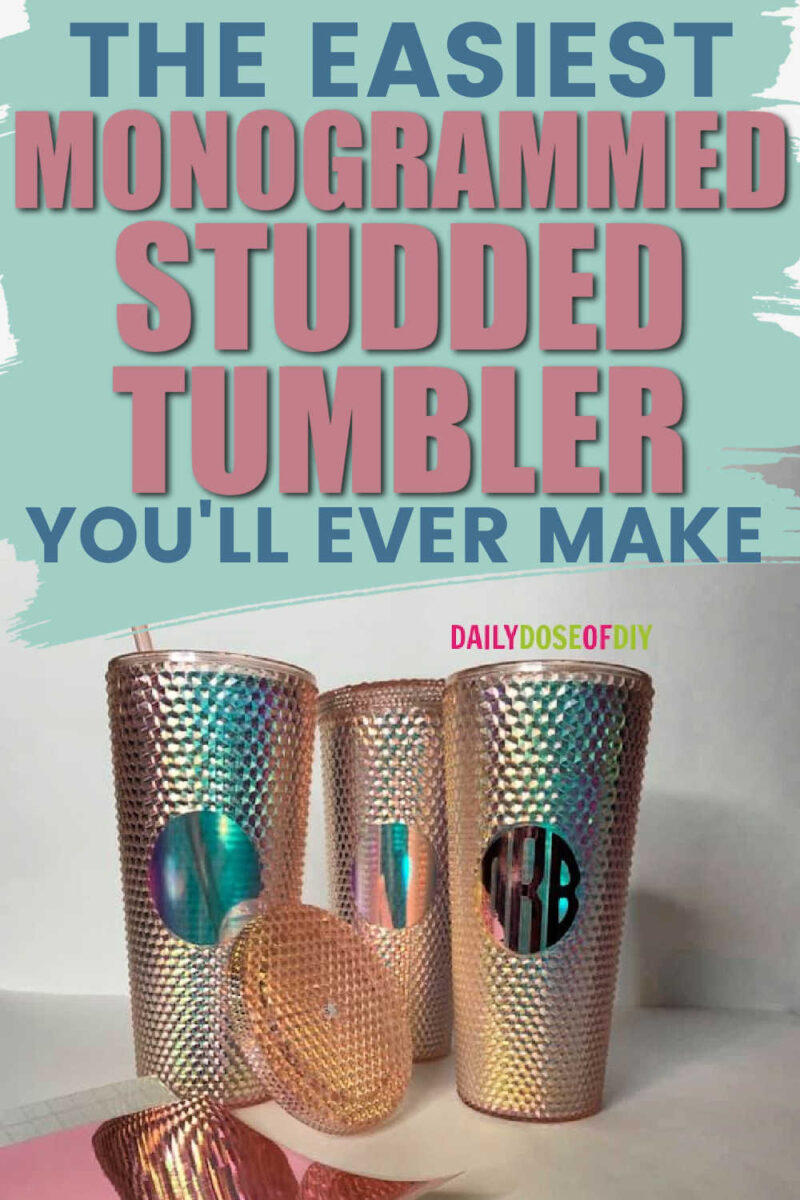
Hey there crafty friends! Today I’m going to show you how to monogram studded tumblers. These cups look just like the Starbucks studded tumblers, but instead of the Starbucks logo in the middle you’re going to be adding a personalized monogram.
Related: Make Easy Monograms with Your Cricut – 3 Ways!
These gorgeous rose gold studded tumblers were in the October box for the Cricut Crafters Club. (If you don’t know what that is, you need to! Check it out here.) I’ve still got some left over and I’ve packaged them into a kit with everything you need to make your own monogrammed tumbler in my shop.
This tumbler has gone pretty much everywhere with me for the last couple of months and the vinyl has been super durable, even running it through the dishwasher! If you’re looking for a great holiday gift for a friend, or just want to have a monogrammed cup that your teenager can’t steal from you, then this studded tumbler is perfect.
Let’s get started!
Quick Links to Information in This Post
Supplies Needed for Monogram Studded Tumbler
- (1) 24oz. Studded Rose Gold Tumbler – https://www.dailydoseofdiyshop.com/b6g54
- (1) 6″x4″ Sheet of Metallic Rose Gold Adhesive Vinyl – (Included with the purchase of a cup)
- (1) 6″x4″ Sheet of Transfer Tape – (Included with the purchase of a cup)
- Cricut Cut Mat
- Weeding & Scraper Tool
Monogram Studded Tumbler Video
Step 1: Download Your Font
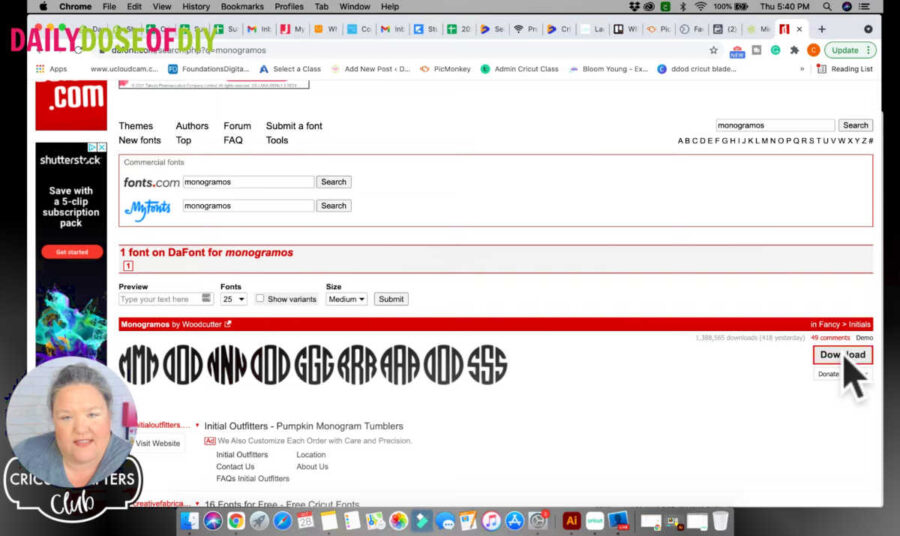
To get started you’ll need to first download the font MONOGRAMOS from dafont.com. Dafont.com is a great site where you can download free fonts for personal use. There’s a search bar on the home page where you can type in the font you’re looking for.
Once you’ve found the font, click download on the right side of your screen.
Once the file has downloaded you’ll need to unzip the folder and download the font to your device. Because there are so many different ways to download based on what browser you use and what type of device you have, I won’t explain in detail how to do that in this post. However, if you need some help figuring it out, first, start with this post about how to add and edit text in Design Space. If you need further assistance for downloading fonts to your device send an email to [email protected]
Tip: If you have Design Space open when you download your font you’ll have to close and re-open for your font to be available for use!
Step 2: Make (and Slice) the Letters for Your Monogram
Make the Monogram Letters
Now that our font is ready for use, let’s open up a new project in Design Space. Click the Text button on the left side of the screen, and for the first letter of my name I’ll type ‘c’. Design Space will automatically start typing in a generic font, so to switch to the monogramos font you’ll need to use the font drop down menu and type it into the search bar.
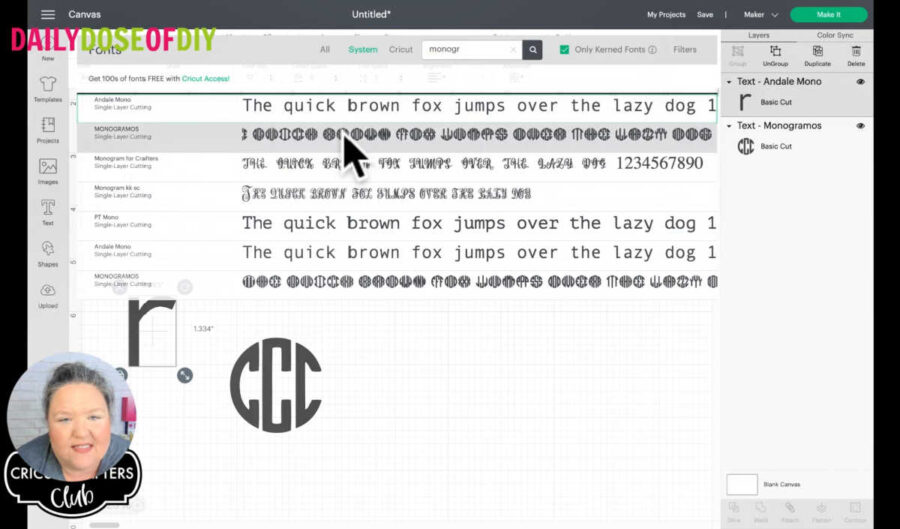
For this font you will need to type each initial of your name into a separate text box. This will create 3 different monogram circles. Also, make sure you type in all lowercase too, since this font has a different appearance if you type in capital letters.
Slice the Monogram Letters
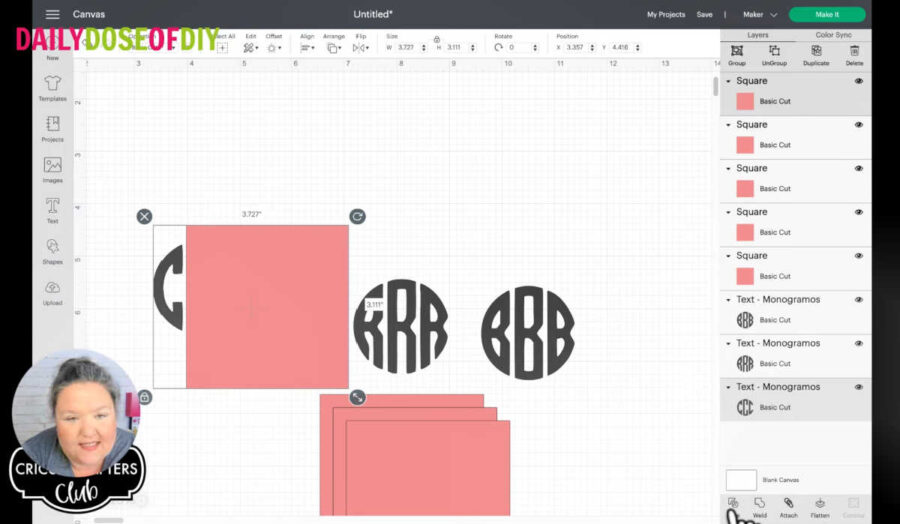
Next, you’ll need to create a square from the Shapes menu. I like to change the color in the top menu to make it easier to see what I’m doing. Duplicate the square three times.
Since ‘C’ will be the first initial in my monogram I’ll start by covering the middle and right ‘C’ in the monogram circle with the square shape I’ve created. Then select the square and the monogram and click Slice in the bottom right layers menu.
Now the ‘C’ from the left of the monogram should be separated from the rest of the design. Keep that letter to the side, select the rest of the sliced design, and click the ‘X’ in the top left corner to delete it. Then we can move on to the next letter.
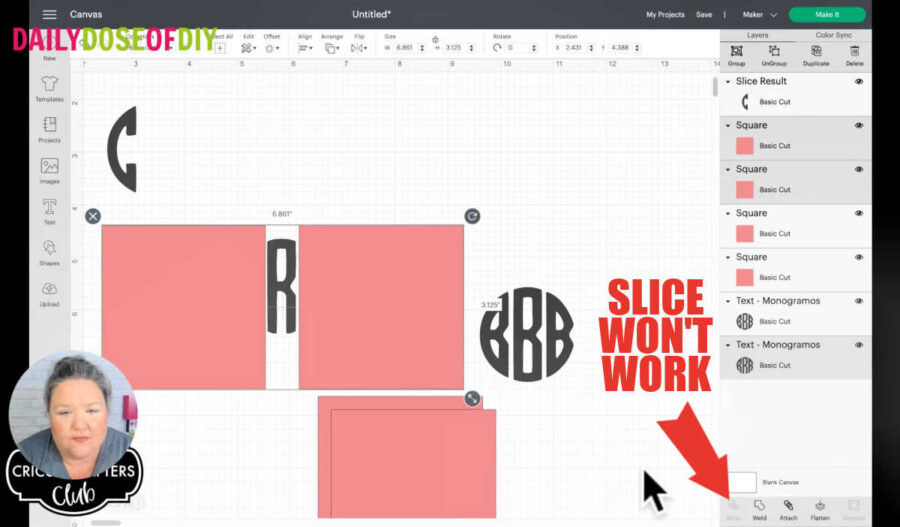
We’re going to use the Slice tool on the middle letter too, however, you cannot slice more than two layers at one time, so we will have to do the middle letter twice. First, place a square over the right side and slice, then, place a square over the left side and slice. Keep the middle letter and delete the rest of the sliced layers.
Tip: If the Slice tool is grayed out in the layers menu, it may be because you have more than two layers selected!
You should be getting the hang of this now! Last, we will do the letter on the right side of the monogram. For me, that’s a ‘B’. So I’ll cover the letters on the left side with my last square and slice. Delete the excess layers and now you should be left with just three letters.
Step 3: Combine the Letters and Resize to Fit the Tumbler
Make a Circle Template
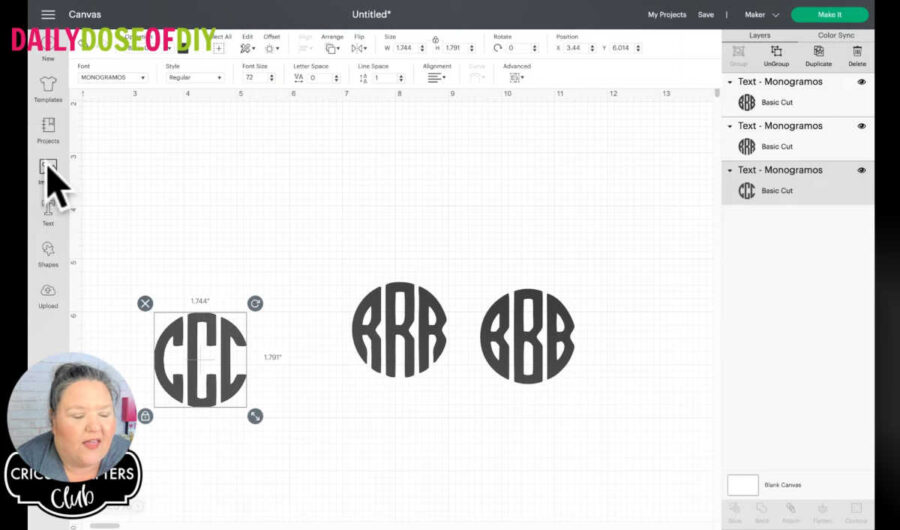
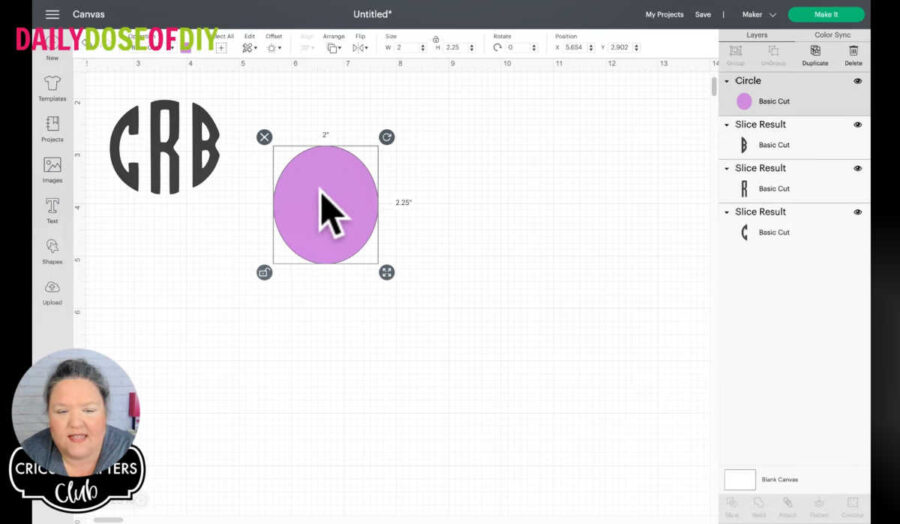
Now we have all the letters of the monogram for our studded tumblers. The next step is to put them all together and make them the right size to fit the tumbler. To do that, we’ll start by making a circle from the Shapes menu.
The circular shape on the studded tumblers is not a perfect circle, it’s more of an oval. So, to change the size, click on the lock icon at the bottom left of the circle. This will unlock your dimensions so you can type in a different height and width in the top Size menu. The width of the circle is 2 inches and the height is 2.25 inches.
This circle will be the template we use to make sure our monogram letters will fit onto the space of the studded tumblers. If the letters are going behind the circle, click on the circle and from the top menu click the drop down for Arrange. Select ‘Send to Back’.

Place and Resize the Letters
Now, place all the letters on top of the circle. Starting with the middle letter, stretch them to fit inside the oval. Each letter will have to be unlocked so it can be stretched to be taller.
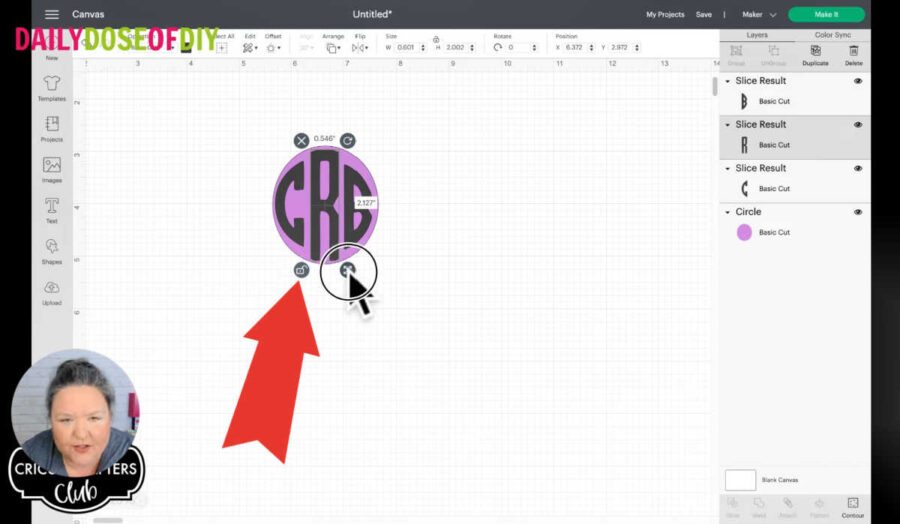
After the middle letter has been sized to fit the oval, move on to the outer letters. Unlock and resize them the same way as the middle letter. When you’re happy with the way the design looks, make sure your letters are centered. First, select all of your letters and your circle. From the top, click the drop down menu for Align and select ‘Center Vertically’.
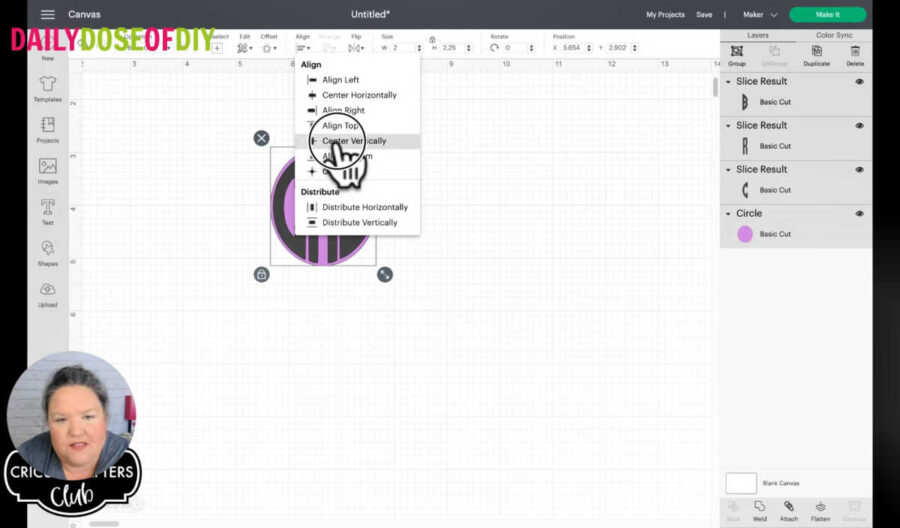
Now our letters are placed perfectly, but we don’t need the circle behind the letters anymore. To get rid of the circle without disturbing your letters, click the eye icon next to the circle in the layers menu. This will make sure the the circle does not get cut.

Now, select all of your letters and from the bottom of the layers menu, click Attach. (You can also use Weld, but after welding a design you cannot alter it anymore.) Then, click ‘Make It’.
Step 4: Cut & Weed the Vinyl
Since we are using adhesive vinyl you don’t need to mirror or do anything special on the mat screen of Design Space; just click continue. Set your material and then prepare your mat to be loaded into your machine. Line the adhesive vinyl up to the top left corner of your mat, shiny side up. Make sure your mat goes under the tabs on your machine, then click the flashing arrow light to load the mat.
When the Cricut logo button lights up, click it and wait for the machine to finish cutting. Click the flashing arrow light to unload the mat. Flip the mat upside down and pull the mat away from the vinyl.
Tip: Don’t pull the vinyl away from the mat. This can cause the vinyl to bubble or crease.
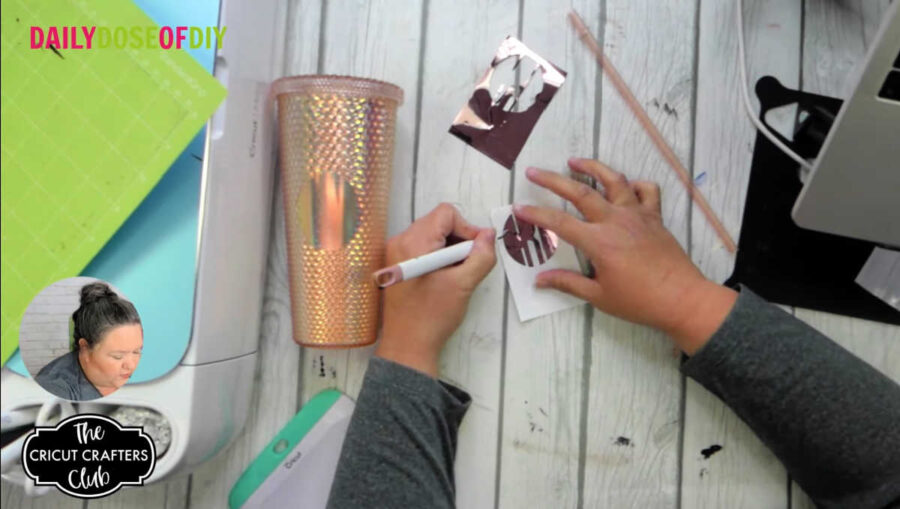
Next, grab your weeding tool and start weeding away the excess vinyl so only your monogram letters are left.
Step 5: Transfer Your Monogram to the Tumbler
To transfer your design, just peel the backing off of your transfer tape and lay it over your vinyl. With a design this small, this should be fairly easy to do. Just remember to use a bit of caution so the sticky transfer tape doesn’t stick to itself. Burnish your vinyl with a scraper tool and then you’re ready to transfer.
Peel the backing off of your vinyl and carefully line up your design with the oval on your studded tumbler.
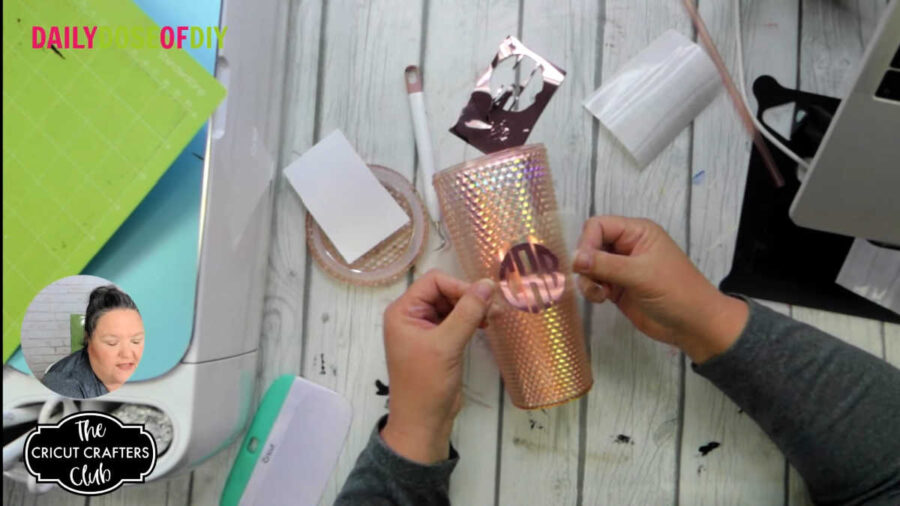
Once you’ve got the design where you want it, lower it down to press it onto the cup with your fingers. Start in the center and work your way out to the edges so there are no bubbles under your vinyl.
Slowly, remove the transfer tape, peeling it back at 180 degrees to keep the vinyl from lifting.
And that’s it! Now you know how to make a monogrammed studded tumbler. I think these tumblers are so gorgeous and incredibly easy to make. Don’t forget to grab your kit from the shop before they sell out! Once they’re gone I won’t be able to get any more before the holidays.
Thanks for crafting with me today!

Chris Butler has helped thousands of crafters learn how to use their Cricut machine without feeling overwhelmed. She is a best selling author and an up and coming designer. For fun Chris enjoys designing SVG Files, hanging out with her family (preferably at the lake), traveling, and volunteering at her church. She is a wife and mom of two crazy fun kids.
Leave a Reply