This post may contain affiliate links for your convenience. If you make a purchase through one of my links I will earn a small commission at no additional cost to you.
Last Updated on August 12, 2023 by Chris Butler
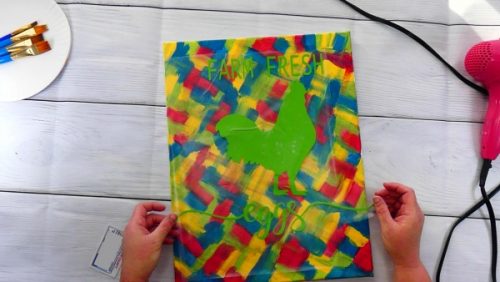
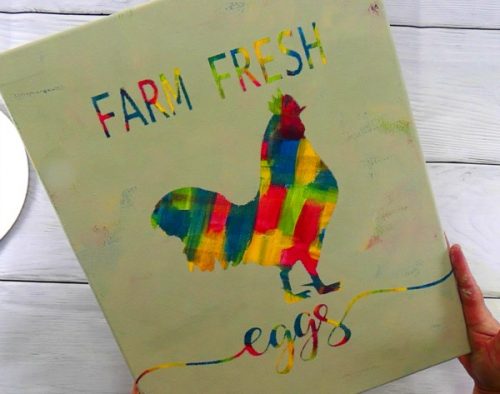
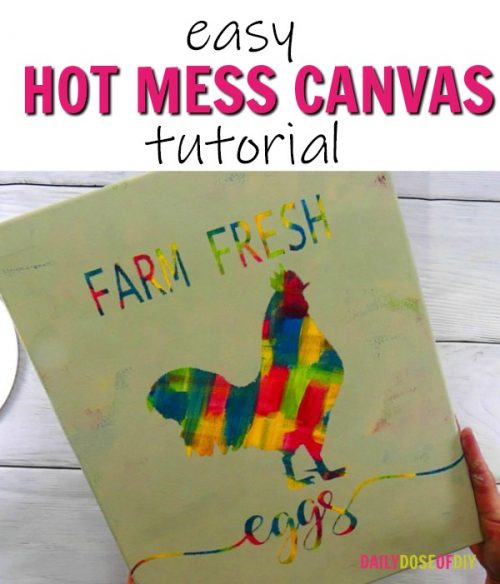
Today we’re going to make an Easy Hot Mess Canvas. These canvases are so fun and addicting to paint. And they turn out beautiful.
I made the one in the tutorial today for my kitchen. You can use my free SVG file to make the same one too. See the end of the post for details on how to get it.
I also made a hot mess canvas for my daughter’s room with her name. And even a third one for my room. They really are that fun!
I used my Cricut to cut the design I’m using today, but Silhouette or anything that cuts vinyl will work too.
Let’s get to it.
Quick Links to Information in This Post
Easy Hot Mess Canvas Supplies Needed
- Canvas (I used 14×18 click here for Amazon Price)
- 3-5 Colors of Paint for the hot mess plus 1 color for the background
- Wide Craft Brushes or Sponge Brushes
- Oracle 651 Vinyl
- Cutting Machine (I use Cricut Explore)
- Scraping Tool
- Transfer Tape
- Thick Book
- *Optional Hair Dryer
- *Optional Mod Podge
- Fun Design – You can swipe my Farm Fresh Eggs SVG Cut file for free
Painting the Hot Mess Canvas
The hot mess canvases look best with 3-5 colors of paint. I ended up choosing four colors all SeaPaint brand:
- Crustacean (REd)
- Island Sun (Yellow)
- Sea Grass (Green)
- Anchored (Blue)
The colors you choose should have some that contrast and some that compliment the other colors too.
Grab a brush for each color of paint you have. Wide craft brushes or a sponge brush works best.
Start with one color of paint and paint a dash in a bunch of random places. You can go different directions too.
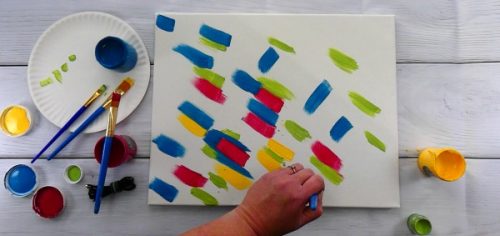
After you have a few dashes of paint of your first color grab the next color. Paint some of your second color of paint in random places on the canvas.
It’s ok if the colors mix a bit but don’t mix them too much or it just turns a yucky mud color.
Continue adding dashes of paint with your third, fourth and fifth colors. (if you have that many)
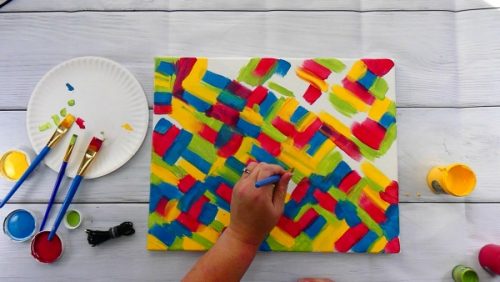
Be sure to get the dashes of paint right next to each other. We don’t want any white showing through. This is the fun ‘hot mess’ part of painting the canvas you can’t screw it up.
As your canvas starts to fill in you’ll be able to see the areas that need more of one color. Keep rotating through your colors until the whole canvas is covered
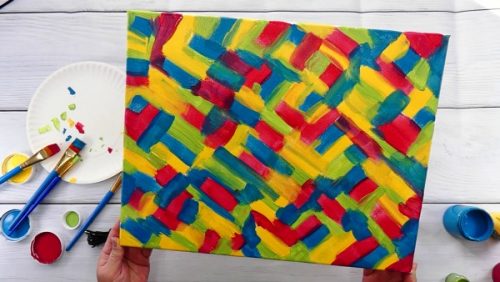
This is my finished hot mess part. Each one I do is unique and they always turn out gorgeous. It’s like painting magic.
Adding the Design to Your Hot Mess Canvas
I made a Farm Fresh Eggs Chicken SVG for my design. You can totally use it too for your hot mess canvas, or any other project. It’s free in my resource library and all the details of getting it ar at the bottom of this post.
So you want to cut the design on Oracle 651 permanent vinyl. At least I did. It’s easier to get to stick to the canvas than stencil or removable vinyl.
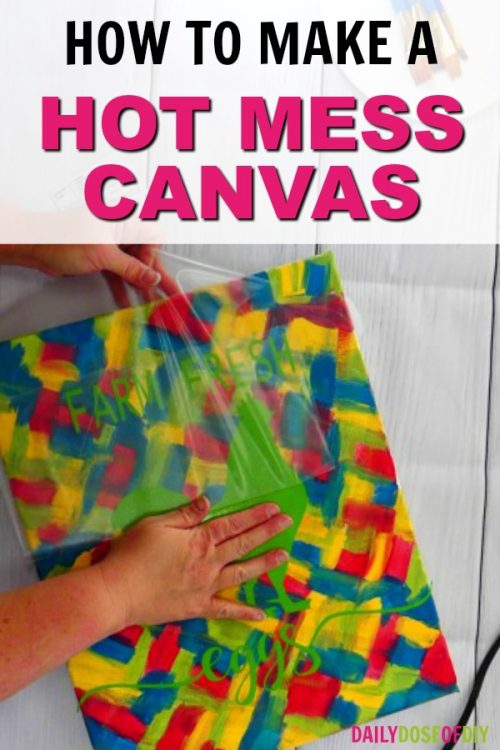
Cut your design, weed it and add the transfer tape. Remove the backing from the vinyl and center the design on your canvas.
You don’t have to worry about laying it on your canvas to center it. It won’t instantly stick like vinyl does to some surfaces so you can move it around until you’re centered.
I usually just eyeball it to get it centered, plus I made the swirls on the word eggs 14″ wide, so that makes it easy to center vertically.
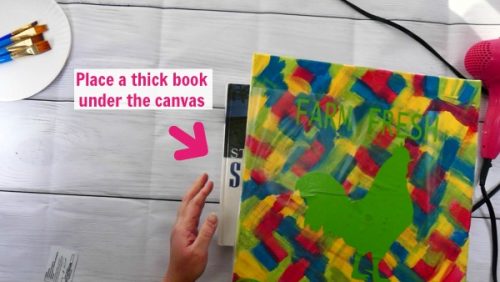
After you’re happy with the placement grab a big thick book and place it behind the canvas. This will give us a hard surface to rub the design down on.
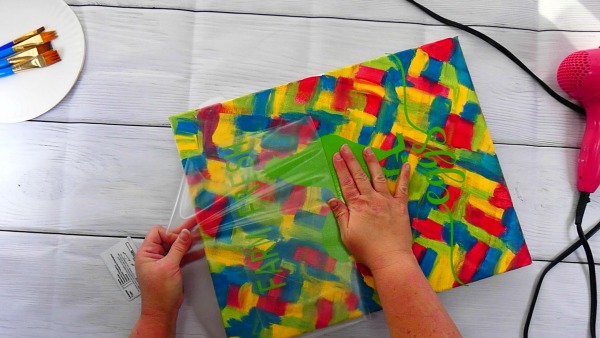
Grab your scraper tool or old credit card and rub the vinyl onto the canvas. Start in the center and work your way out to avoid bubbles.
After you’ve rubbed everything down really good slowly remove the transfer paper.
If you are using an intricate design or need more help getting vinyl to stick to canvas see this post.
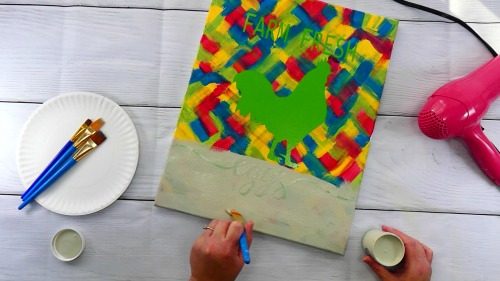
Next we want to make sure that vinyl is stuck down good on the edges so paint doesn’t leak underneath.
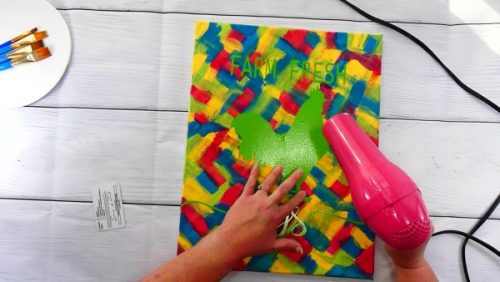
I always rub over everything with my fingers. If it’s not sticking well for you try heating it up with a hairdryer and rubbing down the vinyl again.
If you want extra assurance that the paint won’t bleed you can paint a thin layer of mod podge over all of the vinyl edges to seal them.
Painting the Background Color
After your vinyl is good and stuck it’s time to start painting over everything. This is also the final background color your canvas will be.
I chose the shade sand dollar by SeaPaint. It’s a nice creamy neutral.Start at one edge of the canvas and start applying the paint in long even strokes.
You’ll have to decide how transparent you want this layer of paint to be. Some people like it solid so none of the background colors shows through.
I like to make it solid around the vinyl so the colors will pop once the vinyl is peeled up. But around the outer edges, I leave it more transparent so some of the bottom layers of colors peek through.
Paint the whole canvas with your background color, even the sides.
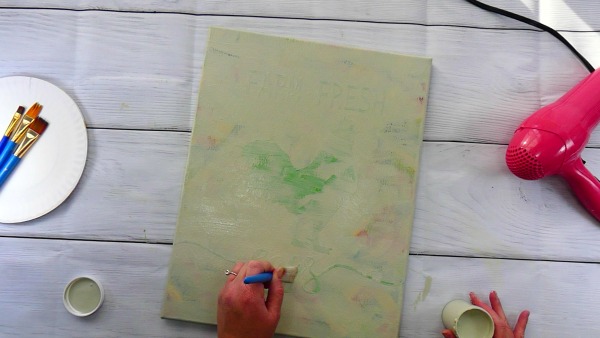
After the whole hot mess canvas is painted you can use a blow dryer to speed up the drying time.
When the final layer of paint is dry use your vinyl pick to pull off all of the vinyl.
The result is a beautiful hot mess.
Swipe the Farm Fresh Eggs SVG Cut File
You can grab the Farm Fresh Eggs SVG file for free. I keep all of my free SVG files in a resource library I set up for subscribers to my weekly newsletter. It’s like a one-stop shop for free SVG files.
When you sign up you’ll instantly be emailed the link and password. And you’ll receive updates from me every week or two when I add new freebies to the library for you.
All of my free SVG files and Designs are kept in a library for your convenience. We will send you the link and password right away, and you’re free to use all the resources you want in the library.
Already have the password? (It’s at the bottom of every email) Enter the Library Here

Chris Butler has helped thousands of crafters learn how to use their Cricut machine without feeling overwhelmed. She is a best selling author and an up and coming designer. For fun Chris enjoys designing SVG Files, hanging out with her family (preferably at the lake), traveling, and volunteering at her church. She is a wife and mom of two crazy fun kids.
Like this. Thanks for the tutorial.
Thanks!
Awesome! Love the tutorial!
Love the Farm Fresh Egg post!
THANKS FOR SHARING IT!
Thank you Michelle!
Trying this for my next project. Thanks for the tutorial.