This post may contain affiliate links for your convenience. If you make a purchase through one of my links I will earn a small commission at no additional cost to you.
Last Updated on December 19, 2023 by Chris Butler
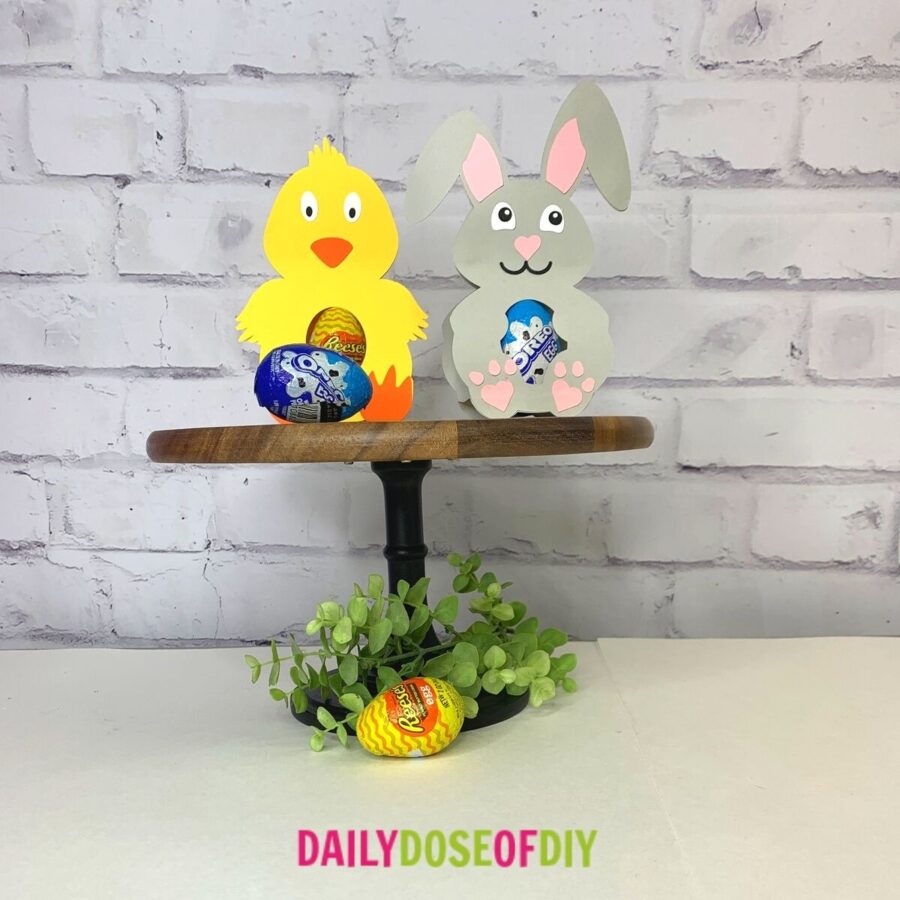
Hi crafty friends, today you’ll learn how to make some fun Easter egg holders out of cardstock.
These little chick and bunny egg holders are super cute, and they’re really simple to make. The whole process, including cutting and putting it together, takes around ten minutes for each one. And you only need a few supplies.
You’ll learn how to cut cardstock with your Cricut, plus a tip to keep your paper from tearing or curling. Plus you’ll get the free SVG files, so you can make the bunny and chick egg holders too! Your kids and grandkids are going to love them!
Let’s get started.
Quick Links to Information in This Post
Supplies Needed for Bunny and Easter Egg Holder
- Cutting machine (I used my Cricut found on Amazon here)
- Free SVG files (Instructions for how to get them will be later in this post.)
- Cardstock (I recommend this value pack of solid core of Recollections cardstock paper found here on Amazon. Solid core is important for these because when you cut it, you get the same color instead of a white edge.)
- Glue stick or glue dots (preferred)
- Well-worn green cut mat or light blue cut mat
- My best-selling guide: Conquer Your Cricut (for extra help) Find it here https://dailydoseofdiy.com/conquer-cricut
Easter Egg Holder Video
Step One: Get Your Free SVG Files
Simply fill out your first name and email address and the link and password for the free SVG library will be sent right to you.
All of our free SVGs and Designs are kept in a library for your convenience. Fill out the simple form and we’ll send you the link and password to access the SVG files right away.
Already have the password? Enter the Library HERE
All of my SVGs in the Free Library are in alphabetical order, so scroll down to the “E” section once you’re in.
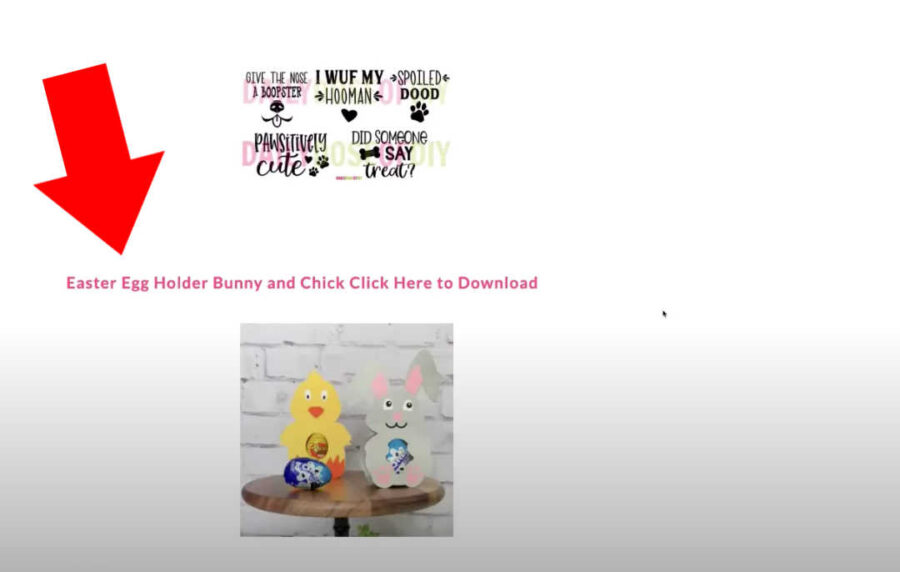
Download the SVG image and upload them into Design Space. If you need more help Downloading and Uploading SVG files see this post.
Select the first animal, and while you hold down the Shift key, select the other one as well. Then click “Insert Images” to bring them both into the canvas at the same time.
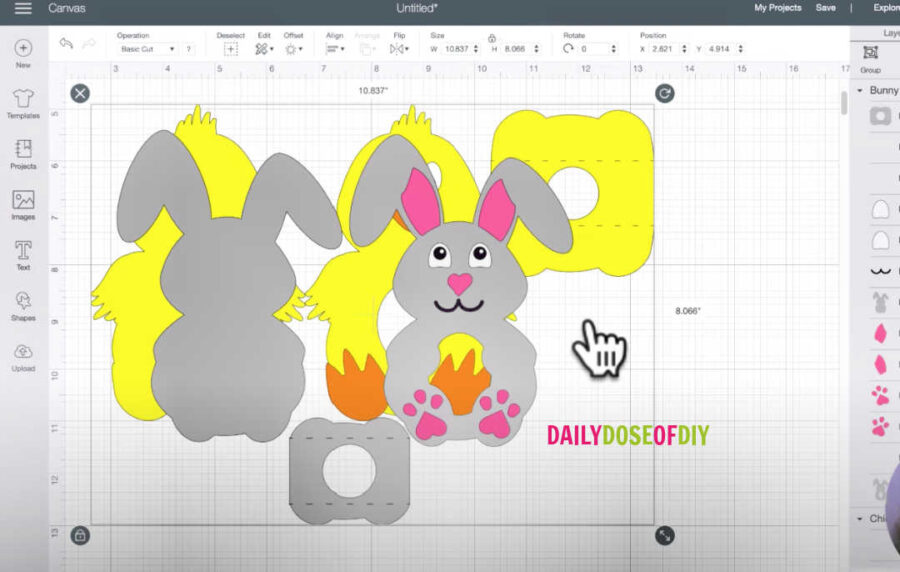
Once they’re in Design Space, you can just go ahead and click “Make It,” since I have them sized to fit each animal in an 8 ½” x 11” sheet of cardstock. If you want to change the size, however, you can. You will just need to click “Ungroup” first to separate them and then make them bigger or smaller.
The mat screen will default to a 12” x 12”, so you will need to adjust this setting. Click on the gray mat, and then in the dropdown menu for “Material Size,” scroll down and select the option for 8 ½” x 11”. You will need to do this for the yellow mat, too, for the chick.

Once you have adjusted the material size for those two mats, click “Continue.”
If you have a Cricut Explore, set your dial to “Cardstock.” If you have a Cricut Maker, once it connects, select “Cardstock” out of the list of materials.
Now you’re ready to cut!
Step Two: Cut the Cardstock
Load your cardstock on the cut mat just like it shows in Design Space. So, line it up vertically in the top left corner. Slide your cut mat under the two white tabs and hit the Load Mat button. Once that “C” Go button starts flashing, hit it, and Cricut will get your first sheet cut. After your first color has finished cutting, hit the Unload Mat button.
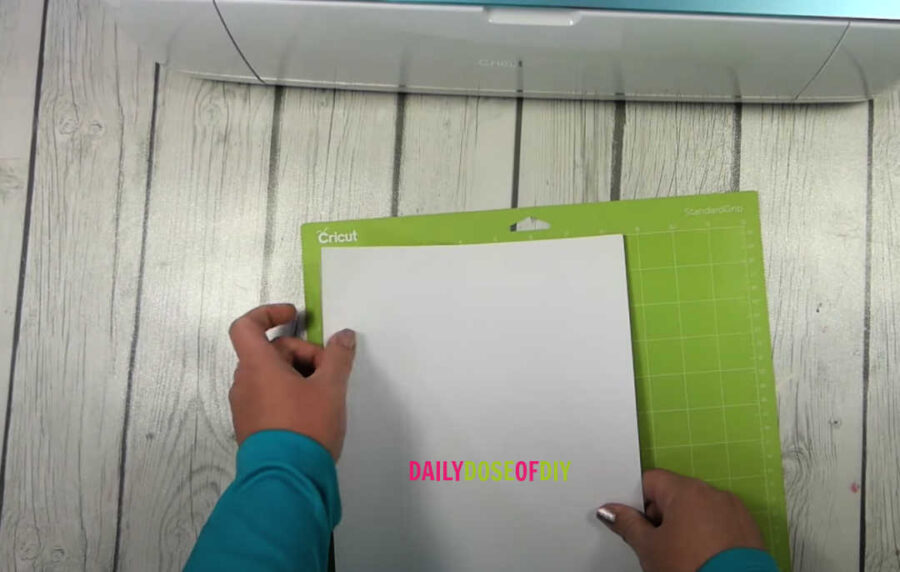
Tip: flip your mat over to remove the cardstock from the mat. This helps keep the cardstock from tearing and curling. But you don’t want to curl your mat at a super hard angle, as that will make it crack. Just slightly bend the mat back and get the cardstock off.
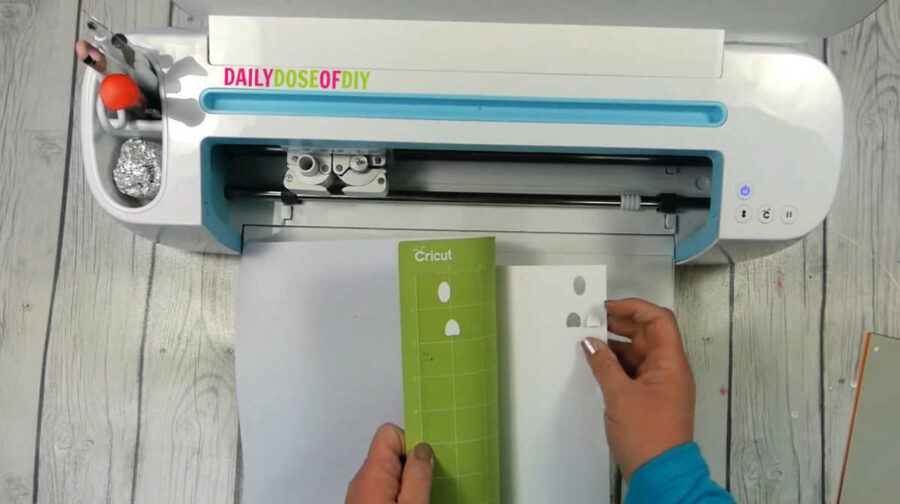
Now that you have the first sheet cut, just keep going down the line in the order that Design Space shows you on the cut mat. Load the cardstock, have it cut, remove it, and load up the next one. It may seem like a lot, but it’s very quick.
Step Three: Assemble the Easter Egg Holders
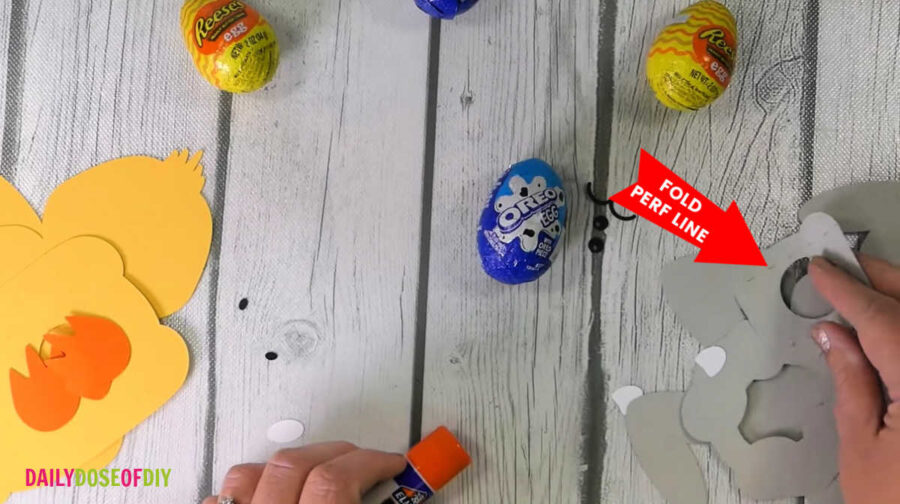
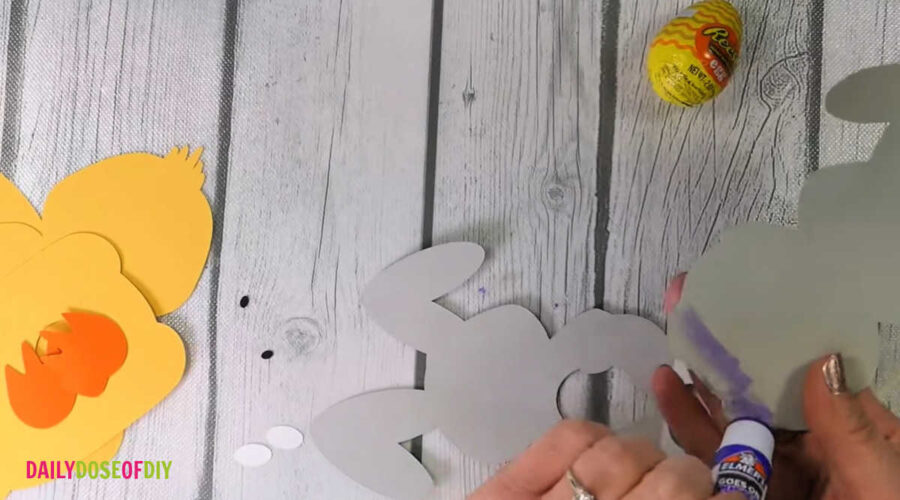
Let’s start with the bunny. The smaller piece with the hole is the base piece that will attach both sides of the bunny. I put perforations in, so you don’t need to use any score lines. Simply fold each of those perforated lines to prepare it for putting the bunny together, and then set it aside. It’s best to start with the bunny face, so you can work with a flat surface.
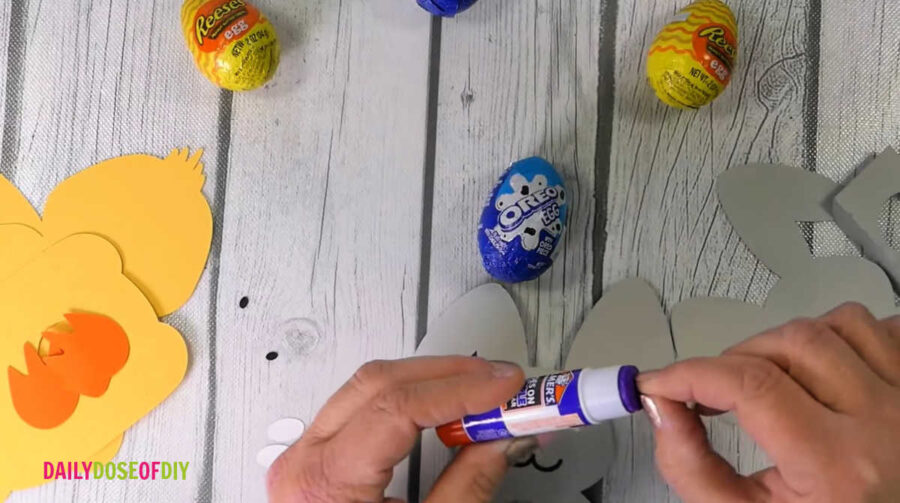
Glue on each little piece of the face. There will be two little white pieces for the eyes, and a little pink heart for the nose. (You will actually have three little pink hearts, but the smallest one is for the bunny’s nose.) Then the mouth and the pupils of the eyes are in black.
Tip: I used a glue stick to do this, but as you’ll see, it got a little messy. Glue dots would be a better option if you have them.
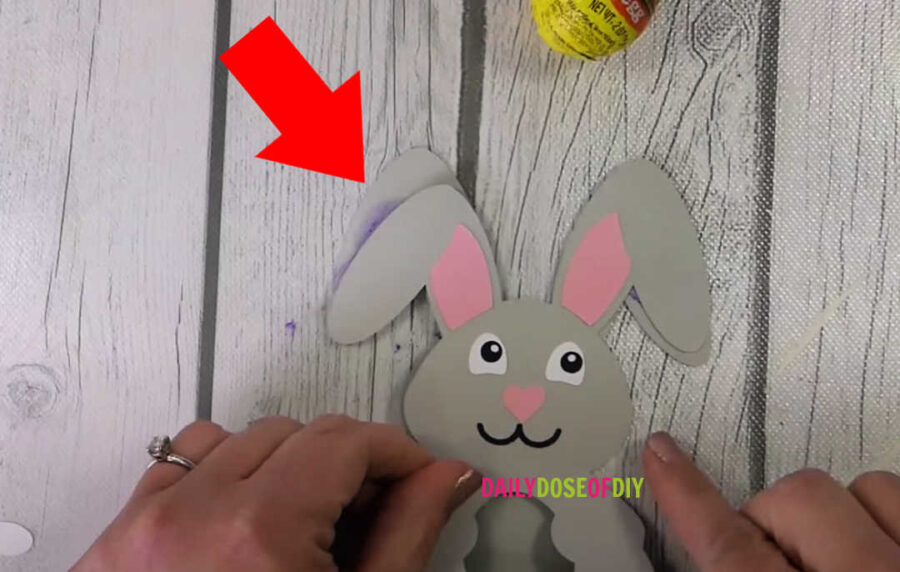
Next, add the ear pieces in. One ear is longer than the other, so you want to make sure you line up those pieces before you glue them and match the pink part to the correct side. Once they look good, just add your glue to the back of those and get them glued down too.
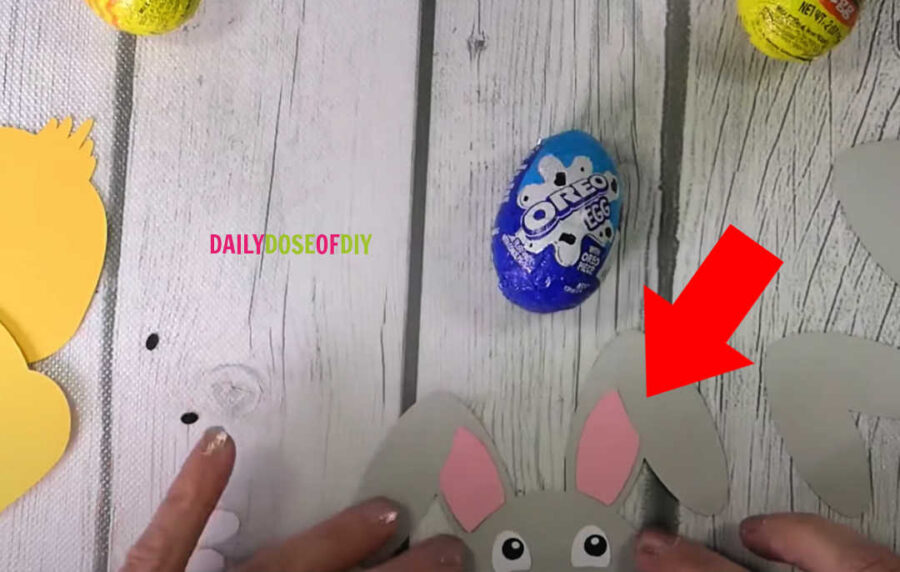
And finally, you’ll need to glue the little pink pieces onto the front of the bunny. These are designed so that the heart shape goes upside-down and the little point looks like a paw. You can see in the video that I accidentally placed them with the heart shape facing up instead, but it worked out okay.
Then there are three little paw print pieces to go on each side. These are really tiny and got stuck to my glue stick, but again, it all worked out in the end.

Now it’s time to glue on the base. If you watch the video, you’ll see that I made another mistake here, too. I actually glued one side on backwards without matching up the bunny shapes. Remember how I said the ears look different? Make sure you match them up before you glue them on!
If you forget, though, it’s pretty easy to fix. I just peeled the base off and flipped it around and glued it together again.
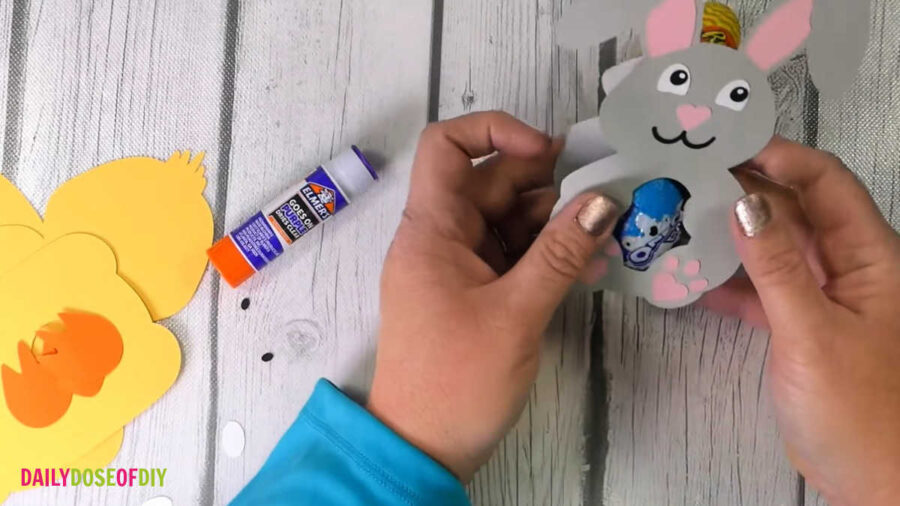
To glue the base, put a strip of glue along the bottom of each bunny all the way across, and attach it to that piece you folded over on the base.
Finally, put glue over the back of the head area and the two ears to glue together the bunny’s top half. Line everything up so that you can’t see any overlap, and then press them together so they stay stuck.
You’re done! You can slide in an Oreo or Reece’s egg. Or a Cadbury Egg, if you like those. (I don’t!) Aren’t these adorable?
You’ll put the chick together in much the same way.
Start by folding the base to get it ready. Make sure you line up the little feet with the bottom edge, because it does make a difference what side they go on, too. Then glue them down.
Then we’ll move on to the face. Glue on the little beak and eyes (there are two ovals of white and then two little black dots).
And then you’re ready to attach the base. Put your glue on the front of the base and attach it to the bottom front of the chick. Once again, line the back and front pieces up carefully, so the hair matches and you don’t end up with it on backwards like my bunny.

Attach the base to the back. Add some glue to the head, glue it all the way down, and you’re ready to insert your egg. Easy as that!
Now you know how to make two adorable little animal Easter egg holders, super easy and quick!
Thanks for crafting with me today, don’t forget to grab the free SVG!
All of our free SVGs and Designs are kept in a library for your convenience. Fill out the simple form and we’ll send you the link and password to access the SVG files right away.
Already have the password? Enter the Library HERE


Chris Butler has helped thousands of crafters learn how to use their Cricut machine without feeling overwhelmed. She is a best selling author and an up and coming designer. For fun Chris enjoys designing SVG Files, hanging out with her family (preferably at the lake), traveling, and volunteering at her church. She is a wife and mom of two crazy fun kids.
Hi Chris,
I appreciate your talent and graciousness in giving away your animal egg holder svg. I am, however, a little frustrated with the process of actually getting the SVG. I have signed up for your sight, gotten the password, got to the area where it shows how to make the project, but there is no svg link that either works or I can find. Where it looks like one should click for the link it takes you right back to signing up for the password. I see your youtube channel, which I have watched, I’ve lookked through all of your steps, I went to the search bar and typed in Animal Egg Holder and it takes my right back to where I can not locate a link. Perhaps I missed something somewhere, but I am finding the process very difficult to navigate through. I don’t know how to create projects yet, otherwise I would just make one.
Again, I appreciate your willingness to give some of your work away and I definately don’t want to come across ungrateful. Perhaps others also have difficulty and they just move on, or perhaps it’s just me. I just wanted to let you know.
Thanks again.
Thanks for the heads up Leanne! We’ll take a look and see how we can make the process simpler. You should go here for the library and to enter the password. https://dailydoseofdiy.com/free-plans-printables/