This post may contain affiliate links for your convenience. If you make a purchase through one of my links I will earn a small commission at no additional cost to you.
Last Updated on August 11, 2023 by Chris Butler
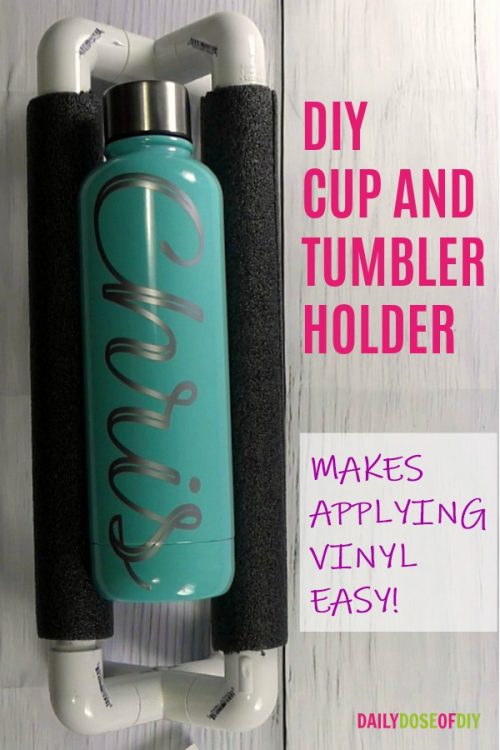
One of the pains of applying vinyl to cups and tumblers is the fact they like to roll away. It’s like you need another set of hands to hold the cup still and your two hands to apply the vinyl.
So today I’m going to show you how to make a cheap and easy PVC frame to hold your cups and tumblers for you so you can easily apply the vinyl.
If you prefer video you can scroll to the bottom or use the quick links to jump ahead.
It’s the extra set of hands you need. And literally, it takes minutes to make and costs less than $8.00.
Let’s get to it.
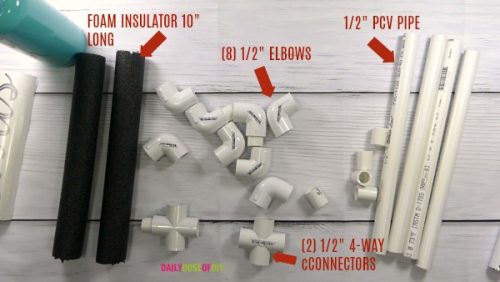
Cup and Tumbler Holder Supplies Needed
- 1/2″ PVC Pipe five feet long
- (8) 1/2″ PVC Elbows
- (2) 1/2″ PVC four-way connector
- 1/2″ foam pipe insulation
- PVC Pipe Cutter
- Measuring Tape
Head to your local home improvement store and go to the plumbing section.
I went to Lowes and they had everything needed for this project in one section which makes it super duper easy. You’ll need 5 feet of PVC pipe which is super cheap.
You’ll also need a PVC pipe cutter if you don’t already have one. Now these can be pretty expensive, but don’t panic if your eyes fall on a pricey one. Keep looking because you can grab a cheap one for $5-$10
Also grab (8) 1/2″ Elbows, (2) 1/2″four-way connectors and some 1/2″ foam pipe insulation. I think the smallest size the insulation came in was 5 feet. But it cost like $1.42, so no big deal.
When you cut your PVC pipe you want (4) pieces 12″ long and (8) pieces 1″ long. These will be our connectors.
Cut (2) pieces of the foam insulation 10″ long.
Building the Tumbler Holder for Vinyl Cup Crafts
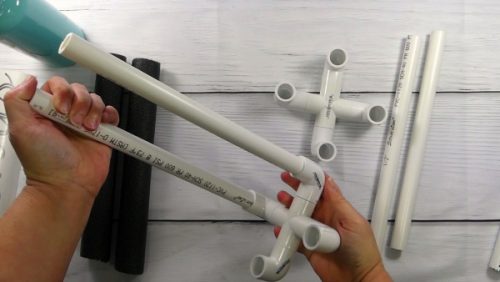
Start with putting the 1″ pieces of PVC pipe into the four-way connectors.
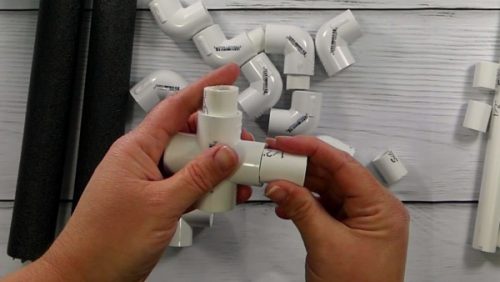
After all 8 pieces are inserted into the (2) four-way connectors, add the elbows.
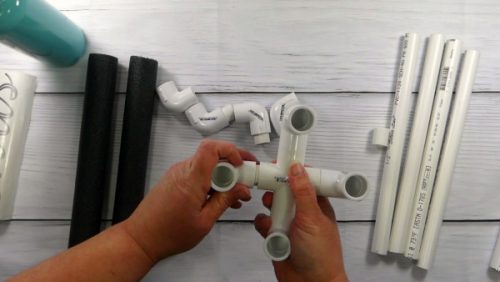
Make sure the elbows are all facing the same direction. Do this for both of the four-way connectors.
Next take (2) of the 12″ long pieces of PVC pipe and insert them into two of the elbows.
This will be the bottom of our cup and tumbler holder. Then put the foam pipe insulation over the remaining two pieces of PVC pipe.
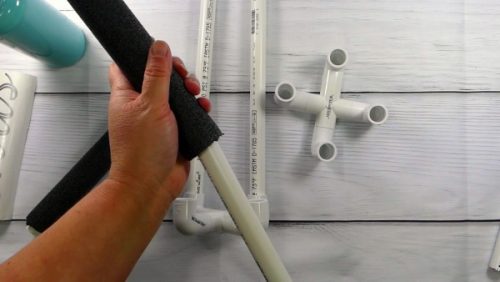
After the foam is on the final two pipes, place them in the remaining elbow connectors.
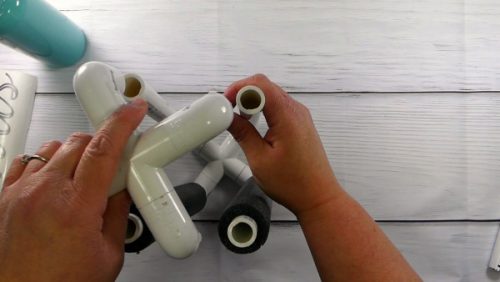
And finally, put the remaining four-way connector with elbows on the end of the PVC pipes.
After your cup and tumbler holder is put together place it on a flat surface with the foam side up. It may be a bit wobbly. Push down on the two pipes covered in foam wiggle them. You may also need to push your connectors closer together.
Keep adjusting and wiggling until it stays flat on the table without wobbling.
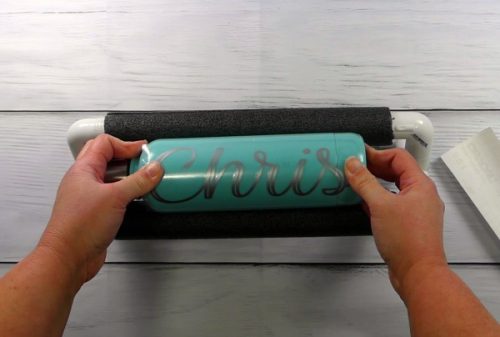
Finally place whatever cup, tumbler or mug you’re crafting with onto the foam. It will cradle your cup so it doesn’t roll away while you’re trying to apply the vinyl. It really is a life saver.
DIY Tumbler and Cup Holder Video
As you can see this DIY cup and tumbler holder for vinyl crafts is easy and cheap to put together. But it’s such a huge help and time saver for applying vinyl to tumblers.
Thanks for stopping by and have a blessed day. Be sure to follow me on Pinterest for more practical and fun crafts and DIY’s


Chris Butler has helped thousands of crafters learn how to use their Cricut machine without feeling overwhelmed. She is a best selling author and an up and coming designer. For fun Chris enjoys designing SVG Files, hanging out with her family (preferably at the lake), traveling, and volunteering at her church. She is a wife and mom of two crazy fun kids.
Love this idea!! And the font you used could you share the name if it?
Thanks Patti! The font is called Arinda
Sure could’ve used this when I made labeled cups for the whole family plus a couple regular visitors 🤪
Have you tried this on Starbuck’s cups? Doing the ring around them?
You are amazing!!!
Love the idea for the tumbler holder. I’m definitely going to make one. Thanks for sharing.
Thank you so much for your tutorial, I made one today and it came out great! It was inexpensive and quick, love it.
Just made this…super easy and a great idea! Thanks for the clear and easy to follow directions!
From measuring to making sure it didn’t teeter, about 20 minutes. Cut with hack saw and sanded rough edges.
Thank you again for sharing!
Very clear directions!! One of the few things I’ve tried to make from pintrest that actually turned out right. Yay!!!!
Thanks Molly!
made mine today came out just great thanks again for sharing
Awesome Linda! Hope you love it =)
Do you think it’s necessary to apply an epoxy or some kind of coating over your vinyl decals on a non glitter tumbler? Also do you treat your tumbler with anything before applying a decal?
no I don’t add epoxy or anything for non-glitter tumblers. Before adding decals just make sure the tumbler is clean and dry. You can do that with alcohol or soap and water.
Just completed mine today! Easy to follow instructions. Thanks for sharing
Thank you So Much!!! Just finished cutting and assembling mine today! Great Tutorial!!
My husband just whipped this up for me this morning. Thank you for easy to follow instructions.
I got apollo pex tubing, is that different than PVC?
Hi, I would love to know the Font, I tried to search “Arinda” and no results were found.
Was simple enough for someone who knows next-to-nothing about hardware! I am happy with my new cradle and cancelled my order for one from Amazon. 🙂
Thank you so much for sharing this! I made it in less 30 minutes, including trimming the PVC pipe. It goes together so easily. I have used it 4 times already and it works beautifully. Thank you for posting the steps as well as video. Following written steps seems to be my preferred choice of tutorial.
Just completed mine today. Thank you for the easy to follow instructions!