This post may contain affiliate links for your convenience. If you make a purchase through one of my links I will earn a small commission at no additional cost to you.
Last Updated on June 22, 2019 by Chris Butler
Do you hate your window trim? I do. Cheap, thin, ugly trim. Not at all the look I was going for. I want big, chunky farmhouse feeling trim.
I am a frugally thrifty tightwad that likes nice things. So I found a way to get the look I want for less. My updated trim cost me less than $10 in lumber to do. And from start to finish only took about three hours! (Most of that time was watching paint dry.)
It is a very easy project and I am going to show you how to do it.
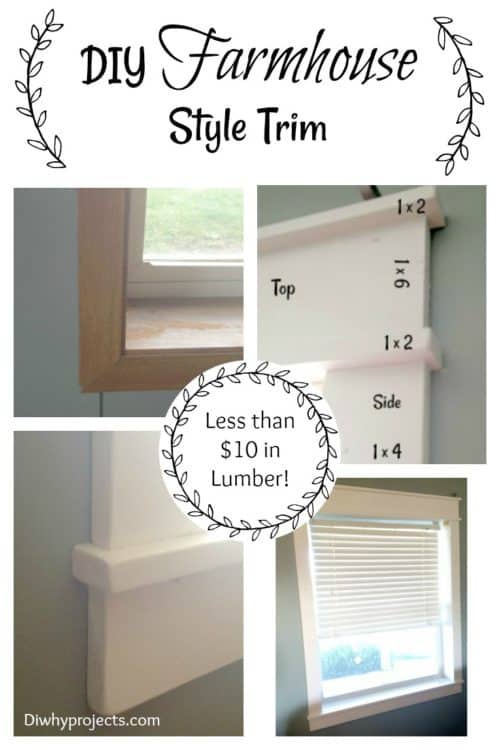
DIY Farmhouse Window Trim
Keep in mind lumber prices my vary by region, and these lengths are for a standard size range of windows. Measure your exact lengths before you buy.
Here’s what you will need:
- (1) 1×6 x 4 foot Pine Board -$1.99
- (2) 1×4 x 8 foot Pine Board -$4.58
- (2) 1×2 x 8 foot Pine Board -$2.48
Tools you’ll need:
- Miter Saw
- Tape Measure
- Hammer
- Nails
- Sand Paper
- Paint
- Wood Glue
- Caulk (optional)
- Screwdriver or Pry Bar
- Level
- Kreg Jig (optional)
Instructions:
- Use your hammer and screwdriver or pry bar to remove the ugly trim.
2. Measure your window from the bottom corner to the top corner on both sides. This is the length you will cut two 1×4’s
3. Measure the top left corner to the top right corner of your window. Add 7 inches to your measurement. This is the length you will cut your 1×6. Now add 1 more inch, this is the length you will cut 2 pieces of your 1×2’s.
-My measurement from top corner to top corner was 30″. I cut my 1×6 at 37″ and my 1×2’s at 38″.
4. Now measure the bottom from left corner to right corner. Add 7 inches to your measurement and cut a 1×4 board to that length. Add 1 more inch and cut a 1×2 to that length.
5. Now all of your cuts are done! It’s time to get sanding. I didn’t sand mine perfect. I like rustic, but still they need sanded, especially the ends.
6. Clean your boards well, make sure all the dust is off. Cheese cloth, or a damp microfiber towel should do the trick.
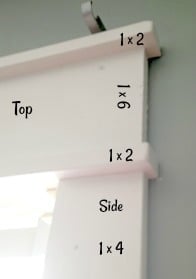
7. I assembled my top before painting using my Kreg Jig. Wood glue will also work, but I like using my Kreg Jig. Center your 1×6 between the two 1×2’s you cut for the top. Your 1×2’s should have a 1/2″ overhang on both sides. Glue together and clamp, or pound in a few finishing nails to hold in place.
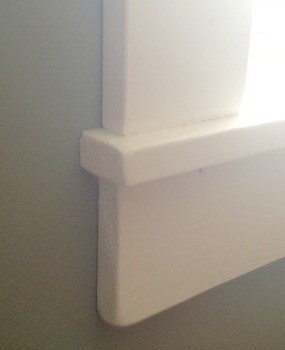
Farmhouse Window Bottom
8. I also assembled my two bottom pieces before painting. Center your 1×4 that you cut for the bottom to your remaining 1×2, again there should be a 1/2″ overhang. Glue together.
9. Now the fun begins. Paint all the boards in your trim color of choice. I used a paint and primer in one and applied two coats.
10. After you’re done watching the paint dry, It’s time to put it all together! Start with the 1×4 side pieces. Line them up so the ends meet the top and bottom corner and nail in place.
11. Now take your assembled top and rest it on the two sides you just nailed in. There should be a 1/2″ overhang on each side. You also may want to check to make sure it is level. After you have everything lined up, nail it in place.
12. For the bottom, push it up so it meets your sides and center. There should be a 1/2 inch overhang here too. Nail in place.
13. You may end up with some gaps where the boards meet. That’s nothing a little caulk won’t fix.
14. Stand back and admire your new window. It’s beautiful! Bye-Bye ugly trim!
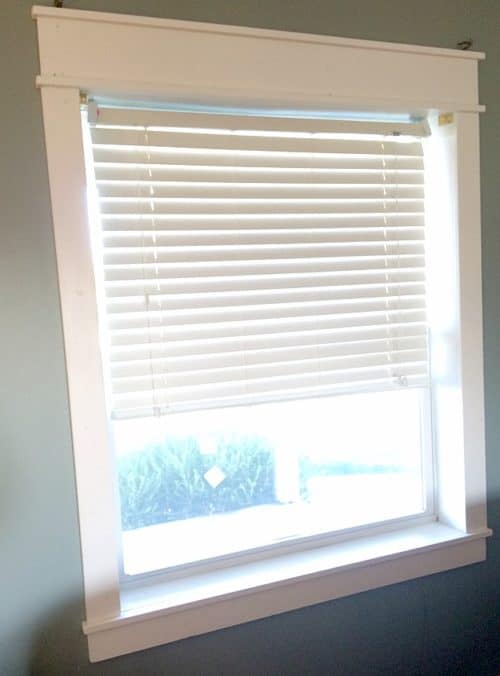
After
I obviously still have a lot to learn about photographing windows! But hopefully you get the idea.
Comment down below and let me know what project you are working on!

Chris Butler has helped thousands of crafters learn how to use their Cricut machine without feeling overwhelmed. She is a best selling author and an up and coming designer. For fun Chris enjoys designing SVG Files, hanging out with her family (preferably at the lake), traveling, and volunteering at her church. She is a wife and mom of two crazy fun kids.
Love the window trim. It looks very country.
Thanks Ruth!
I love this trim!!! This is definitely the trim I want in the house I’m working on!