This post may contain affiliate links for your convenience. If you make a purchase through one of my links I will earn a small commission at no additional cost to you.
Last Updated on August 31, 2023 by Chris Butler
Do you love the look of etched tumblers? They are super trendy, last forever, and a super fun Cricut craft idea. This post will cover how to use Citristrip paint stripper on stainless steel tumblers and give them a beautiful etched look.
We’ll use our Cricut cutting machine to cut out our design. Next we’ll apply the design to our tumbler, add the Citristrip gel and let it work its magic. Wipe off the Citristrip and Viola! You have an amazing etched tumbler. You can even use this method for stainless steel painted water bottles too.
It all sounds nice and easy, but there are a few tricks you’ll want to know about to get good results. I did lots of testing and I’ll show you what worked great and the methods that were a big fat fail.
To grab the free SVG for this craft fill out the simple form below
All of my free SVG files and Designs are kept in a library for your convenience. Simply CLICK HERE to get access. We will send you the link and password right away and you’re free to use all the resources you want in the library.
Already have the password? (It’s at the bottom of every email) Enter the Library Here
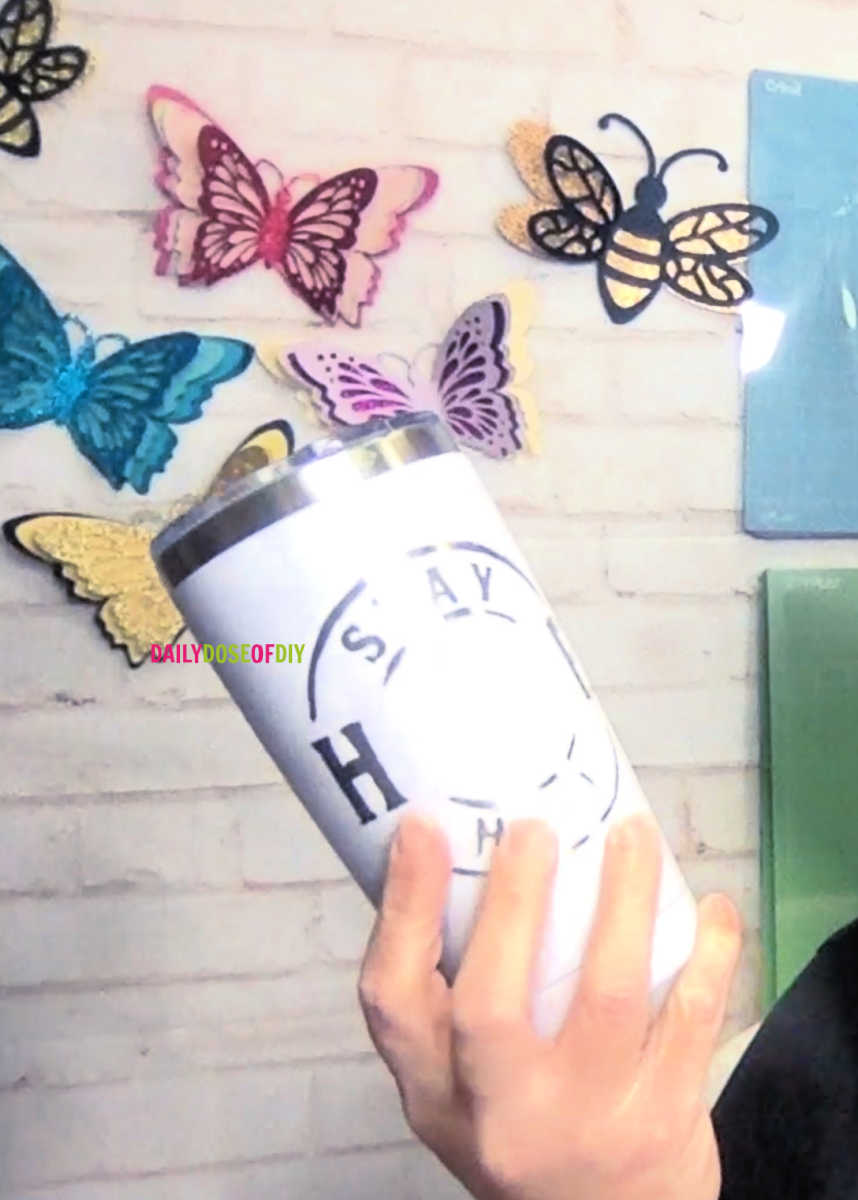
You’ll find this SVG under ‘S’ for Stay Humble Hustle Hard

Let’s get to it:
Quick Links to Information in This Post
Citristrip Etched Tumblers Supply List:
- Citristrip Stripping Gel – Found here on Amazon or any home improvement store
- Powder Coated Tumblers – I am using this colored tumbler set
- Oracle 651 Permanent Vinyl (other brands will probably work, but it has to be permanent like found here)
- Transfer Tape –This is my favorite brand
- Paint Brush
- Paper Towels
- Paper Plate
- Painter’s Tape
- Gloves (recomended)
- Alcohol
- Heat Gun or Hair Dryer
- SVG Design to Etch – You can grab my free design here
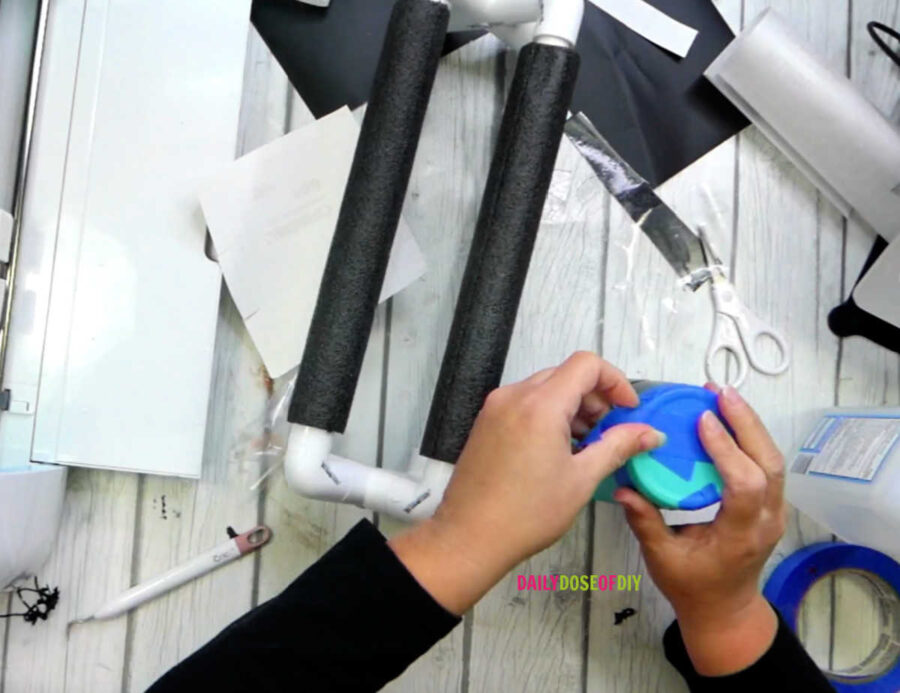
This tumbler holder I made is super handy to have too. It’s life-changing if you make a lot of tumblers. See how to make the tumbler holder here
Some people use removable vinyl or stencil vinyl instead of permanent vinyl. I didn’t get great results using either of those. The best results came from using permanent vinyl. The vinyl is going to get ruined, so grab a scrap piece or an ugly color you have on hand.
CitriStip Etched Tumblers Video

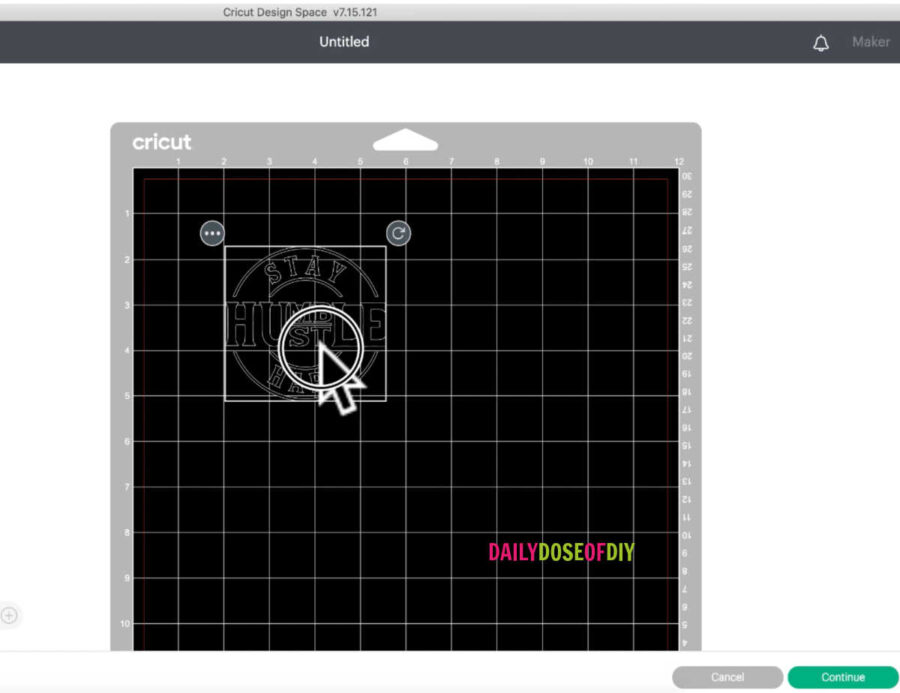
Step One: Upload, Cut and Weed Your Design
First things, upload your design to Cricut Design Space. Measure your tumbler so that you cut the design the correct size. I show you step by step how to do this in the video above.
Cut out your design using Oracle 651 permanent vinyl. Be sure to leave a good margin on the edge of your design. In the video, I show you how to move the design on your mat so that there’s 2-3 inches of extra vinyl around the design.
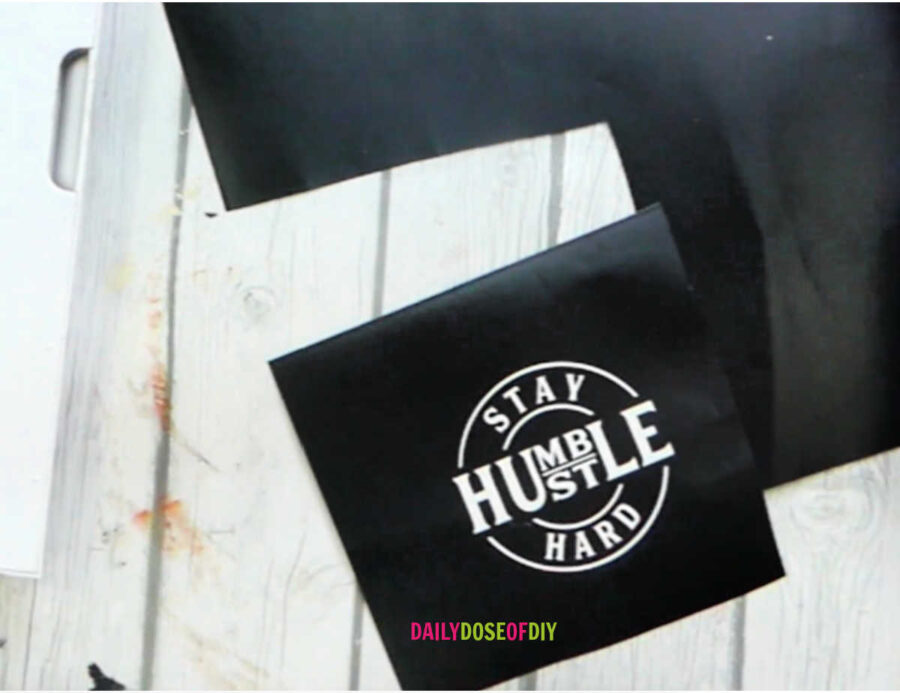
After your design is cut you’ll need to weed it. This is the opposite of weeding a normal vinyl decal. We’re actually making a vinyl stencil. So you’ll need to weed out the letters (be sure to leave the centers) and leave the rest of the vinyl alone,
It should look like this when you’re done.
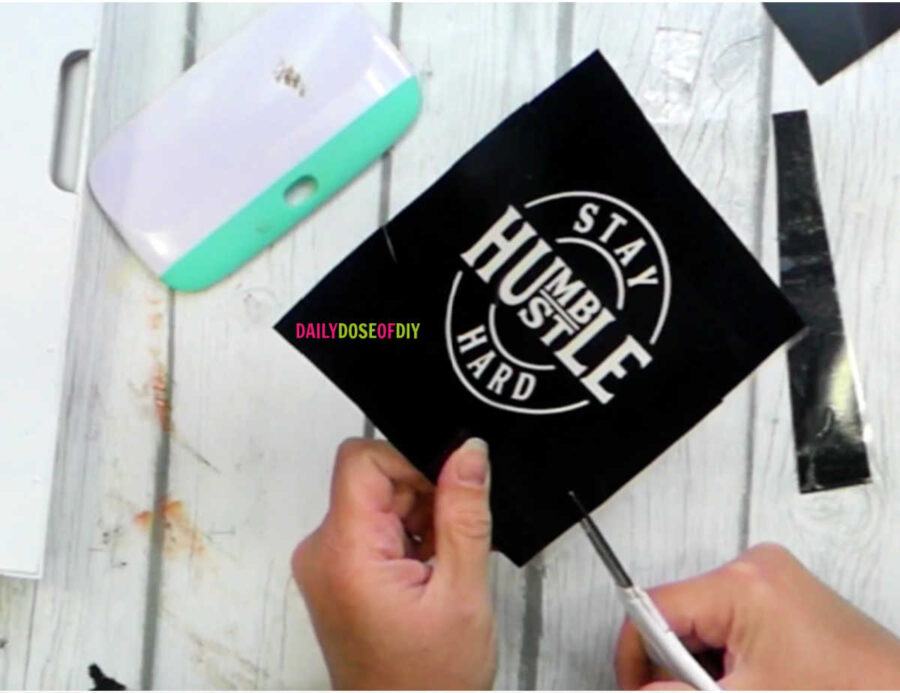
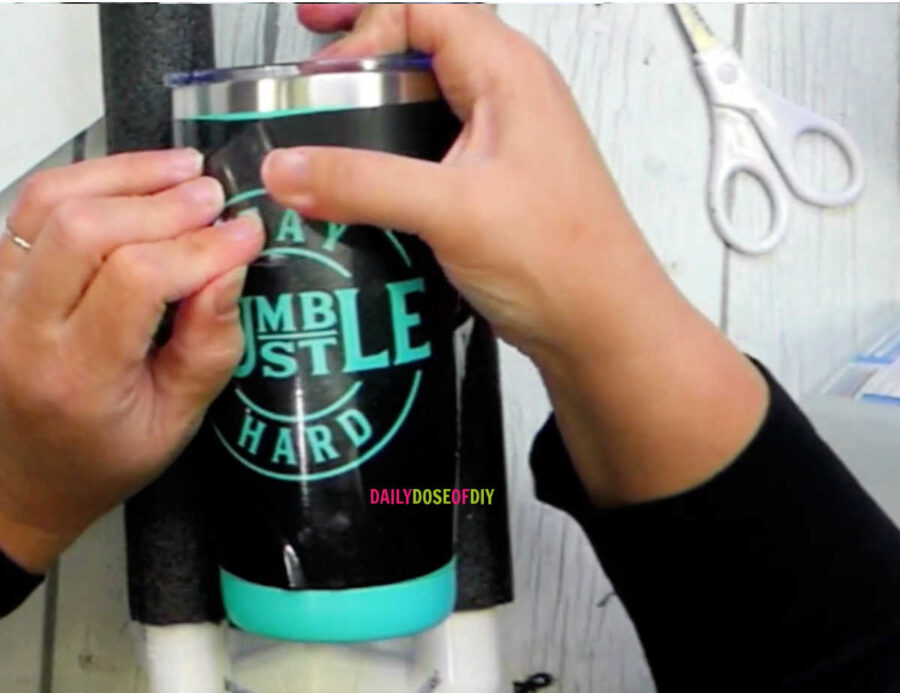
Step Two: Transfer Your Design to The Tumbler
Next, apply transfer tape to your design so we can get it transferred to your tumbler. After applying the transfer tape, I cut two slits on each side of the design to help it go on the tumbler smoothly.
Grab a paper towel and some alcohol and clean off your tumbler where you’re going to place the transfer. After the alcohol dries, remove the backing from your transfer and center it on the tumbler. This is where the tumbler holder really comes in handy!
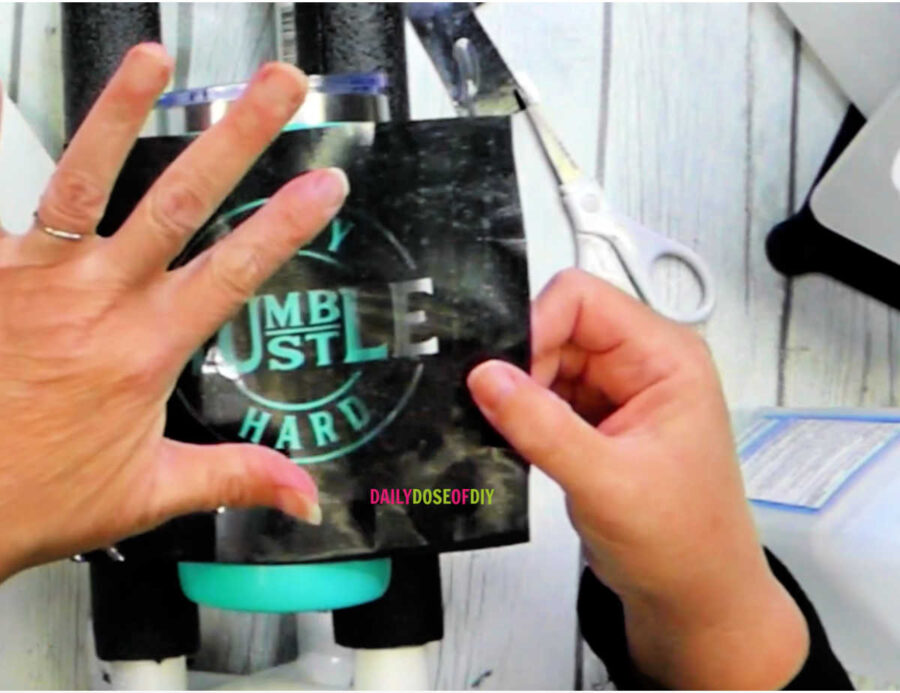
Once centered on your tumbler, press down the center of the design and work your way out to the edges. Depending on your tumbler shape, you may get some wrinkles.
This is okay around the edges, but you want to ensure your design area is nice and smooth. Push out any wrinkles with your fingernail.
Once the transfer is smoothed down, remove the transfer tape. Depending on your tumbler, this might go a little slowly. My tumbler has a rougher coating for extra grip so the transfer doesn’t want to stick super well. Smoother tumblers shouldn’t have an issue.
Step Three: Tape off Your Tumbler
Next you want to take the painter’s tape and tape off any areas of the tumbler showing.
The Citristip Gel will start to run a little bit. So whether you leave your tumbler standing up or laying on its side, gravity will work and the gel will pool up on the opposite side.
The tape will protect your paint from peeling in areas you don’t want it to.
Step Four – Wait
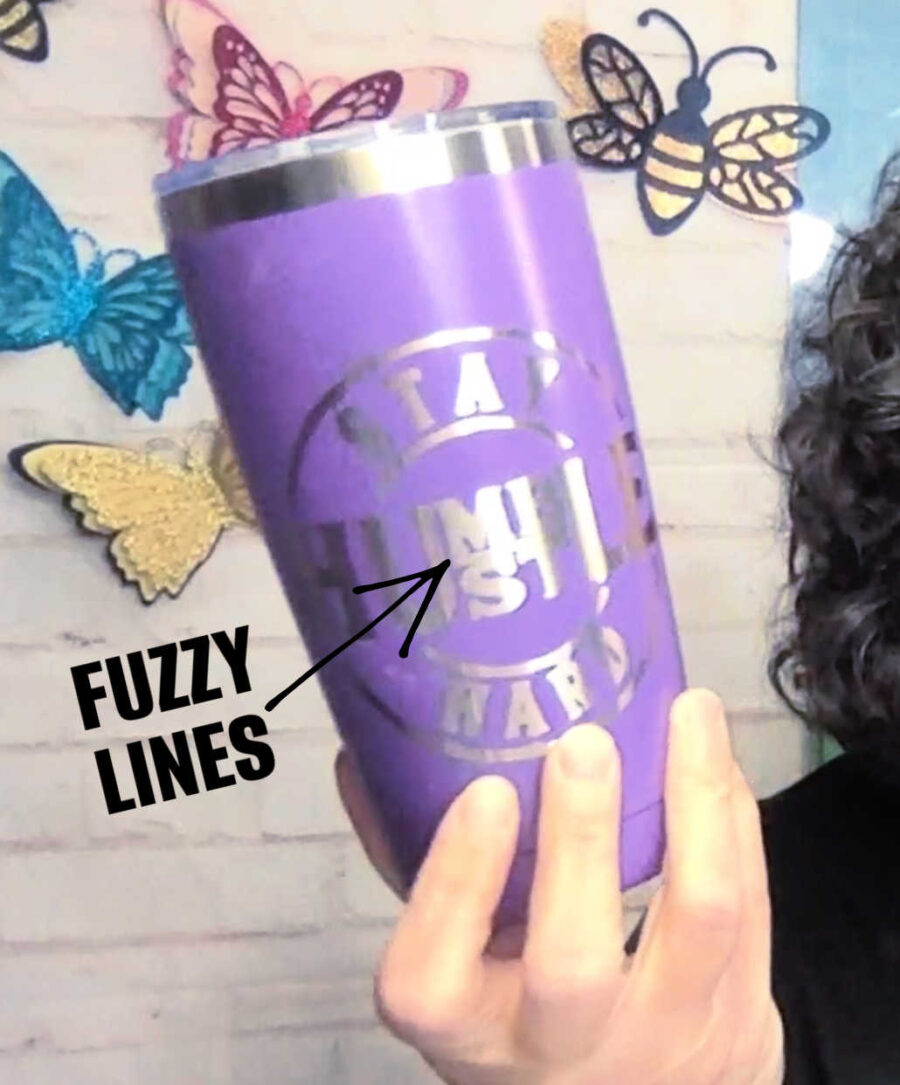
Once vinyl is applied it’s best to let it cure. I did two tumblers applying Citristrip right after I applied my decal. One was a total fail (left the citristrip on too long – keep reading so you know what to watch for)
The second was OK, but I got the crispest lines when I waited 12 -24 hours before applying the Citristrip. This allows the vinyl to cure and get a good stick to the cup.
Step Five – Apply Heat
Between all my tests, the tumblers I applied heat to came out the best. So after your vinyl has cured for 12-24 hours grab your hair dryer or heat gun. If you’re using a heat gun use it on the lowest setting, we don’t want the vinyl to melt off.
Go back and forth and warm up the vinyl. This is also a good chance to work out any wrinkles that have formed around your design.
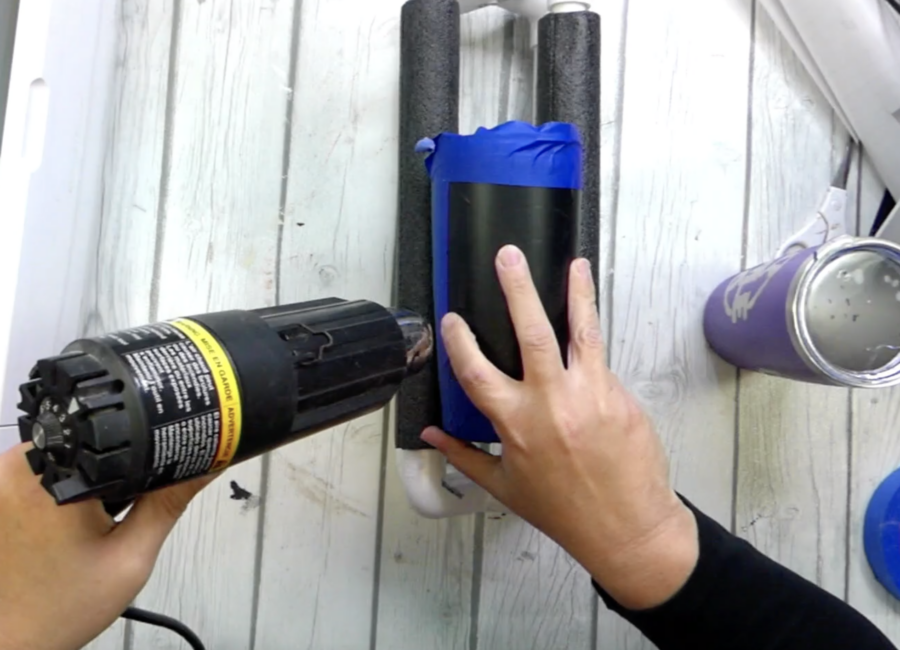
After the vinyl is warm go over it with your scraper tool or your hands and give it another good press down. Allow the vinyl to cool off and then we’re ready to apply the CitriStrip
Step Six: Apply Citristrip to the Tumbler
You may want to put gloves on for this part. It’s not really that messy, but you could get some on you.
Shake the Citristrip well and then pour some onto a paper plate. As far as chemical strippers go, this one has a nice pleasant citrus scent and not an overbearing chemical smell. However, if you’re sensitive to strong smells be sure to do this in a well-ventilated area.
Dip your brush into the Citristrip and dab it onto your tumbler.
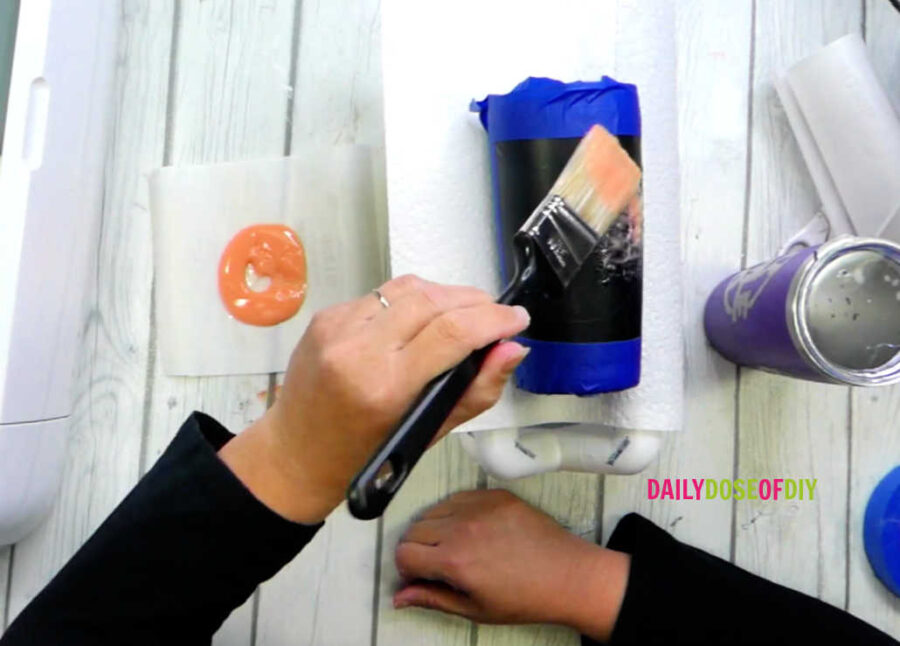
You don’t want to paint it on because going back and forth could push it under the vinyl. It has a thick consistency like slime, so dabbing works well.
After all parts of your design are covered in Citristrip, gently pull your brush across the top to get a nice even layer. Then we get to let it set and work its magic.
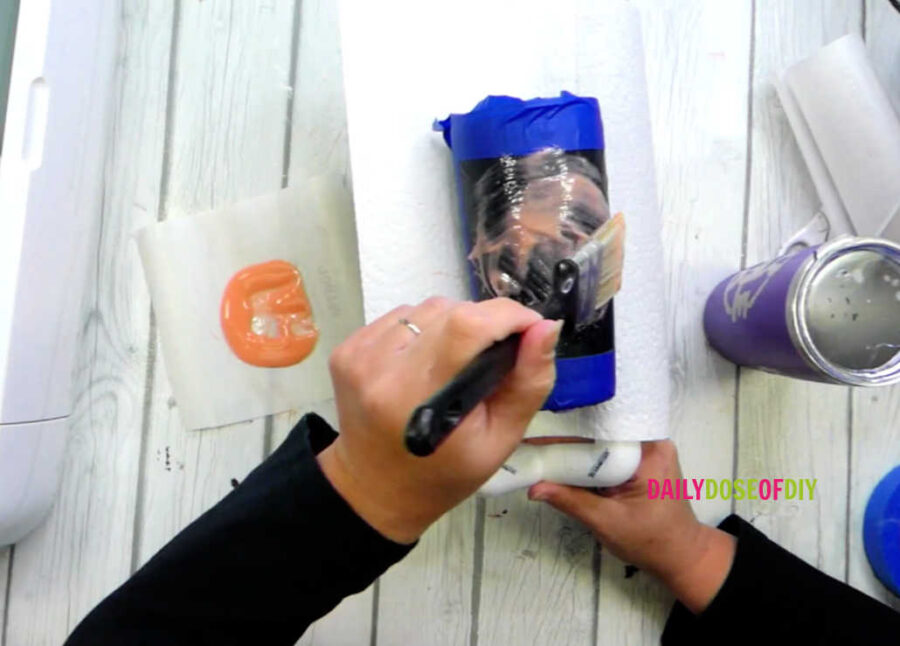
How Long Should You Leave CitriStrip On?
This is going to depend on many factors. One is the type of tumbler you use and the type of paint it has. Even the color of Tumbler you’re stripping will make a difference. I used all the same tumblers and one color took two hours and another color took 50 minutes.
So set your timer for 45 minutes and I’ll show you how to tell if the Citristrip has been on long enough.
Step Seven: Test After 45 Minutes
When it’s time to remove the Citristrip you’ll notice the powder coating is nice and bubbly.
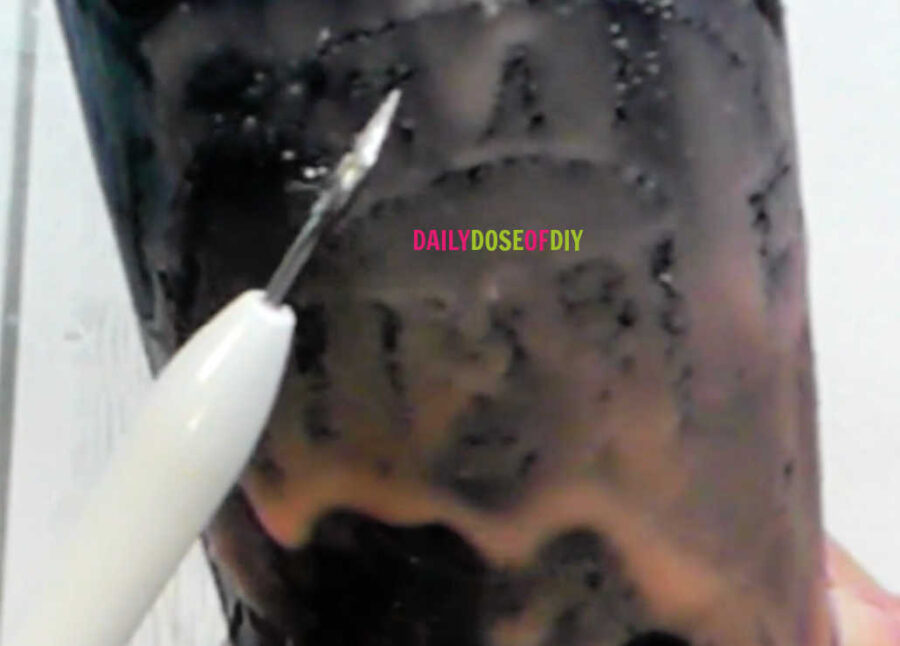
If you’re uncertain, grab your weeding tool or a toothpick and give it a little scrape. If the paint easily moves, it’s ready.
If you don’t see paint bubbling and it doesn’t easily scrape, set your timer for another 15 minutes and check again.
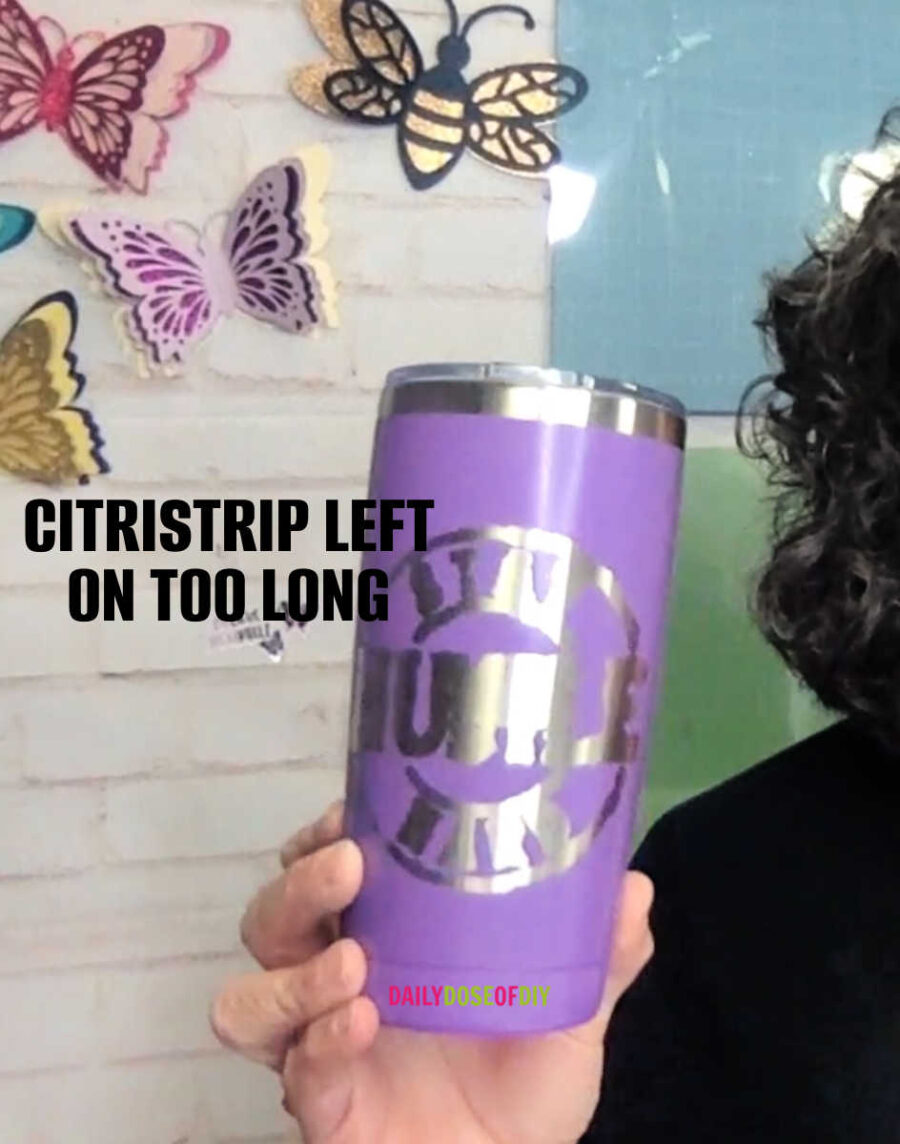
DO NOT just let it go overnight or even for a few hours. This is a tumbler that I let set for 3 hours. The bubbling paint will eventually allow the Citristrip to seep under the vinyl. And the Citristrip will eventually start eating away the vinyl.
Step Eight: Remove the Citristrip
Once you see the nice bubbly paint, it’s time to remove the Citristrip. I wiped the excess off with a paper towel. And then run cool water over the tumbler.
Grab and old dish towel and start scrubbing. It really doesn’t take much elbow grease if your paint was good and bubbly. The vinyl will also start tearing away at this point. That is fine you can toss it out.
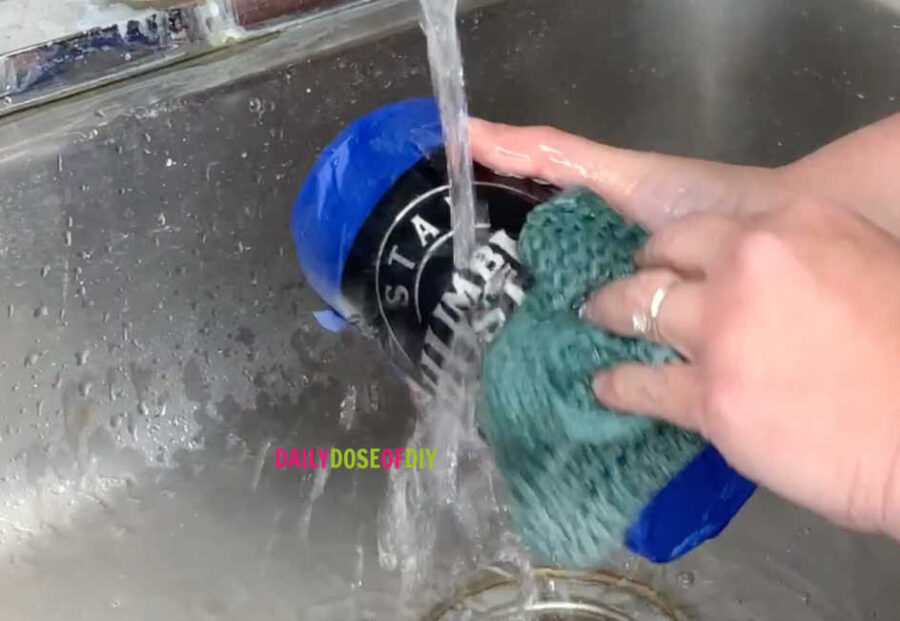
After most of the paint has been removed, go ahead and remove the tape and vinyl that is still left. Give the cup another good wash to remove the sticky residue.
Another common problem I hear is I scrubbed and scrubbed, but the paint isn’t coming off?
If the paint is not coming off easily, then you didn’t leave the Citristrip on long enough.
I left the Citristrip on this tumbler for an hour, and it wasn’t long enough. The paint did scrape away with my weeding tool, but I eventually got a hand cramp and had enough of that lol.
If the paint is not bubbly you’ll waste way too much energy scrubbing and scraping. It should wipe right off. I also don’t recommend using a brillo pad or steel wool as that could scratch up and damage the coating of the paint that you want to stay on the tumbler.
Note the same tumbler in black only took 50 minutes until it was ready. This is why testing and checking frequently is super important.
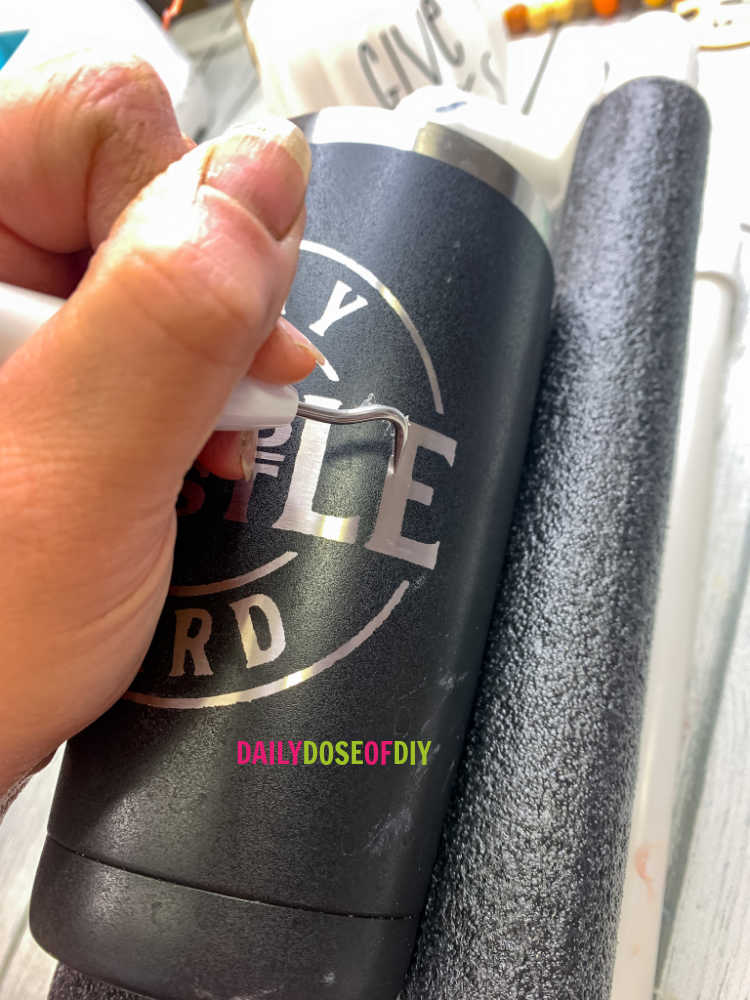
Step Nine: Clean Up the Edges
There might be an area or two that’s not super crisp and you need to clean up. Scraping it with a weeding tool or a tooth pick will easily clean up and paint that wasn’t removed and make your lines super clean.
Now you know how to easily etch tumblers with Citristrip! We covered all the supplies you’ll need form the tumblers to the type of vinyl. And you learned how to test if the tumbler was ready for the citristrip to come off so you get perfect results every time.
I think I’m going to test the citristrip on a few more things. Who knew paint stripping could be so fun?
Don’t forget to grab the free SVG design to make some of your tumblers with.
To grab the free SVG for this craft fill out the simple form below
All of my free SVG files and Designs are kept in a library for your convenience. Simply CLICK HERE to get access. We will send you the link and password right away and you’re free to use all the resources you want in the library.
Already have the password? (It’s at the bottom of every email) Enter the Library Here
And grab the tutorial for the life-changing tumbler holder here
Love to make Tumblers? See How to Use Infusible Ink on Tumblers for Stunning Results

Chris Butler has helped thousands of crafters learn how to use their Cricut machine without feeling overwhelmed. She is a best selling author and an up and coming designer. For fun Chris enjoys designing SVG Files, hanging out with her family (preferably at the lake), traveling, and volunteering at her church. She is a wife and mom of two crazy fun kids.
Chris,
I watched your Citristrip video a month ago and you replied to my comment about the Floral design. I have looked but can’t seem to find it in your library. I have done several tumblers since watching your video and most have turned out great. The timing is definitely different with different tumblers and colors!
Thank you so much for your wonderful videos! If you could direct me to the floral svg that would be great!
Hello- the first few times I tried this, it worked perfectly. The last 2 HAVE NOT. Do you think the temperature in the house can effect how it works? Have you found that the Citrustrip goes bad after a certain amount of time after opening?? I’m just a bit frustrated and perplexed! Any help you could give would be much appreciated!!
IN would keep a close eye on them. The amount of time you leave the sitristrip on for can be effected by humidity for sure, and different tumblers, even the same tumbler in different colors.
Why is your vinyl solid black again before you paint on the Citristrp? I do not see the letters you weeded out.
Thank you,
Darla
I would love to know the time of the colors. I bought the exact cups for my wedding party, so I do not have 2 cups of the same color.