This post may contain affiliate links for your convenience. If you make a purchase through one of my links I will earn a small commission at no additional cost to you.
Last Updated on April 22, 2023 by Chris Butler
How to Apply Transfer Tape to Vinyl Without Bubbles
Hello crafty friends! Today I will show you an easy way to apply transfer tape to vinyl without bubbles or wrinkles. This method works for Cricut vinyl as well as other brands of vinyl.
The last thing you want is for your vinyl to be covered in wrinkles and bubbles, or for you to go from a gorgeous project to a sticky mess in less than ten seconds.
So today, you’ll learn a quick and easy way to keep those vinyl projects looking beautiful and clean!
But first, what is transfer tape for vinyl?
Transfer tape is a clear, sticky tape used to move vinyl from its backing to the project you’re working on. To do that, you first need to apply the transfer tape to the vinyl, and that’s where things can get a little sticky!
There are different types of transfer tapes. One you may have heard of is transfer paper. Transfer paper is a sticky, mostly opaque paper. Kind of like what you see on a lint roller.
Transfer tape is usually a clear plastic film. There are some transfer tapes that are not 100% see through, but I find the clear tapes easier to work with. You may have also heard clear transfer tape or paper referred to as application tape.
As you can imagine there are many different brands of transfer tape as well. One of my favorite transfer tapes is actually clear contact paper that you can find with the shelving liners at Walmart. It’s just the right amount of stickiness. My second favorite is Oracal Transfer Tape. It’s not too sticky, but it can be reused several times.
Cricut transfer tape is one of my least favorites. (don’t tell them I said that lol). Except for their strong grip transfer tape. High tack transfer tape is needed to transfer glitter vinyl.
And just to be clear, the transfer tape is used for adhesive vinyl. It’s the vinyl you use to make adhesive vinyl decals for signs, cars, mugs, a water bottle and more. Heat Transfer Vinyl (the kind you use for making shirts) comes with it’s own carrier sheet. Therefore transfer tape is not required for HTV.
Related: Which Vinyl Do I Use? Beginners Guide for Different Vinyl Types
How to Use Transfer Tape on Vinyl Video
The video below will show you how to apply transfer tape without bubbles. Scroll just past the video for written instructions.
Be sure to scroll to the bottom of the post for the list of transfer tape FAQs.

How to Transfer Permanent Vinyl
To begin, cut a piece of transfer tape slightly larger than your vinyl decal.
DON’T peel off the entire backing of the transfer tape. That’s a quick and easy way to end up with a big sticky ball of tape.
Instead, take your transfer tape and peel back one corner of the transfer tape. The hardest part is usually getting the paper peeled back from that corner.
Once the corner is free peel the backing paper away from the shortest edge. Pull it back just a little, so that you have one section of stickiness along the end of the transfer tape, and make a crease in the paper backing.
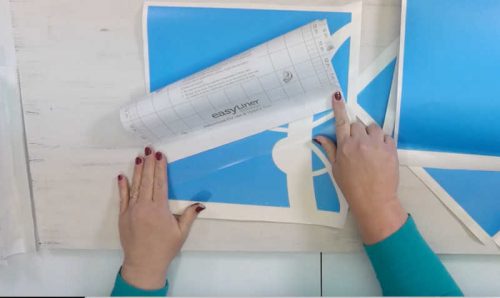
Apply the Transfer Tape to the Vinyl AND the Table
Next, apply that sticky section you just created to the end of the adhesive vinyl design you need to transfer. Part of the transfer tape also need to stick to the table or the project you’re working on.
Or if you prefer, leave the adhesive vinyl on your cutting mat. Remove the mat from your Cricut machine. While the transfer is still on the mat, remove the excess vinyl and apply the transfer tape. Either way make sure an edge of the transfer tape is stuck down to something else besides the edge of the decal.
The idea is to hold everything down and keep it together while you’re working, so you don’t end up with air bubbles, wrinkles, or a huge sticky mess on your hands.
Grab the Ultimate Crafting with Vinyl Guide here and learn all the tips and tricks for working with adhesive and heat-transfer vinyl
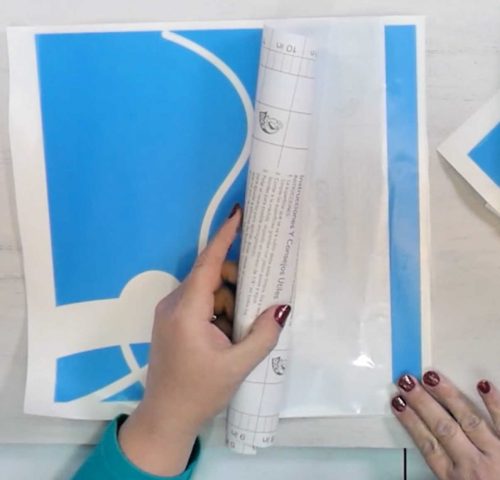
Remove the Backing While Smoothing Down the Front
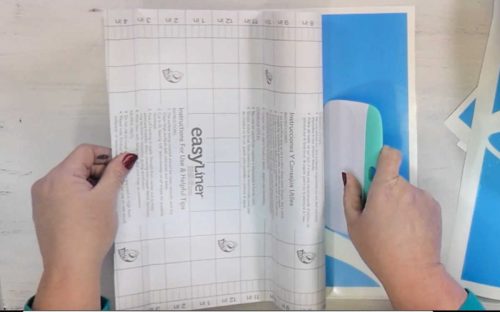
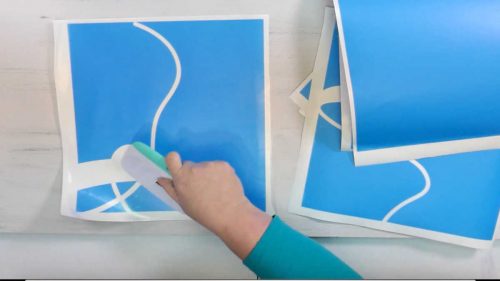
The key to this step is to do two things at once: remove the backing of the transfer tape with one hand, and smooth down the front of the tape onto the entire design with the other hand.
Tip: You can just use your hand, or you can use a large scraper tool to help you smooth it down. A small scraper will work, but if you have a large piece of vinyl, it’s best to use your hand.
So let’s recap a little. Right now, you have your vinyl with the transfer tape stuck to one end, holding it down on the table or project. On the back side of the tape, you have that little tab you created by folding back and creasing the tape backing.
Pull that tab away from the sticky edge to remove the backing, and, at the same time, take your scraper (aka burnishing tool) or your hand and smooth the transfer tape down in a line across the center.
Both of your hands should start at the same end of the vinyl (the end you stuck the transfer tape to) and move towards the opposite end at the same time.
In the video above you’ll see how this motion works.
Then, once you have removed the backing sheet, smooth out the rest of the transfer tape, starting from the center, scrape down or burnish it onto the rest of your vinyl.
It’s as easy as that.
Don’t worry if it doesn’t turn out perfectly on the first try. You might need to practice a few times to get it totally smooth, and that’s fine! Once you get the hang of it, though, you’ll apply your transfer tape easily – and without the mess.
Related: How to apply vinyl decals with the hinge method
Frequently Asked Questions About Using Transfer Tape:
Yes, when making adhesive vinyl decals you need to use transfer tape to get it to your final project.
One Cricut transfer tape alternative that you may have on hand is Glad Press’n Seal. But I prefer to use clear shelf liner that you can find at places like Walmart. (Check the Amazon price here) That is the best transfer tape for vinyl that I’ve found.
UNLESS you are transferring glitter vinyl, then you will need a special strong adhesive transfer tape
The short answer is no. In most cases if you try to use sticky transfer tape on paper, your paper will tear.
However you can de-stick the transfer tape a little bit and use it successfully with paper
There are few things worse than a transfer tape that is too sticky. First, make sure you’re transferring your vinyl to a clean surface so it will stick.
Use firm pressure with your scraping tool to burnish (rub really hard) the vinyl onto your project.
If the vinyl still won’t come off the tape, grab your weeding tool.
Use the end of your weeding tool to pull the vinyl off the transfer tape and hold it down while you remove the tape. 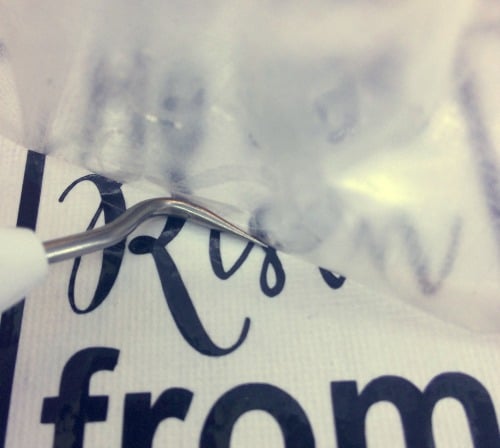
My favorite thing to use for regular vinyl is clear contact paper from places like Walmart. (Check Amazon Prices here) It’s the perfect amount of sticky for transferring vinyl.
The only exception to this is when using glitter or other textured vinyls, they need a super-strong transfer tape.
No you do not. Heat Transfer Vinyl or HTV comes with its own carrier sheet.
If your transfer tape will not stick to the vinyl first check your vinyl type. Glitter vinyl will need a stronger transfer tape. Next make sure you are applying firm pressure with your scraper tool (also called burnishing) over the entire area of vinyl you are trying to transfer.
Now you know how to apply transfer tape to vinyl without bubbles, wrinkles, or a sticky mess. Plus you know the best transfer tape to use for vinyl and what to do if things don’t go quite as planned.
I can’t wait to see what you make! 😊
Thanks for crafting with me today!
Vinyl Tutorials that Will Help You
How to apply vinyl with the wet method
How to Reverse Weed Vinyl for Intricate Designs
How to use Color Changing Vinyl with Cricut
How to Apply Transfer Tape To Vinyl

Learn how to apply transfer tape to vinyl like a pro! Our step-by-step guide will help you achieve perfect vinyl transfers every time. Whether you're a beginner or an experienced crafter, our tips and tricks will help you master the art of transfer tape application.
Materials
- Transfer Tape
- Vinyl Decal Transfer
Tools
- Scraper Tool or Credit Card
Instructions
- Cut the transfer tape slightly bigger than your vinyl decal
- Remove the paper backing from one corner of the transfer tape and peal back the shortest edge.
- Crease the paper backing to make a pull tab
- Place the sticky side of the transfer tape over the edge of the vinyl decal so it sticks to the work surface
- Using the pull tab you created, pull the paper backing off of the transfer tape with one hand, while smoothing down the top center with your other hand.
- Use your scraper to burnish (rub really hard) the transfer tape to the vinyl decal starting in the center and working your way out to the edges.
Notes
The video shows the motion of applying transfer tape in action. This is the best way to apply transfer tape without air bubbles and wrinkles.

Chris Butler has helped thousands of crafters learn how to use their Cricut machine without feeling overwhelmed. She is a best selling author and an up and coming designer. For fun Chris enjoys designing SVG Files, hanging out with her family (preferably at the lake), traveling, and volunteering at her church. She is a wife and mom of two crazy fun kids.
Hi! Newbie here, I was trying contact paper as my transfer tape and there’s sticky residue on my vinyl now. Any thoughts on how to safely remove that without ruining my project? Thanks!
Oh no! What brand was it?
Hi Chris! Do you leave your vinyl design on the mat while you apply the transfer tape? Thank you !!!!
Sometimes I do, especially if I am using a roll of vinyl.