This post may contain affiliate links for your convenience. If you make a purchase through one of my links I will earn a small commission at no additional cost to you.
Last Updated on December 19, 2023 by Chris Butler
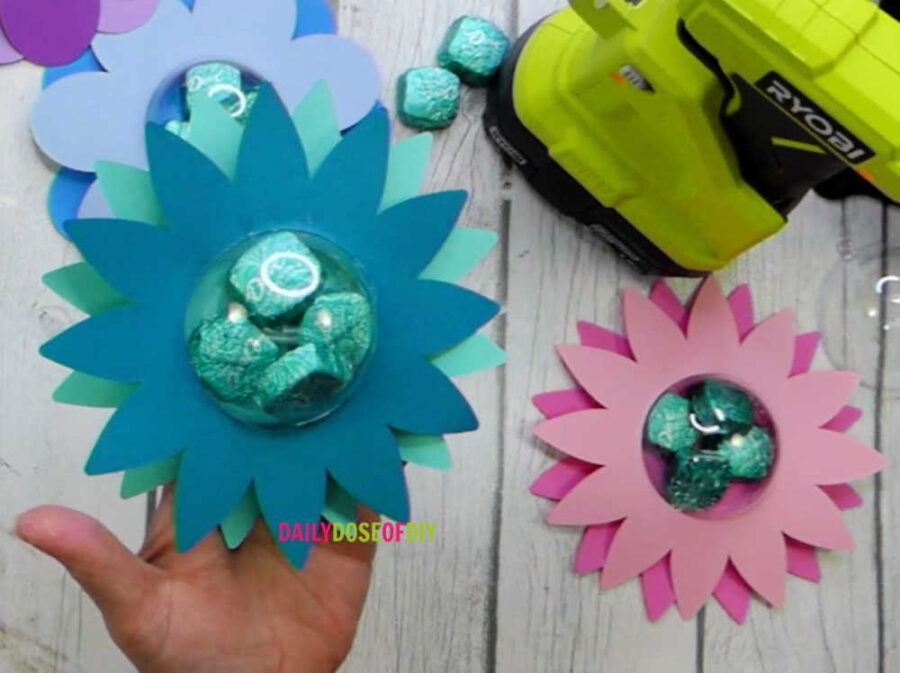
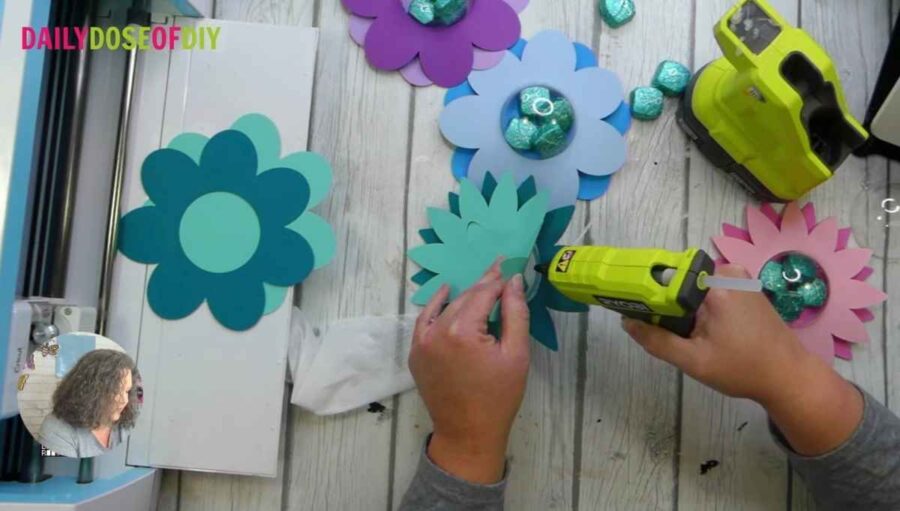
Hi Crafty Friends! Today I wanted to share this adorable paper flower candy holder craft with you. These flowers are cute enough to share with all of the special ladies in your life this Mother’s Day. They would also be great party favors, table decor, and more. And I’ve made a free SVG file for you to download that will make this craft super simple!
Looking for some other Mother’s Day crafts? Check out this beautiful shadow box display that can be customized for mom!
Watch the tutorial video for how to make a paper flower candy holder below. Then check out the supplies list to make your own!
All of our free SVGs and Designs are kept in a library for your convenience. Fill out the simple form and we’ll send you the link and password to access the SVG files right away.
Already have the password? Enter the Library HERE
Quick Links to Information in This Post
Supplies for Paper Flower Candy Holder
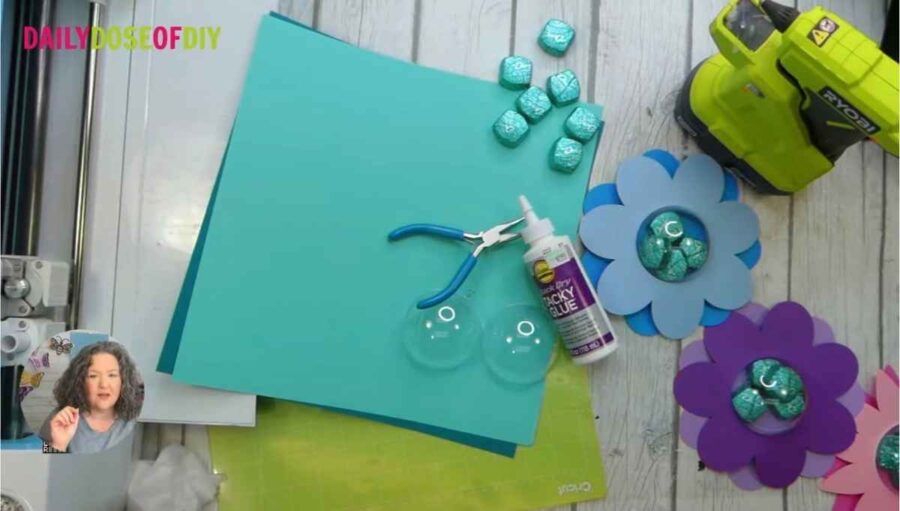
To make a paper flower candy holder you will need:
- Tacky Glue
- Hot Glue Gun
- Candy
- Clear Plastic Christmas Ornaments (70mm) – https://amzn.to/39E1e1D
- 2 Coordinating Colors of Medium-Duty, Solid Core Cardstock – https://amzn.to/3FjG6te
- Needle Nose Pliers
- Cricut Cut Mat
- The Free SVG File found in the SVG Library, sign up here – https://dailydoseofdiy.lpages.co/svg-library/

Step 1: Upload Your Paper Flower Candy Holder Design
First, we need to download the free paper flower SVG File and upload it to Design Space. If you need extra help with downloading please see this post.
When your design has been uploaded, add it to your canvas in Design Space. The flower has already been sized appropriately for a 70-millimeter plastic Christmas ornament, so don’t change the size unless you have a different sized ornament.
At the current size, I can make 2 paper flowers from one sheet of 12″x12″ cardstock. Since I want to cut 2 flowers from the same cardstock, I’ll need to change the color of my layers in Design Space. To do this, ungroup the design so that you can click on each layer of the flower separately. With one layer selected, click the colored square in the top menu and select a color close to the material you’ll be using.
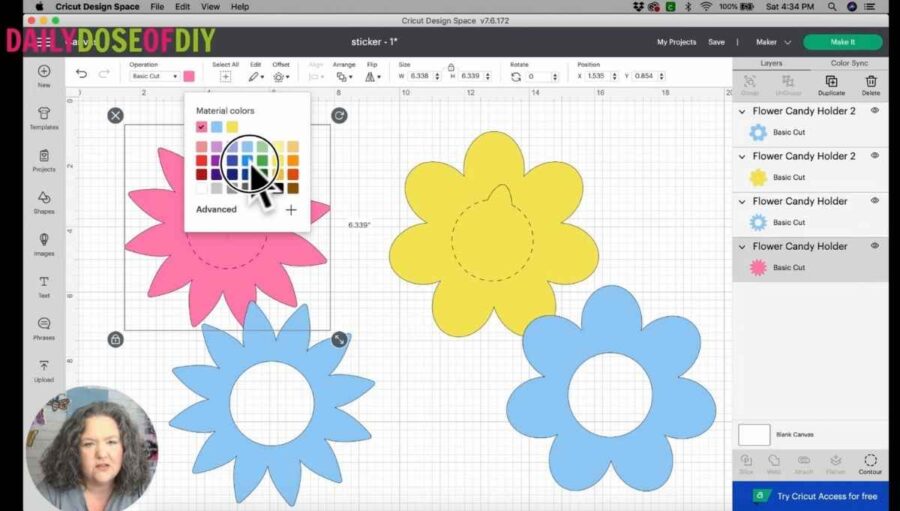
Make sure that both top layers are the same color. Then, change both of the bottom layers to a different color than the top. When your colors are set, click ‘Make It’ to go to the mat screen.
How to Move Your Design to a Different Mat
Hopefully Design Space will realize that 2 flowers will fit on one mat, but if it doesn’t don’t worry. Since mine split into 4 separate mats, I had to change it manually.
To change which mat your layers will be on, select the second mat, and click on the design. In the top left corner of your design you will see three dots. Click the dots and then select ‘Move Object’.

Design Space will ask you which mat to move your design to. Select mat 1. Now both layers should be on one mat. Make sure you move the design far enough over that the cut lines don’t overlap.
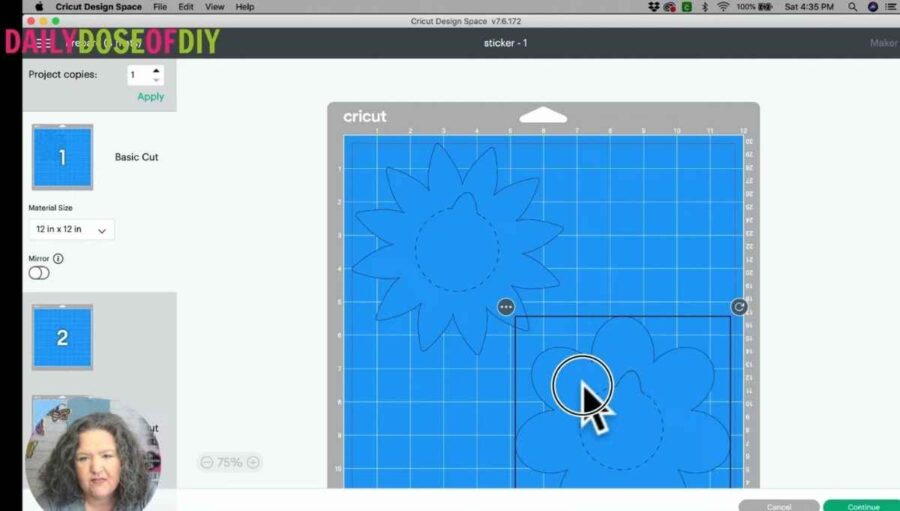
Repeat the process for your other 2 layers, then click ‘Continue’.
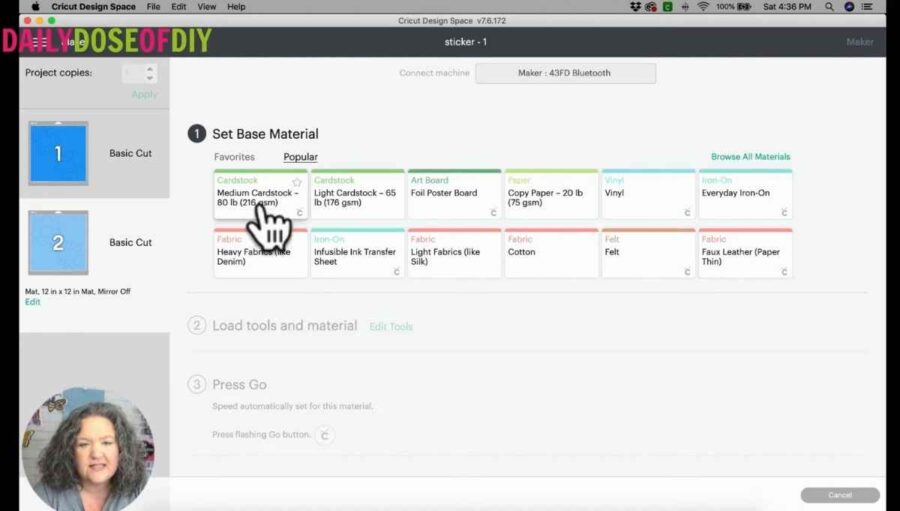
If you have a Cricut Explore, set your dial to cardstock. If you have a Cricut Maker, select medium cardstock from the materials list. Now you’re ready to cut out your flowers!
Step 2: Cut Your Paper Flowers
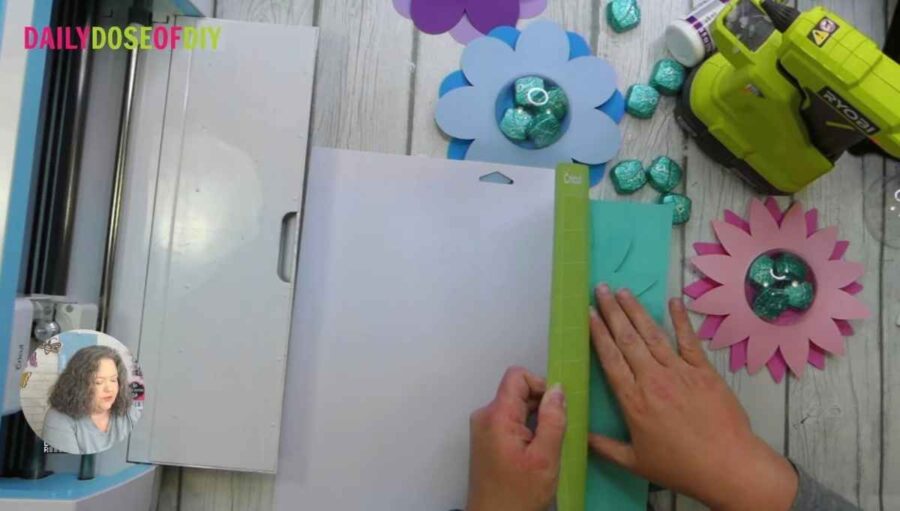
Now, your Cricut is ready to cut. Place your cardstock onto your mat and then load the mat into your Cricut. Give your machine a few moments to cut out your design, then click the arrow button to unload your Cricut mat.
To remove the flowers from your cut mat, turn the mat over and pull it away from the cardstock while using your other hand to hold the flowers down. Make sure you don’t bend the mat up too far or it may crack.
Repeat this process for your second mat and then you are ready to assemble your paper flower candy holder!
Step 3: Glue the First Layer of Your Paper Flower
Most plastic ornaments have a small tab to place a hanger from. Before you can put your flower together, you’ll need to remove that tab.
To remove the tab, use your needle nose pliers. Just gently bend the tab back and forth until it snaps off.

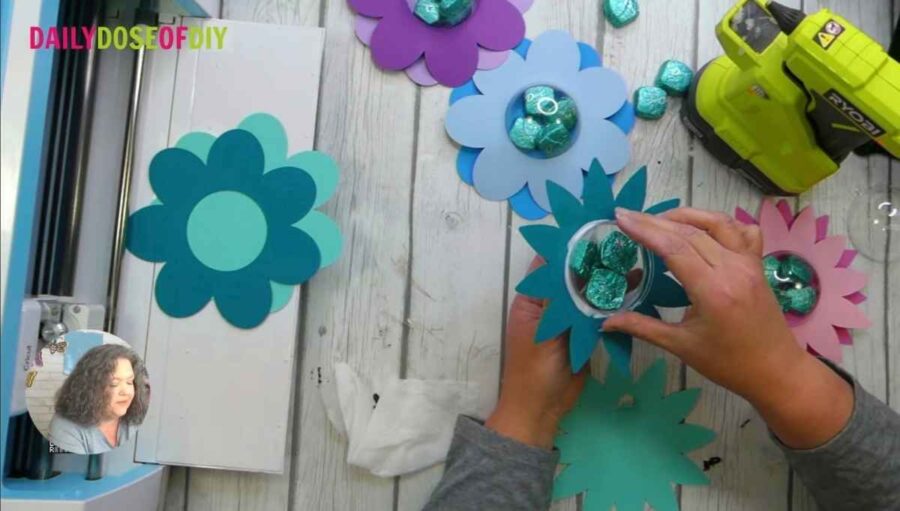
Next, you’ll need the cardstock layer with the hole in it and your tacky glue. Place a very thin layer of glue around the edge of the circle, and use your finger to place glue on the inside rim of the circle.
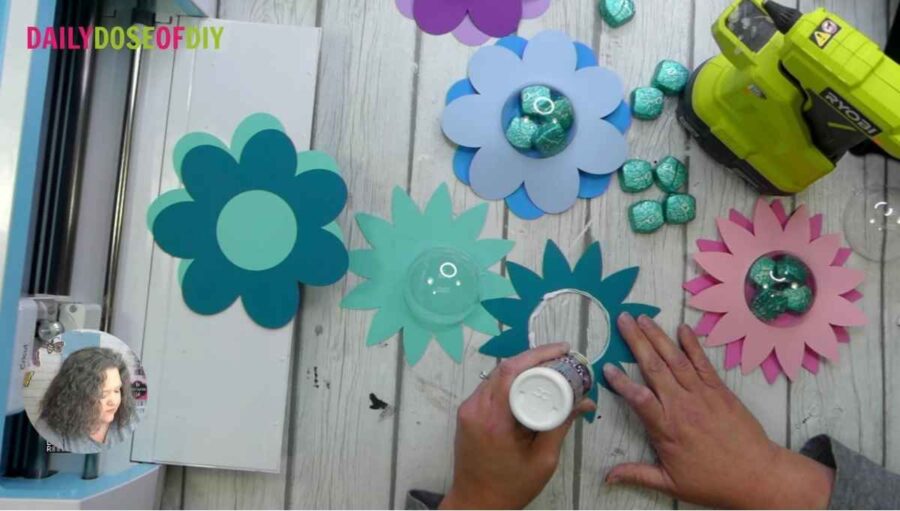
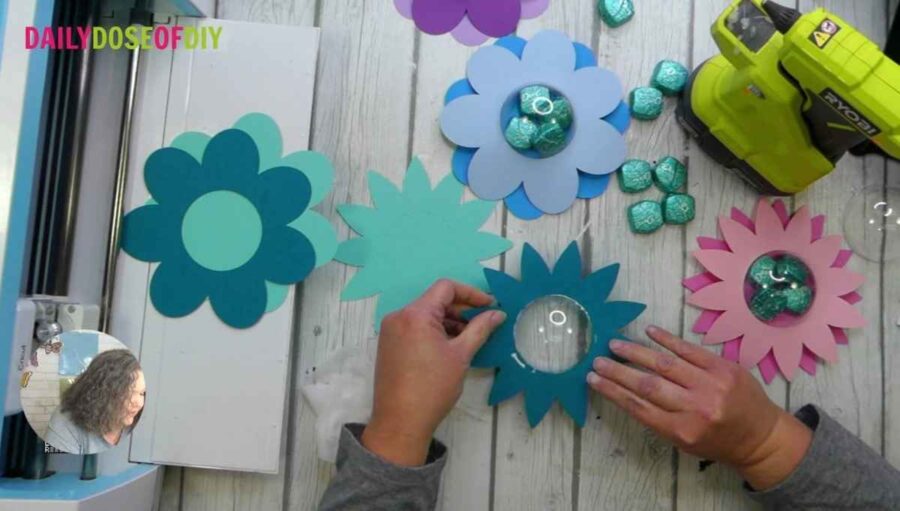
Then, place the plastic ornament flat on the table, turn your cardstock with a layer of glue over and place it down slowly over the ornament, being careful not to get too much glue on the clear bulb.
The layer of cardstock won’t go all the way down to the edge of the ornament, but should stop just short of it, giving your paper flower a 3D effect.
The glue will dry clear on your cardstock but will make your plastic bulb look cloudy. Wipe off any excess glue with a cleaning wipe and then let the first glued layer dry for just a minute.
Next, turn your plastic ornament over and fill it with candy with the front of the candy wrapper (the pretty side) facing down.
Step 4: Glue the Second Layer of Your Paper Flower
Now, before we glue the second layer of cardstock, you’ll want to pop the pull tab out. Just gently fold it out so that when you’re ready to get the candy out the tab is easily accessible.
Note: The perforated lines won’t work perfectly for pulling the back layer off if you use a heavier cardstock. It will probably tear, but no worries – you can still get your delicious candy!
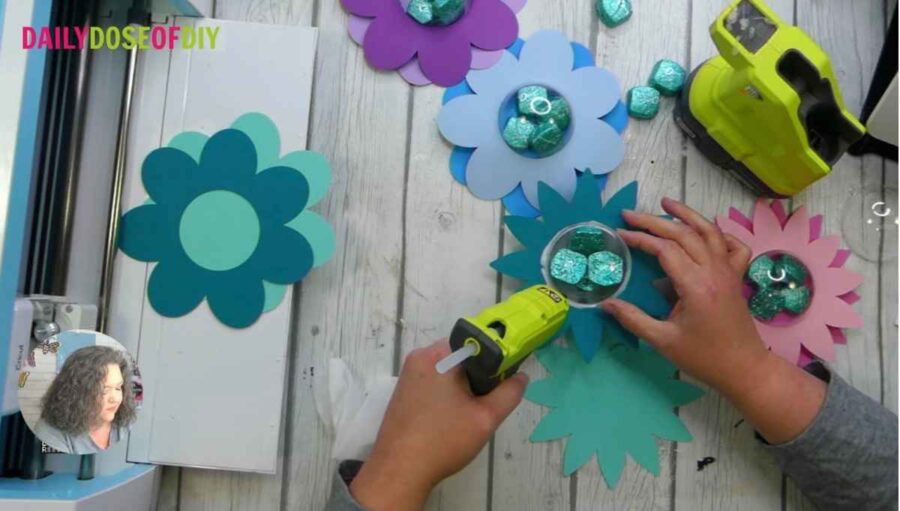
To glue the back layer on, I like to use my hot glue gun rather than tacky glue. It tends to hold better, and it dries faster. However, if you try to place hot glue around the entire rim of the ornament, it may start to set before you have your second layer in place.
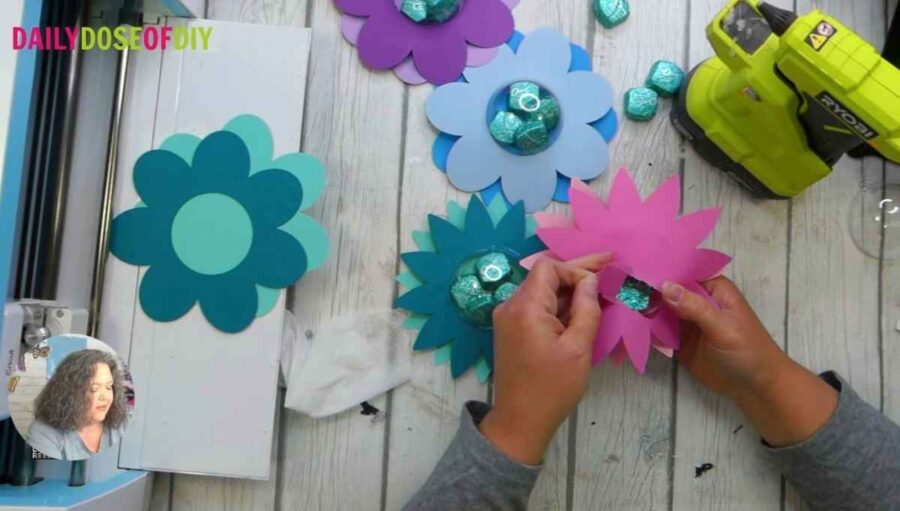
So, for the second layer, run a small line of glue at the top and bottom of the ornament rim with your glue gun. Be careful not to get glue on your candy!
Then, quickly pick up your second layer of cardstock and try to line up the rim of the ornament with the perforation lines.
Once the layer is in place flip the paper flower over and lay it flat on the table. You should have enough time before the glue dries to turn the ornament so that the flower petals of the top and bottom layer are fanned out and not overlapping.
There isn’t enough glue on the back layer to be able to pick your flower straight up from the table yet. So, slide the flower to the edge of the table and support the back of the flower with your hand to turn it back over.
Now you can lift up the side of your back layer and run another line of hot glue to finish attaching the cardstock to the rim of the ornament. DO NOT glue the pull tab down.
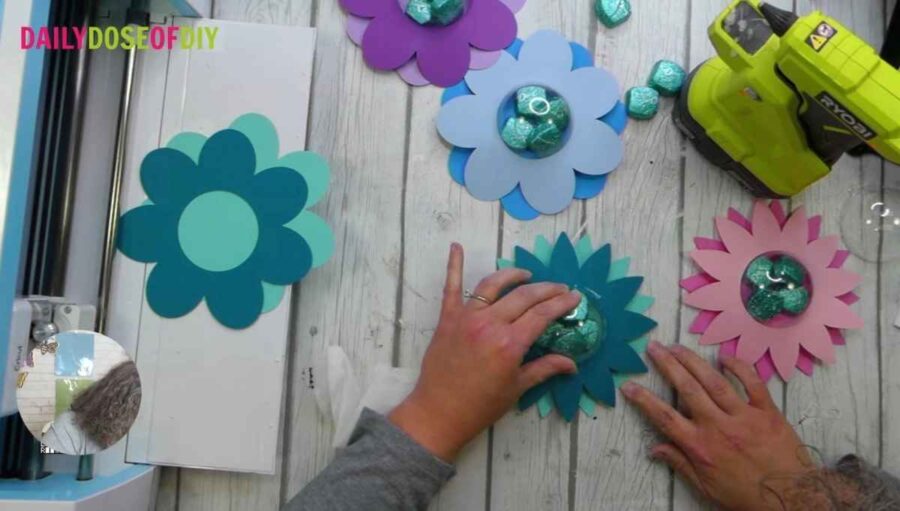
Give the glue a minute to dry and then pull the cardstock up gently to see if you missed any spots. When you’re satisfied that the second layer is attached, you’re done!

Now you’ve got some adorable gifts to give out. Just pull the tab and get a sweet surprise!
Thanks so much for crafting with me today and learning how to make this paper flower candy holder for gifts and party favors. Don’t forget to grab the free SVG File!
To grab the free SVG for this craft fill out the simple form below
All of my free SVG files and Designs are kept in a library for your convenience. Simply CLICK HERE to get access. We will send you the link and password right away and you’re free to use all the resources you want in the library.
Already have the password? (It’s at the bottom of every email) Enter the Library Here
Don’t Forget to Pin it!


Chris Butler has helped thousands of crafters learn how to use their Cricut machine without feeling overwhelmed. She is a best selling author and an up and coming designer. For fun Chris enjoys designing SVG Files, hanging out with her family (preferably at the lake), traveling, and volunteering at her church. She is a wife and mom of two crazy fun kids.
Love the flower candy holder!!! Thank you!
This is an amazing idea!!! I absolutely love it!!! Have you tried larger ornaments like the 4.72″/11.98cm. I was thinking wouldn’t it be awesome to put giftcards in them as well???