This post may contain affiliate links for your convenience. If you make a purchase through one of my links I will earn a small commission at no additional cost to you.
Last Updated on May 26, 2018 by Chris Butler
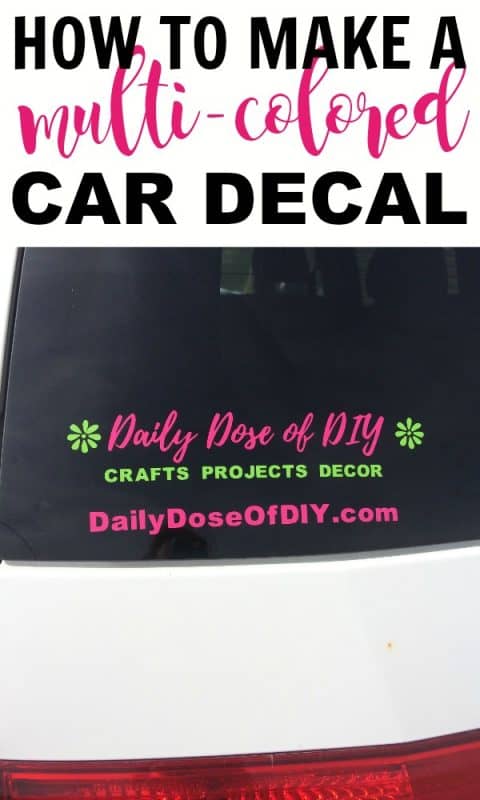
Do you have a business you want to advertise on your car? Or maybe a fun quote you want to share with the world? You can totally make your own multi-colored car decal with your Cricut cutting machine.
There’s a little trick to lining up the different colored words and graphics just right. Once you know it you will be able to vinyl all the things in more than one color.
Let’s get to it.
PIN IT
Quick Links to Information in This Post
Multi-Colored Car Decal Supplies Needed
- Oracle 651 Outdoor Vinyl
- Weeding Tools
- Transfer Paper or Contact Paper
- A Cutting Machine (I use Cricut Explore)
I made my car decal partially from my logo which is a .jpg image. You can upload jpg, gif, png, bmp, svg, or dxf files to design space to make your decal. You can also design your car decal right in design space.
Upload your File to Cricut Design Space
So to start, upload your file to Cricut design space. When it’s uploaded Cricut will ask you to select your image type. I always select moderately complex. Then click continue.
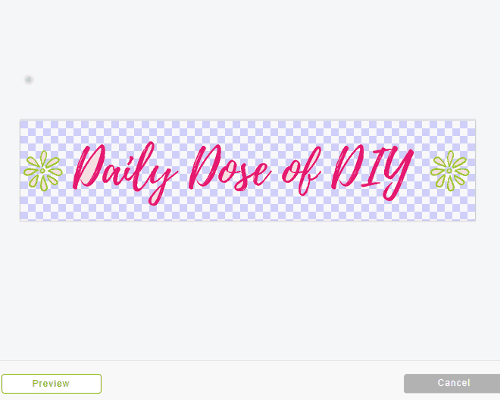
The next screen will ask you to select and erase. This is where we will clear out the background and the centers of the text and images.
As you click the background and centers away it will change to blue checks. In the above picture, I have the background clicked away. But I still need to click out the centers of the letters and flowers. If you accidentally click a letter away you can just hit the undo button on the top right.
When you are done click continue. The next screen you will choose if you want to save as print and cut or save as a cut image. Be sure to select save as a cut image.
Next select the image you just saved and click insert images. Now we are in design space and you can adjust the size of your image to the size you would like your decal to be. You can also add text or upload more images for your decal if you like.
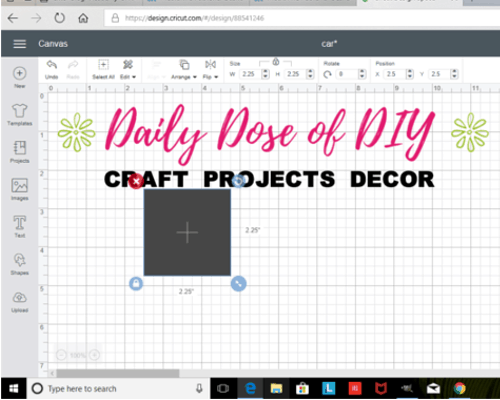
I decided to add CRAFTS PROJECTS DECOR under my logo and I just added that right in design space.
Fun Fact: It wasn’t until I was editing the video that I realized that this decal said CRAFT instead of CRAFTS and I had to re-cut it.
Preparing Your Decal To Cut Multi Colors
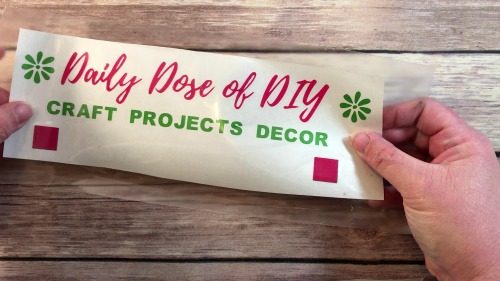
On my decal I want Daily Dose of DIY to be pink and the flowers along with crafts projects and decor to be lime green. And I want it all to line up perfectly as pictured when it goes on the back of my car.
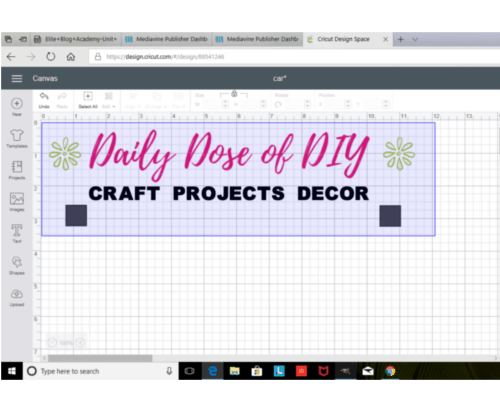
So to do this we are going to make two little squares to be our guide. Go to shapes and select square then size it down to a 1×1 square or smaller. Next right click on your square and select duplicate. Place one square on the bottom left of your decal and the other on the bottom right.
After your squares are placed select everything and click attach on the bottom right-hand corner (the paper clip).
I am going to cut everything together. Once in pink and once using lime green. For one reason if you upload a jpg as I did you can not change it to multiple colors. Even though it’s showing two colors in my example picture, when you select it as a cut file it will go to one color.
And second, we need those squares cut in both colors too. This will make it super easy to line everything up when we transfer.
If you don’t want to cut everything twice, there is a way to get the squares in both colors. I cover this method in detail in the post How to Make Knockout Designs found here. Just skip ahead to the layering adhesive vinyl section.
So once everything is attached, hit the make it button and cut your decal in every color that you plan on using.
Transfering Your Cut Decal
After your colors are cut we need to weed out the extra vinyl and also the words and images that we don’t want in that color. Be sure to leave the squares on every vinyl color.
After you’re done weeding you’ll apply the transfer paper to one of your vinyl sheets. Keep the backing of the transfer sheet handy, we are going to need it again.
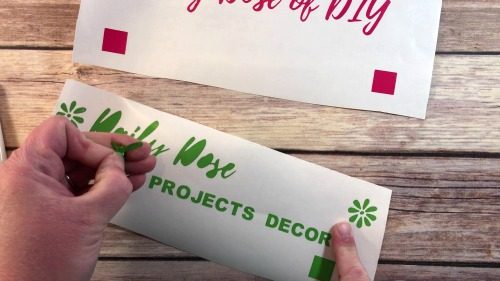
Use your Cricut scraper or a credit card to smooth out any bubbles and to get the vinyl to stick to the transfer paper. Then flip it over and slowly pull the backing off of the vinyl. Be sure all of your vinyl pieces are sticking to the contact paper. Now we’re going to replace the backing from the contact paper so it’s easier to line up the next color.
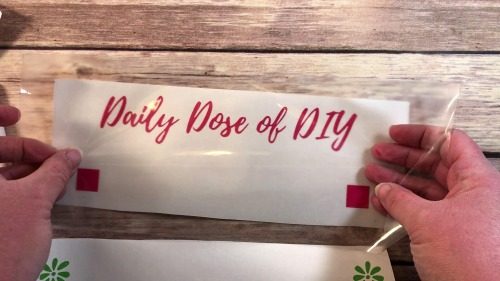
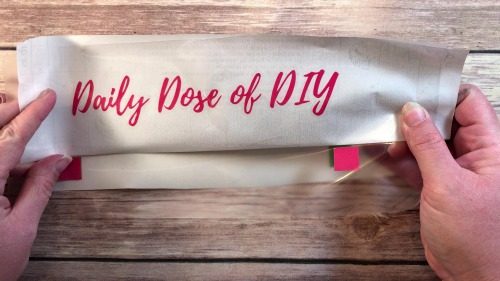
Fold back the contact paper backing so only the squares are uncovered. Grab your next color of cut vinyl and line up the first squares and press down so it sticks. Then line up your second set of squares and stick them together.
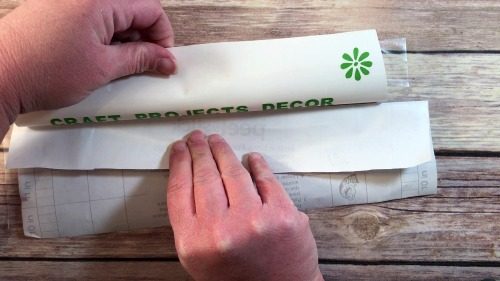
After your squares are lined up and stuck, flip your decal over and remove the rest of the transfer paper backing. Smooth down the rest of your 2nd vinyl color onto the transfer paper. Flip it back over and burnish (rub with the scraper) the second color onto the transfer paper.
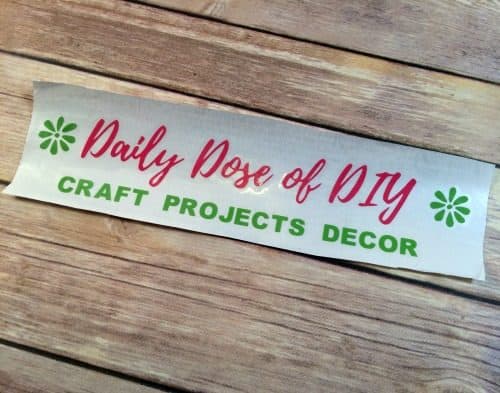
It lines up perfect! Repeat this process for every color you have. When you are done remove the last vinyl backing and replace it with the transfer paper backing. This is just to make sure all of your vinyl has stuck to the transfer paper ok.
Next trim up the sides and go ahead and cut off the squares.
Applying Your Decal To Your Car
Now we are ready to transfer it to our car. Be sure to clean your window or bumper before you apply the decal. Then remove the paper backing and stick the decal to your car.
Make sure it is positioned how you want because once it sticks it will be hard to get off without ruining it.
Again use your scraper to burnish the vinyl onto the car. Be sure to go over each piece of vinyl. Next, slowly pull off the transfer paper.
PIN IT
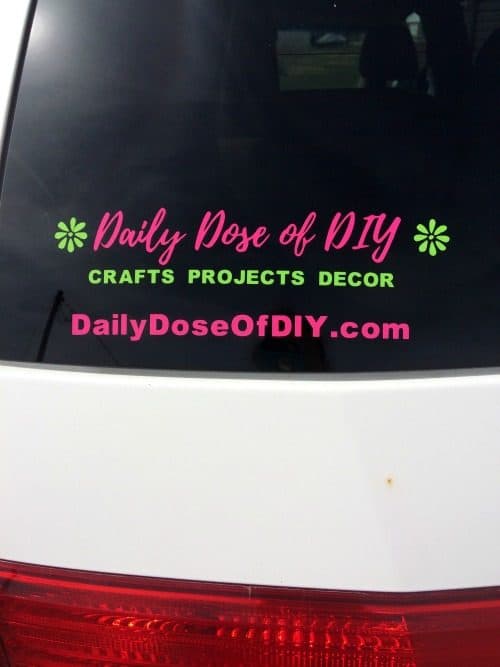
All done! I decided to go back and add my site URL too. But it was pretty easy to get one line centered.
Using squares to line up different colors of vinyl will work on multiple projects. Now that you know this little trick you can vinyl all of the things in multiple colors!
Be sure to join my weekly newsletter and get my latest tips and tutorials delivered straight to your inbox! Plus you will get exclusive access to my Free Resource Library where I keep all of my files, printables, and plans.

Chris Butler has helped thousands of crafters learn how to use their Cricut machine without feeling overwhelmed. She is a best selling author and an up and coming designer. For fun Chris enjoys designing SVG Files, hanging out with her family (preferably at the lake), traveling, and volunteering at her church. She is a wife and mom of two crazy fun kids.

Can you do full color with the printable vinyl, or is it not suitable for outdoor car use?
I’ve never tried it with the printable vinyl. They do make an outdoor printable vinyl, but you have to protect the ink with laminate or a spray sealer.
For the outdoor printable vinyl, as you said you can spray it with clear sealer. Also for those with the wallet for it, you can purchase a Laser Printer instead of an inkjet which provides slightly better print quality than a high end inkjet, but more importantly the print is also reasonably water and weatherproof. I use this combo to print my wine labels. Also, there is a way to do this project in design center with a single step with a single graphic or group of graphics and still print out a single sticker with everything properly aligned and ready to stick in place. It’s actually a simpler process.
IT Guy
I’ve been wondering about using a color laser printer vs. ink jet and didn’t see paper that was specifically suited to laser. Did you find it? Or are you using the vinyl that says it’s for ink jet?
Thanks in advance for the info!
Jeff
Be sure to check the printable vinyl as some can only be printed on with inkjet.
Could you just put the two colors of vinyl on the mat at the same time ?
Yes you can. And then when you get the to the screen with the cut mat you position them to match.