This post may contain affiliate links for your convenience. If you make a purchase through one of my links I will earn a small commission at no additional cost to you.
Last Updated on April 27, 2018 by Chris Butler
Don’t you just love the look of Ombre signs? It’s such a fun painting technique to do. In this post I will show you how to choose or mix your ombre paint colors and how to blend them from dark to light to achieve the ombre effect.
Plus you can swipe my free ‘Spirit Lead Me’ SVG design I have in my resource library. You can request access at the bottom of this post.
Let’s get to it.
PIN IT

Quick Links to Information in This Post
Supplies Needed for Ombre Sign
- Paint -Four shades light to dark or mix your own with one dark color and white (I love SeaPaint)
- Brushes (I prefer to use makeup brushes…minimal brush strokes!)
- Wood board approximately 12×12
- Cutting Machine (I use Cricut Explore)
- Stencil Vinyl and Transfer Paper
- Cricut Tools
- Spirit Lead Me SVG File (available in my FREE Resource Library -get access at the bottom of this post)
Choosing the Colors for your Ombre Sign
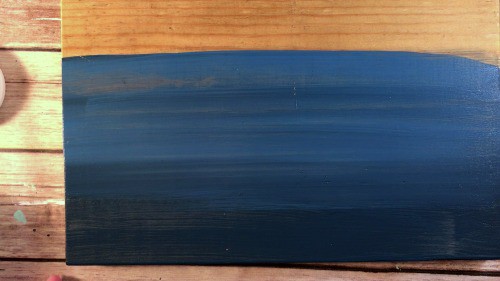
First decide the color you want your ombre sign to be. I decided to go with blues for this sign, it seemed the most fitting. Next, you are going to choose four shades of your color ranging from dark to light.
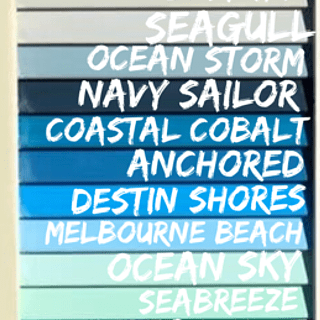
Image credit seapaints.com
The colors I used for my sign are Navy Sailor, Costal Cobalt, Destin Shores and Melbourne Beach. Besides the fact that SeaPaints have a handy-dandy color scale, their colors are highly pigmented. A little goes a really long way! Plus they are a dream to blend.
Mixing Your Own Colors
Another way to get 4 different shades is to mix your own paint. You can start with your dark shade and mix a little more white in each time.
Start with (3) 1/4 teaspoons of a dark color and mix (1) 1/4 teaspoon of white for your second shade. Mix (2) 1/4 teaspoons of your dark color with (2) 1/4 teaspoons of white for your third shade. And mix (1) 1/4 teaspoon of the dark shade with (3) 1/4 teaspoons of white for your fourth shade.
How To Blend Paint for the Ombre Effect
Now that we have out paint colors ready it’s time to get painting!
My board is approximately 12″x12″ and I have four shades of blue that I am using. So I want each shade to cover about 3″ of my sign. To figure this out simply take the height of your board and divide it by four. Then you can use a tape measure and a pencil to mark guidelines for each shade of paint.
I usually just eyeball it myself.
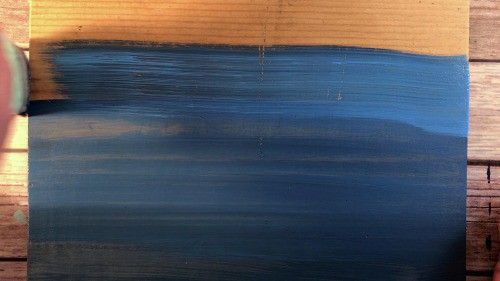
Start at the bottom 1/4 of your sign with the darkest shade and paint that section.
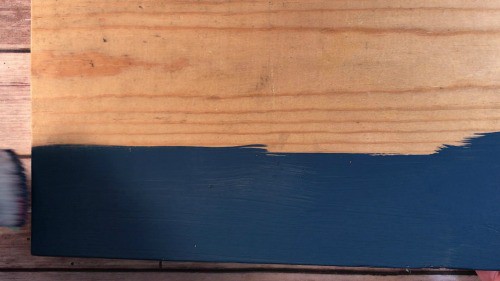
It doesn’t have to be perfect.
When that is done use your same paintbrush without cleaning it and dip it into your next color.
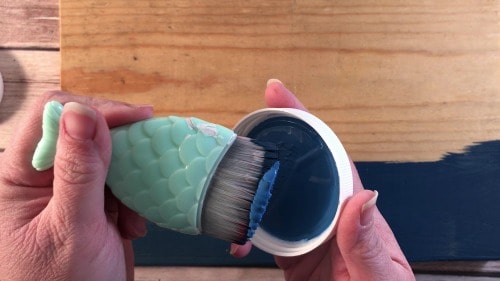
You don’t need to wait for your darkest shade to dry either, it blends better when it’s still wet.
Don’t you just love my little mermaid tail brush? They come with several of the kits SeaPaints sells. Plus those dense soft makeup brushes really minimize paint strokes.
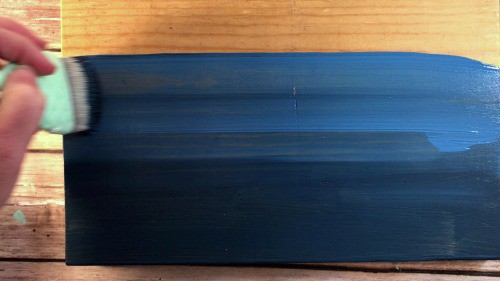
Be sure to overlap the dark blue with your new shade. You can see how having both colors on the brush is helping it blend itself.
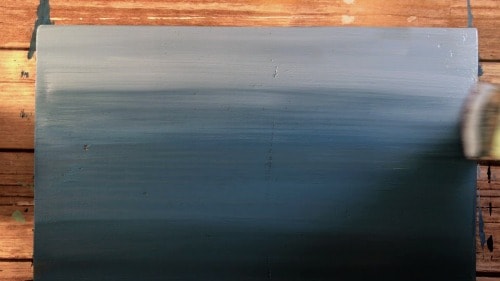
Dip your brush in the lighter shade again and paint upper part of this section.
You see how the upper part of the section is mostly the lighter shade of blue, and the bottom blends into the darker shade. You may have to go over where the two shades meet with your brush a couple of times to get a good blend.
Repeat this process for your next shade. Don’t clean off your brush yet, just dip it into the next color.
And then do your final lightest shade with the same process.
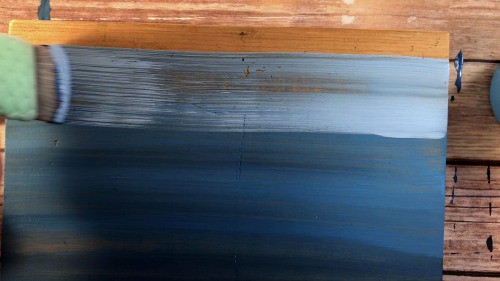
Even though you can see the lightest shade it still has a lot of the dark paint blended in it since we haven’t cleaned our brush yet. I want the tip top of my sign to be that true light shade.
Painting the Second Coat
So now we are going to clean out our brush really good and let this first coat of paint dry. If you are using SeaPaint drying time is only a few minutes. But you can speed up the process with a hairdryer.
With your clean dry brush and your lightest color, paint the top section again. I usually do the whole sign in a second coat. Reversing the order I did for the first coat.
So after my lightest color has a second coat, I dip my unclean brush in the next shade and work my way back down.
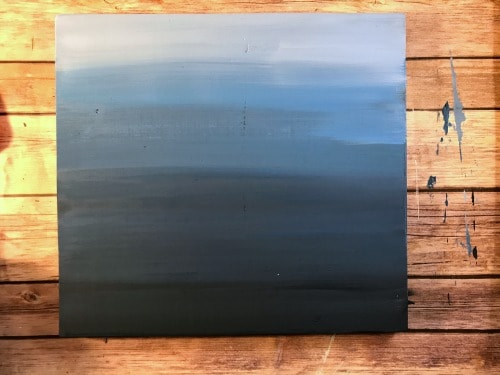
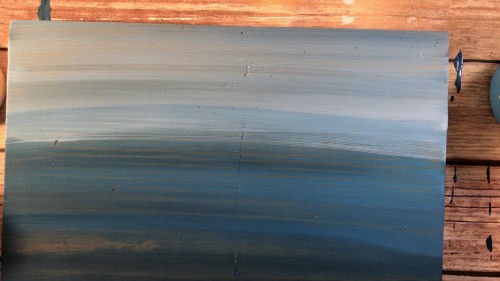
Here it is after my second coat. And I kept blending even more until I was happy with it.
It’s easy to keep going and going and going lol. It doesn’t have to be perfection. And I find if I work it too much I screw up a sign that looked pretty good to begin with. So be sure to stop when it looks pretty good, don’t go for perfect.
Here is my final sign.
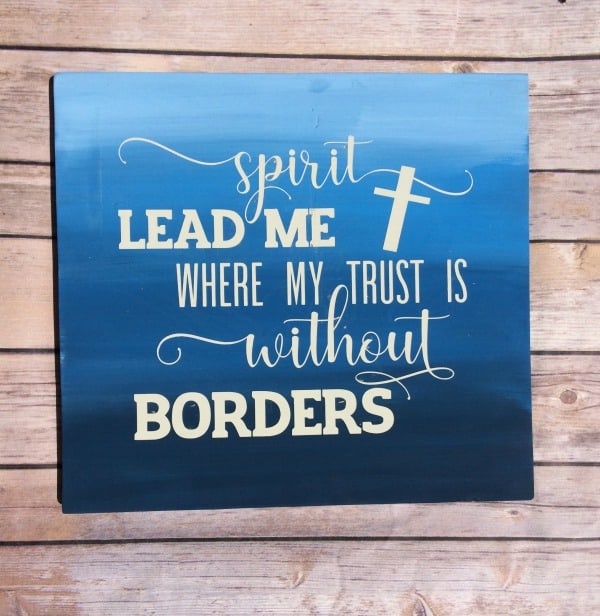
Applying the Stencil
I’m not a fan of putting poly over my base coat of paint before I put the stencil on. I know some people are. Maybe it’s my lack of patience for letting the poly completely dry and cure, but I’ve messed up more signs putting poly down first than I care to admit.
I use Oracle 813 Stencil Vinyl for my stencils. And a little paint may stick to it when I peel it off, but not enough that bare wood is showing through.
However once the stencil is down I will go over the letters with mod podge, poly, or my base coat of paint to make sure my stencil will not bleed.
For this sign, I used mod podge.
I have a whole post on how to paint a sign without bleeds or peeling up paint here. It also covers how to easily get your stencils on straight if you would like to check it out.
And if you need a quick and easy way to turn an SVG file into a stencil in Cricut Design space see this post.
Swipe My SVG File
I designed and painted this sign to donate as a door prize for a Mother’s Day Banquet coming up at our church. And I will totally share the SVG file with you!
I keep all of my files, plans, and printables in my free resource library that is available for subscribers.
When you sign up for my weekly newsletter you will get the exclusive password plus free lifetime access to this SVG file plus any others that I make. I love designing SVGs and have been adding new files weekly.
Be sure to follow me on Pinterest

And PIN IT for Later


Chris Butler has helped thousands of crafters learn how to use their Cricut machine without feeling overwhelmed. She is a best selling author and an up and coming designer. For fun Chris enjoys designing SVG Files, hanging out with her family (preferably at the lake), traveling, and volunteering at her church. She is a wife and mom of two crazy fun kids.
Leave a Reply