This post may contain affiliate links for your convenience. If you make a purchase through one of my links I will earn a small commission at no additional cost to you.
Last Updated on August 15, 2023 by Chris Butler
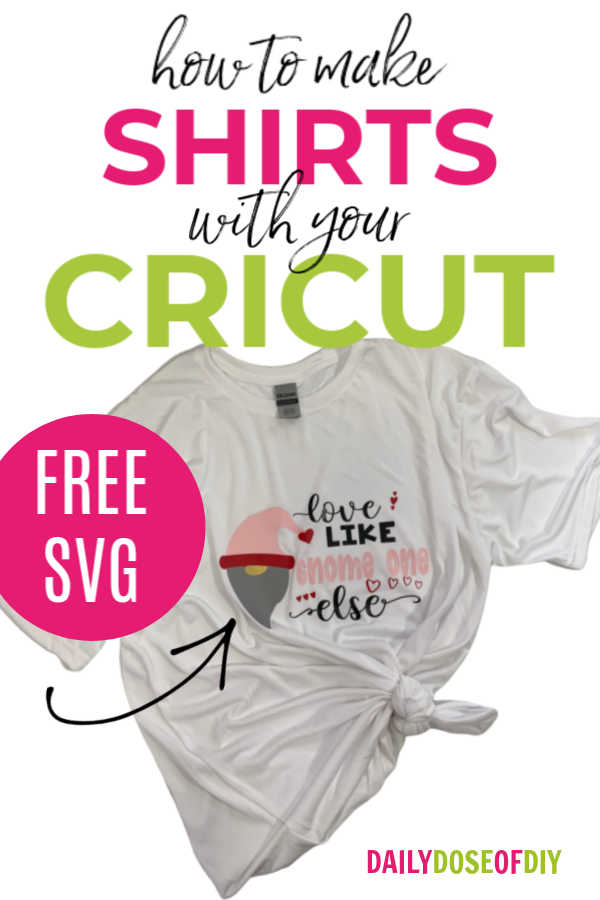
Hello my crafty friends! Hands down, one of the funnest things to make with your Cricut is T-shirts. So today I’m going to show you how to make shirts using a Cricut.
Quick Links to Information in This Post
Wait, Can I Make Shirts with My Cricut?
We aren’t ‘making shirts’ per se. As in we aren’t gathering up fabric and sewing together a shirt. But you can create your own custom designs or use ready-made designs called SVG files to make custom graphic T-shirts with your Cricut.
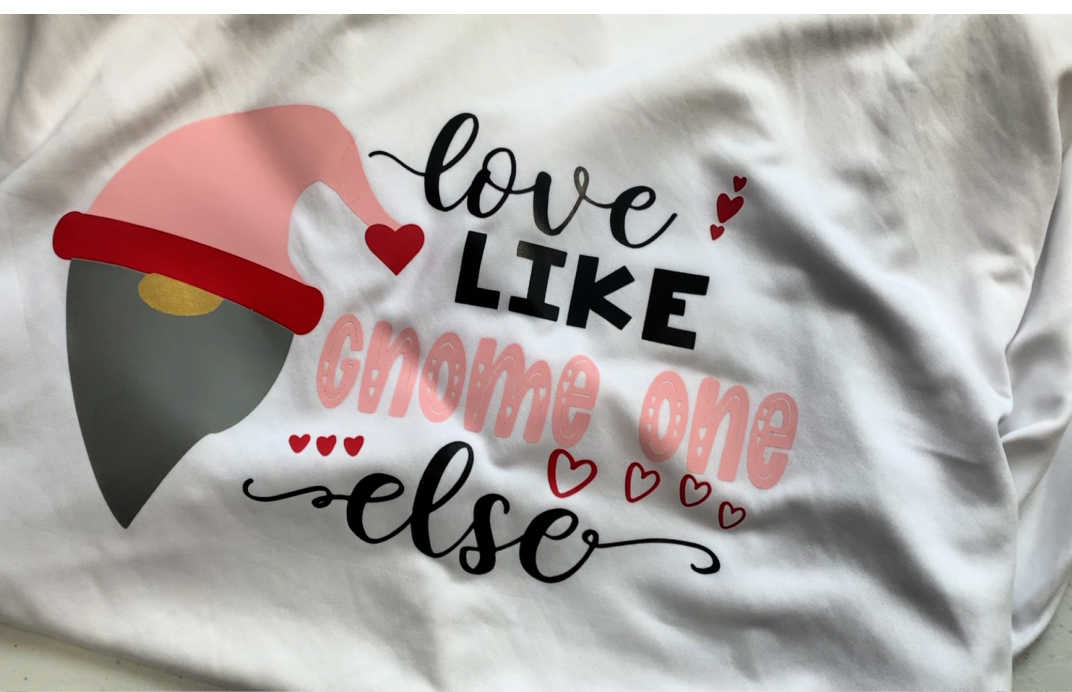
For the purpose of this tutorial I’m going to be using a design I made, and you’re welcome to use too called ‘Love Like Gnome One Else’ The details on how to grab this SVG is at the bottom of the post.
If you want to create your own design in design space my post here about working with text will help you out with part of the process.
We’re also going to learn how to layer heat transfer vinyl to make this shirt and I have some tips for you so you’ll never cut HTV wrong again.
If you prefer watching I have a video of this whole process just passed the supplies list.
Let’s get started.
PIN IT
What You’ll Need to Make Shirts with your Cricut
Parchment Paper or Teflon Sheets like these
Tape Measure
Heat Press or Cricut Easy Press
Heat Mat or Towels
Cricut Cutting Machine and Mats
Shirt Design – (You can totally swipe my ‘Love like Gnome one else’ design – details at the bottom of this post)
Make a Shirt with Your Cricut Video
Getting Ready to Cut Your Shirt Design
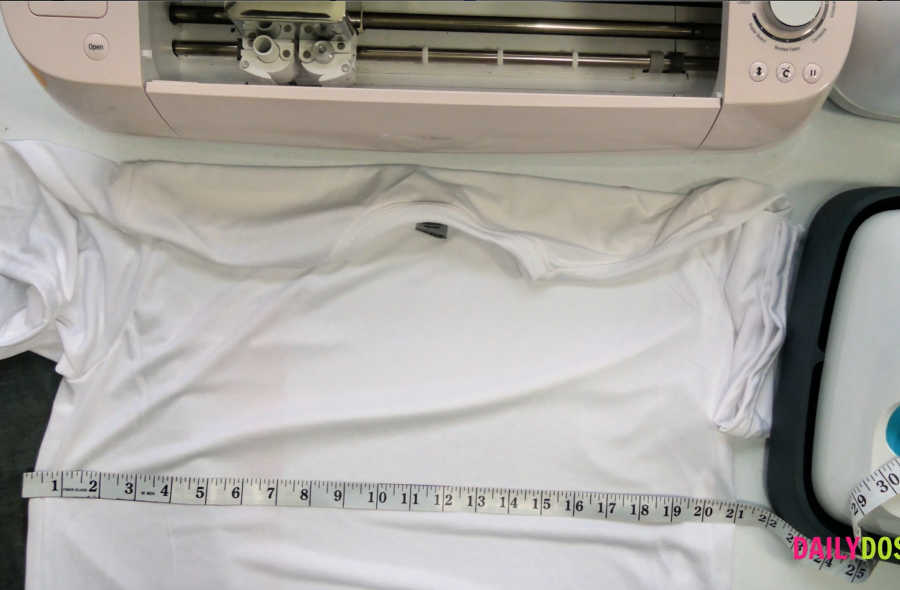
The first thing you’ll want to do is measure the width of your shirt. The general rule of thumb is to make your design around twelve inches less than the shirt is wide.
This shirt is 21 inches wide, so 21 minus 12 is 9. I ended up making my design 9.5″ wide. As long as you are in the ballpark of 12 inches less, you’ll be fine.
In Design Space once your SVG is uploaded you can change the size of it on the top menu under size. Just change the width to your desired size and the height will automatically adjust.
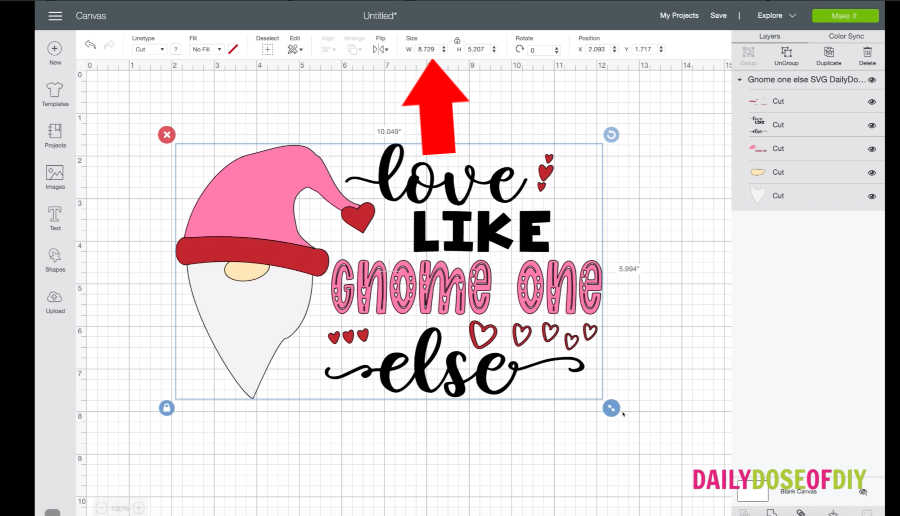
With this particular design after you set the size, you can click the make it button. Everything is already attached and ready to go for you. Other designs you may have to use the attach button on the bottom of the layers menu so the design goes to the cut mats as you see it in design space.
On the next screen, you will see a preview of the cut mats. The first biggest mistake with working with HTV is we forget to click that little mirror button.
And even if you click it for mat number one, it does not change all of them. You’ll have to click on each mat and then click mirror.
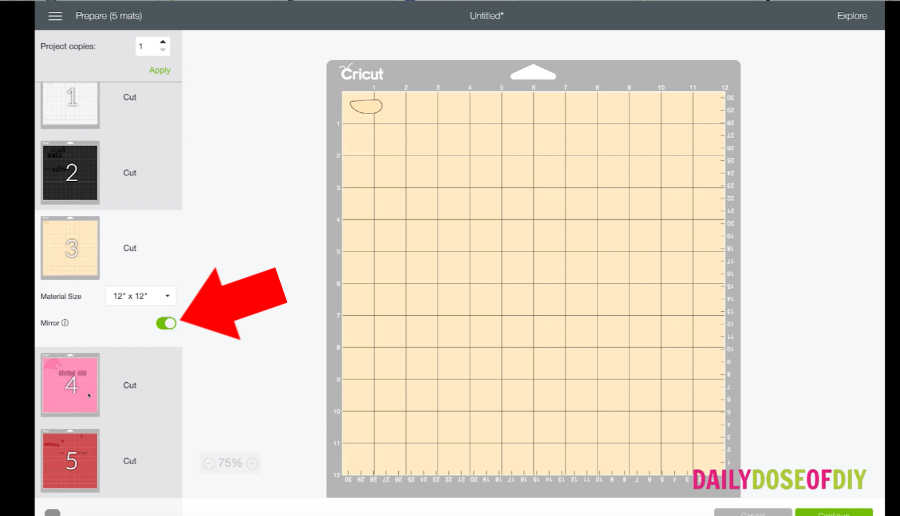
In the video you’ll see another common mistake (I made it myself during filming!). After I clicked through all of my mats to turn on mirror, I left mat 5 selected. So I loaded grey vinyl on my mat and was expecting Cricut to cut mat #1. But because I left mat #5 selected, that’s what Cricut started cutting.
So a little reminder to go back and click on mat #1 after you turn mirror on all of the mats. 😜
After all of your mats are mirrored and you’ve gone back up and selected mat #1 go ahead and click continue.
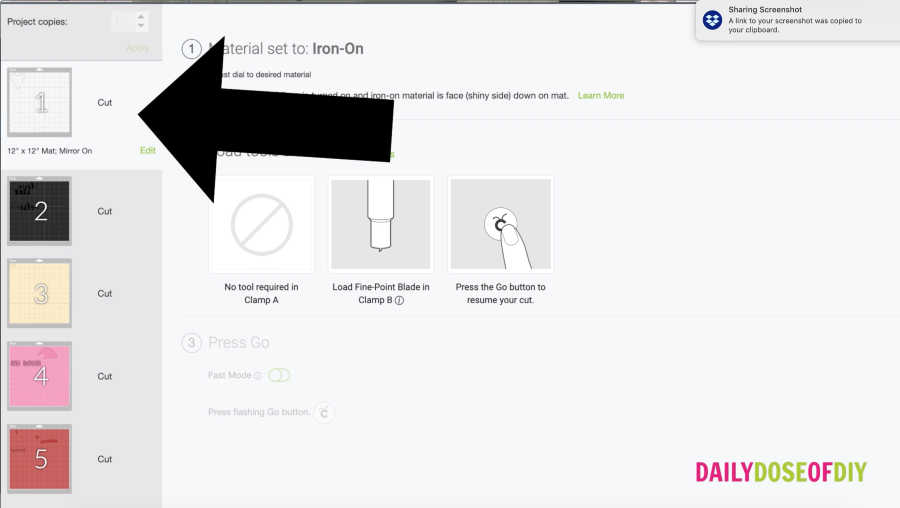
Next, if you have a Cricut Explore turn the dial to Iron On and if you have a Make choose ‘Everyday Iron On’ from the materials list.
Cutting and Weeding HTV For Cricut Shirts
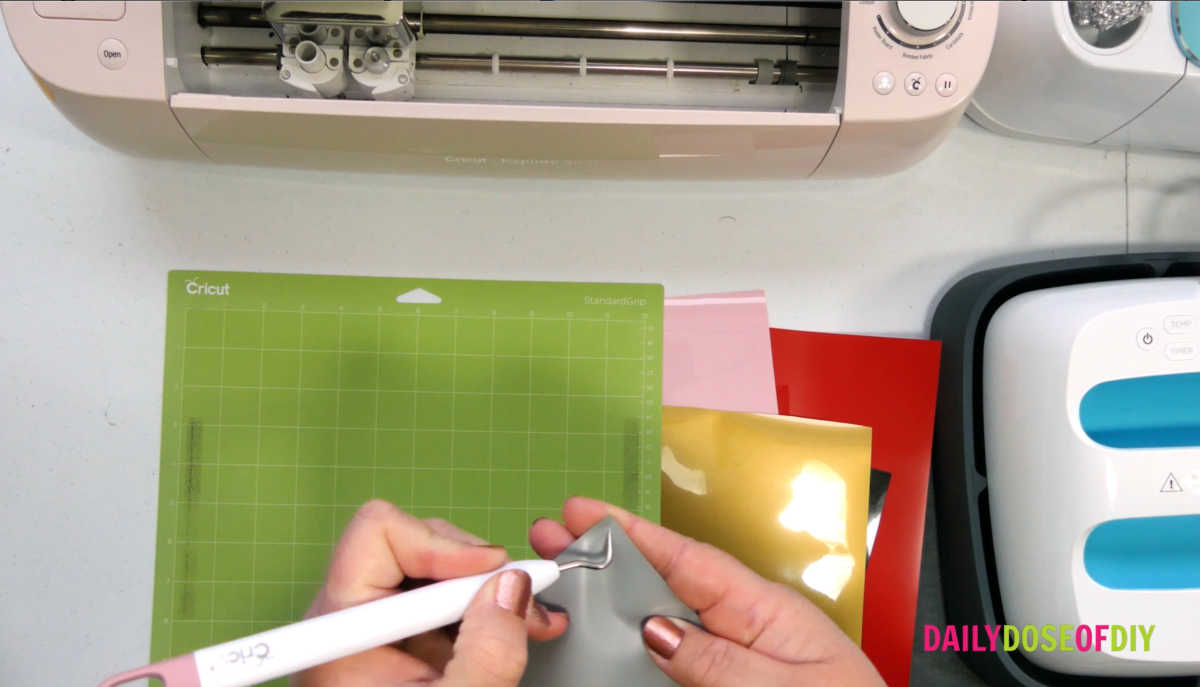
Now you’ll need to put your first color of HTV on the cut mat. Iron on vinyl comes attached to its own carrier sheet and the sheet is transparent.
Most of the time the instructions for your vinyl will say put the shiny side down. The shiny side is the carrier sheet of course. The problem is, some colors are impossible to pick a ‘shiny side’ because they look so similar.
So my fail-proof plan after wrecking a lot of vinyl is to make my weeding tool and poke at a corner of the vinyl first. If the weeding tool won’t poke through, that’s the carrier sheet side. And if you get the vinyl side you’ll be able to poke through and pull up a bit of the vinyl.
No more cutting the wrong side for me!
Go ahead and load and cut each of the colors you need for the shirt design.
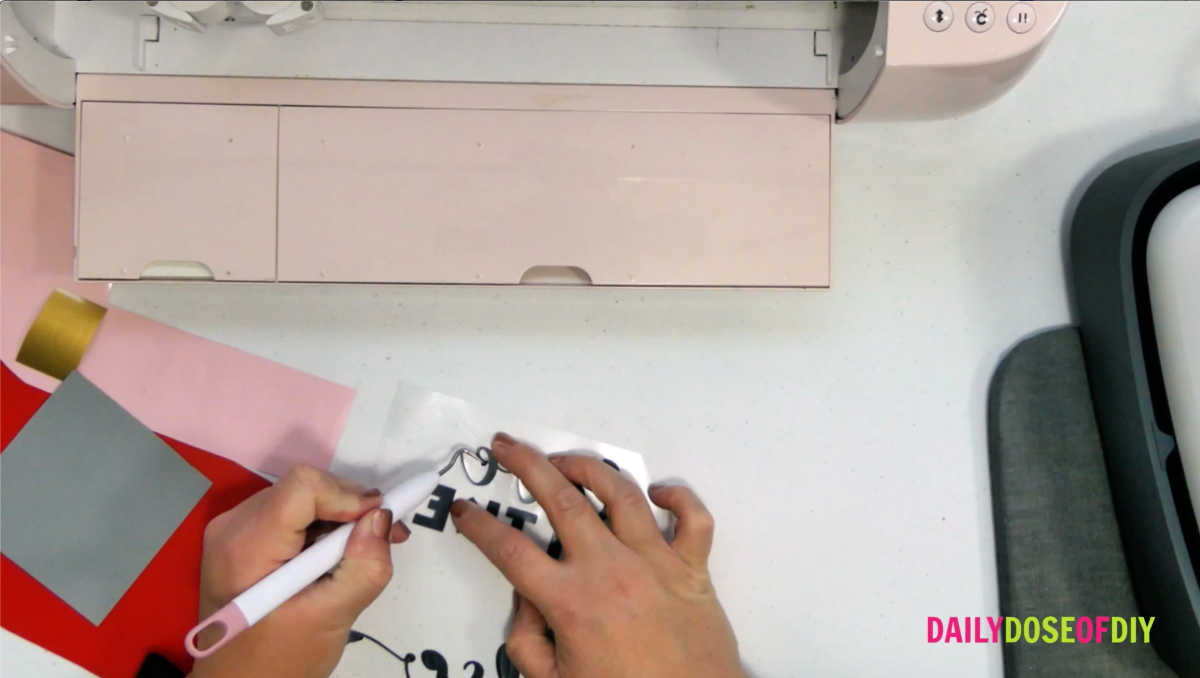
After everything is cut, we’ll need to weed the vinyl. Weeding is removing any pieces of vinyl that aren’t part of the design.
To get started poke your weeder tool into the vinyl of one of the corners and peel it off the carrier sheet. HTV is not sticky like adhesive vinyl. The carrier sheet is slightly sticky though.
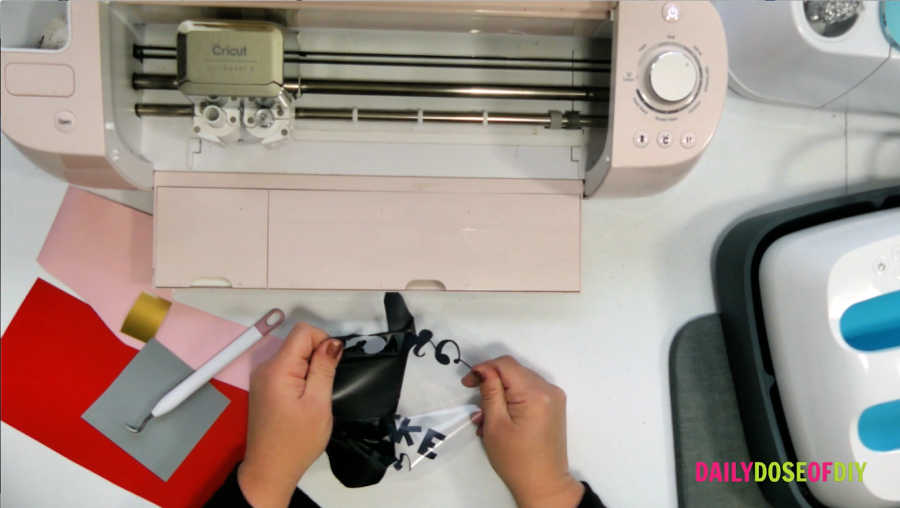
After you have the bulk of the extra vinyl removed use your weeding tool to go back in and get the smaller pieces like the insides of letters.
Repeat the weeding process for each sheet of vinyl that you have cut for your shirt and then we’ll be ready to heat press the shirt.
Heat Pressing Your Shirt
I’m using my Cricut Easy Press to press my shirt. A heat press will also work. Home irons are not recommended because they don’t get hot enough and they heat unevenly. They will get the vinyl to stick and will work in a pinch, but don’t expect the vinyl to last long at all.
To determine the time and temp that you need to use head over to https://cricut.com/en_us/heatguide. There you can select the type of your heat transfer vinyl and then select the fabric type of your shirt. They will tell you how long and what temp to use when pressing.
Set your Heat Press for the correct temperature and let it warm up.

You’ll need to pre-press your shirt to remove moisture and wrinkles. When I do this I fold the shirt in half and then fold it again at the armpit line. This will put creases in the shirt that will pinpoint the center.
Make sure you have your heat press mat or some towels under your shirt to protect your table.
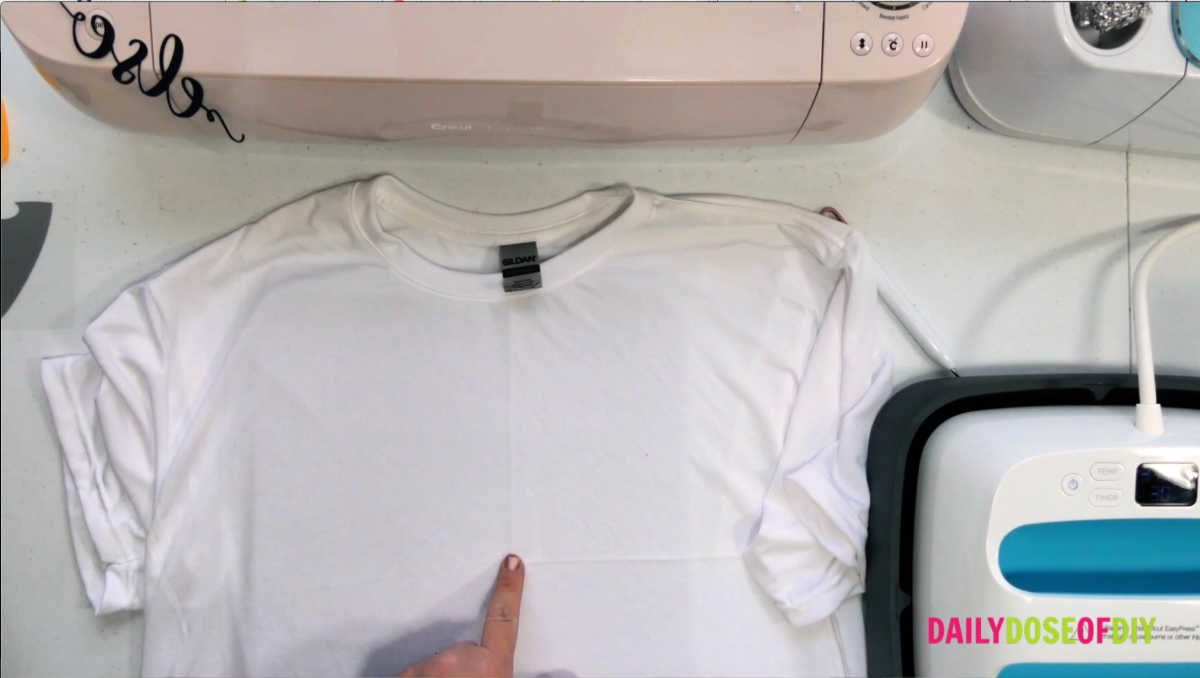
You may not need to use the center point depending on the size of your shirt. The top of the design should be 2-4″ down from the collar on most shirts. So some designs won’t even go down to the center point, but having the horizontal line there still helps keep things straight.
The vertical line is another story, we’ll definitely need that line to so our design doesn’t end up too far left or right.
To find the center of your design you can take the biggest piece you have cut and fold it in half to find the center. Or you can use design space to help you find the center.
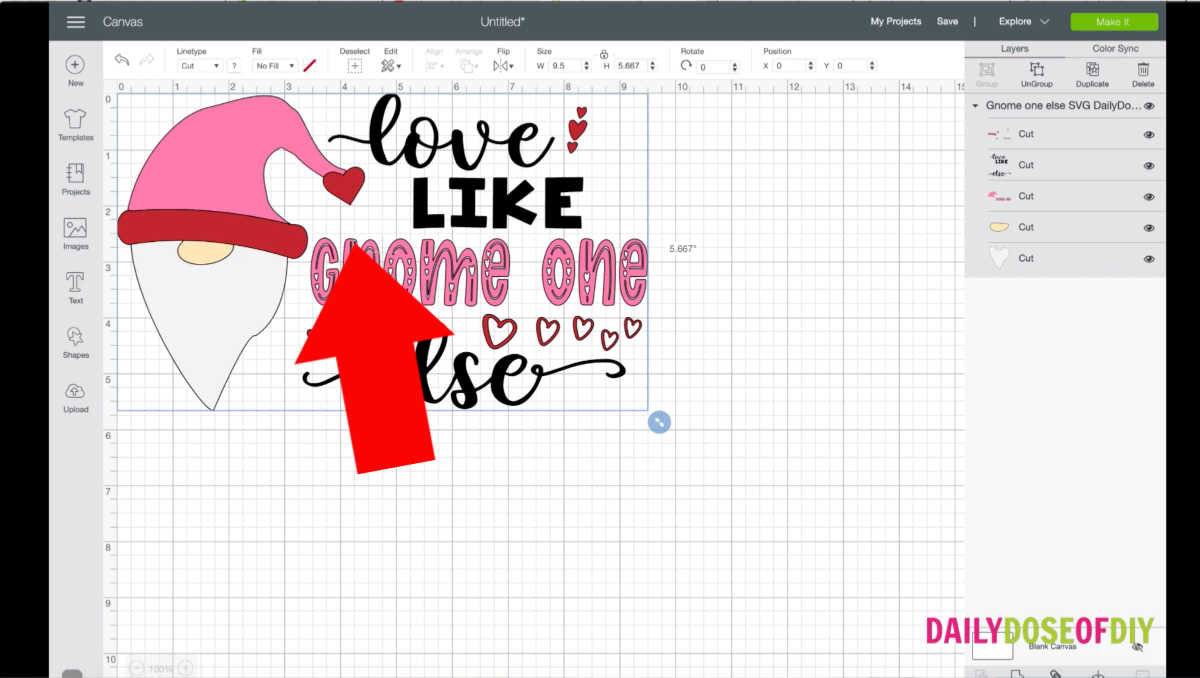
If you drag the design to the top left corner we can use the rulers in Design Space to find the center. It’s a bit like plotting in geometry class lol.
Anyway the design is 9.5″ wide and half of that is 4.25″. It’s 5.66 tall and half of that is approximately 4.75 inches. Since Cricut gives us 1/4 grids I can see that the tip of the ‘n’ in gnome is the center point. So that is my reference point for centering the shirt.
How to Layer Heat Transfer Vinyl on Shirts
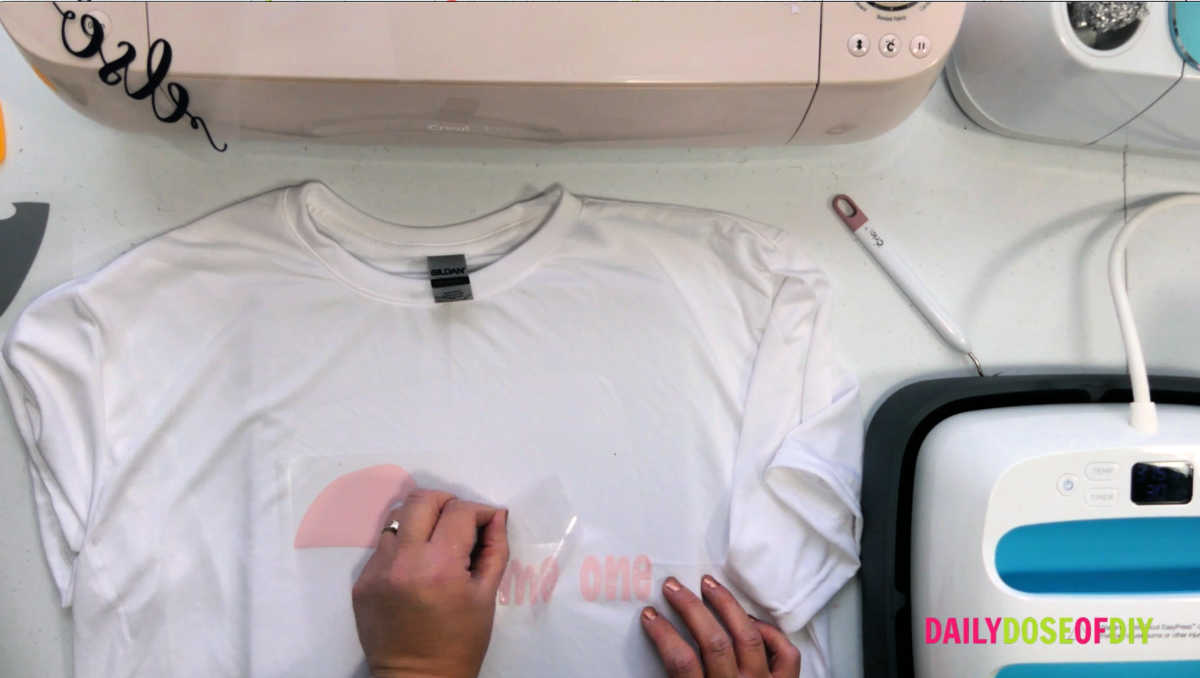
The first color or layer of vinyl you want to press is usually the largest but it doesn’t always have to be. It needs to be the bottom layer though. So if you have hearts that go over words, the words would have to go first and then the hearts on top.
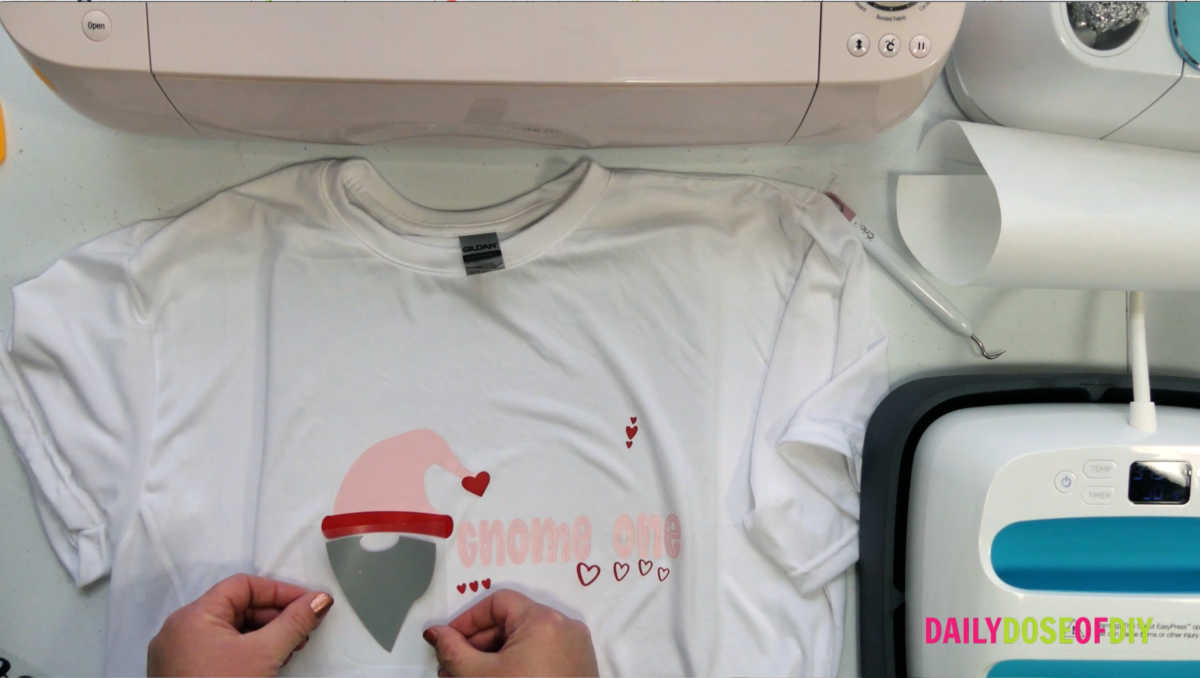
I’m starting with the pink layer because it was the largest and I’m using that to find my center.
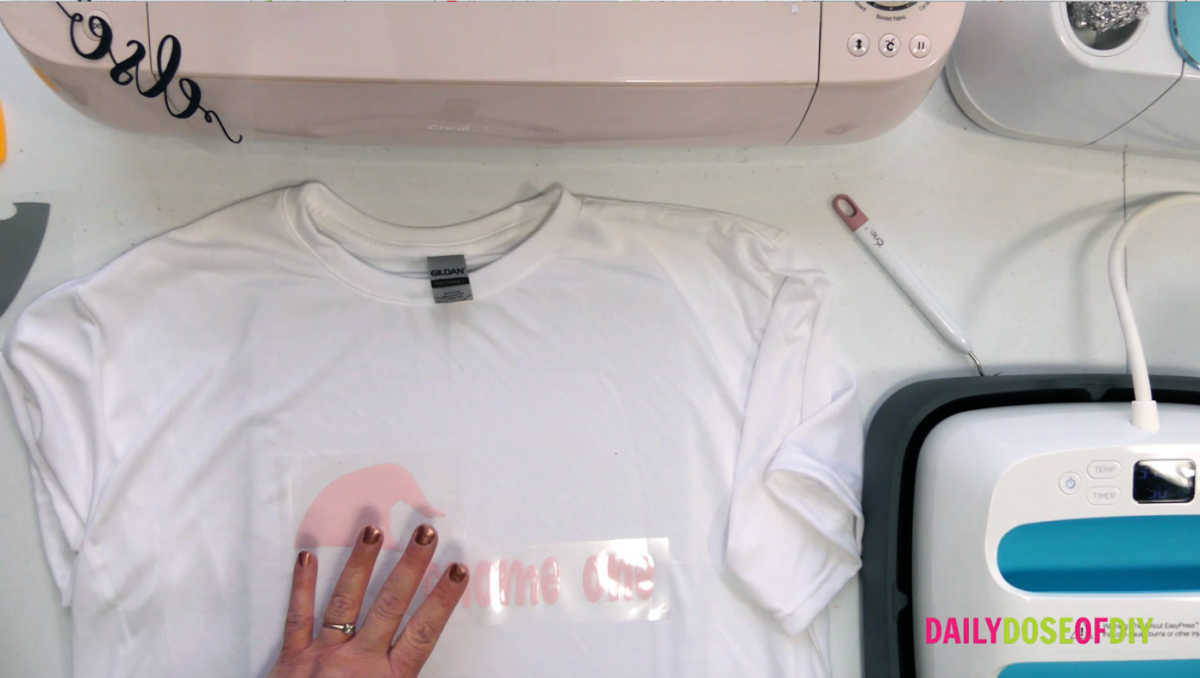
If you’ve ever used adhesive vinyl you know once it’s on your project it’s pretty much stuck. That’s not the case with HTV, the carrier sheet is slightly sticky but you can pick it up and move it around. So take your time positioning the layers before you press them.
Also, you don’t need to press each layer for the full 30 seconds. We will do that for the last layer we put on, but the first layers you just need to press them long enough to stick. The more intricate the design, the longer you’ll want to press it for it to stick.
I usually press in the 5-10 second range for the first layers. This pink layer though I had re-press because parts of hearts in the letters didn’t want to stay.
The vinyl you have should also tell you if it’s a warm or cold peel. That means you either peel the carrier sheet off when it’s still warm from pressing or you have to wait until it cools off to peel it.
This vinyl is warm peel, so once it cools down enough to touch it, you can peel it away.
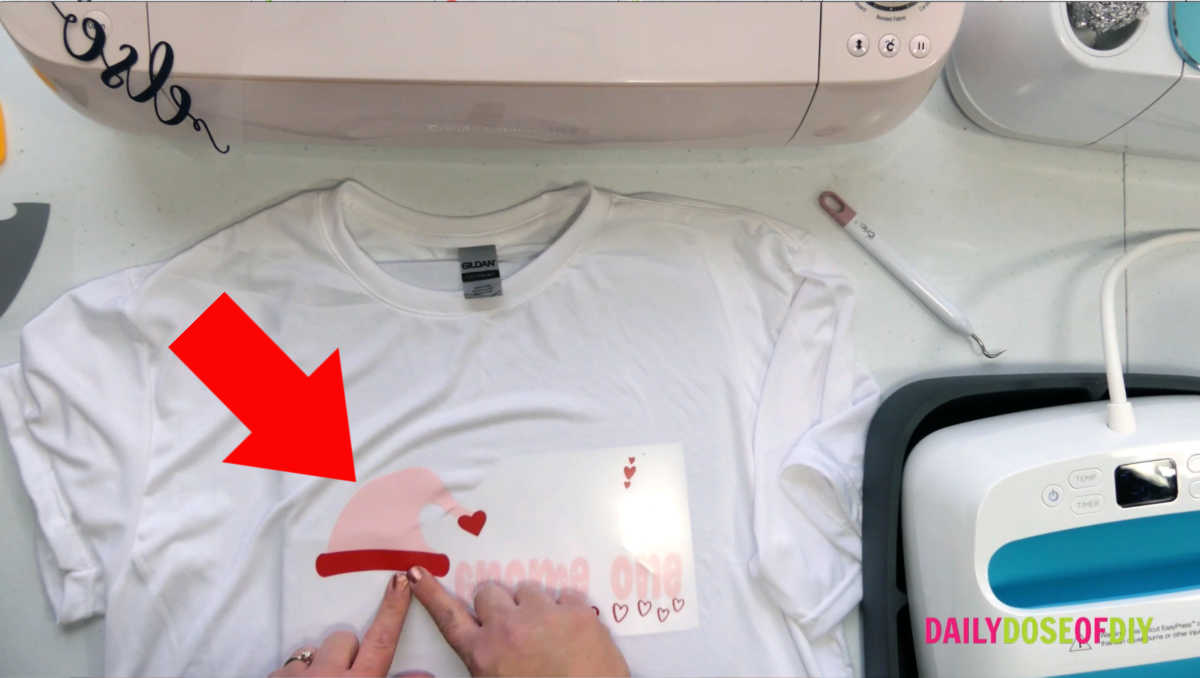
The next layer I’m going to press is the red layer. I’m going to focus on lining up the red heart at the end of the hat and the red piece at the bottom of the hat.
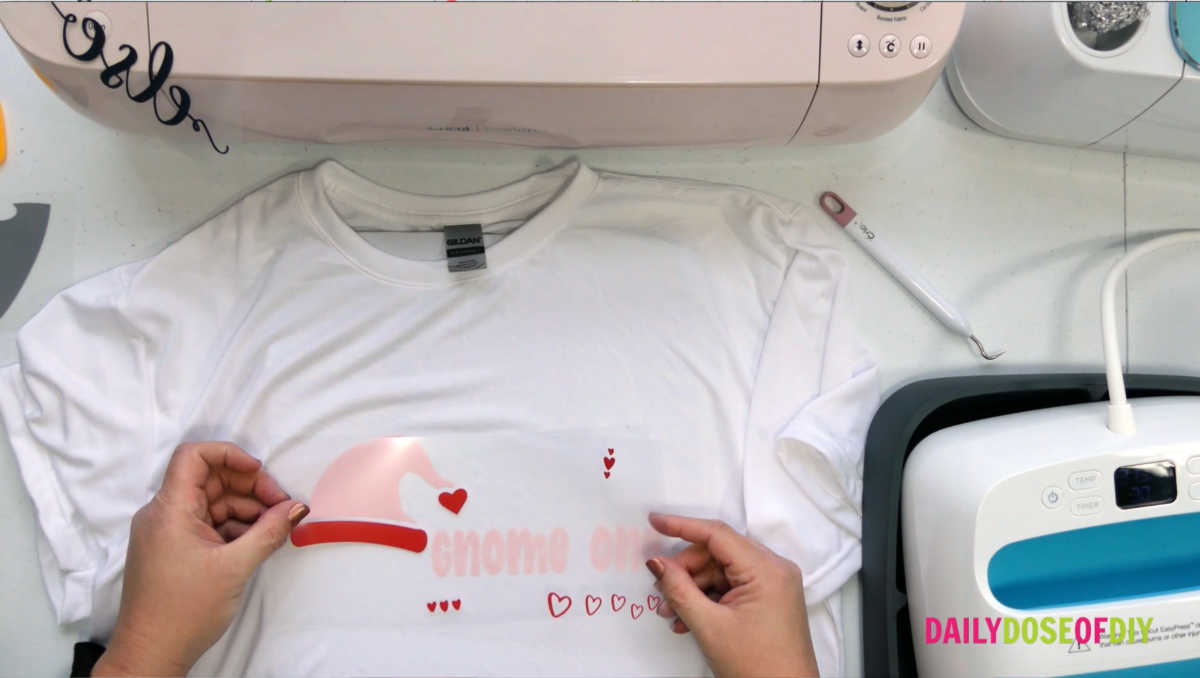
Once again take your time, if it ends up a little off you can pick that layer back up and try again. Once you’re happy with the way it’s lined up you can press this layer for 5-10 seconds.
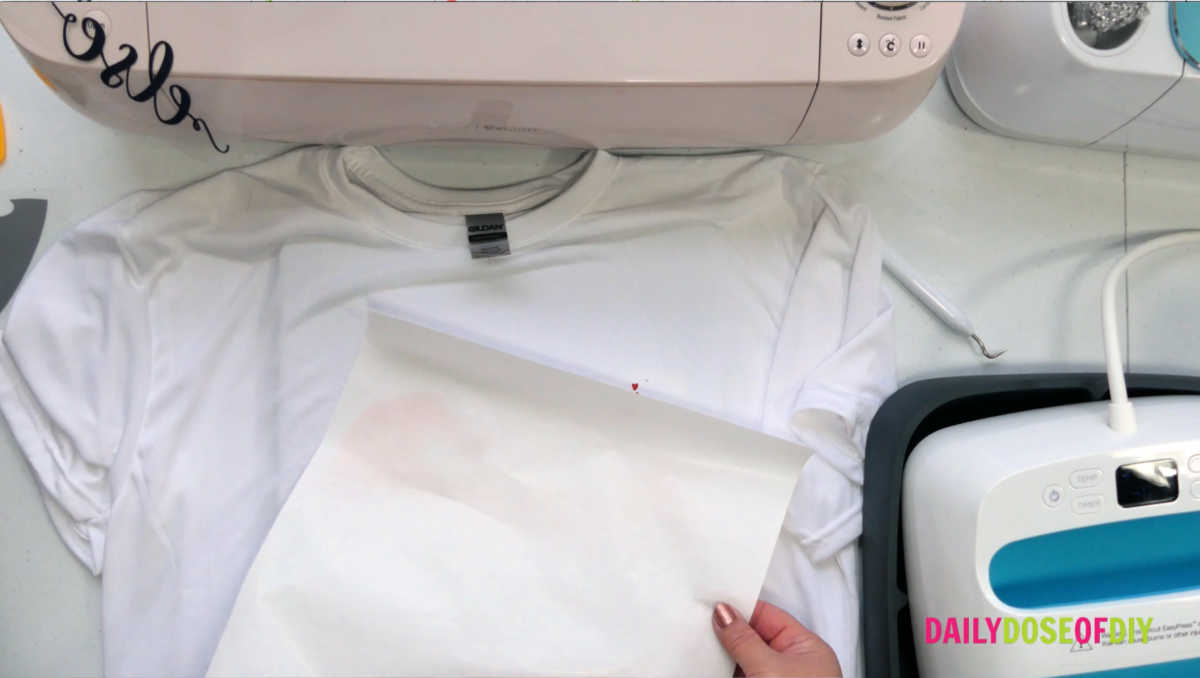
But there’s something you need to know first. The carrier sheet for your second layer is probably not going to cover all of the vinyl from your first layer. You have three options here.
- Place a Teflon sheet over your shirt before you press it
- Put parchment paper over your shirt before you press it
- Place part of the carrier sheet from the first layer over any exposed parts of vinyl
Whatever you do, do not put your heat-press over naked vinyl, you’ll have a mess.
So we are going to repeat this process for each layer. The next layer I’m going to do is the beard. Line it up to the hat, cover the design and press for 5-10 seconds.
Remove the carrier sheet and then do the next layer which is the nose. After the nose is on then we are ready for our final layer, the black words.

On the last layer is when you want to make sure you press for the full time and that your heat press is up to the correct temperature.
Cover the shirt with your Teflon sheet or parchment paper and then your heat press. Make sure the heat press is covering the entire design and press firmly without moving the press for the entire time.

After the time is up put your easy press back on the base. Next you’ll want to place your barrier sheet over your heat pad and then flip the t-shirt over. So you’ll have your heat pad, your barrier sheet, and then your shirt design down so we can press the back of it.
I usually press the back for about 15 seconds.
After the back is pressed peel the remaining carrier sheet off of the design and let it cool.
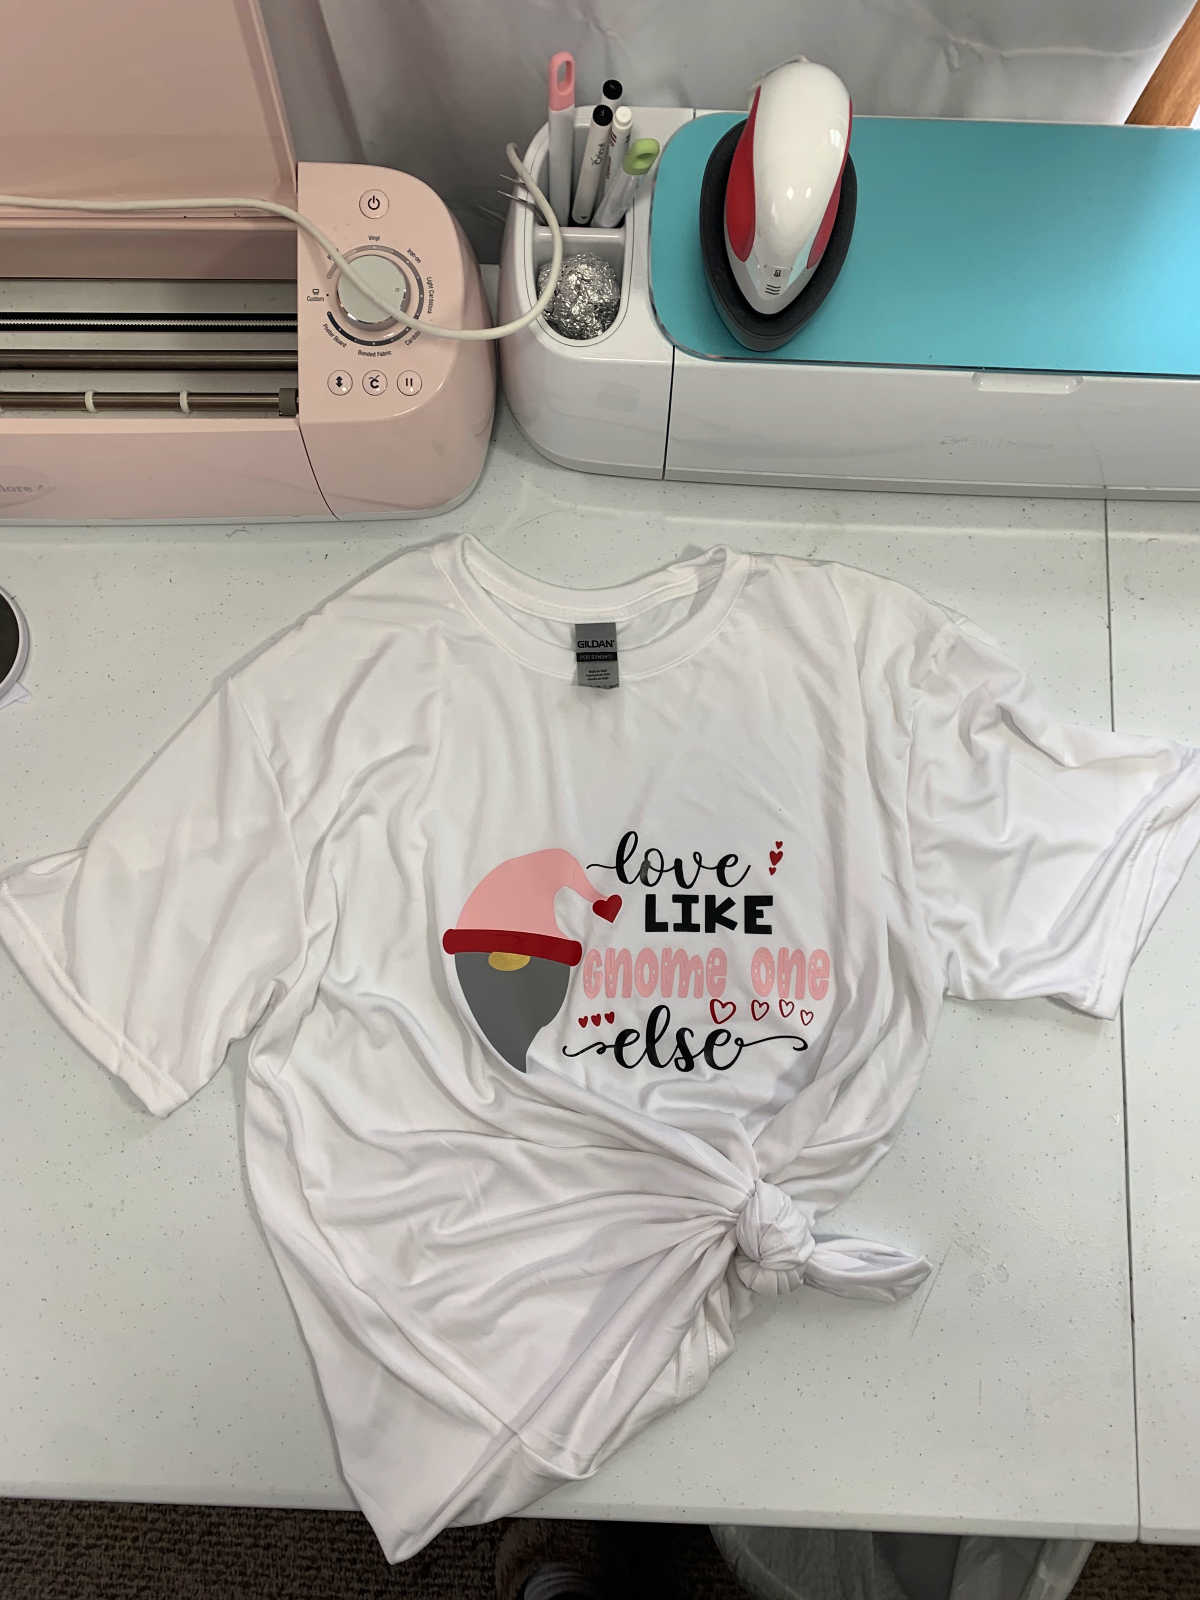
With vinyl T-shirts, you’ll want to turn them inside out to wash and tumble dry on low.
Free Love Like Gnome One Else SVG
I keep all of my free SVG files in a resource library for your convenience. It’s like a one-stop shop for everything. To gain access and sign up for my weekly newsletter (where I alert you to more free crafts and SVGs) simply fill out the form below.
All of my free SVG files and Designs are kept in a library for your convenience. We will send you the link and password right away, and you’re free to use all the resources you want in the library.
Already have the password? (It’s at the bottom of every email) Enter the Library Here
Thanks for crafting with me today.

Chris Butler has helped thousands of crafters learn how to use their Cricut machine without feeling overwhelmed. She is a best selling author and an up and coming designer. For fun Chris enjoys designing SVG Files, hanging out with her family (preferably at the lake), traveling, and volunteering at her church. She is a wife and mom of two crazy fun kids.
So stinking cute. Thanks for both the tutorial and the adorable gnome SVG
Thanks Barbara!
Thank you chris for walking me through this I have been using the wrong vinyl. I have melted lots of money!! Excited to make this design and make it right.
You’re welcome Libby!
Chris,
I just want to thank you for all of your help in my journey of learning this new joy of crafting with my Cricut! I have watched several of your tutorials and they are wonderful and so easy to follow. I was so overwhelmed with this machine initially but you have come to the rescue. So, thank you very much! I am able to actually use my Cricut instead of it just collecting dust. 🙂
Awwww you’re welcome Kari! That’s what I’m here for =)
I’m so glad you did this type of project! I’ve made a bunch of shirts but not layers of color. I’m looking forward to learning how to do the infusable ink, I’m kind of scared lol.