This post may contain affiliate links for your convenience. If you make a purchase through one of my links I will earn a small commission at no additional cost to you.
Last Updated on December 19, 2023 by Chris Butler
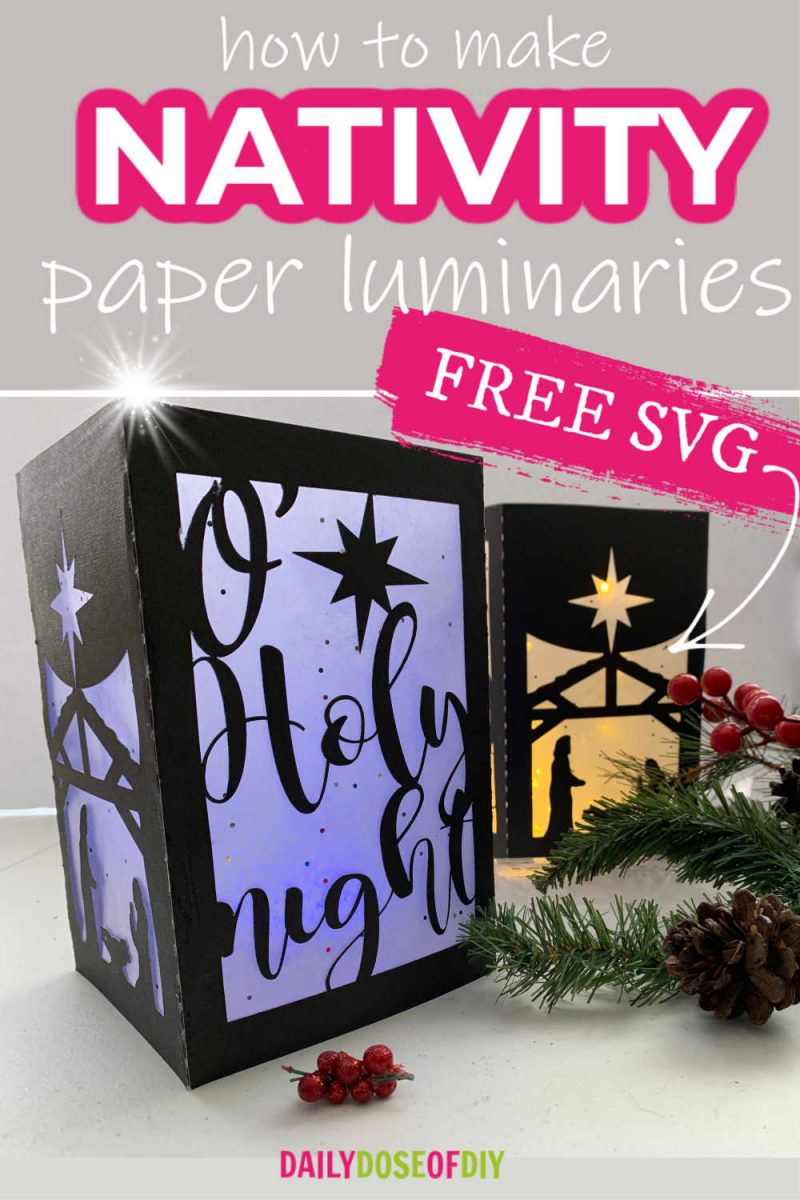
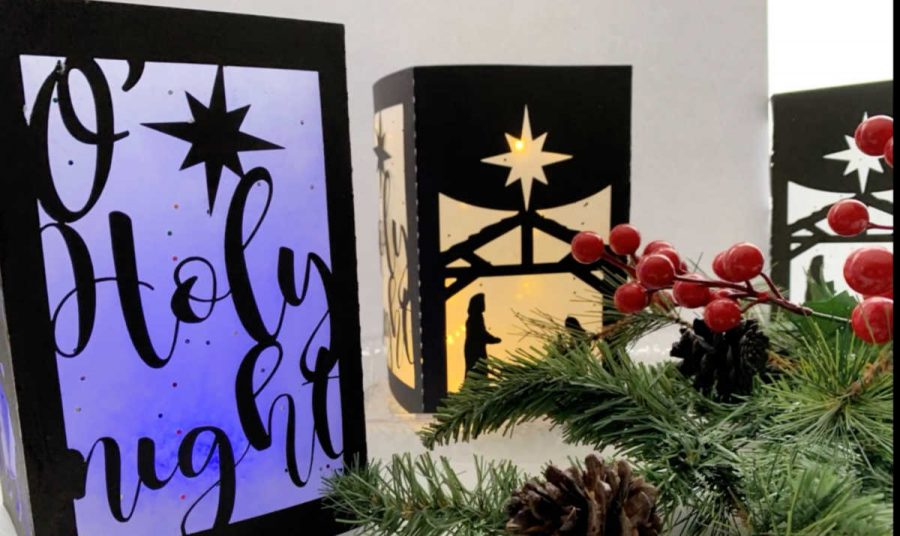
Hello there crafty friends! Today we’re making a Nativity Scene Paper Luminary for Christmas. I love luminaries, don’t you?
They look fantastic on the mantel or on tables. Turn off all of the lights except for your Christmas tree and a few luminaries and just relax. In the video you’ll see the two types of lights I like to use in my paper luminaries for a nice glow.
I cut these Luminaries with my Cricut cutting machine, but any cutting machine that accepts SVG files will work. I’m sharing my free SVG cut file of the Nativity Luminary with you so you can make one too.
Let’s get started:
Quick Links to Information in This Post
Nativity Luminary Supplies Needed
Card stock -2 sheets of 8.5×11″ for each luminary
Tissue or Velium Paper
Fairy String Lights – I used these here
or
LED Color Changing Puck Lights Found Here
Tacky Glue
Scissors and Tape
A Cutting Machine like the Cricut
The Free Nativity Luminary SVG – Found in my resource library of SVG files -more info after the video
Nativity Paper Luminaries Video

Watched the video and you’re ready to grab your free SVG file? Fill out the simple form below and we’ll send the link right away, you’ll find this SVG under Christmas SVGs
All of our free SVGs and Designs are kept in a library for your convenience. Fill out the simple form and we’ll send you the link and password to access the SVG files right away.
Already have the password? Enter the Library HERE
Keep scrolling for written instructions.
How To Make Nativity Paper Luminaries
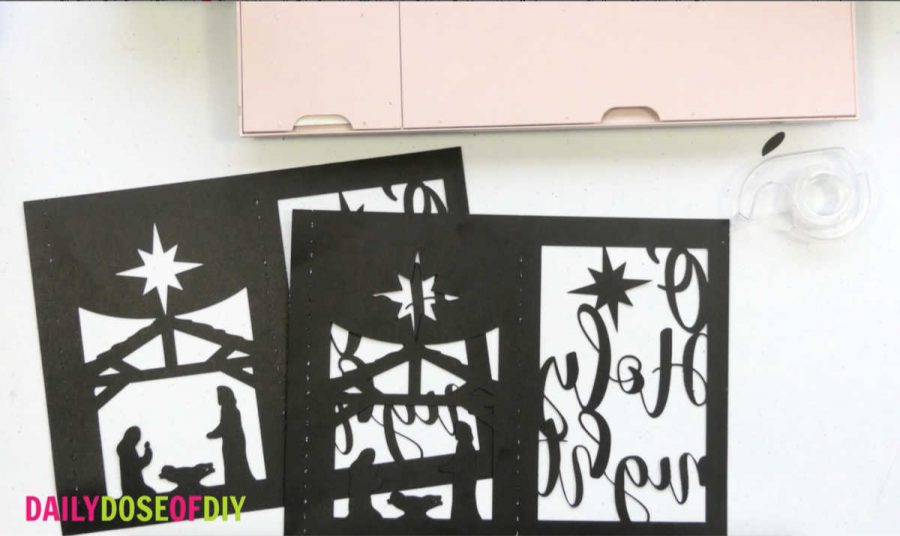
When you upload the SVG cut file to design space it will look like it’s just one sheet. I double-stacked the designs to save some space.
But if you look over in the layers menu you’ll see there are in fact two pages you’ll need to cut. Everything is ready to go, no need to change anything on the file. So as soon as it’s in design space you can click the make it button on the top right of the screen.
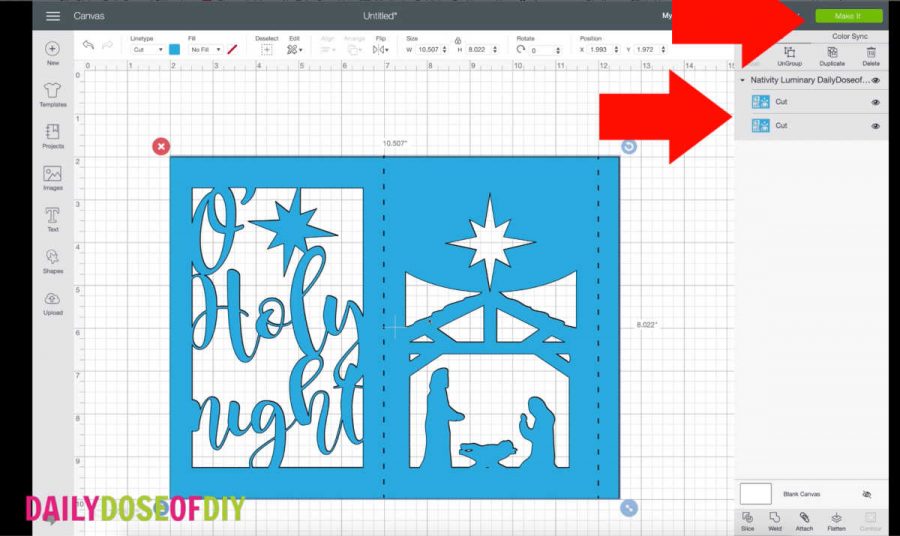
If you have a Cricut Explore be sure to turn your dial to cardstock if you have a Cricut Maker choose cardstock from the list of materials.
Cut the Nativity Luminary
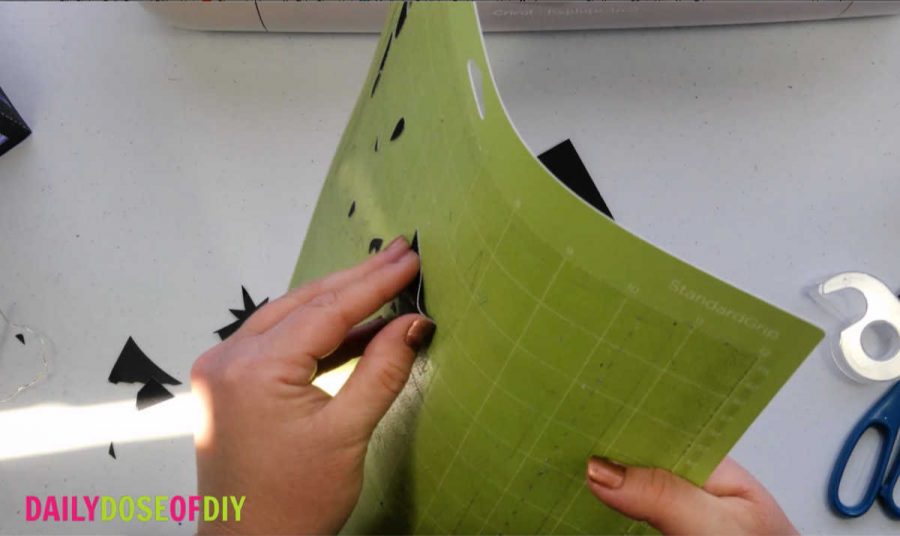
Next place your cardstock on to the cut mat. Line one corner up with the top left corner of the Cricut cut mat.
I’m using a well worn standard grip green cut mat today. I don’t recommend you use a newer green mat for this design as it may tear. The blue light grip cut mat is the best to use for cardstock.
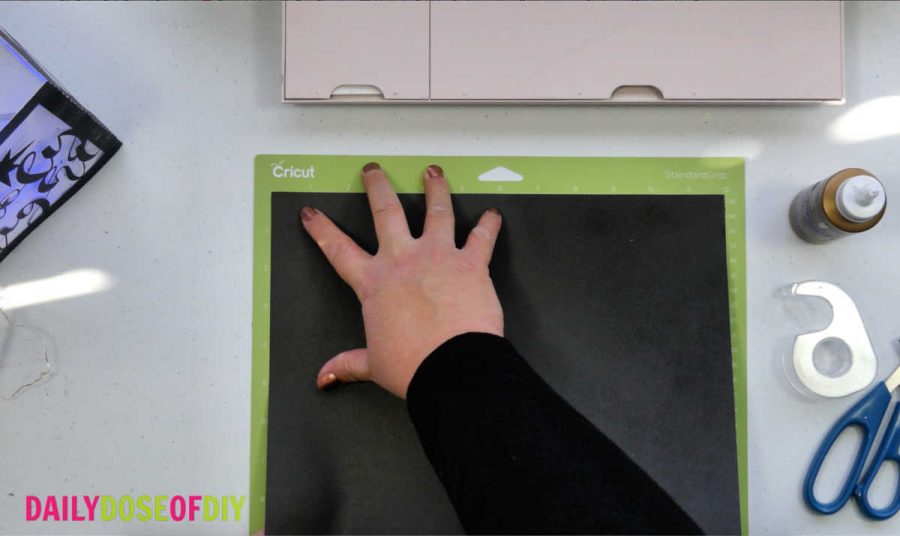
Slide the cut mat under the guide tabs and hold it against the roller bar as you press the load mat button. The go button should then start flashing. Press the go button and the Cricut will cut your luminary.
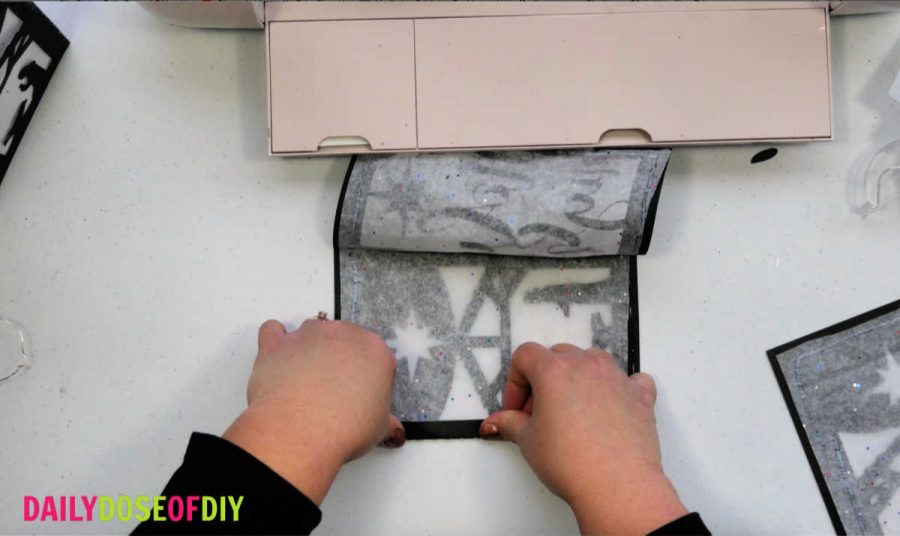
After it’s finished cutting press the unload mat button.
Be sure to flip the mat over and carefully remove the mat from your luminary.
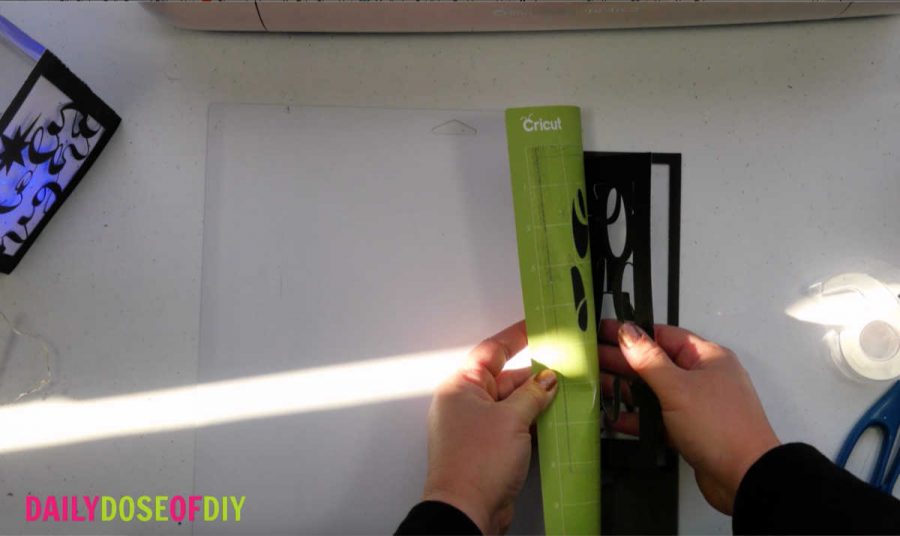
This will help keep the paper from tearing and curling.
BONUS TIP – Remove the paper scraps from your mat the same way. Many people use the scraper to scrape them off, which is ok, but your mat will not last as long. According to Cricut scraping off the paper scraps pushes the tiny fibers into the mat and causes it to lose it’s stick faster.
You can use your Cricut tweezers to help with this too.
Next, repeat those steps to cut your second sheet for the luminary and then we can add the tissue paper and put it together.
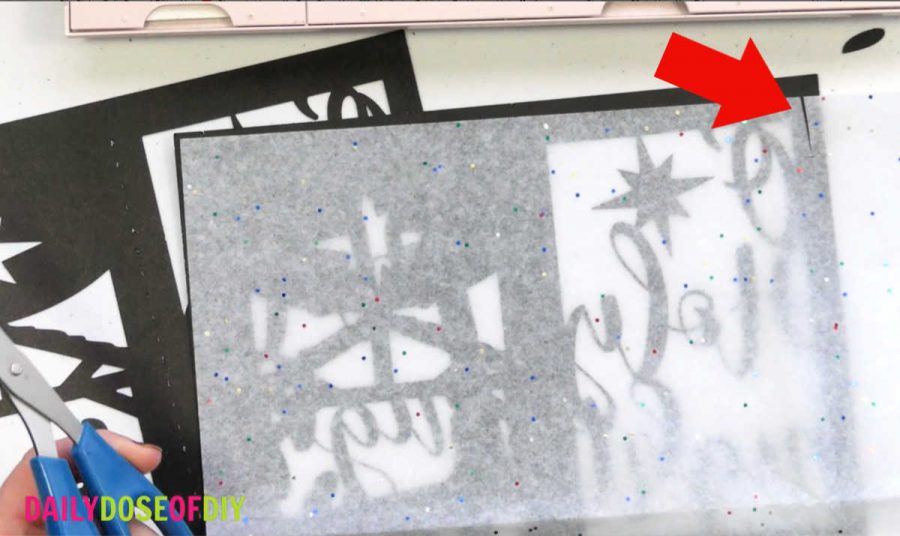
To cut the tissue paper I placed it over the luminary and cut a notch on each edge to use as a guide. Then I folded the tissue paper in half so I could cut two panels at once.
Using the notch as guides, cut each side until they meet and your two panels are cut out.
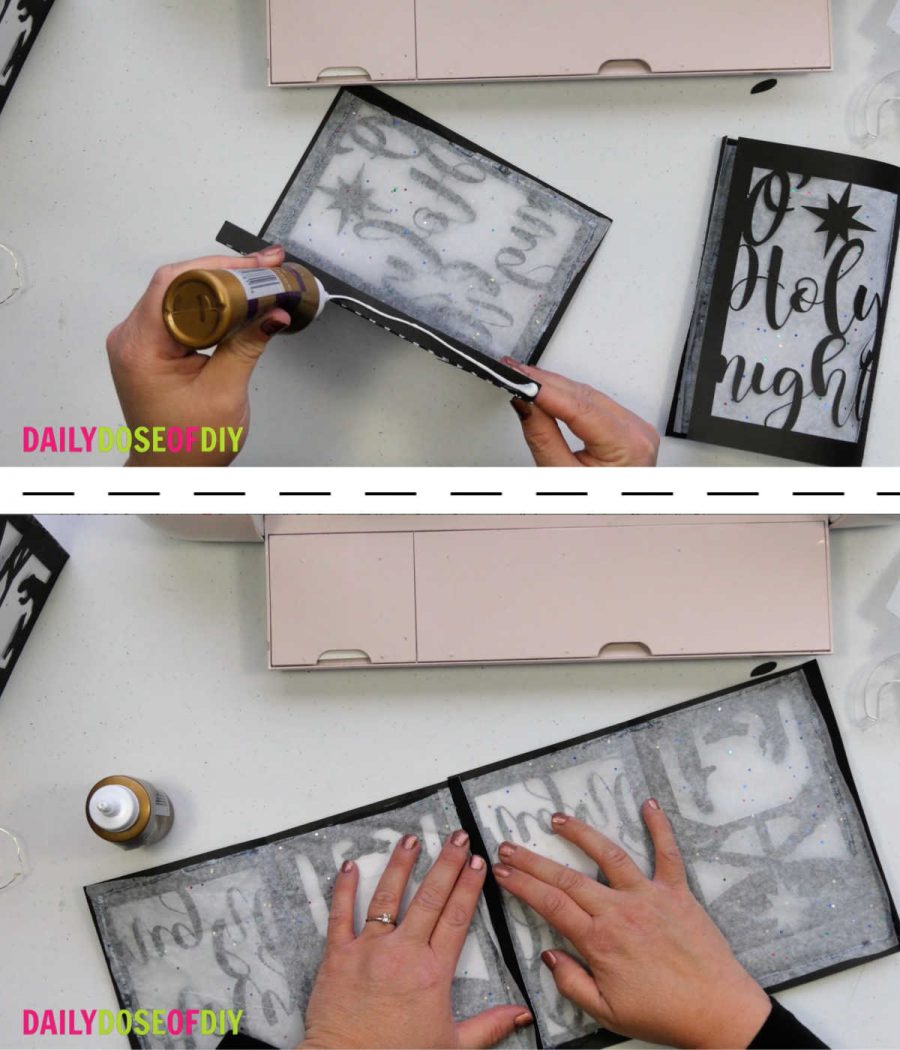
Here’s another tip before you glue.…. make sure you’re gluing the tissue paper to the back of the luminaries. (I may have glued one to the front 🙄)
Putting the Nativity Luminaries Together
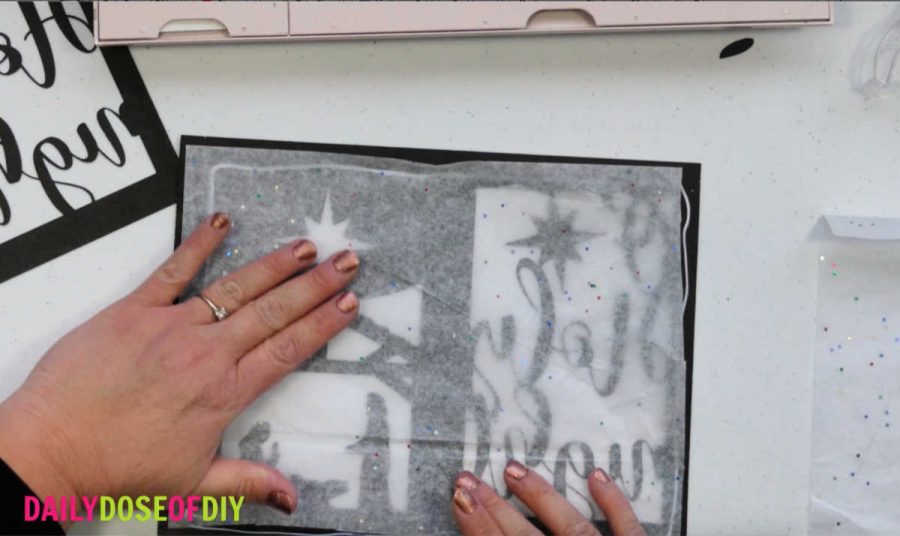
Place a line of glue along the outer edge of your luminary panel and then smooth the tissue paper over it, making sure each edge of the tissue paper is glued. Repeat for the second luminary panel.
Each luminary panel will have a tab at the end that we need to fold. You’ll also see cut lines down the center that need folding so that we can make each side of the luminary.
Fold both panels along the cut lines and then we can glue them together.
Once they are folded, place a line of glue down the tab on one of the panels. Line that tab up with the second panel on the end that doesn’t have a tab.
Press the two pieces together and hold for a few seconds so the glue will stick.
Next place a line of glue down the other tab and bring it around and stick it to the other end of the luminary. You’ll probably have to put one hand inside of the luminary so you can press the two ends together until they stick.
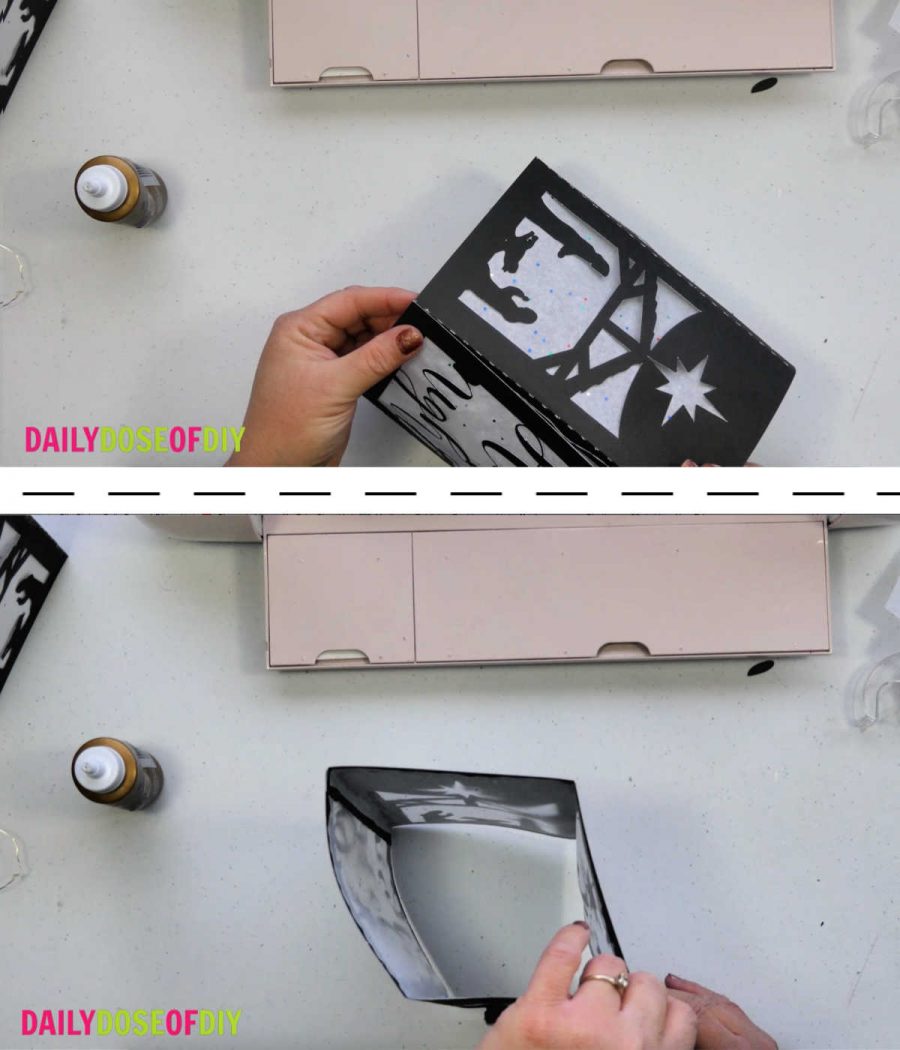
You may have to go back around and re-crease the corners to square up the luminary. After you’re happy with the shape, add the best part, the lights.
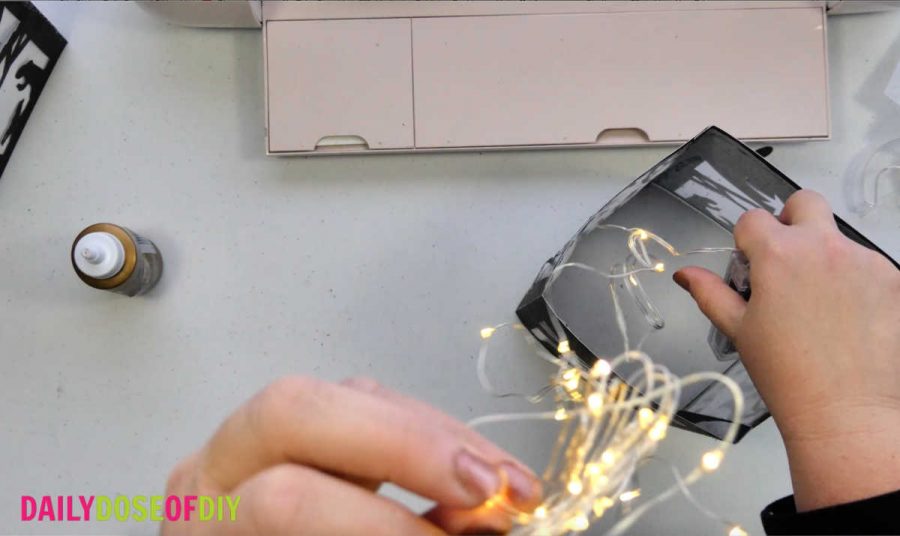
I like the fairy string lights found here because I can tape them on the inside of the luminary where I want them to shine brightest, like the star.
Of course I like the color changing LED puck lights found here too.
Get the FREE Nativity Luminary SVG Cut File
I created a free resource library full of SVG files for subscribers to my weekly (let’s face it sometimes it’s bi-weekly) newsletter where I send you even more free SVG files and Cricut crafts.
To subscribe and get instant exclusive access fill out the simple form below.
The SVG files are in alphabetical order in the library, this one is named ‘Nativity Luminary’
All of our free SVGs and Designs are kept in a library for your convenience. Fill out the simple form and we’ll send you the link and password to access the SVG files right away.
Already have the password? Enter the Library HERE
Thanks so much for crafting with me today!


Chris Butler has helped thousands of crafters learn how to use their Cricut machine without feeling overwhelmed. She is a best selling author and an up and coming designer. For fun Chris enjoys designing SVG Files, hanging out with her family (preferably at the lake), traveling, and volunteering at her church. She is a wife and mom of two crazy fun kids.
I’m not seeing the actual luminary svg cut file in the list of available files. Am I missing something?
Hi Jan, under SVG files (They are in alphabetical order) scroll down to the ‘N”s and you will see it
Luminary nativity Scene cut out is what I am interested in please.