This post may contain affiliate links for your convenience. If you make a purchase through one of my links I will earn a small commission at no additional cost to you.
Last Updated on December 19, 2023 by Chris Butler
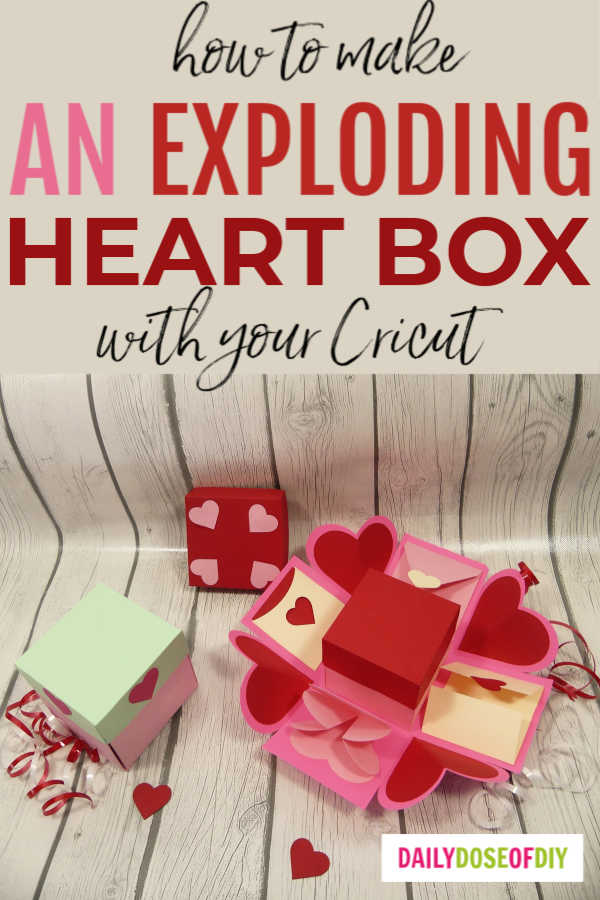
Hello crafty friends! Today we’re going to make a simple explosion box.
We don’t need a whole lot of supplies or much time at all. But don’t let that fool you because these are so fun! They are fun to make and even more fun to give. This exploding box will be a treasured gift for some time.
I’m using a Cricut cutting machine to cut the explosion box. And I have a free SVG cut file I will share with you so you can make you’re very own.
Quick Links to Information in This Post
What is an explosion box?
Some of you may be wondering what an explosion or exploding box even is. Basically it’s a box that is made out of card stock.
However, when you take the lid off the sides ‘explode’ out to reveal places where you can leave fun notes, or add pictures. Typically there is another box in the center (the none exploding type) that can hold a gift.
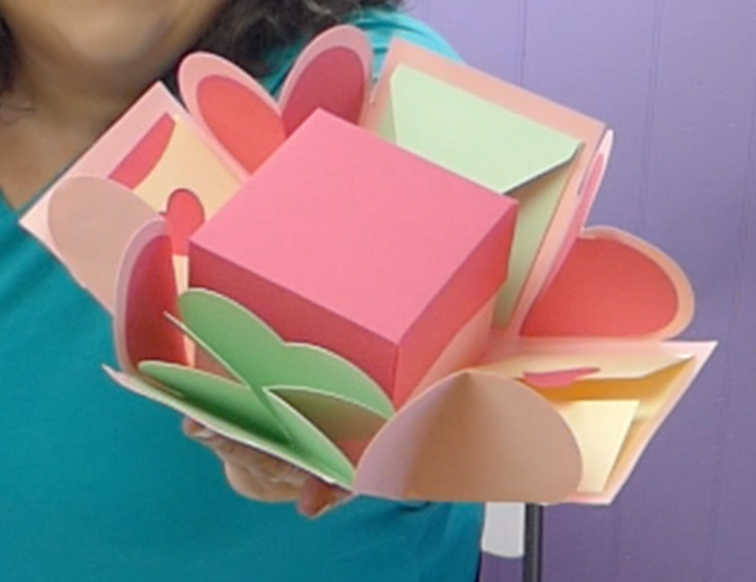
I’ve seen some really complex exploding boxes where the sides are 3-5 layers deep! While they are super cool, I decided to keep this design ultra simple. So it’s not going to take a whole lot of time to make, but you still get that fun wow factor when you give it as a gift.
Let’s get to it:
What You Need to Make an Exploding Box
Tacky Glue – https://amzn.to/2RY1wDLTacky glue really does help especially when gluing the sides. You won’t have to hold them forever and wait for the glue to set if you use tacky glue.
Scoring Stylus – https://amzn.to/38Q8f9L
I tested a couple of different designs and methods to make an exploding box and score lines were the easiest by far to get nice folds.
What type of paper is used for explosion boxes?
We use cardstock to make explosion boxes. You’ll want to use at least 65 lb card stock and make sure it’s solid core. That means that when it’s cut it still shows the paper color on the cut lines versus white like some of the cheaper cardstocks.
If you already have some cardstock and it shows white when you cut it, you can use a marker that is the same shade as your paper to go over those white lines.
This design uses four colors of cardstock. Feel free to change it up and use different colors though.
Red Cardstock – https://amzn.to/37DiduP
Pink Cardstock – https://amzn.to/38PAV2B
Cream Cardstock – https://amzn.to/2tZWz5u
Dark Pink Cardstock – https://amzn.to/3aV7HRA
Cutting Machine – I’m using Cricut, both Explore and Maker will work for this craft.
Exploding Box Design – I’m sharing my free SVG cut file for this design.
All of our free SVGs and Designs are kept in a library for your convenience. Fill out the simple form and we’ll send you the link and password to access the SVG files right away.
Already have the password? Enter the Library HERE
Exploding Box Video
Using the Exploding Box SVG
If you need help uploading SVG files to Design Space see this post.
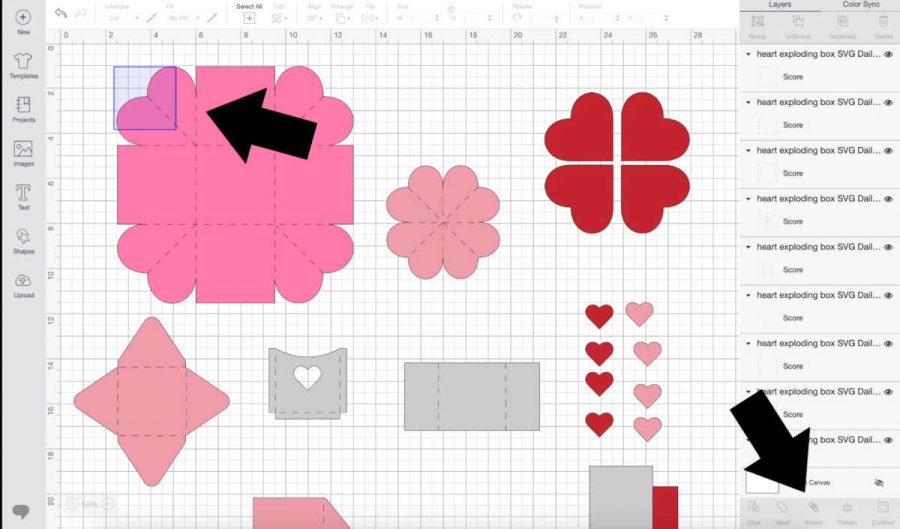
When you get the SVG into Design Space this is what you will see. Unfortunately, Cricut doesn’t recognize score lines from regular cut lines so we will need to change them.
To make it easy I made the design so the lines that we need to change will be the first 8 things on the layers menu. (Highlighted below)
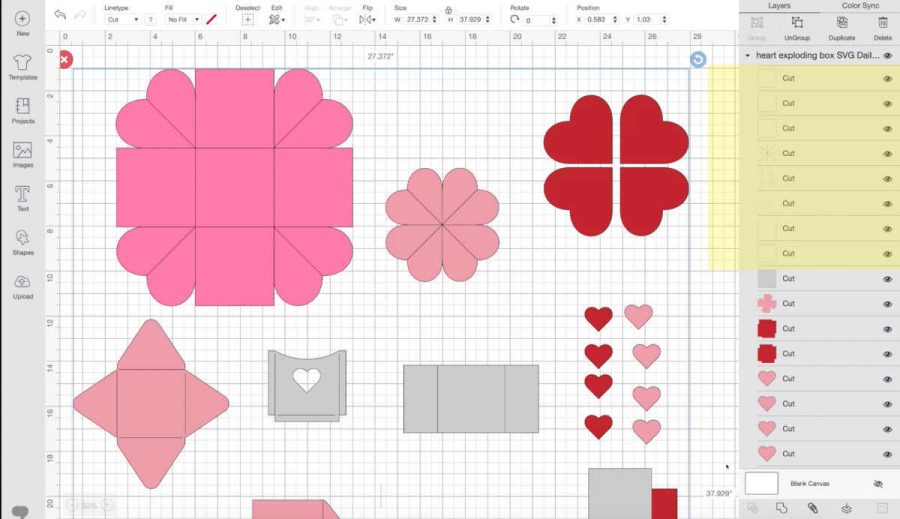
In the layers menu select the top object that says cut. And then while holding down the shift key go down the line and click those first 8 objects that we’ll need to change to score.
You’ll see the object changing to a darker grey color as it’s selected. After you have them all you can let off the shift key.
Next go to the top menu where it says line type. Click on the down arrow and select score from the options. You will see all of the score lines change to dotted lines.

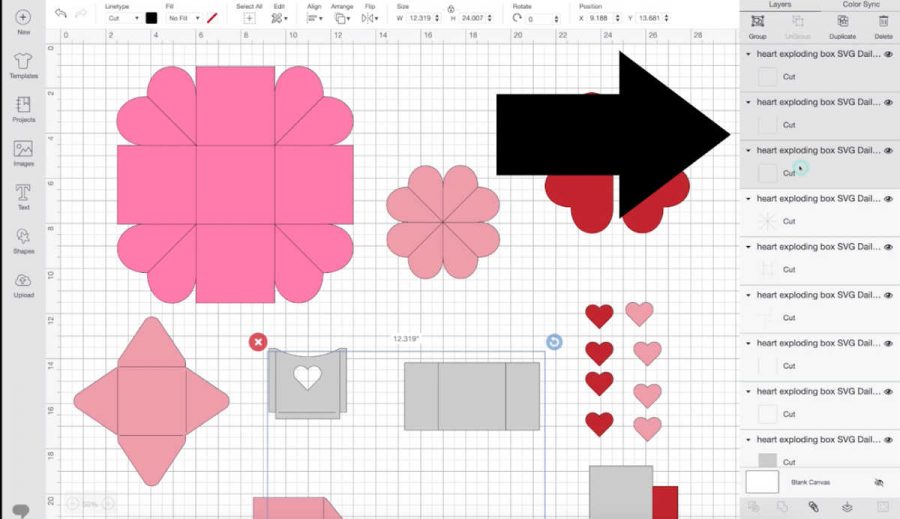
The next fun thing about Cricut is they will put the score lines on a separate cut mat if we don’t attach them. So we’ll need to select each object with the score lines and then click attach on the bottom of the layers menu on the right.
To select them place your cursor over to the side and left-click the mouse while you drag the cursor over. Once a part of the design and the scoreline is in your selection box you can release the mouse and it will automatically select the whole thing. Then click attach and move on to the next one until all 8 designs with score lines are attached.
Scoring and Cutting the Exploding Box
Once everything is attached you are ready to click the make it button and cut your mats. Be sure to turn your dial to cardstock for Explore machines or select cardstock from the materials list for Maker machines.
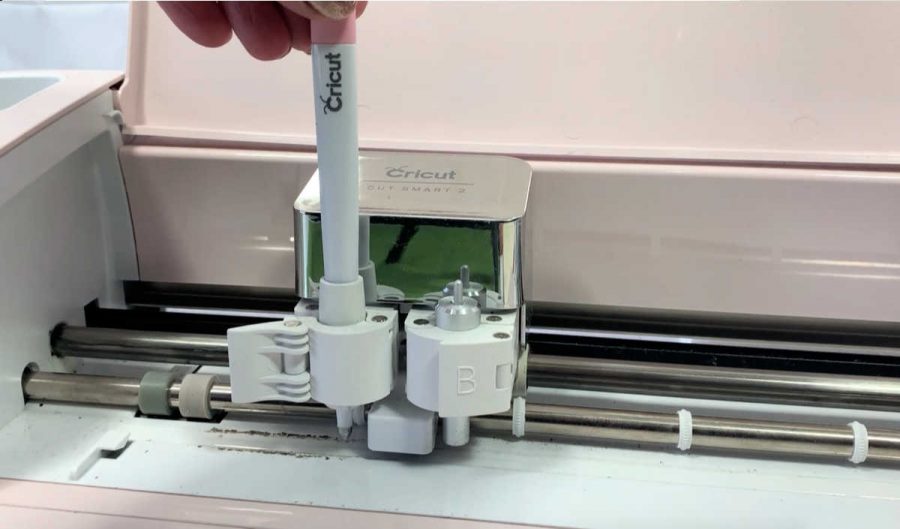
Cricut will score the lines before it cuts, so load your scoring stylus before you start cutting.
To load the stylus open clamp ‘A’ and place the stylus straight down until the little arrow on the stylus disappears. Re-close the clamp and you are ready to go.
Ok now you’re ready for Cricut to score and cut the exploding box. In the video above I show how to place the cardstock and load the cut mats if you need help with that.
You’ll want to use a well worn green standard grip mat or a blue light grip mat for cutting cardstock.
Putting Together Your Exploding Box
After all of the pieces are cut you’ll want to fold the pieces that have score lines.
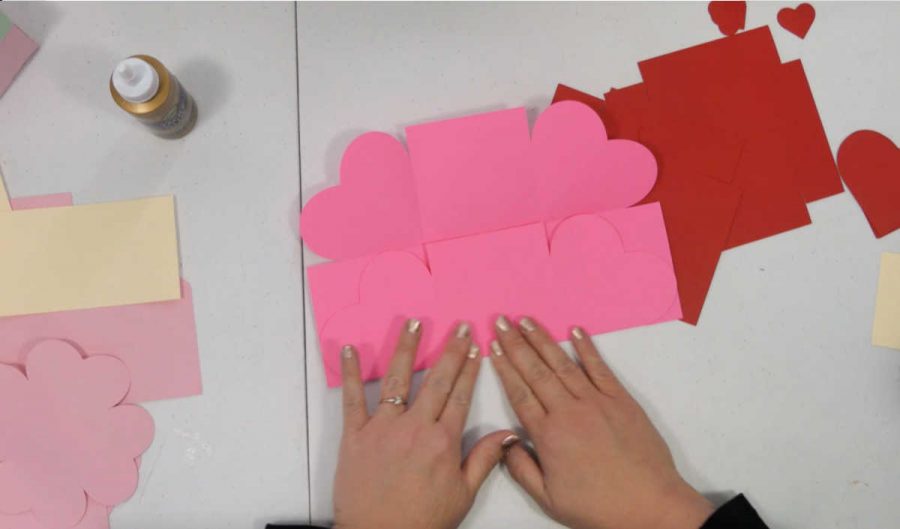
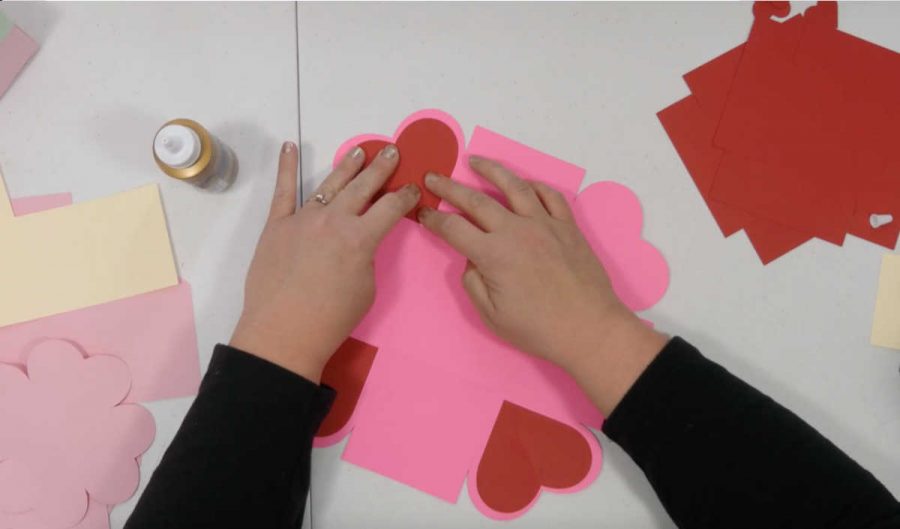
Fold the line for the hearts in the four corners in the opposite direction of the rest of your folds.
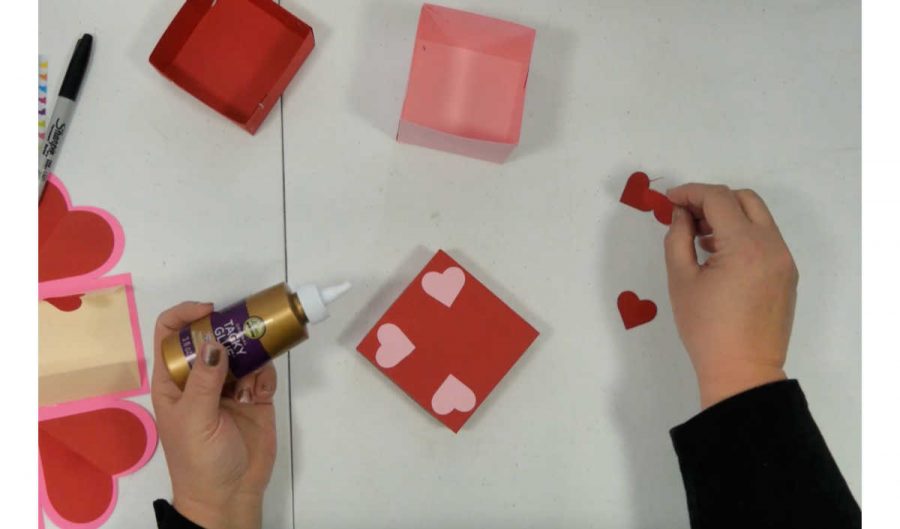
Fold the large red hearts in half. I did not add score lines to these since they are easy to fold.
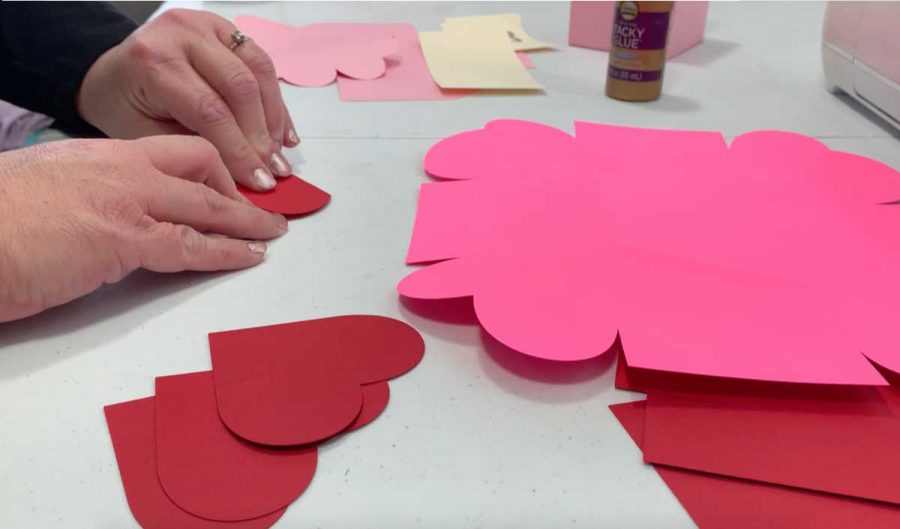
Once you have the hearts folded, glue them to the corner hearts of the base using tacky glue. Line the folds up and make sure they are going in the same direction.
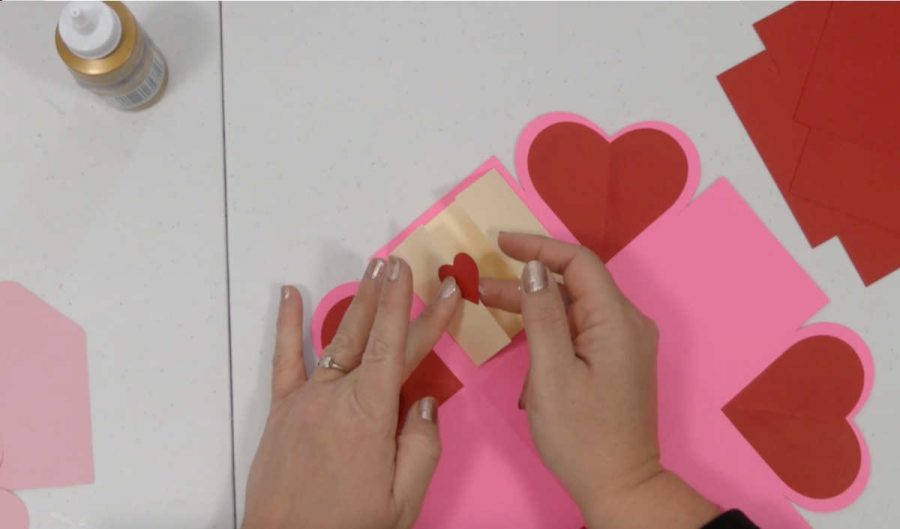
Next take the rectangle piece and glue the back to one of the outer squares. Glue a heart on one side of the flaps. You can write a message or glue a picture on the inside and then close the flaps after the glue is dry.
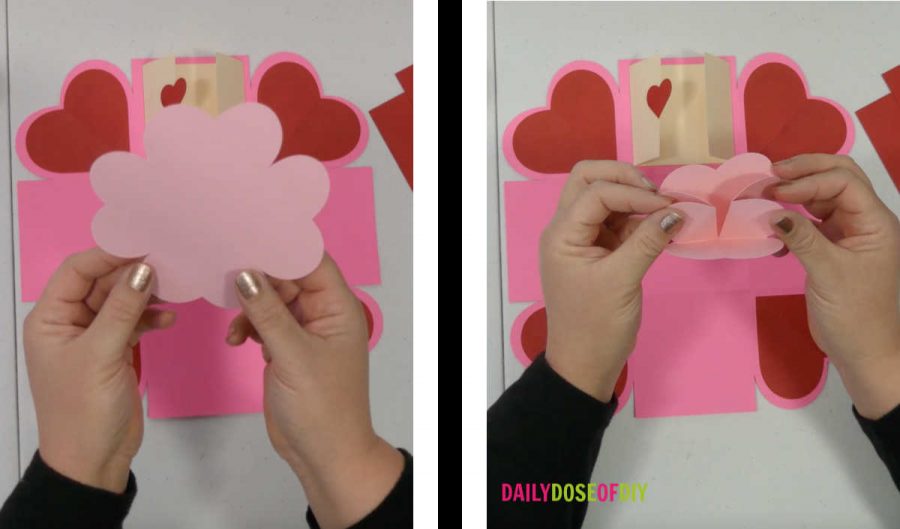
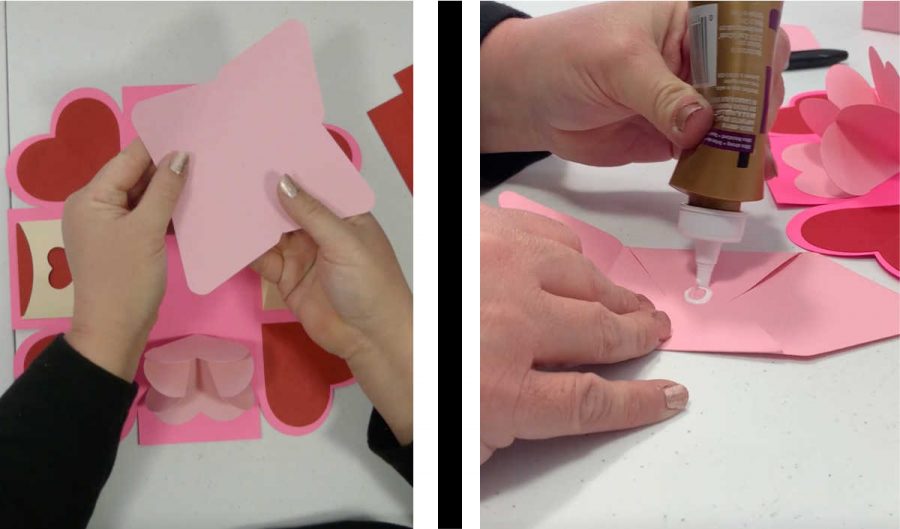
Next, we’ll place the expanding heart. To get it to fold into a heart shape you’ll need to fold one side of the hearts the opposite direction of the other folds. That will allow one side of hearts to tuck in so it makes a heart shape.
Glue one side of the heart to one of the outer squares.
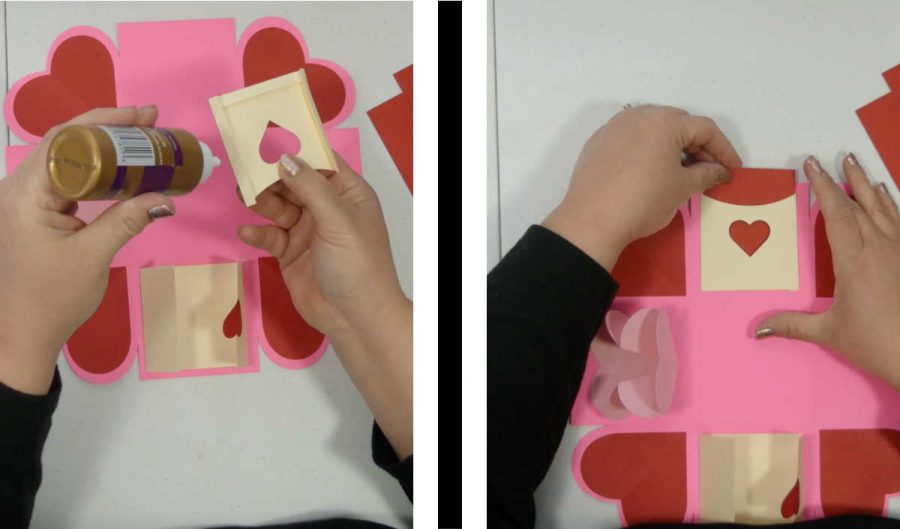
Next take the piece that has a heart cut out of it and fold over the tabs. Place a small line of glue on the tabs and then glue it to one of the outer squares. Wipe away any glue that seeps out so the pouch doesn’t glue closed.
There is a red sheet that will slide perfectly into this pouch. You can also write a message or place a picture on the red sheet too.
The last part of the outer box is the envelope. Fold two side flaps in and place a dot of glue in the center. Next fold the bottom flap up so it glues together.
Again wipe away any glue that seeps out so the envelope doesn’t glue closed.
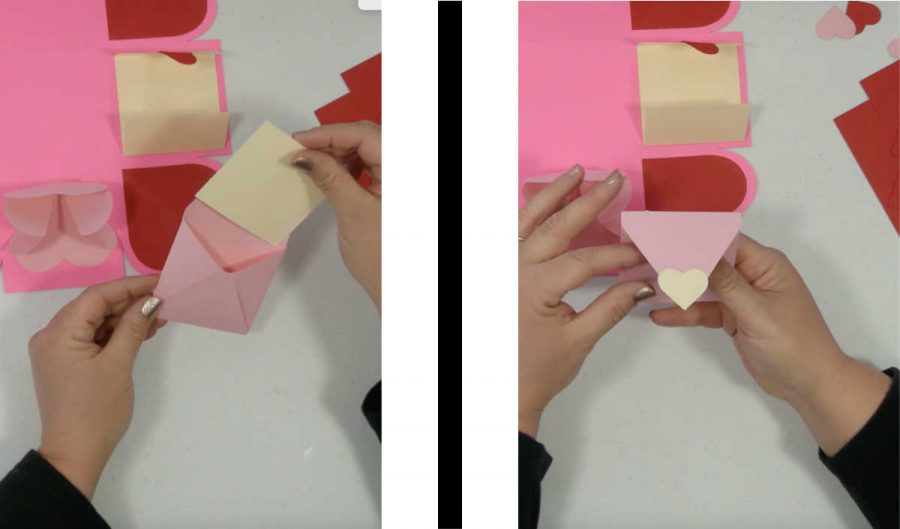
There is a square cut out in the lighter colored cardstock for you to place inside the envelope. Then fold down the top of the envelope and glue one of the smaller hearts to the end.
Be sure you don’t glue the envelope closed though!
Finally glue the back of the envelope to the last outer square.
Put Together the Inner Box and Lids
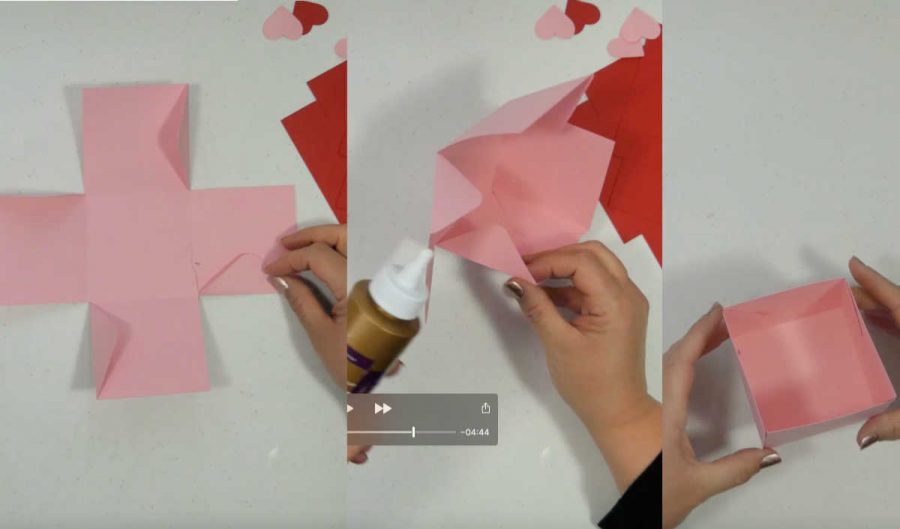
Fold the score lines on the inner box. They will all go in the same direction.
Next place glue on the triangle pieces. Fold that sid up to glue the triangle to the square to the left of it. Repeat for all four sides until the box is together.
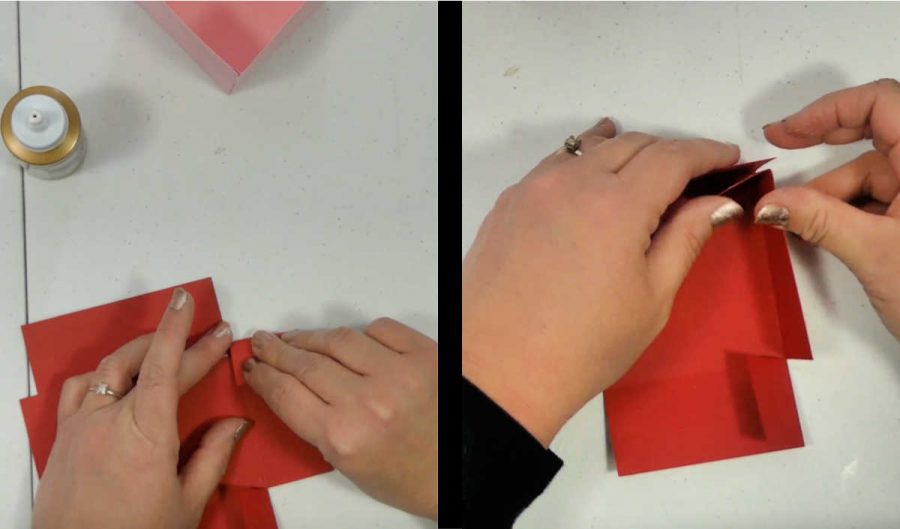
The lids are essentially done the same way. Fold along the score lines. Fold the tabs back to the corner. Apply glue to the tabs then fold it up and glue it to the side on the left.
There are also extra heart cutouts you can use to decorate your box as you wish.
Assemble the Exploding Box
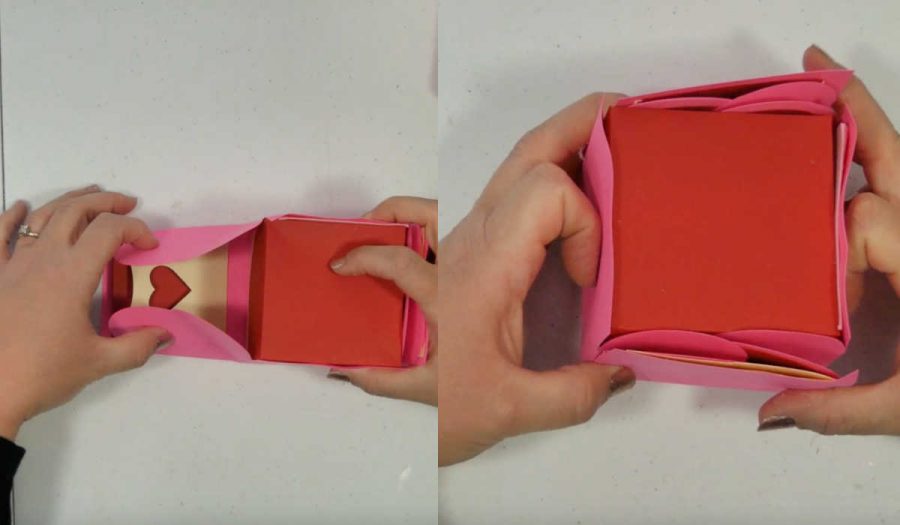
Alright now we get to put it all together! You can fill the inner box with treats or small gifts. Once it’s full place the smaller lid over the box.

Place the inner box on the center of the exploding box. Now we are going to fold the sides of the exploding box up around the inner box. You’ll want to make sure all of your glue is dry before you do this.
Start by grabbing two of the hearts. As you lift that side of the box up, fold both of the hearts in. Once you get them closer together, you’ll need to tuck one heart behind the other.

Now with one hand, you’ll be able to hold three of the sides of the box up. With your other hand work on folding the other two hearts on the last side in.
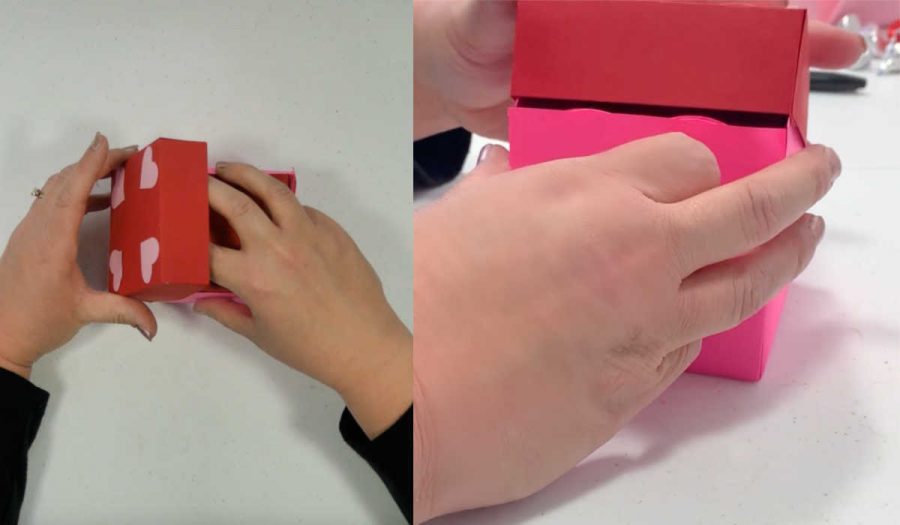
If you position your hand on the top you’ll be able to hold all four sides up while you grab the lid. Slide the lid over the top so that it will hold up three of the sides.
On the last side, you may need to tuck into the lid. It fits snug to hold it all together, but it’s not too tight.
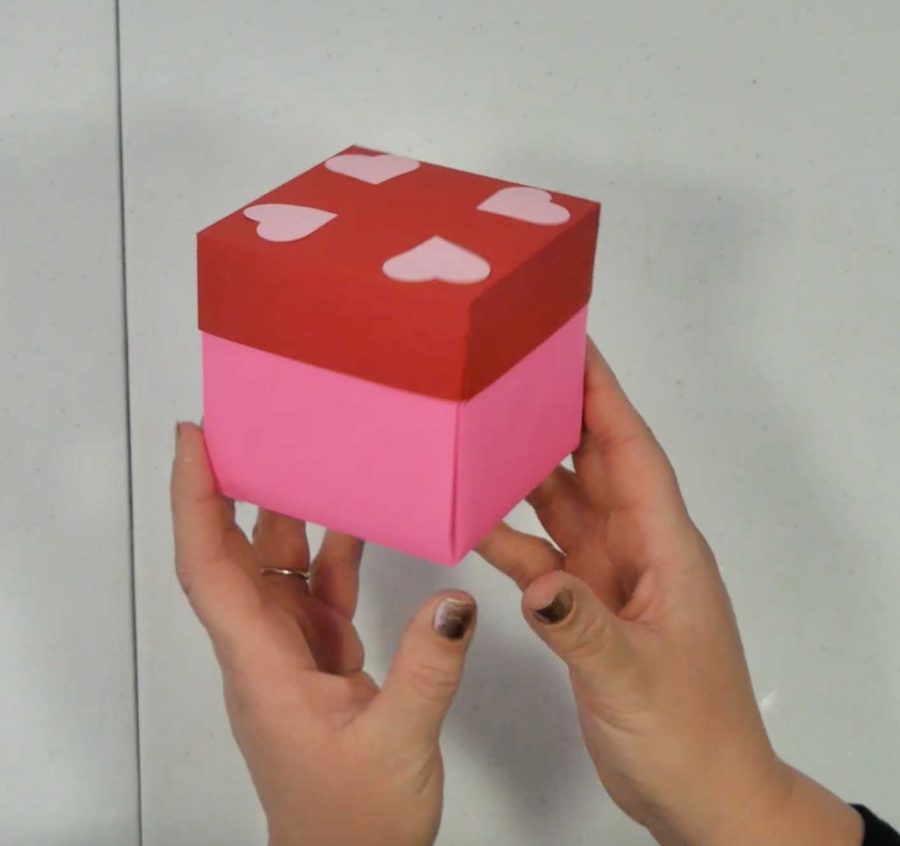
And then when you take the lid back off….
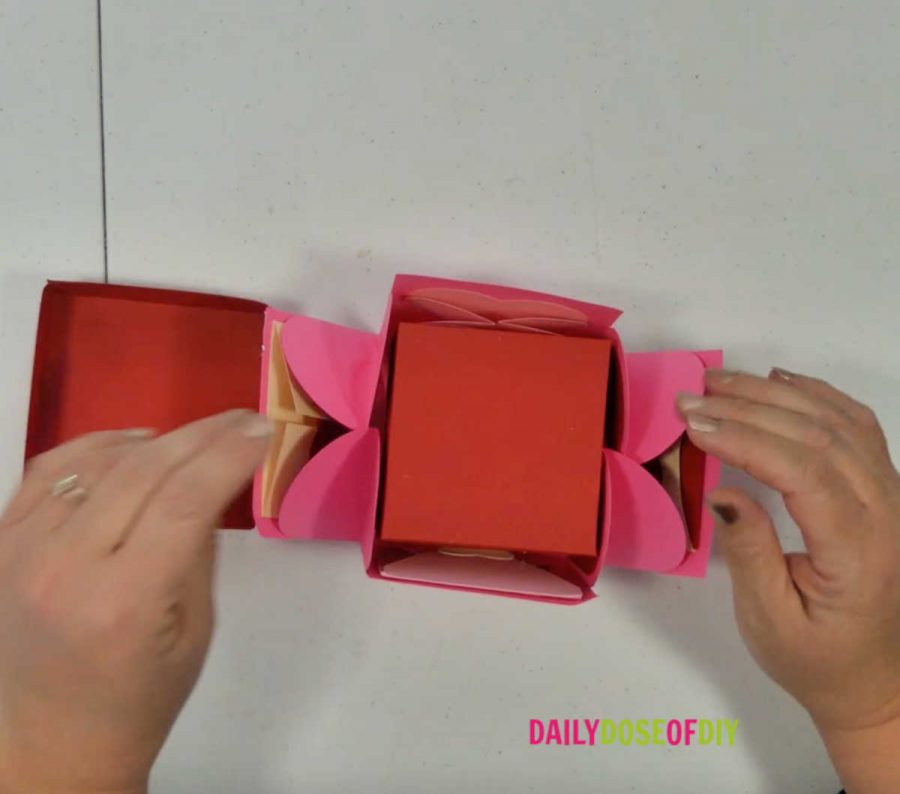
The sides explode out to reveal your fun messages and gift.
Get the Free Exploding Box SVG
You can make your very own exploding box with the SVG pattern that I made. I keep all of my free SVG cut files in a resource library for your convenience. It’s like a one-stop shop to find everything.
The SVG files are in alphabetical order, so once to get into the library scroll down to ‘Heart Exploding Box’, there’s also a picture to help you find it.
To gain access to the free library simply fill out the form below and the link and password will be immediately sent to you. This also adds you to my weekly (sometimes bi-weekly) newsletter where I send more fun SVGs and crafts. (You can unsubscribe at any time – but you won’t want to)
All of our free SVGs and Designs are kept in a library for your convenience. Fill out the simple form and we’ll send you the link and password to access the SVG files right away.
Already have the password? Enter the Library HERE
Thanks for crafting with me today!


Chris Butler has helped thousands of crafters learn how to use their Cricut machine without feeling overwhelmed. She is a best selling author and an up and coming designer. For fun Chris enjoys designing SVG Files, hanging out with her family (preferably at the lake), traveling, and volunteering at her church. She is a wife and mom of two crazy fun kids.
tHIS OPENED REALLY BIG IN DESIGN SPACE IT WON’T FIT
It will all cut on 12×12 sheets or smaller though. All you have to do is reduce your canvas size in design space to see all of the pieces. You can reduce your canvas on the bottom left corner of the canvas.
I LOVE this box! I’ve had my Maker for 2 years and have mostly done onesies for the grands. This was my first “real” venture into card making. And you made it so much fun I feel I could make more without issues.
I’ve made other types of cards since. You gave me the confidence and I’m grateful for that!
I made the box for my husband. We have a big anniversary Feb 16. I have the candy for the inner box but can’t figure out what to write on the little notes. I’ll figure it out 😉
Again, Chris, thank you so much. You are appreciated!
Cathy (near Baltimore, MD)
Thanks so much Cathy!
`This was so simple to make. I have seen the exploding boxes and have always wanted to make one. I was so scared that I couldn’t make one but with your file and directions it was very easy to make. This box is going to be part of my one year anniversary gift for my husband.
Thanks Melissa!
Thank you for this wonderful file. only everything is stuck together, and unfortunately I can’t get it loose. this makes the scoring lines loose on a mat, instead of on the part. Do you have any idea how I can untie it all?
After the file is in design space click Un-group.
Thank you for the svg exploding box. I used my cricut and made a sample one. Then I made one for my daughter for Mother’s Day. Came out super cute since I used photos and The inside box I used a thick ribbon spacing out hearts and on each heart wrote Happy Mother’s Day to our Beautiful Daughter and love you followed by a square with our photos and ending with one heart saying Mom and Dad. I glued a piece of the ribbon to inner top and folded the ribbon with the hearts which fit the size of lids so when she took off the lid I came out like an accordion. At the end I used your envelope svg for this project and out money in it. She absolutely loved it. Would love to send you the video