This post may contain affiliate links for your convenience. If you make a purchase through one of my links I will earn a small commission at no additional cost to you.
Last Updated on October 5, 2020 by Chris Butler
How to Make a Photo Name Plate
Hello Cricut crafty friends!
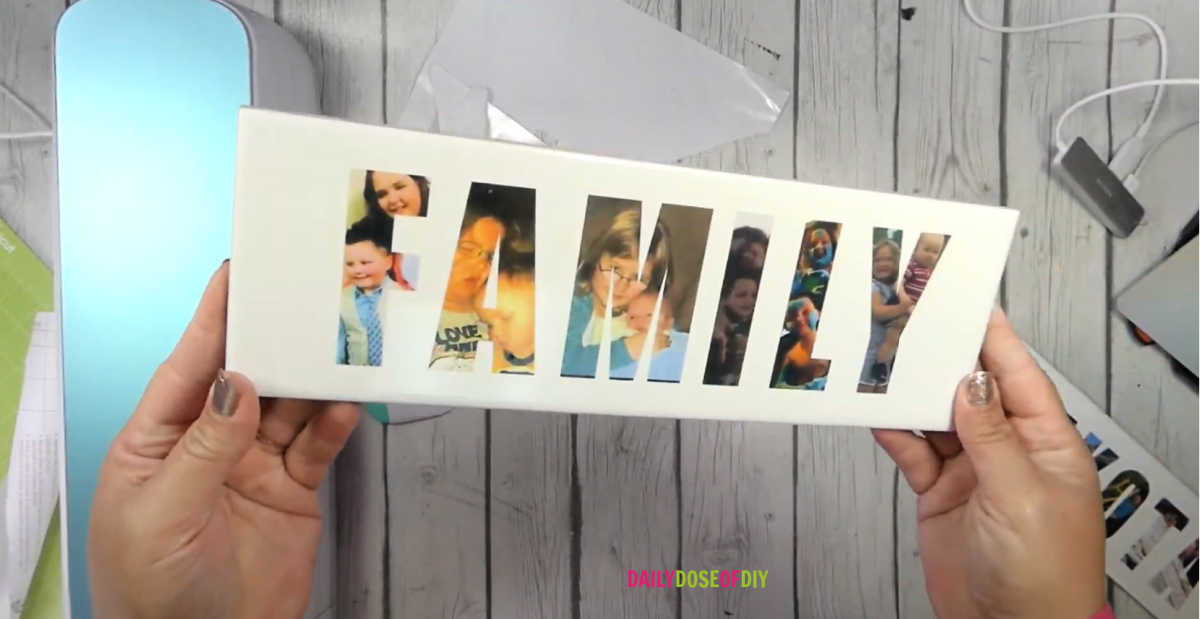
Today, I’m going to show you how to make gorgeous photo name plates with your Cricut. You’ll learn how to turn your own photographs into letters and put them on tiles to display.
I made one for my daughter’s Sweet 16 birthday, and it was a big hit!
Let’s get started.
Quick Links to Information in This Post
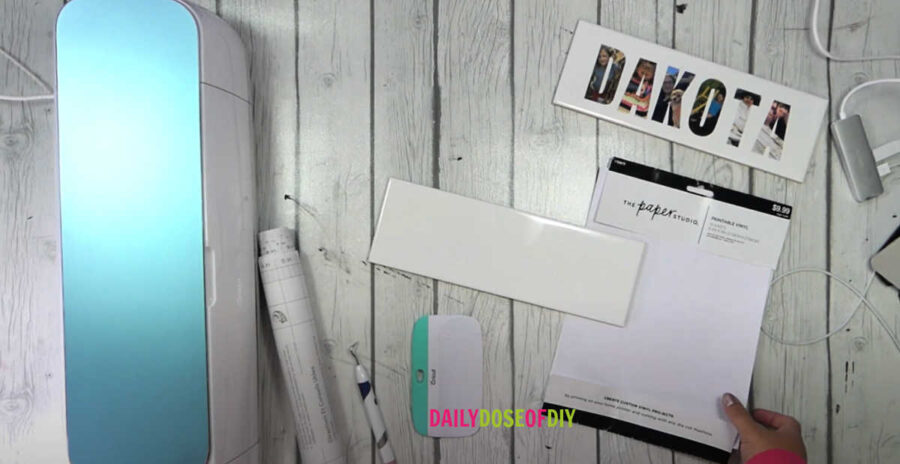
Supplies Needed for Photo Name Plate
- Printable vinyl (You can find it on Amazon here)
- Inkjet printer
- Tile (I used a subway tile I found at Lowe’s. This is something you might use in a bathroom or kitchen, and it’s very affordable – less than $1 apiece.)
- Scraper and weeding tools (I have this set here)
- Transfer tape
- Cricut machine
Pictures into Letters Video
To see the step-by-step process of turning pictures into letters and making a name plate check out the video below.
Step 1: Upload Your Pictures
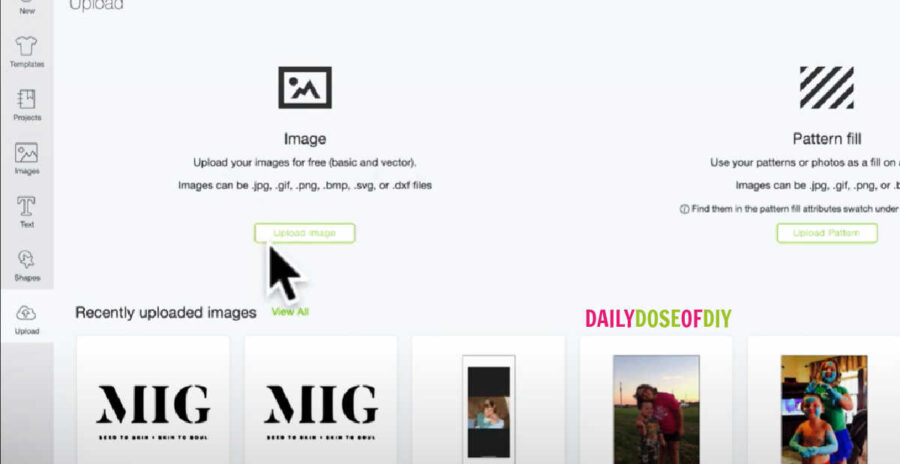
We’ll start in Design Space. The first thing you need to do is upload the photos you want to use. Hit the “Upload” button, then “Upload image,” and then “Browse.” Locate the image from your folders, and open it.
If you need more help with uploading files to Design Space see this post here.
Next you need to select the image type. Click on “Complex,” and then “Continue.”
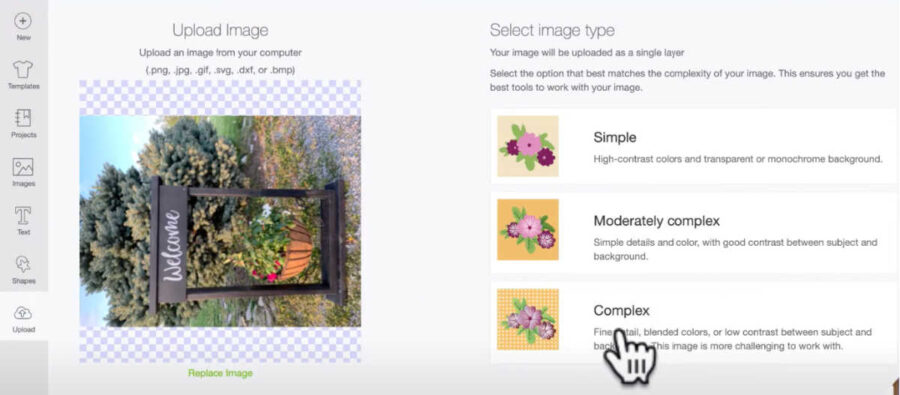
That will bring you to a screen where you can select and erase anything you want. If there’s nothing you want to erase, just hit “Continue” again.
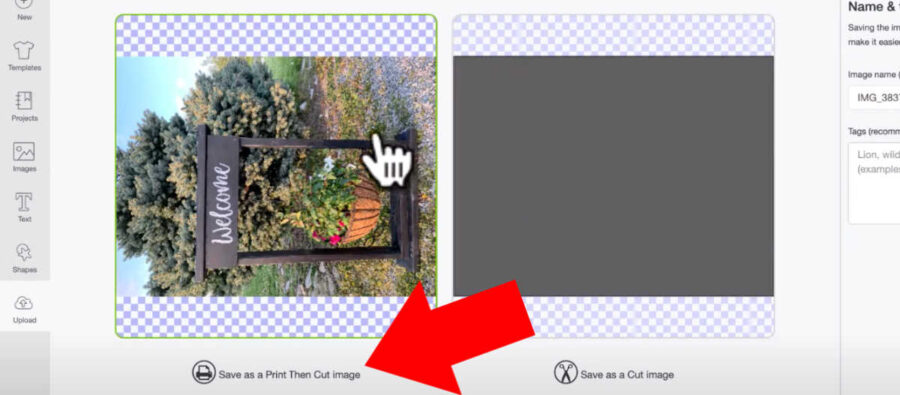
Here you’ll see the options “Save as a Print Then Cut image,” and “Save as a Cut image.” If you try to save as a Cut, you’re just going to get a blank square. So you want to save it as a Print Then Cut image. Select “Save as a Print Then Cut image” and hit “Save.”
If it’s a big file, it might take a few minutes to save. You may want to reduce your pictures before you upload them into Design Space, so it doesn’t take as long.
Once your image is saved, you will see it under “Recently uploaded images.”
So, pick a photo for every letter in the word you want to use and upload them into Design Space. Once they’re all uploaded, you can select them all at once and click “Insert Images.”
Tip: To select more than one image at a time, select the first image and then hold down the Shift key while you select the rest.
When you have inserted all your images into Design Space, you’ll want to move them out of your way. Now you need the text for the word you’re going to use for your design. (I used the word “Family” in this video.)
Step 2: Type Your Word
Click on “Text” in the left menu, and type your word into the text box. This will be in the default Cricut Sans font, so you’ll need to change that. Go up to the top menu on the left and change the font to Impact. These are nice, fat letters, so you’ll be able to see more of the pictures.
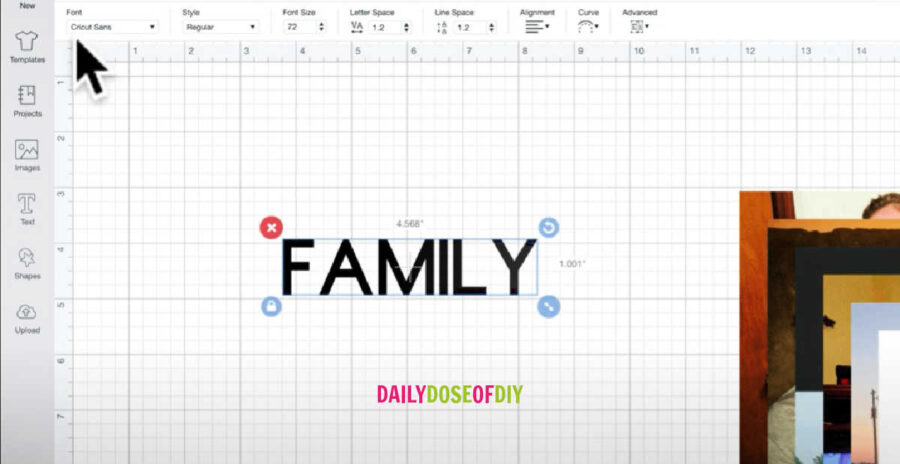
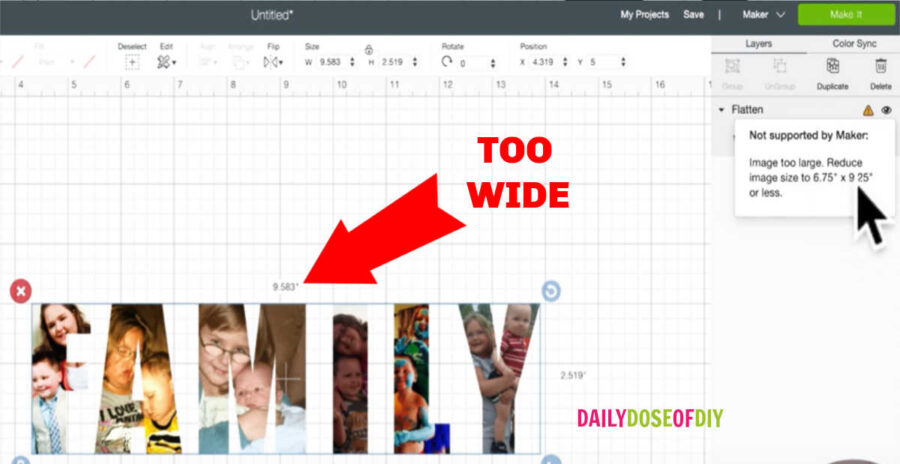
The next thing you want to do here is to make your letters bigger. Now, the size is limited for Print Then Cut to no larger than 6.75” x 9.25”. So change the width of your text to 9.25”, and you’ll be fine.
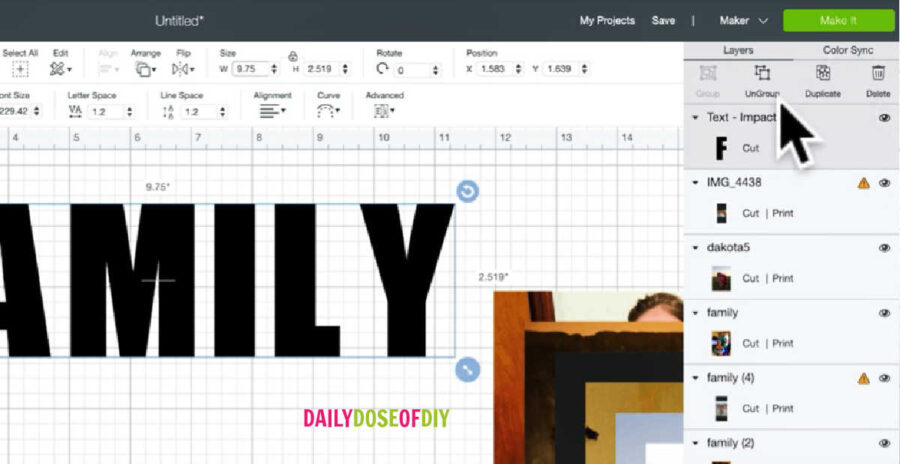
Next, go up to the top of the Layers menu and click “Ungroup.” Now you can move each of letters around individually.
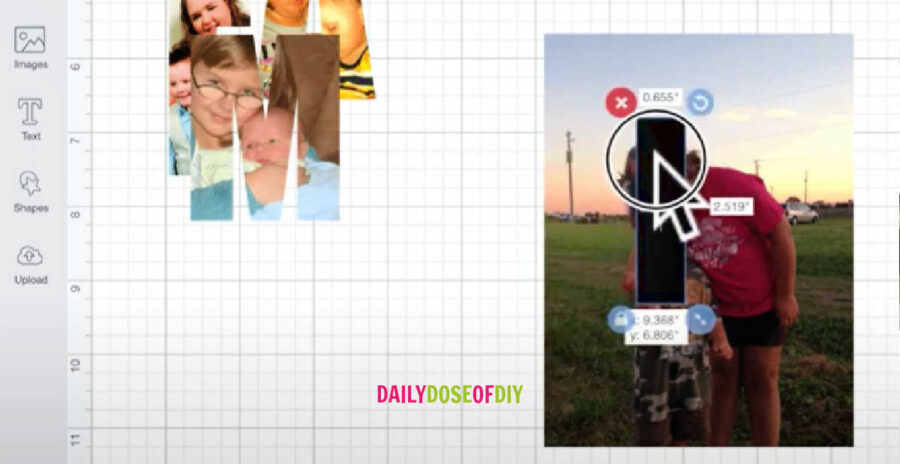
Take some time to compare your letters with your images. Place the letter on top of the image and play around with the size of the image until you’re sure that you can get the part of the picture that you want inside of the letter.
For example, my word, “Family,” includes the letter I, which is basically just a straight line. For that letter, I chose a photo where the two faces I wanted to include were resting one on top of the other, so they would line up nicely inside of that letter I.
Step 3: Slice the Letter and Picture
Once you are happy with the placement of photo behind the letter, select both the letter and the picture, go down to the bottom of the Layers menu, and hit “Slice.”
What that will do is slice the shape of the letter out of your picture.

After it’s sliced, select and delete the black letter and picture.
And you’re left with the photo in the shape of the first letter. Repeat this same process until you have all your letters cut out.
Step 4: Place the Letters Back in Order
Now put your letters back in order. Don’t worry about getting the placement exact, but do space them out a little. Click and hold down with your mouse, and drag it across the letters to select them all at once.
From the top menu, click “Align” and then “Center Vertically,” and that will put them all in a nice, straight line.
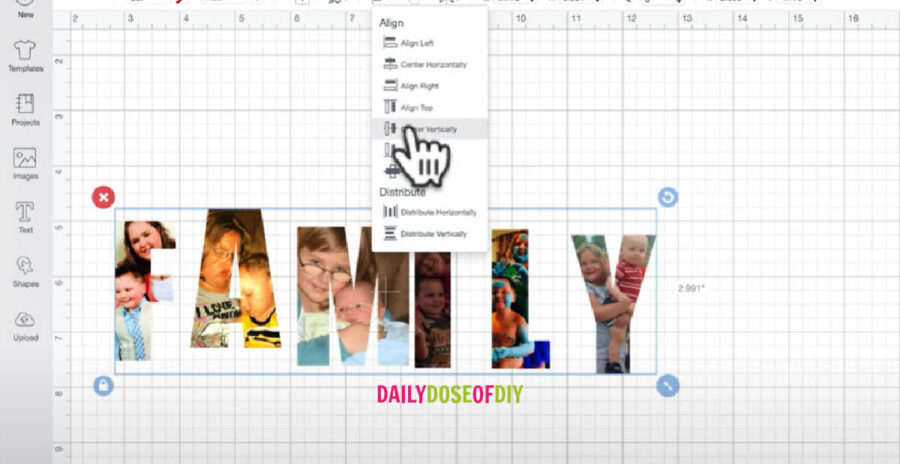
Next, go back up and click “Align” again, scroll down to “Distribute,” and click “Distribute Horizontally.” That should space them out evenly.
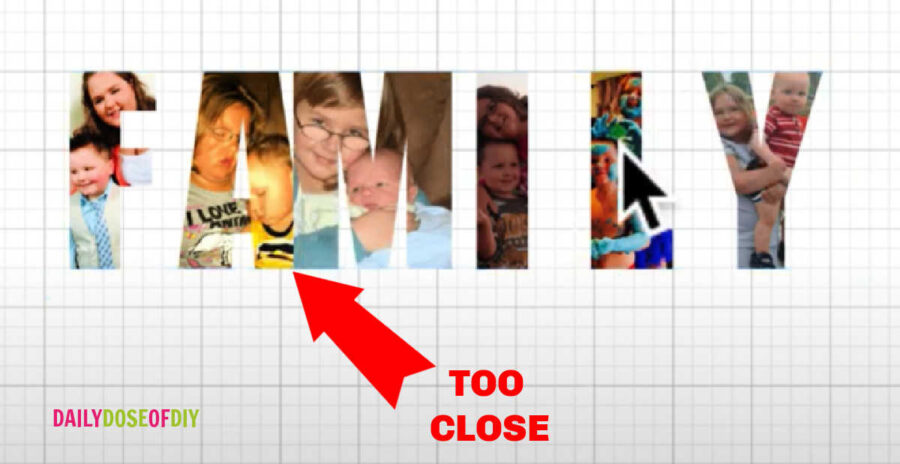
Here is where I ran into a small glitch. If you watch the video you’ll see that for some reason, it didn’t seem to like my A and M, and kept squishing them together.
If you have this same problem, you’ll have to do it manually like I did. Don’t click and drag the letters, though, or you’ll mess up the centering vertically. Select one letter at a time, and use the arrow keys on your keyboard to move the letter to the right or left until you think it looks pretty even.
Step 5: Flatten and Prepare to Print
Whichever method you use, when you’re happy with the spacing, select everything again and click “Flatten” at the bottom of the Layers menu. That puts everything back together as one.
If you see an alert icon in the Layers menu, click on it to see what the problem is. You might need to adjust the size again to make sure it can print.
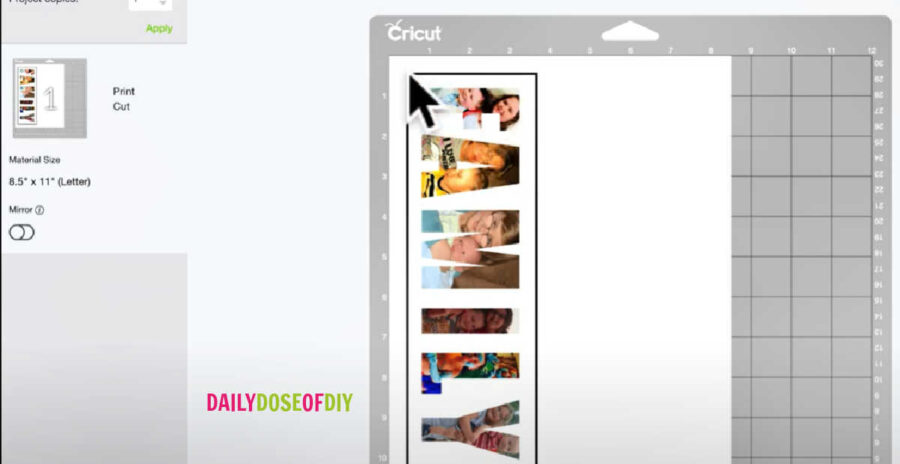
If there are no alerts, you can go ahead and click the “Make It” button. The screen will show you how to put your word on the mat.
You’ll also see that it will print a little rectangle around your word.
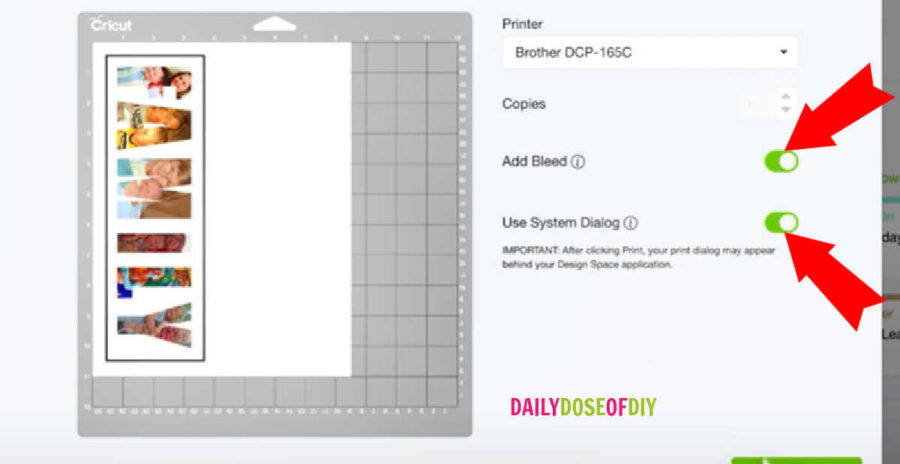
Click “Continue,” and then “Send to printer.” It should come up with the printer that you normally use, if it’s connected. If not, you want to make sure you get your computer connected. You also want to make sure “Add Bleed” is toggled on. That will give a bleed around the letters.
I also like to toggle on “Use System Dialogue.” And it tells you that after clicking print, the dialogue may appear behind the Design Space application. So click “Print,” and then if nothing else happens, you need to go up and minimize Cricut to see the application behind it.
Step 6: Send to Your Printer and Print
The reason you want to view the dialogue box is so you can change your print settings to photo quality. I do this by changing the media type to photo paper, which automatically changes the quality to photo as well. Your printer may be different, so just make sure you get it set to photo quality.
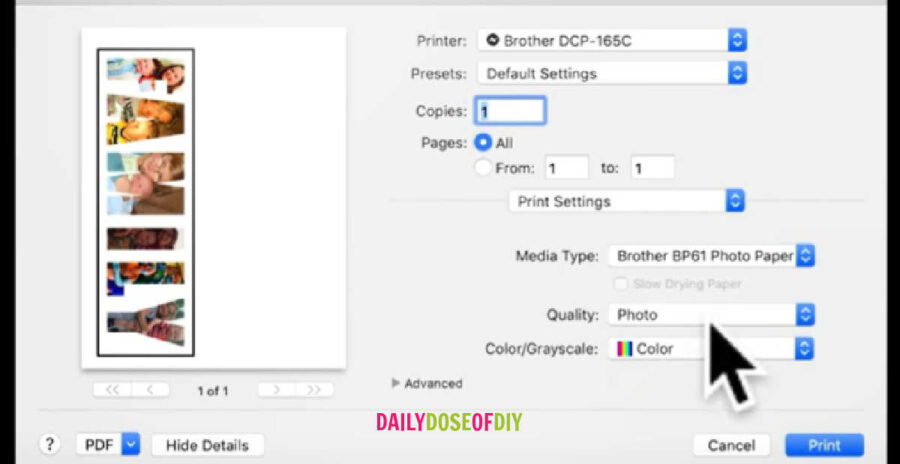
Now you’re ready to send it to your printer.
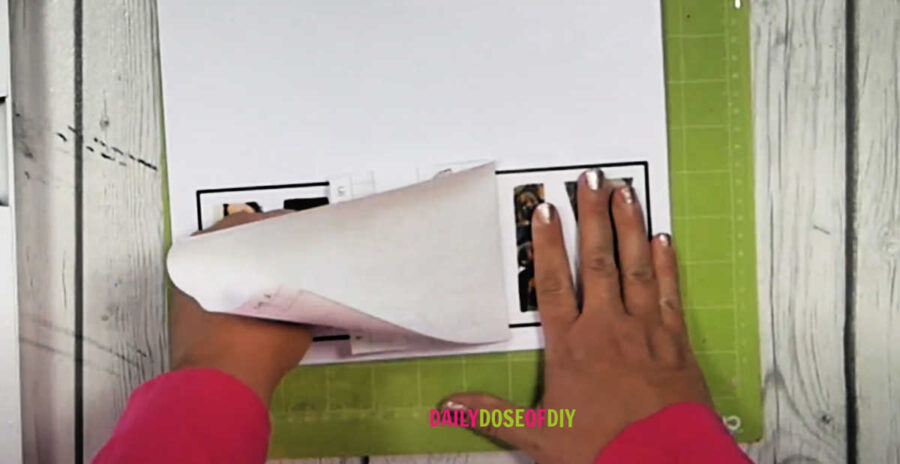
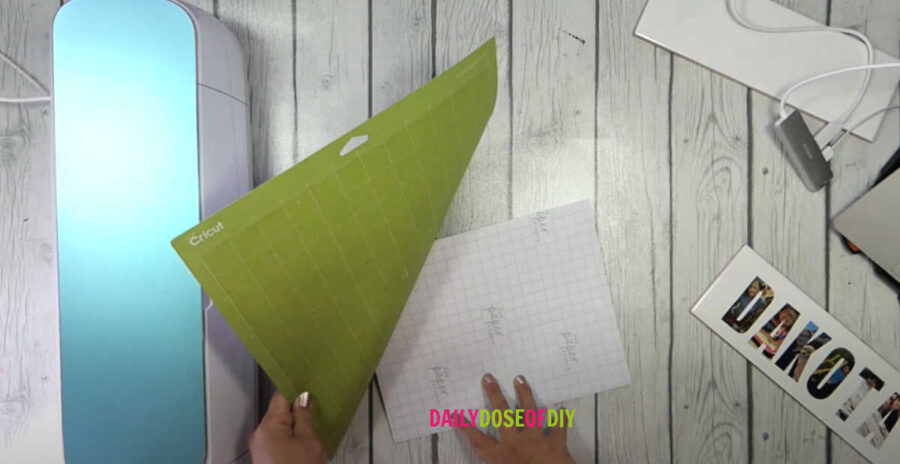
However, before you actually print this on the vinyl, you may want to do a test run to make sure you know which way to load the printable vinyl. For my printer, I put it down in the tray, and then it feeds through and prints. If you aren’t sure, and you don’t want to waste a piece of vinyl, you can do a test print.
Just mark a plain sheet of paper so you can see if you need your printable vinyl facing up or down to print correctly. After you test it, go ahead and print the photo on the printable vinyl, and you’re ready to get it cut out.
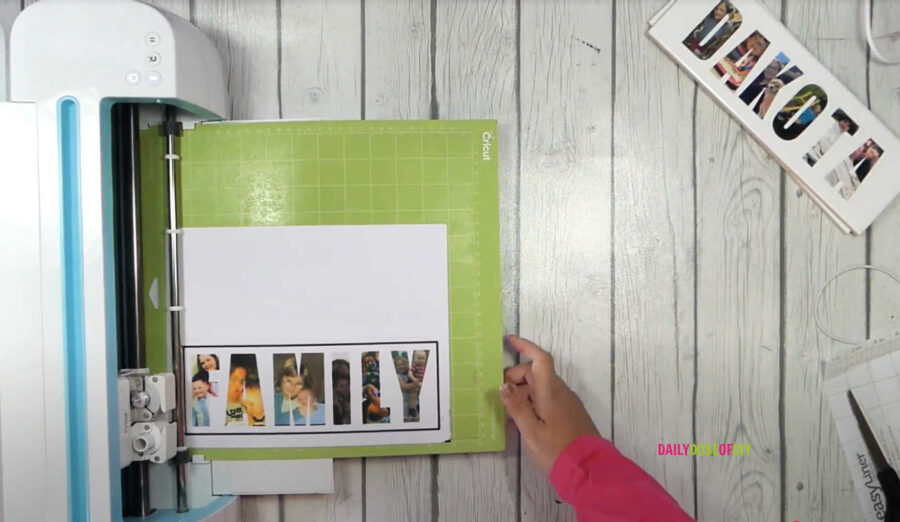
Step 7: Cut with Your Cricut
Before you cut the vinyl, you’ll want to add some clear shelf liner on top. (I use this shelf liner as transfer tape, also.) Adding the shelf liner to the vinyl will help protect the photos and give them more of a glossy look, especially if you’re using matte printable vinyl like mine.
For a simple way to place transfer tape on vinyl without bubbles or wrinkles see this post.
Remember to place the design on the cut mat exactly as shown on the print screen. Like I mentioned earlier, mine needed to be placed in the top left corner, with the F at the top.
If you have a Cricut Maker, choose “Light Cardstock” from the Set Base Material list.
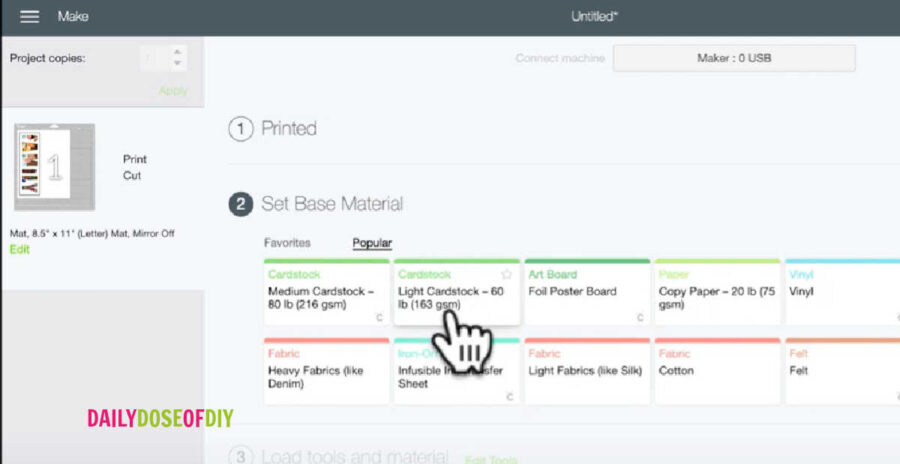
If you have an Explore, change the dial to “Light Cardstock.”
I use the light cardstock setting because of adding the clear contact paper. Cutting it as regular vinyl didn’t cut deep enough to get the whole design out. The light cardstock setting may cut through the backing in some places tho.
Now you can get your mat loaded and get the vinyl cut.
Once your mat is loaded Cricut will scan those black lines to calibrate the cut. Then it will cut around each letter.
Once it’s finished unload the mat. Be sure to flip the mat over and remove the mat from your vinyl to help prevent curling and tearing.
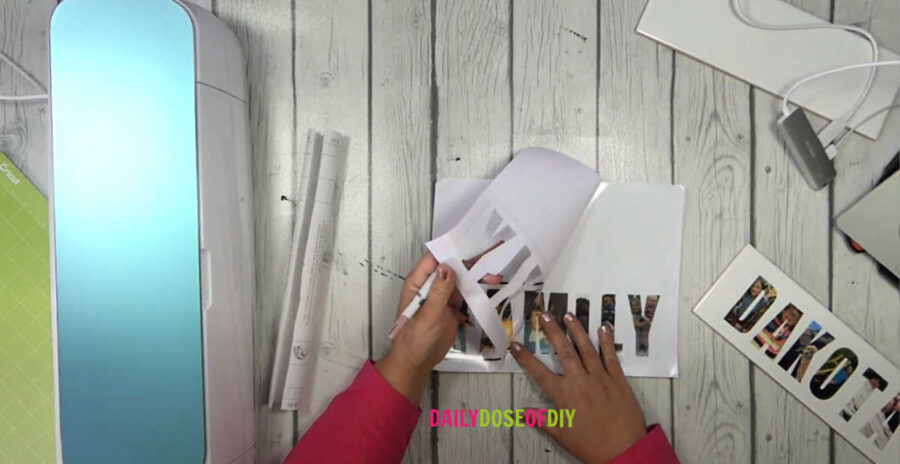
Step 8: Weed and Transfer the Vinyl
When you weed the letters, you want to leave them exactly in line with each other as they are. So start in one corner and remove all the extra vinyl around the letters, as well as the centers of letters like A or O.
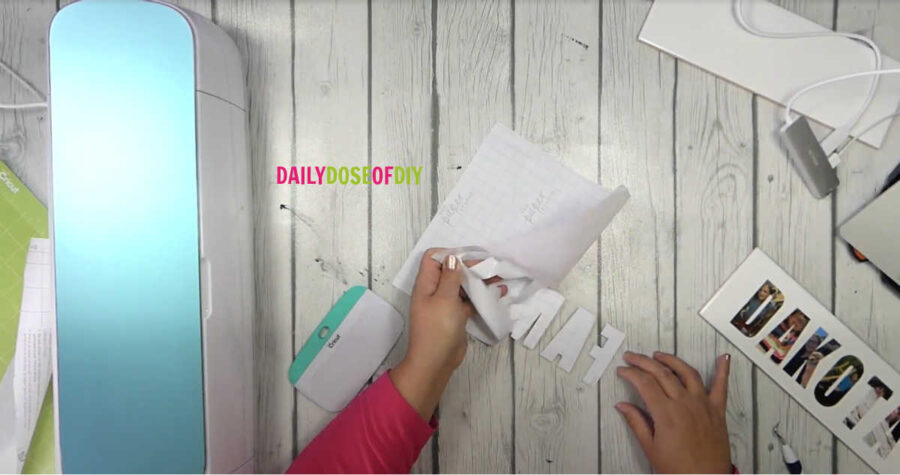
Once all the vinyl is weeded away, get another piece of transfer tape. You’ll use this one to transfer the vinyl to your tile.
Line the transfer tape up on one end and smooth it across the whole word, and then use your scraper tool to make sure it sticks.
Tip: If you have trouble getting it to stick, flip the whole thing over and burnish it again, and then just pull the backing off your vinyl.
If Cricut cut through the backing a little bit, you’ll also have to go back and peel the extra backing off some of the letters.
Now you are ready to transfer it to your tile. I just eyeball it to get it straight, but you can pre-measure to find the center of your tile if you want.
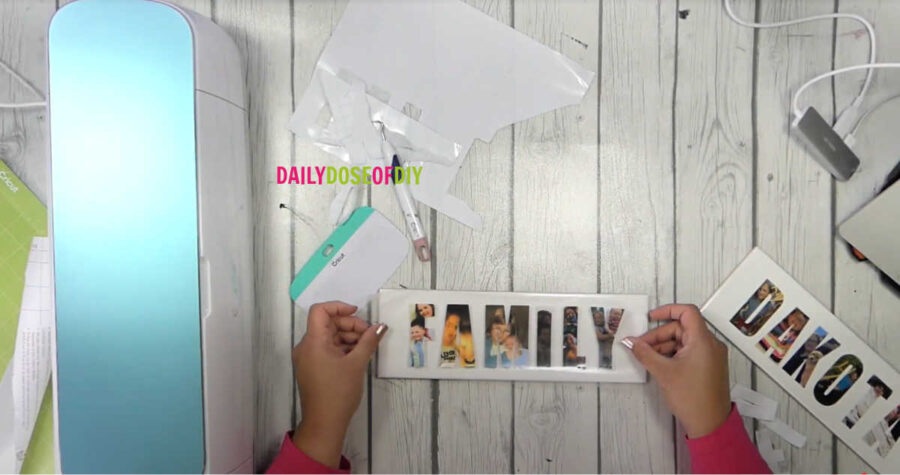
Once you get it centered how you want it, burnish it really well with your scraper, so that the vinyl sticks. Then peel back that piece of transfer tape, leaving just your word. The project is complete!
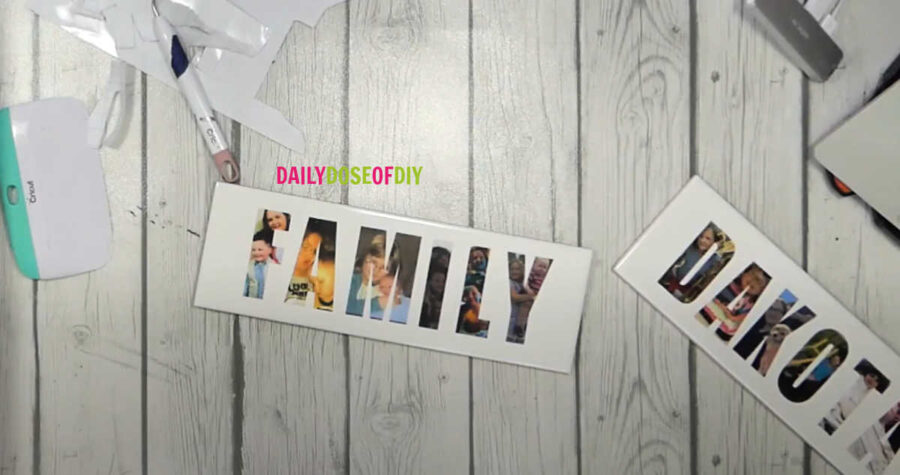
So now you know how to make these lovely photo name plates. I can’t wait to see yours!
Thanks for crafting with me today!


Chris Butler has helped thousands of crafters learn how to use their Cricut machine without feeling overwhelmed. She is a best selling author and an up and coming designer. For fun Chris enjoys designing SVG Files, hanging out with her family (preferably at the lake), traveling, and volunteering at her church. She is a wife and mom of two crazy fun kids.
What are some ways to display the nameplates?
Hi Chris,
Thank you so much for this great idea. We are still having severe lock downs in Australia and my mum is in a nursing home and we cannot have our usual Residents & family Christmas lunch this year because of COVID restrictions.
I plan on making a FAMILY sign for her table so we can share in the day even if we are not there.
Thanks again
Karen T xxx
Hi Chris,
I love the name plate project, so I have done everything up to the point of the cut. I get the message “Machine cannot read senor marks. Make sure you’re using white material, it is positioned correctly on the mat, and the cut sensor marks are fully printed.” Yes, I’ve cleaned my sensor light, I’ve turned off the overhead light and still no luck. Any other suggestions? I am using an Explorer Air.
Thank you
Sheri
Thank you for sharing this! Did you do anything to the back of your tiles to make them smooth, or just leave them with the ridges (all the tiles I found at the home improvement store have grooves for the tile “glue” to affix to)?
Hi Jen! I just left the back as is. If you wanted to make it nicer you could glue a piece of felt to the back.
Great Idea … What is the exact measurement of the tile you used?
can you do this on wood?
yes!
Can you use printable sticker paper for this?
yes you can