This post may contain affiliate links for your convenience. If you make a purchase through one of my links I will earn a small commission at no additional cost to you.
Last Updated on March 22, 2018 by Chris Butler
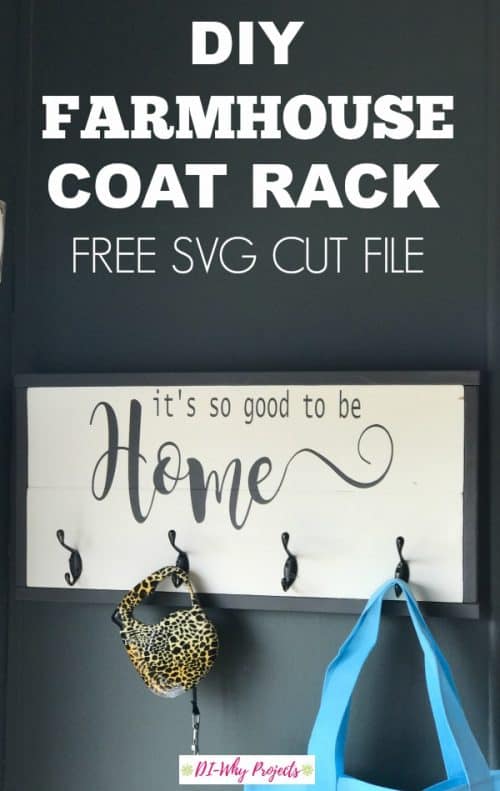
I’m kind of in love with Farmhouse signs. But the costs can add up really quick! Plus I need functional first. Thankfully we can combine Farmhouse Decor with functionality with this simple DIY coat rack.
This project came about one day after picking up a few too many coats. I decided we needed a coat rack. And I needed it to look nice, and match the decor, and not cost an arm and a leg. That’s not too much to ask, is it?
I don’t think it is. Which is why I love doing DIY Projects. These are made for a small fraction of the cost of buying one. And we get to paint! It’s a win win!
So let’s get to it.

Quick Links to Information in This Post
DIY Coat Rack Supplies Needed
- 1×6 board 4′ long or 1×12″ board 2′ long
- 1×2 board 6′ long
- Coat Hooks
- Pocket Hole Screws (if using two 1×6 boards)
- Paint
- Wood Glue
- Nails
- Drill
- ‘It’s so good to be home’ SVG File (available in my free resource library, get access at the bottom of the post)
How To Make A Farmhouse Coat Rack
First, we are going to cut our wood. If using the 1×6 boards, you will need to cut them at 24″ each.
The 1×2 is used for the frame, cut two lengths at 11″ and two at 25 5/8″ (If you are using a 12″ board, check these measurements.)
I used the two 1×6 boards together for the base of my coat rack.
To do this I used a pocket hole screw system like the Kreg Jig

I love how Kreg Jig allows you to attach two boards together to look like planks.
After the boards are screwed together, sand everything down really well, including your frame pieces. And then clean up the wood being sure to remove all of the dust.
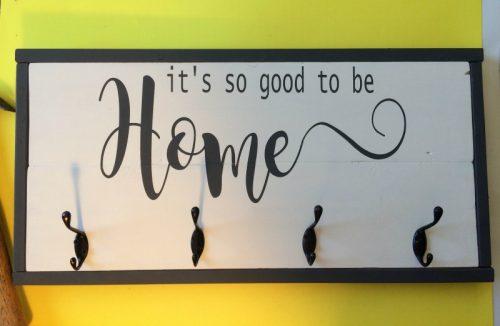
Paint or stain the base with your choice of color. I used Waverly Chalk Paint in Ivory for my base. And I painted the frame and words with Waverly in the color Elephant.
After the base is done and dry it’s a good idea to give it a light sanding with 220 grit sandpaper. Be sure to remove all of the paint dust when you are done. We want our stencil to really stick!
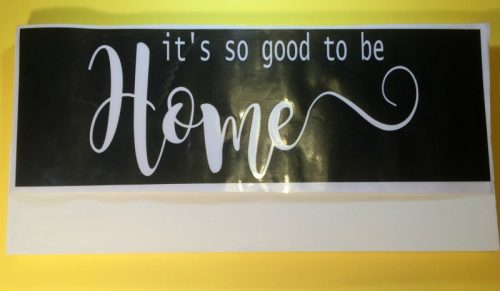
Now we are ready to put our stencil on and paint it. I have this SVG file in my Free Resource Library that you can use. (details at the bottom of this post)
Stenciling the Design
If you need a stencil you can make one with your Cricut. I have a complete tutorial for making a stencil here if you need help. You can design your own or use mine if you like.
You want to line your stencil up to the top so we have room for coat hooks at the bottom.
Seal it so your paint will not bleed, and then paint the letters in your color of choice. If you need more help I have detailed directions with extra tips for painting a perfect sign every time here.

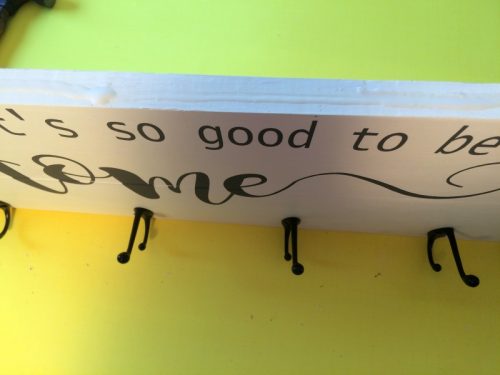
See how crisp the lines are, even where the two boards join together? I just love it!
Adding the Hooks to Your Farmhouse Coat Rack
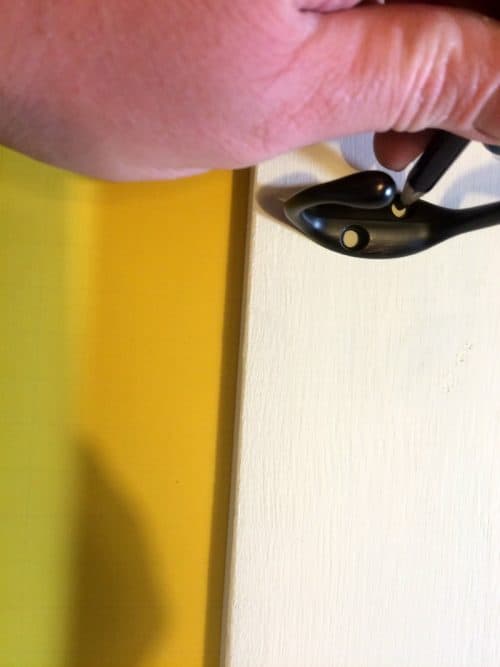
I placed my coat hooks about an inch up from the bottom of my sign. I used four hooks. Across the 24 inch span of my board, I placed the hooks at 3″, 9″, 15″, and 21″.
Line them up and mark the holes for the screws.
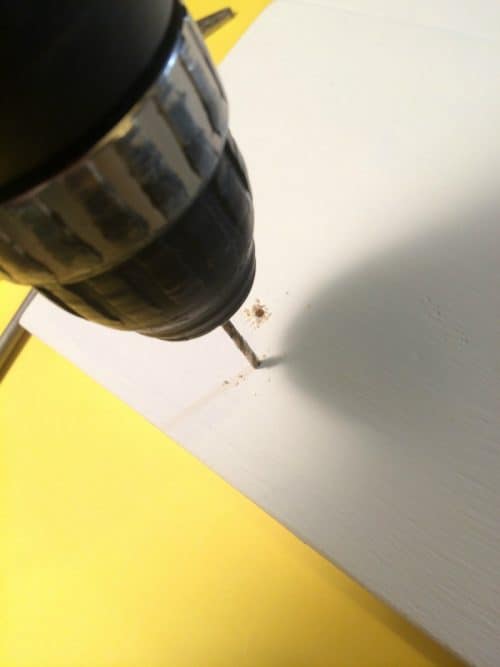
Grab a drill bit slightly smaller than your screws. Trust me pre-drilling the holes will save you stripped screws later. Been there, done that. Drill holes for each one of your marks.
After all of your drilling is done, line the coat hooks up to their holes and screw them all down.
Framing It Up
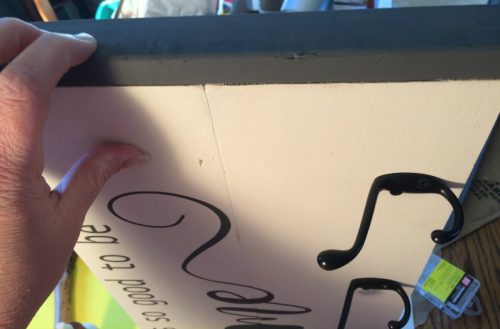
I start with the sides of my frame. They will be the exact width of your boards. And for this project, I want the frame flush with the front of the sign.
You can use a nail gun or 1″ finishing nails and a hammer. I put three nails in the sides and 4 on the top and bottom.
You should add glue to all the frame sides, but especially the top for this one. That’s where I want to attach my hangers, and I want to make sure it doesn’t move!
After the top frame is on, flip it over and add your bottom frame piece.
If you want to add hangers, they can be attached to the back of the top frame piece. So far I have mine just hanging from the frame and it’s all good.
Pretty easy huh? This is a great beginner/intermediate project. Plus it’s a fraction of the cost of buying one. It’s a great way to save money on home decor. And you could even sell them and make a little side hustle income!
Here are the links again for ‘Making your own stencil with a Cricut’ and How to Paint a Perfect Sign Every Time’ if you needed them.
Swipe My ‘it’s good to be Home’ SVG File
Want to use my ‘it’s good to be Home’ SVG file? You totally can! I have it available in my Free Resource Library where I keep all my plans, printables, and files. To get exclusive access, simply fill out the form below.


BE SURE TO SAVE THE SIMPLE DIY COAT RACK TO YOUR FAVORITE PINTEREST BOARD!


Chris Butler has helped thousands of crafters learn how to use their Cricut machine without feeling overwhelmed. She is a best selling author and an up and coming designer. For fun Chris enjoys designing SVG Files, hanging out with her family (preferably at the lake), traveling, and volunteering at her church. She is a wife and mom of two crazy fun kids.
I cannot wait to try this. And thank you for the great Cricut tutorials..just what I was looking for!
I just happened across your website and am so glad that I did!!! You are awesome 🙂
Thank you Beth! I’m so glad the posts are helping you.
This is the BEST tutorial. I now I can do this now!
OMGOSH… I think I love you… I have read and looked at every single thing you have on your site. and I will be back often just as a refresher… YOU make everything so easy to understand… simple and easy to follow.
THANK YOU FOR ROCKIN’
Joy
Awweee Thanks Joy!