This post may contain affiliate links for your convenience. If you make a purchase through one of my links I will earn a small commission at no additional cost to you.
Last Updated on March 14, 2018 by Chris Butler
Are you ready to start adding some Spring decor to your home, without spending a ton of money? I have the solution with this crazy easy Spring Farmhouse Wreath.
It seriously cost like $5-$6 in supplies and took me less than 20 minutes to make. Crazy right? We really don’t have to spend a lot of money to make our houses beautiful.
In fact, I found most of the supplies at Dollar Tree! Dollar store crafts are some of my favorites. You can make some really cool crafts with the items you find there.

Don’t you just love the door my wreath is hanging on? Can you believe it was once a hollow core door? You can see how I transformed my hollow core door to a barn door here.
Let’s get started!
Quick Links to Information in This Post
DIY Spring Farmhouse Wreath Supplies Needed
- Styrofoam Wreath Form (I Used 9.5″)
- Burlap Ribbon 2″ Wide
- Artificial Flowers (2-3 bunches)
- Twine
- Hot Glue Gun
- Wire Cutters
- Craft Knife
- Wreath Hanger
The wreath form and artificial flowers I found at my local Dollar Tree. They normally carry the burlap ribbon, but they didn’t have any brown when I stopped by. However, I found a spool at Dollar General for $2.00
The nine-foot spool of burlap ribbon was plenty long enough to cover the 9.5″ wreath.
Adding the Burlap Ribbon to your Spring Farmhouse Wreath
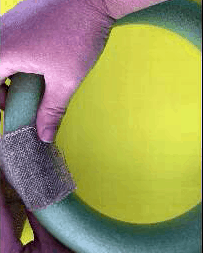
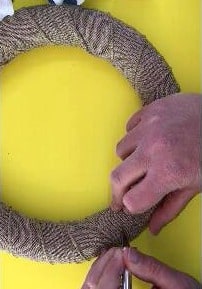
So to start we are going to use hot glue to attach one end of your burlap ribbon to the styrofoam wreath. Be careful not to burn your fingers! I usually use the end of a pen to push the ribbon onto the wreath so I don’t burn myself.
After the glue is dry (it just takes a few seconds) begin wrapping your burlap ribbon around the wreath.
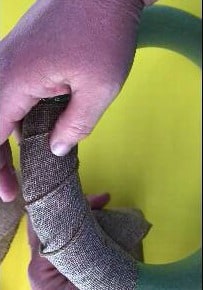
Be sure to overlap the ribbon each time you go around so we don’t see the styrofoam underneath.
Continue wrapping your ribbon all the way around your wreath.
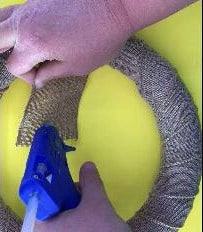
When you get around your whole wreath cut off the remaining ribbon. Make sure your end will be on the same side as your start. This will be the back of the wreath. We don’t want to see the glued ends on the front.
While holding the ribbon so it won’t unravel, apply hot glue to the end and secure it to your wreath.
Adding the Flowers to your Spring Wreath
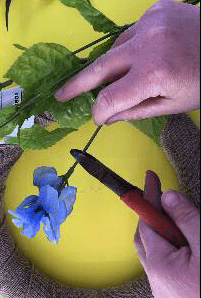
Now we get to decorate our wreath with pretty flowers! Use wire cutters to cut the flowers from their stems. Be sure to leave enough wire at the end of the flower to insert it into the styrofoam.
After your flowers are cut, flip your wreath so the front is facing up.
My flower stems were not strong enough to poke through the burlap ribbon. So I used a craft knife to cut a slit in the burlap where I wanted my flowers to go.
When you cut your slit place your finger on the cut so you don’t lose it. Then take your flower and poke it through into the styrofoam.
I did not use glue to hold the flowers in. As long as your stems are long enough (about an inch) the styrofoam will hold them.
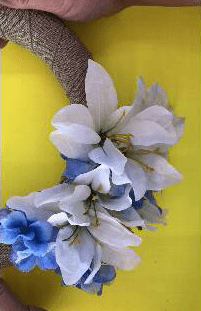
Keep cutting slits and adding flowers to your wreath. You will want to keep the flowers fairly close together so it will look full.
It’s ok if you need to take some out and rearrange them. The slits you cut are hard to see and they will be covered by the flowers anyway.
I used two different colored flowers for my wreath. So I alternated the colors with about two rows of white for every row of the lavender.
The flowers cover about 1/4 of my wreath. If you were looking at a clock, the flowers go from about 6 o’clock to 9 o’clock.
I used three bunches of flowers to cover this area. It will depend on how many flowers are in your bunch. My white ones had four, so I bought two of those, and the lavender had several flowers so I only bought one of those.
Hanging your Spring Farmhouse Wreath
After you are happy with your flower arrangement flip your wreath back over to the back.
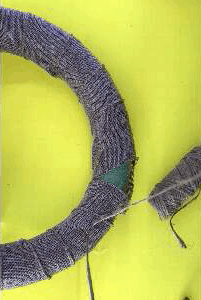
In keeping with the clock reference, we are going to add twine at the 12 o’clock position to hang the wreath.
Cut two slits in the burlap to thread your twine through. I really should have cut mine a bit wider, but it works. Since mine was a bit on the narrow side I added a couple of dots of hot glue when I was done. This will keep the burlap from tearing and the twine from moving.
I tied the end of the twine off in a bow and added another dab of hot glue to keep it secure.
All done! Now you are ready to hang your wreath.
As you can see this is a crazy easy (and cheap) way to spruce up your home for Spring. I really hope you enjoy making yours, and I would love to see it! You can snap a pic and email it to [email protected] come or tag #dailydoseofdiy on social media.

Want to save this Spring Wreath for later? Be sure to Pin it to your favorite Pinterest board.

Sign up for my weekly newsletter and stay up to date on all my budget-friendly DIY ideas. Doing so also gives you exclusive access to my FREE Resouce Library where I keep all of my plans, printables, and files.

Chris Butler has helped thousands of crafters learn how to use their Cricut machine without feeling overwhelmed. She is a best selling author and an up and coming designer. For fun Chris enjoys designing SVG Files, hanging out with her family (preferably at the lake), traveling, and volunteering at her church. She is a wife and mom of two crazy fun kids.
Leave a Reply