This post may contain affiliate links for your convenience. If you make a purchase through one of my links I will earn a small commission at no additional cost to you.
Last Updated on April 20, 2023 by Chris Butler
Do you want to use your Cricut to make Sublimation Designs? You’ve landed in the right place. Today I’m going to show you how to make your own sublimation prints in design space.
We’re even going to go over some things you can do to get around Cricut’s Print then Cut limited sizes. There’s a little trick we can use to bypass those limitations.
If you’re totally new to Sublimation crafts, be sure to see my Sublimation for Beginners post. It’s the ultimate guide for everything you need to start sublimation printing, from the best sublimation printer to sublimation ink, and paper.
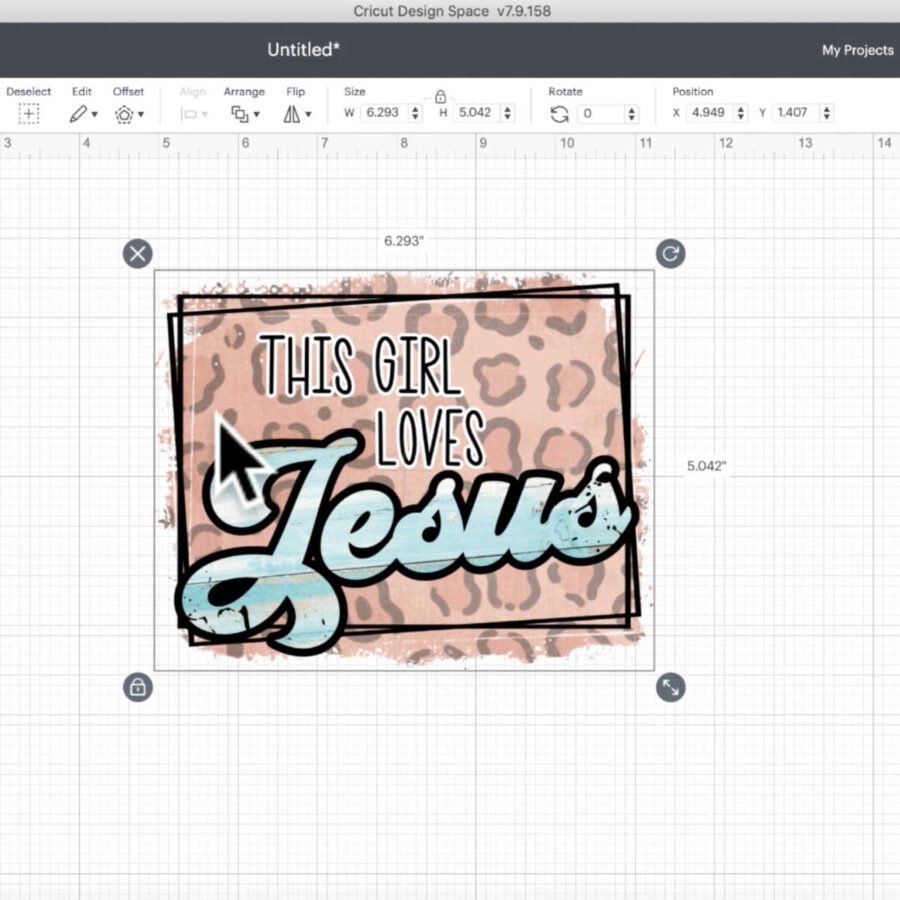
Let’s take a look at the design I’m going to show you how to make. You can use the techniques you’ll learn in this post to make your own sublimation transfers.
Quick Links to Information in This Post
Can You Make Sublimation Designs on Cricut?
Yes you can! You don’t even need a Cricut Machine in order to use Design Space to make your own sublimation designs. And starting with Cricut Design Space is an easy way to begin your sublimation designing journey.
You may know design space is a bit limited on what you can design. Like you’re not going to design an animal print or blend colors. To do things like that, you’ll need design software like Adobe Photoshop or Illustrator.
Even though you can’t do that in Design Space, there are some tools we can use to help.
My favorite place to use is Design Bundles. If you search backgrounds, you’ll find all different sorts of excellent sublimation designs. And they come in pretty big bundles for only a couple of dollars.

You can also search for clip art in Design Bundles and find plenty of images. I searched for Bees in the video tutorial and found all sorts of cute stuff that would look amazing sublimated on shirts or tote bags. If you have Cricut Access you can also find some clip art and already designed text there.
We’re going to use these different elements to create our own designs for sublimation applications.
How to Make Sublimation Designs in Cricut Design Space
I’m going to show you my whole design process for sublimation designs using Cricut. You’ll be able to use all of these techniques to make your own sublimation designs.
Upload Your Design Elements
So once you get some design elements you want to use, open Desing Space and Click on New Project. Next click Upload

You can either browse or you can drag and then drop from your downloads folder.
With all sublimation designs or clip art you should get a png image. If they give you choices… you might get the original file ,a png, a jpeg ….always choose the png.
PNG images will not have a background. So once it comes into Design Space choose complex for the image type. On the next screen you don’t have to do anything since png images will not have a background so click apply and continue.

On the next screen we want to choose the print then cut image and then upload.
PNG images are a little bit larger than SVGs so it might take a little bit depending on how big the file is. Once it’s in Design Space select the image and then click add to canvas.
If your image comes in huge, use the bottom left zoom buttons to zoom out so you can easily make the design smaller.

Don’t worry about your final size yet, we just want to get it down to a size we can work with. I’ll show you how to print the design as big as your sublimation paper in the following steps.
Apply the Design to Your Text
This is the image I’m using to make the word Jesus out of. It’s part of a background pack I purchased here.
So click text on the left menu and type out your word. And then on the top menu click on fonts and choose the font you want to use.

I’m using Groovy Script Font found here.
Related: How to Find Free Fonts and Download them to Cricut
Next select your text and click weld on the bottom of the layers menu. And then place the text over the design. Re-size as necessary.

Once you’re happy with the placement of the text select both your text and background design and click Slice on the bottom of the layers menu. Using Slice will cut the word out of the background.

Next move the background design and the layers you do not need from slicing and delete them. You can use this method with any background and any word. It’s an awesome thing to do to get different designs and different texture looks on your designs.

Offset Your Text
When placing a word with a pattern over another pattern it is hard to see the word. So we’re going to add an offset to make it stand out.
Click offset on the top menu on the top menu. It defaults to a quarter of an inch and that’s a bit big for what i want so i’m going to reduce it to 0.09 and then click apply.

The offset will comes in black. But it is a separate layer so you can change the color to whatever you wish. For this design I am leaving it black.
Since the text and offset are two different layers it’s a good idea to select them both and then click group on the top of the layers menu. This will keep them together as you move it around.

Upload Additional Design Elements and Add Additional Text
Now that my stand out word is done I’m going to bring in the background for my design. This is a cheetah print I found on Design Bundles here.
Once it’s on the canvas select your background and on the top menu click arrange and then send to back. Now I can put the main text on top of the design and add my remaining text.

Again select text on the left menu and then type out your words and select your font. I am using Sunkissed Beach found here.
I like to keep different lines of text in separate text boxes so I can arrange the lines how I want them.

I am also going to offset this text. Since it’s a thinner font I’m going to give it a .05 offset. And then select the offset and on the top menu change the color to white.

Once you’re happy with your text size and placement it’s time to add the outlined squares.
Make Outlined Squares in Design Space
You can kind of see our design is coming together the only thing we have left to add is the square outlines and line everything up. The square outlines will really make this pop.

We’re going to use the slice feature again to make the square outlines so on the left menu click shapes and then click square. A 2 inch by 2 inch square will appear on your screen.
Next select the square and click duplicate on the top of the layers menu. This square I am going to change the color to purple just so we can see what we’re doing.

Then on the top menu (with the purple square still selected change the size from 2 to 1.95 to make the purple square slightly smaller.

Next select both square and then on the top menu click align and then center. This will center the purple square on top of the black one.

With both square still selected click Slice on the bottom of the layers menu. Just like before pull the squares apart until you get the outline layer and delete the rest.
The default Cricut color is actually more of a charcoal color, so if you want real black change the color on the top menu.

Putting the Design All Together
Now that we have our square outline place it over top of your sublimation design and resize accordingly. You can also hit the little unlock button on the bottom left of the square to stretch it to more of a rectangle.
Once you’re happy with the placement select the outline and hit duplicate on the top menu. Take your duplicate outline and place it over the design. Using the arrow on the top right of the square tilt it a little bit to offset the first square.

Now you might need to arrange some other parts of your design. Like I want the word Jesus to be on top of the square outlines. So you will select that word and on the top menu click arrange and bring to front.

Re-size and re-arrange your words and design elements until you are happy with the look. I can spend forever on this part lol.
Once you’re happy with everything select your whole design and click flatten on the bottom layers menu. This will turn everything to a print then cut image.

If you have the orange triangle warning over in the layers menu, that means your design is too big. Reduce the size of your design to fall within Cricut’s print then cut range (6.75 x 9.25). Don’t worry, I’m going to show you how to bypass that in the next step.

Prepare to Print Your Sublimation Design
Once your design is sized correctly click the make it button. I’m sure you’re aware that sublimation designs need to be mirrored just like Cricut Infusible Ink sheets or heat transfer vinyl. So on this screen click mirror image.
Then click continue and send to printer.

When the print screen shows up toggle off the add bleed. If you do not need to resize your design you can print directly from design space.

If this is the case toggle on Use System Dialog and then click print. The new print screen will probably pop up behind Design Space. Select your sublimation printer and if you don’t have an ICC profile installed you can choose photo quality on matte paper.
The downside to this is you are also printing Cricut’s registration marks and wasting some sublimation ink. But you can simply cut them off after your design prints and press your sublimation blanks as normal.
How to Bypass Cricut’s Print then Cut Size Restrictions
But what if you want to make your sublimation design bigger and get rid of Cricut’s registration marks? The good news is you can do that too!
You will need to install a PDF printer on your computer for this to work. If you have a Windows PC, the Bullzip PDF printer will work. It’s a free download, just go here and click download and follow the instructions.

If you have a Mac go to the app store and search for PDF printer. Now for Macs, they don’t have a free version for color prints. But it’s just a one time fee of less than $10.
Once your PDF printer is installed you will most likely have to close out of Design Space and re-open it to see the PDF printer option.
After you click send to printer in Design Space select the PDF printer from the printer options. Make sure add bleed and use system dialog is toggled off and then click print.

It might take a minute but this will open up a new window with your design.
Now you want to click file and then “save as” or export. Once the save window pops up. name your design, and select where you want it to save. Change the format from PDF to PNG and if it gives you the option, 300 resolution. And then click save.

Now we have a copy of our sublimation image saved as a PNG like we need for sublimation. The final step is re-sizing our design and getting rid of the registration marks. If you have a photo editor or a program you love that will do these things you can use that.
But if you don’t, no worries we can use Google Docs (which is free)
Re-Size Your Sublimation Design and Get Rid of Registration Marks
Open up a new Google Doc and the first thing I’m going to do is change the zoom to 50% so we can see the whole page.
Then click insert and insert an image. Upload your sublimation design from your computer.

Once the image is in your Google Doc, double click on the image to crop it. Drag the black handles inside of the registration marks but don’t cut off any part of your design. Once you have all four sides done hit enter (or return) and your image will be cropped and the registration marks gone!

Now we can make the image bigger by clicking on the image and dragging one of the blue squares on the corner out. You can make the image as big as the sheet of paper you are printing on.
If you are making it bigger and the image looks like it is going off the page, select one of the icons at the bottom of the sheet. Then you will see the option to move with text. Click on that and select the option “fix position on page”. This will allow you to move the image and center it on the sheet.

Once all of that is done select file and save the new version for future use.
You can also print from here too. Select file and then print. That will open up your print menu where you can select your sublimation printer and color profile or print quality.
So now you know how you can use Design Space as a tool for your sublimation projects. If you’re not quite ready to invest the time and money for a sublimation software like Adobe Illustrator, you can still create your own designs right in Design Space.
Starting with Design Space is a great way to begin your designing journey for your sublimation business or just for fun.
You’ll also like:
- Sublimation 101 – Everything You Need to Get Started
- How To Bleach Shirts for Sublimation
- The BEST Shirts to use for Bleaching and Sublimation


Chris Butler has helped thousands of crafters learn how to use their Cricut machine without feeling overwhelmed. She is a best selling author and an up and coming designer. For fun Chris enjoys designing SVG Files, hanging out with her family (preferably at the lake), traveling, and volunteering at her church. She is a wife and mom of two crazy fun kids.
[…] that you know a little bit more about sublimation printing, it’s time to give it a try! Here are some sublimation for beginners tips to help you get […]