This post may contain affiliate links for your convenience. If you make a purchase through one of my links I will earn a small commission at no additional cost to you.
Last Updated on April 19, 2021 by Chris Butler
Hello, crafty friends!
Today I want to go over an exciting new Cricut update. This update allows us to offset text rather easily in Cricut Design Space.
This update is available for Windows 10 (64 bit) or Mac iOS 10.15 and newer. If you didn’t get the update, see this post for another way to offset in Design Space.
As soon as the offset update hit my Design Space app, I started playing around with it. In this post, I’ll show you exactly how to use this new feature. It’s a lot of fun, but still a little glitchy.
But first, I also wanted to mention another little piece of Cricut news. At the same time that Cricut announced the Offset update, they also told us that they were going to start charging for extra uploads. So you were going to have to get Cricut Access if you wanted to upload more than 20 images a month.
Of course, that upset a whole lot of people in the Cricut community, including myself. As an SVG designer, sometimes it takes 20 uploads of one design into Design Space just to get the design right! We have to keep going back and fixing little things and making little tweaks here and there to make sure it’s perfect. So that would have used up a lot of the free uploads for designers.
Thankfully, Cricut’s CEO, Ashish Arora, has since announced that they are no longer going to put that restriction on free uploads. So you will not be forced to purchase Cricut Access in order to upload files. I want to thank Cricut for listening to their community and making that change!
Now, let’ get into Design Space and talk about the new update that they did make.
Quick Links to Information in This Post
Offset Text Video
How To Offset Text in Cricut Design Space
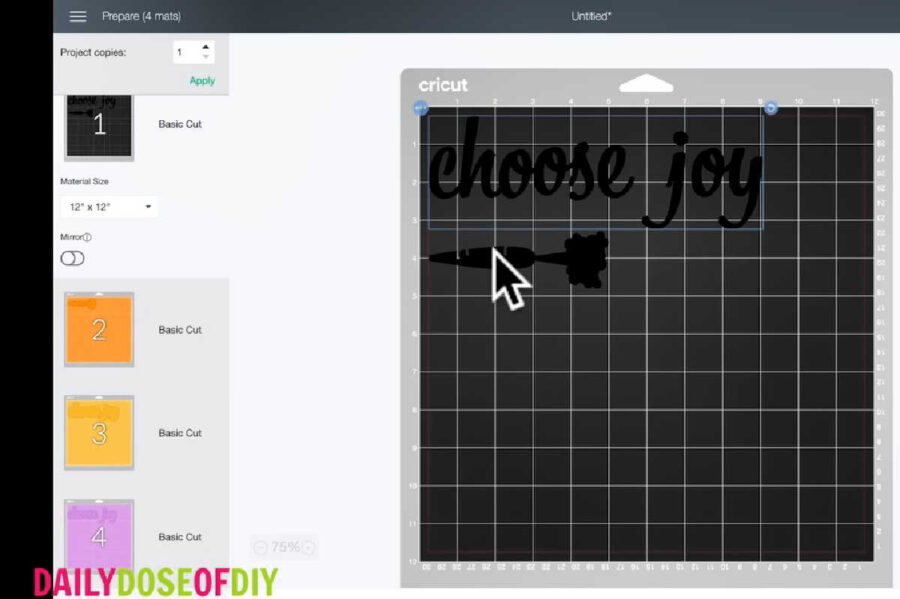
I have to say, after playing around with the new offset text feature, it is still a little glitchy. However, it did seem to get a little better as I kept playing with it.
To offset text, the first thing to do is type out your text, ungroup it, and move the letters closer together. But here is where you might come across one of those glitches. The first few times I tried to do this after the update, it was not allowing me to move the letters at all. After a few tries, though, I was finally able to move them. So maybe it just needed to warm up a little.
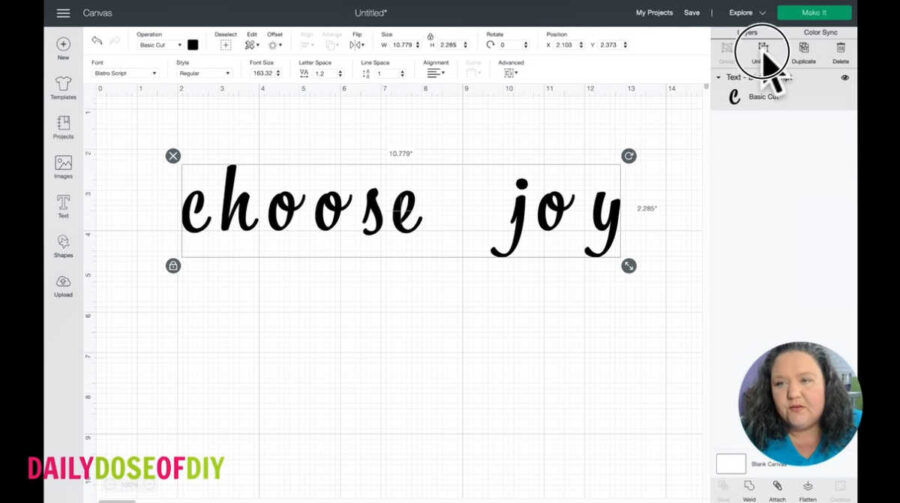
(By the way, if you like the font I used in the video, it’s an Adobe font that I uploaded into Design Space myself! It’s called Bistro Script, and you can get it here.)
Next, drag your cursor over all the letters to select them all, and click on the Weld button at the bottom of the Layers menu.
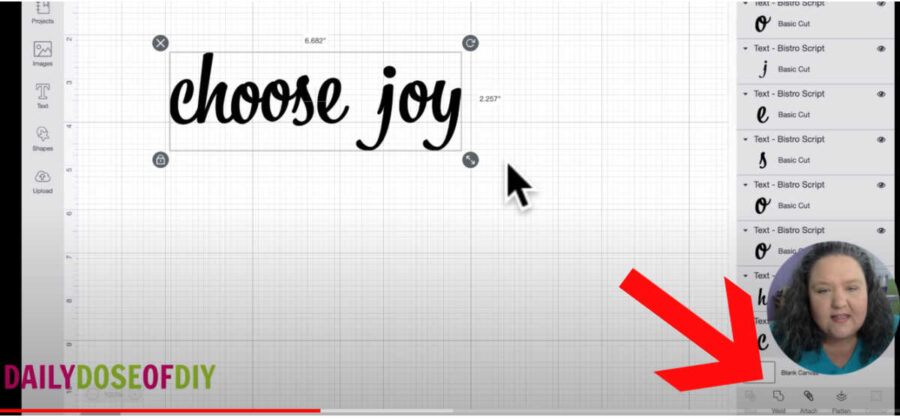
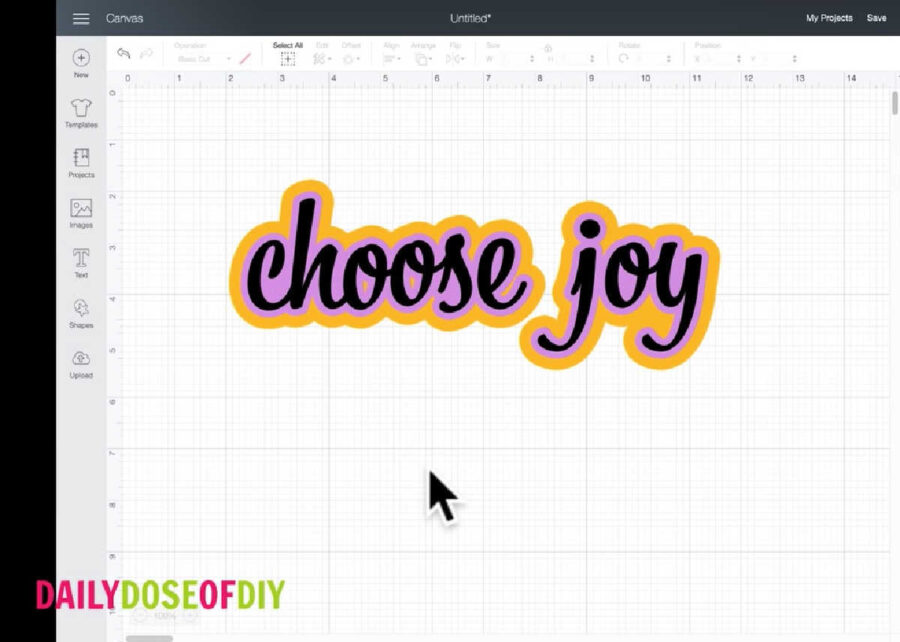
Once they’re all selected, you’ll be able to click on the Offset button, which is located in the top menu. Click on the little down arrow, and it will give you a sliding scale.
As soon as you click on the arrow, you will be able to see a little blue outline going around the letters. Then you can use the sliding scale to adjust the size of your offset. You can drag the slider all the way out for a really big offset, or bring it into the center for no offset whatsoever.
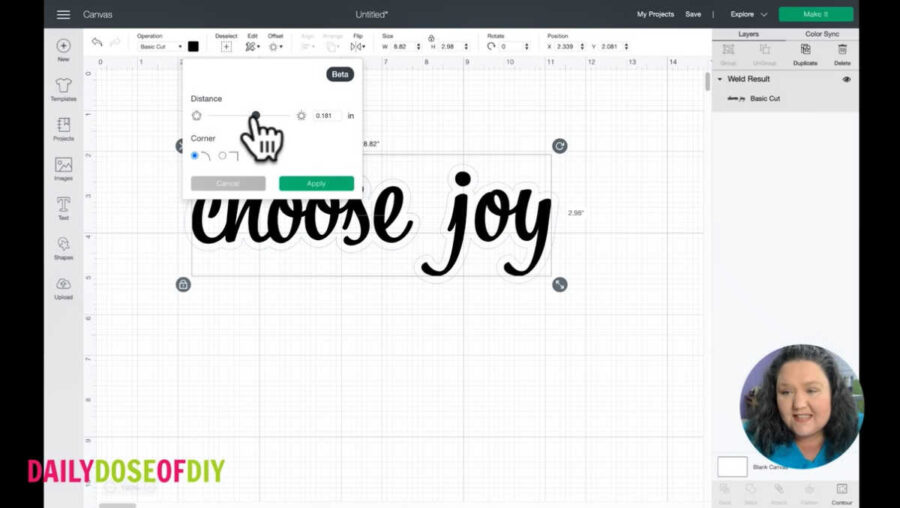
The default setting is rounded corners that curve nicely around the letters. This looks better with a script font like the one I used, but you can also change it to a square one if you prefer or if you’re using a regular print font. But there seemed to be another glitch with this part, too, because it took forever to switch between the two.
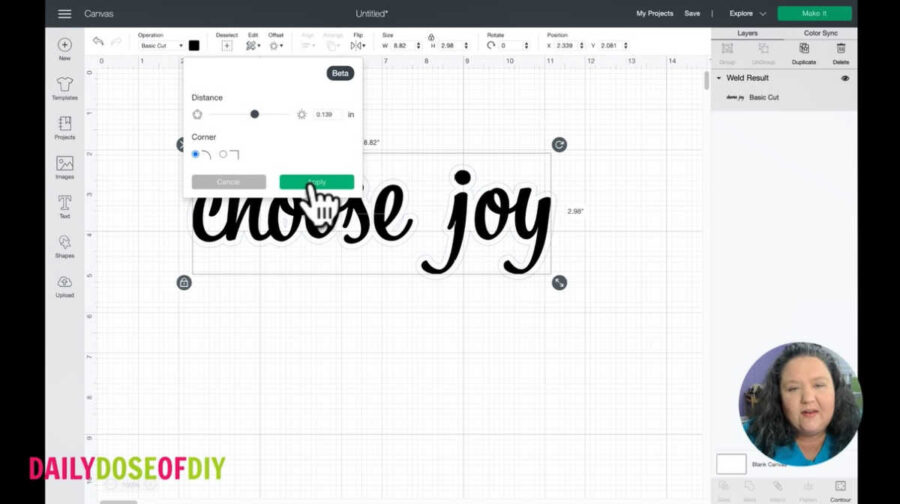
Once you have your offset adjusted the way you want it, click “Apply,” and that will add the offset. It’s a whole new layer, so you can change the color of the offset to whatever you want. Simply move the letters down, select the offset layer, and then go up and change the color from the top menu. Then just put the letters back over the top, and it looks perfect!
Once we get all the glitches worked out, I think this feature will be amazing and a lot of fun for us to work with.
How To Offset Your Offset
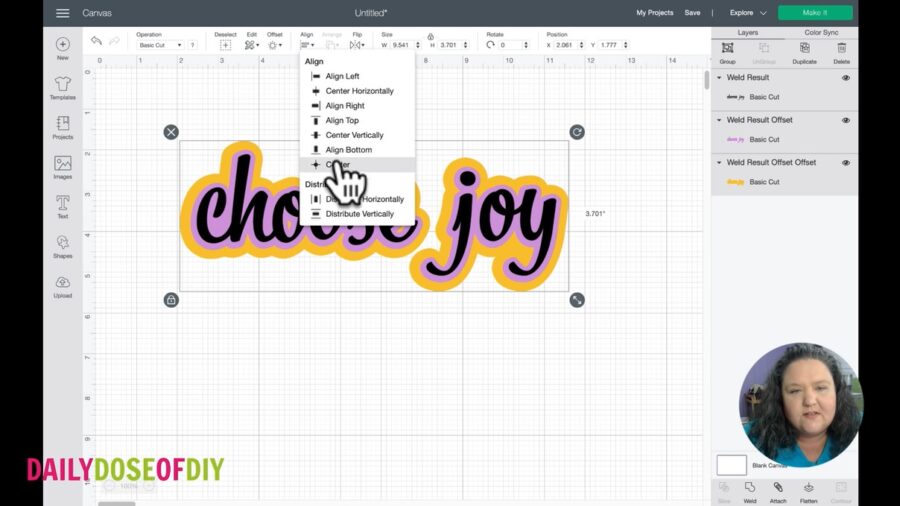
Another fun thing you can do is to offset your offset. All you have to do is add another layer. Select your offset, and then go up and click “Offset” again. That will show you the blue lines again as you adjust, and then once you click “Apply,” you’ll be able to change the color of the new layer, just like you did with the first one, and then put your layers back on top of each other.
Tip: To line up all of your layers perfectly on top of each other, select everything and go to the top menu and click “Align.” Then select “Center” from the dropdown menu.
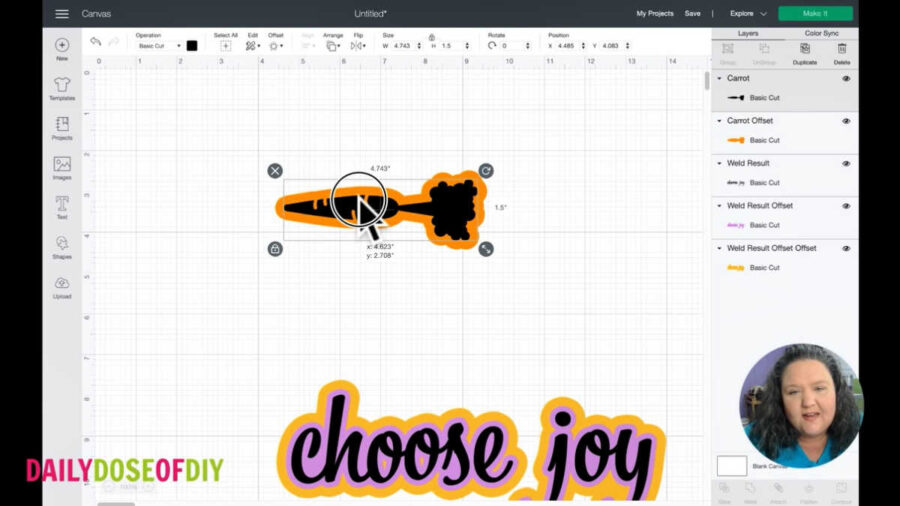
How To Offset Images
Lastly, you can also offset images. Click on “Images” and choose the image you want to use. Once you get it into Design Space, it will be exactly the same process. Select the image and then click on the Offset button. Adjust your offset so that it’s the size you want, and click “Apply.”
Cutting Out Offset Images or Text
When you’re ready to cut out your designs and you hit the Make It button, it will of course separate those mats for you according to the color of your layers.
Now, if you’re using paper or HTV, those are pretty easy to cut and layer, since they aren’t too sticky. But if you’re using adhesive vinyl, you need to be careful with your layering. You don’t want to end up with a big ball of mess! I have another post here that explains how to layer adhesive vinyl.
I had a lot of fun playing around with this new update, and I hope you do, too! Thanks for crafting with me today!

Chris Butler has helped thousands of crafters learn how to use their Cricut machine without feeling overwhelmed. She is a best selling author and an up and coming designer. For fun Chris enjoys designing SVG Files, hanging out with her family (preferably at the lake), traveling, and volunteering at her church. She is a wife and mom of two crazy fun kids.
Thanks for explaining this for us. I’m wondering why the option to curve words no longer appears at the top of the page. What am I doing wrong? Thanks
Once you attach or weld, or group a word the curve option goes away. But it’s also a pop up menu, so you’ll have to type out a word and then select that word for the text menu to pop up. It’s not there all the time. Hope that makes sense!