This post may contain affiliate links for your convenience. If you make a purchase through one of my links I will earn a small commission at no additional cost to you.
Last Updated on June 23, 2022 by Chris Butler
Do you love to monogram all of the things? Today I’ll walk you through how to use the new monogram maker in Cricut to make your own monogram designs. It’s a super easy way to make your own custom monograms quickly.
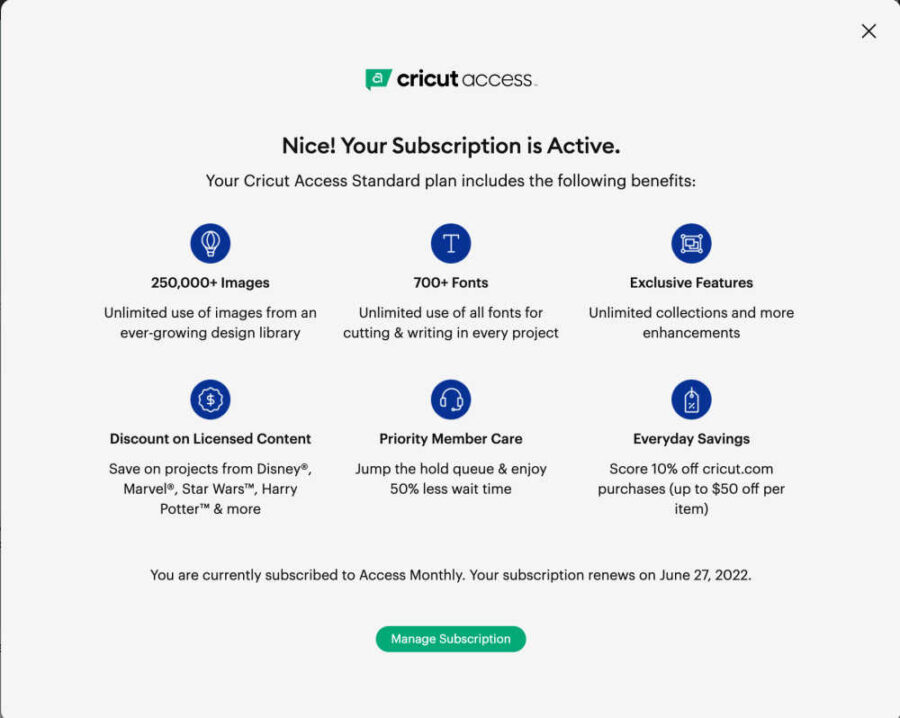
Please note this new tool from Cricut is exclusive to Cricut Access members. There is an additional cost for the Cricut Access subscription. With it, you can access all of the tools, fonts, and over 200,000 images in Cricut Design Space.
And of course, it will unlock all of the monogram options for you to use. You can sign up for a 30-day free trial here.
If you don’t have Access, you can still see the monogram maker and play around with it, but it will not let you make the project if you are not an Access user.
In addition to having Cricut Access, the monogram maker is only available on the desktop version of Cricut Design Space. There isn’t a date set on when it will be available for IOS or Android devices.
Related: Learn How to Make Circle Monograms with Free Monogram Fonts
With all of that in mind, I will show you all the features and some tips on how to best use the Cricut Monogram Maker, and you’ll learn how to add your monogram to a snack board. (can anyone actually pronounce charcuterie?)
There are several different types of monograms you can make with Cricuts new tool, so let’s get started:
Quick Links to Information in This Post
Getting Started with Cricut Monogram Maker
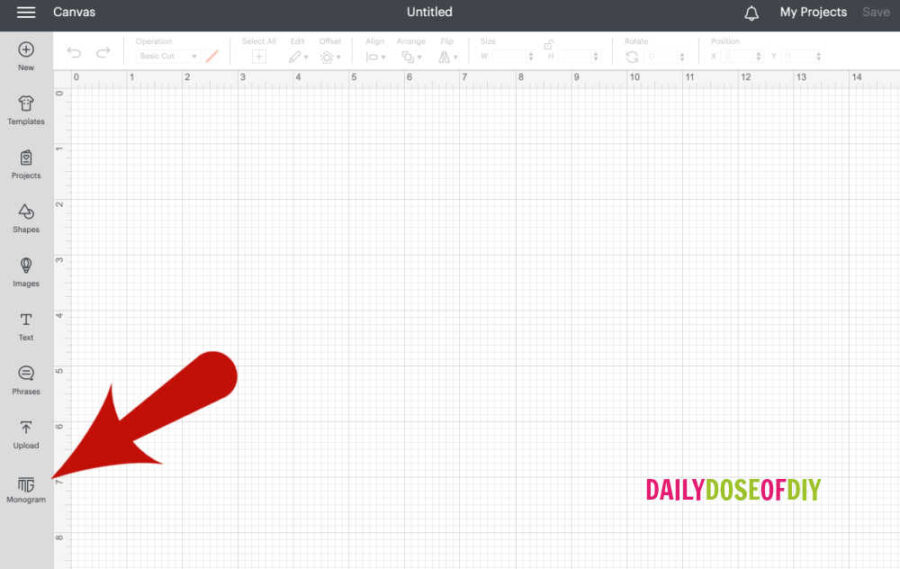
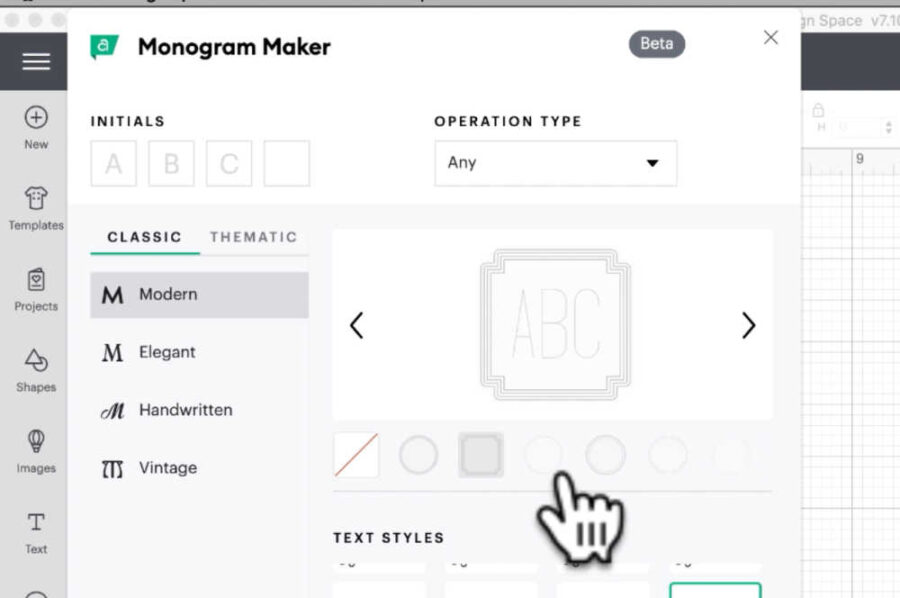
To start making monograms open up Cricut Design Space and click on New Project. Once Design Space is open, you will see Monogram on the left menu at the bottom. Click on that and it will open up the monogram maker window.
Classic Monograms
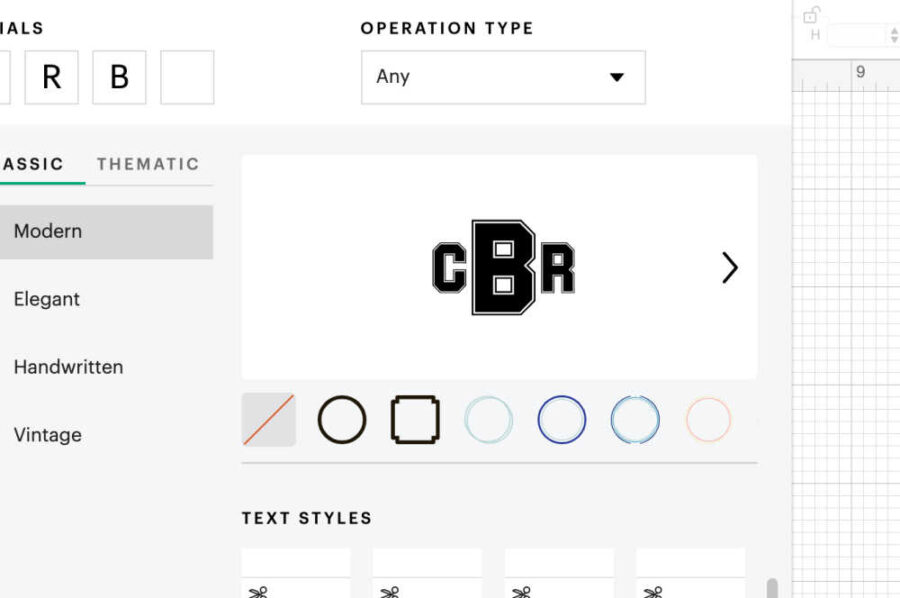
We’re going to start with a standard monogram. The first thing you see at the top is the place to enter your initials. You can enter a single letter or up to four initials. Enter in the initials you want to use.
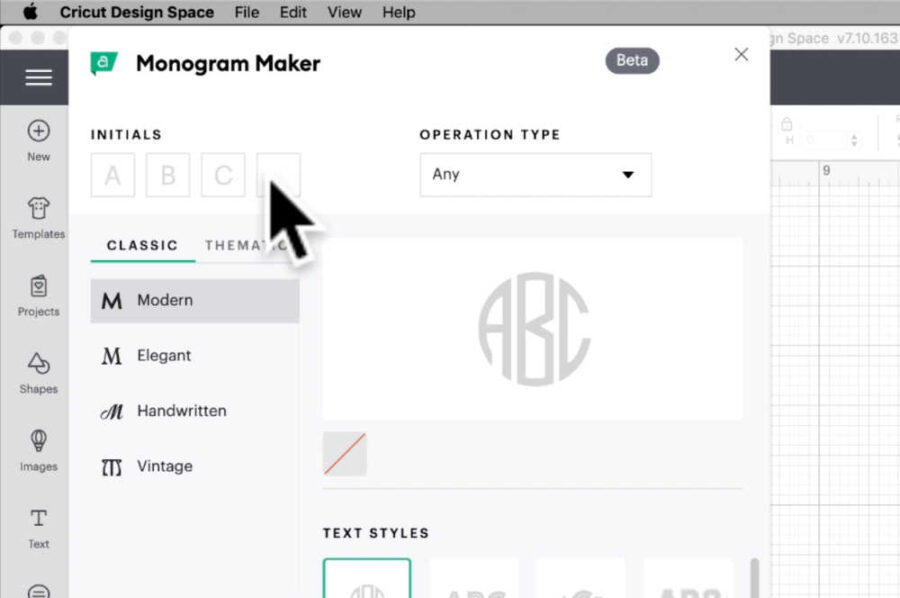
The preview will show you what your initials look like in the available fonts. There are four font categories to choose from, Modern, Elegant, Handwritten, or Vintage.
You will notice some fonts make the middle letter bigger. With these fonts, they take your last initial and stick it in the middle. While this is the “standard” way monograms should be made, anytime I make a monogram that way, everyone asks why lol.
If you want your middle initial to be the bigger letter in the center, reverse the order of your initials in the text box. So you would enter your first initial, last initial, and then middle initial.
After choosing the font you want to do your monogram with, you may see options to add a frame in the preview window. The monogram frames you see will depend on the font style you chose and the number of letters in your monogram.
Scroll through the frames and choose a frame to add to your monogram if you wish. Don’t worry about the color that can be changed later.
Also note at the top you can change the operation type from Any, to Cut, to Cut + Draw. If you are making a card or a Cricut project and you want to use pens, you can narrow down the fonts and frames.
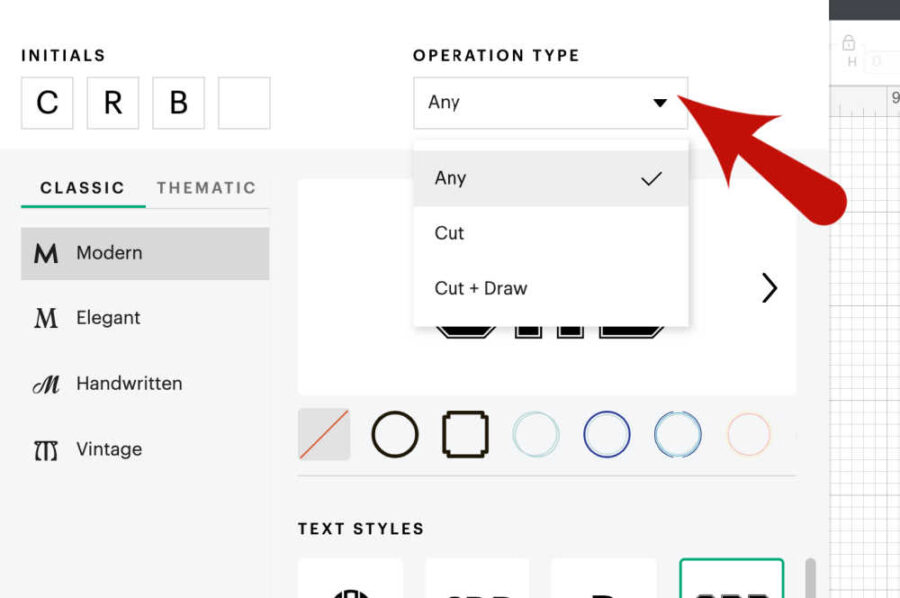
You’ll also see a little pencil icon on the font, indicating it is a drawing font.
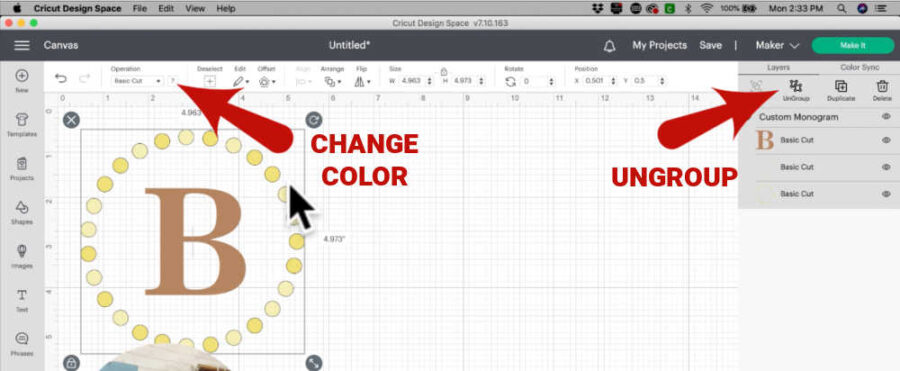
Once you’re happy with your design, click the add to canvas button. Back in Design Space, we can now change the font color or the frame color. Do this by clicking ungroup on the top of the Layers panel. Next, select your font or frame and click the color square on the top menu.
Now you are ready to size your monogram and click the make it button.
Tip: If you are making the same size designs for multiple Cricut projects, Learn how to use Cricut Guides to make custom templates.
This is the easiest way to make a classic monogram. It beats any of the free monogram makers I have tried.
In the next step, you’ll see different styles of monograms and themes you can use with the monogram maker.
Using Themes in the Monogram Maker
In addition to the classic monograms, you can click on the Thematic tab in the monogram window. They have many different designs and themes to choose from to make a perfect monogram for you.
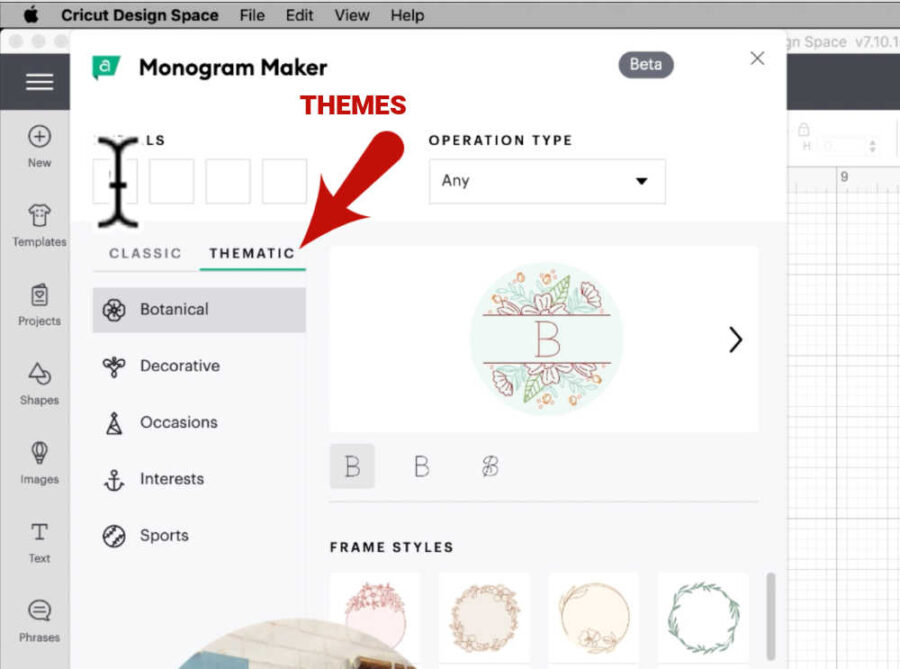
You will see different design elements depending on the number of monogram initials you enter into the text box.
I recommend scrolling through the designs before you enter any initials to see all of the designs available to use. In the video tutorial below, you’ll see me showing how the design choices change depending on the number of letters in your monogram.
If you leave the text box blank and choose your design first, you can then enter 1-4 monogram letters.
Once you have your design selected and your monogram initials entered into the text box you will see the different custom fonts you can choose in the preview window.
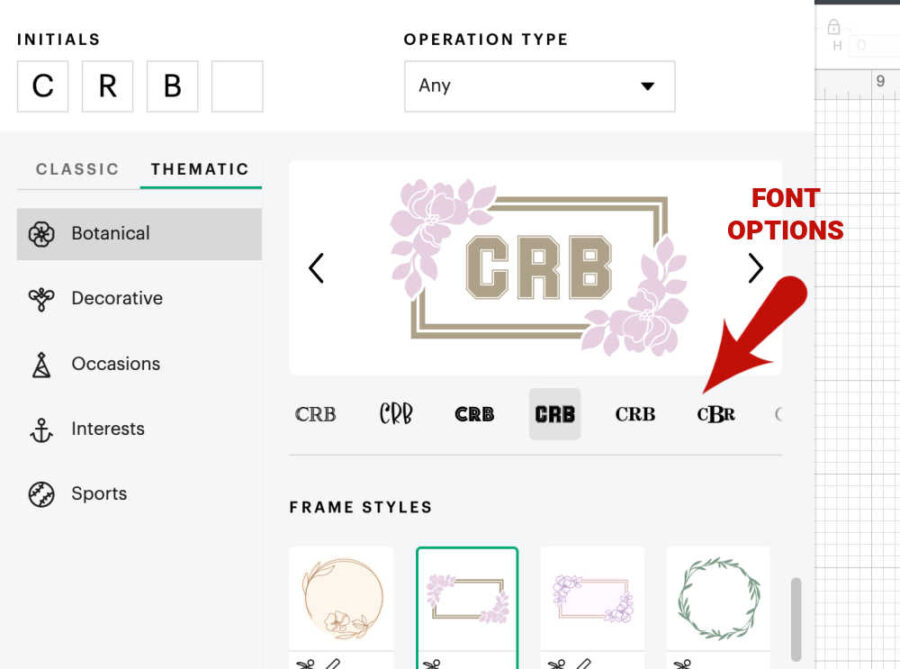
So this way is a little different than the classic monograms. You’ll choose your design first and your font last.
Once you have everything how you want it, click add to canvas.
These are the different monogram styles you can make with Cricut’s Monogram Maker. I think the only thing they are missing is the split monogram design with your initial. See this post to learn how to make split monograms in Design Space.
Cutting Your Monogram with Cricut
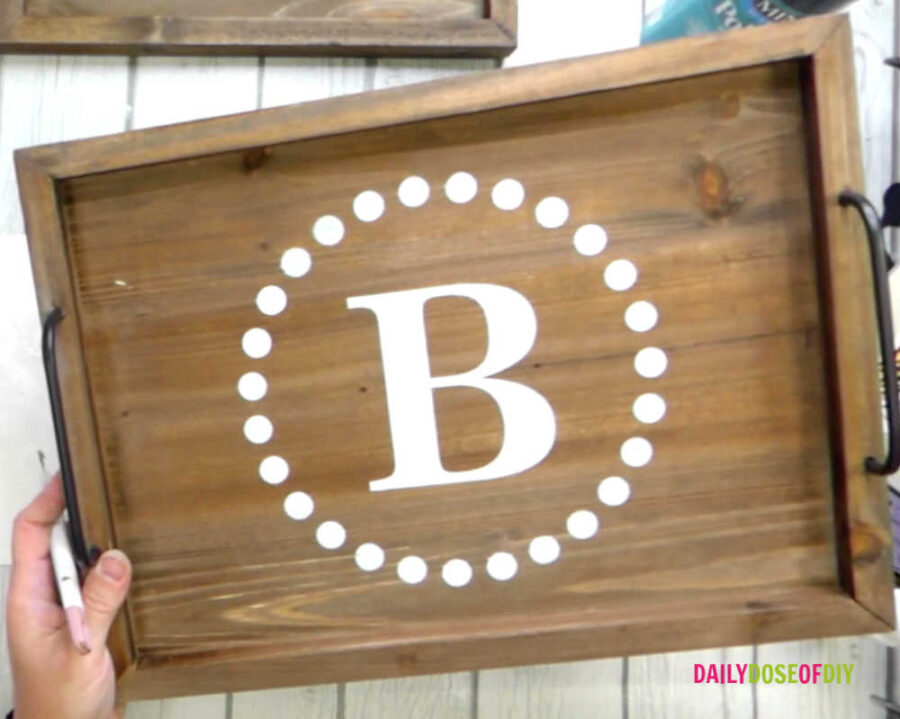
I am making myself a snack board with my monogram on it. The following is the list of supplies you’ll need to monogram your own trays.
- Wooden Tray – I used these from Amazon
- Stencil Film – This is my favorite
- Transfer Paper
- Paint
- The Best Stencil Sponges here
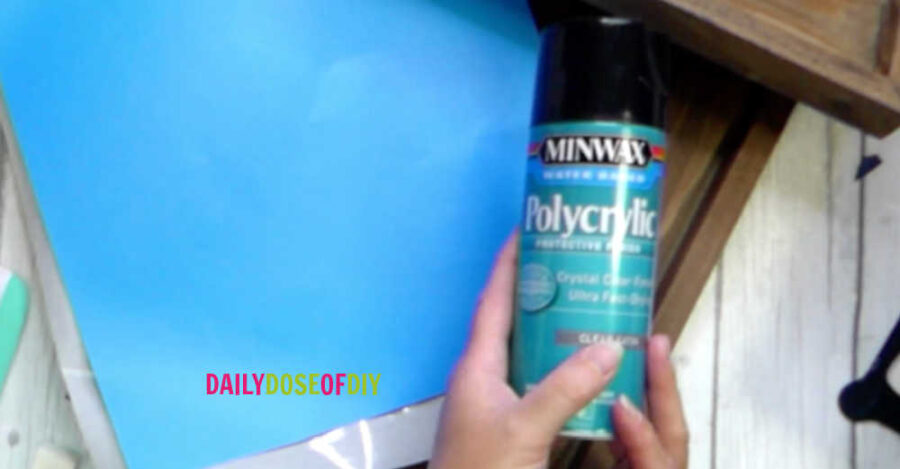
- Polycrylic Spray to make it food safe
- Cricut Machine
I want to use my last initial only. So first, go to the thematic tab and choose your Design. I found the circle border under decorative designs. Then type in the initials you want to monogram. For me that’s the letter B. And finally choose the font.
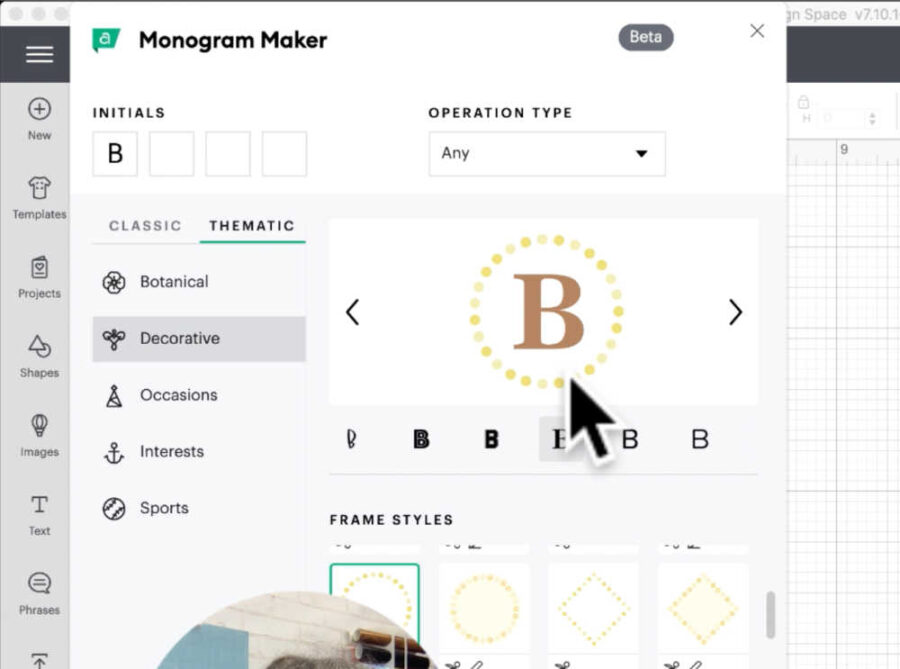
Once that’s all done click add to canvas. Since I’m making a stencil, I don’t have to worry about the color.
Next add a square from the shapes menu and size it close to the size of your tray. This will create a border for your stencil and give you an idea of how big to size your monogram.
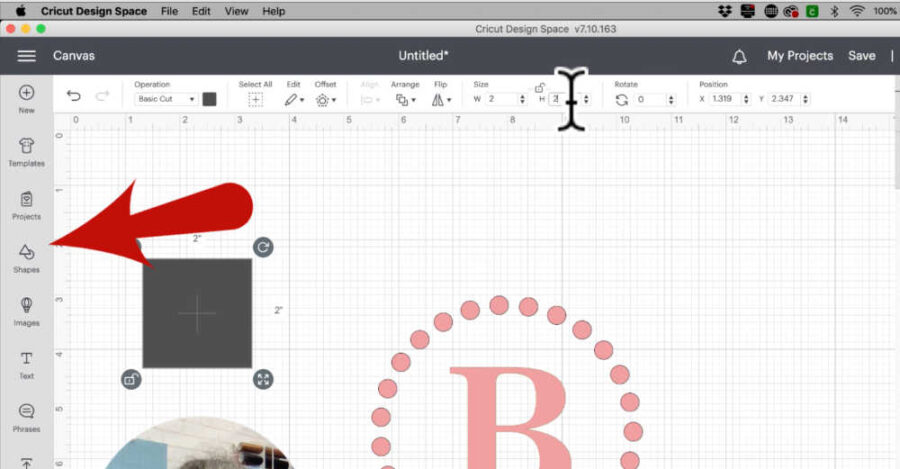
Move the square to the back by clicking arrange and send to back. Then select both your monogram and the square and click align and then center.
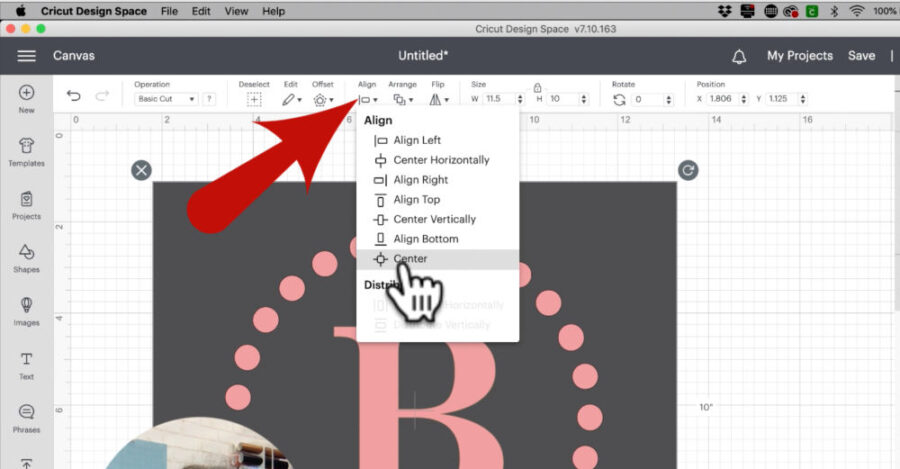
Once your monogram is centered and with them both still selected, click attach on the bottom of the layers menu. This will keep everything together when it cuts.
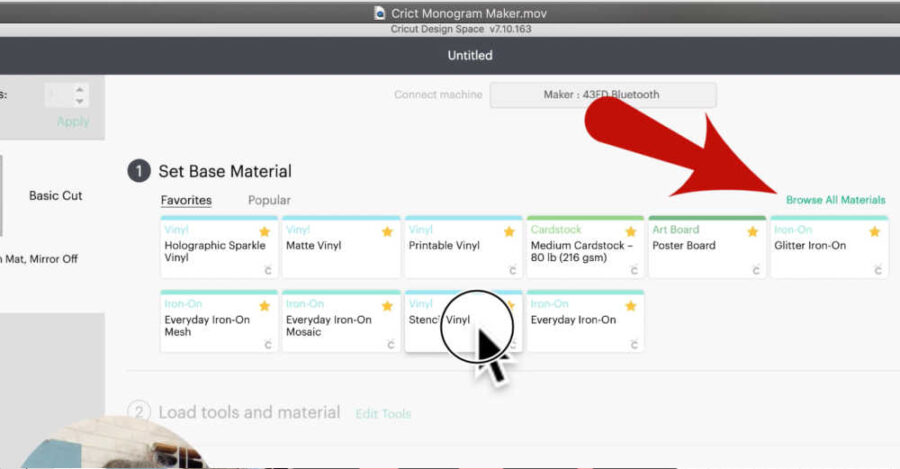
Now click the make it button. There is no need to mirror so on the next screen click continue. Choose stencil film from the list of materials. If your Cricut has a dial set the dial to custom to see the materials list.
Place your stencil vinyl on your green Cricut mat and load it into your machine and press the go button.
Once it has finished cutting unload the mat and flip it over to remove the mat from the vinyl.
When you weed for a stencil its the reverse from what you might be used to. You’re going to weed out the letters and designs, leaving the centers of the letters and the background there.
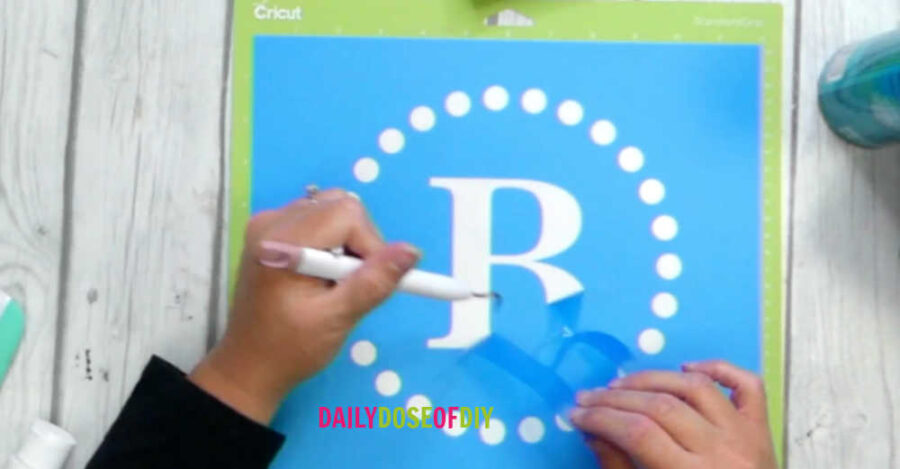
Once you’re done weeding add the transfer tape.
SEE: How to easily add transfer tape without bubbles or wrinkles
Scrape down the transfer tape really well and then remove the backing from the vinyl. I normally don’t like to remove the backing all at once, but wood is pretty porous and the stencil is not going to stick right away. So we can move it around to get it centered before we scrape it down.
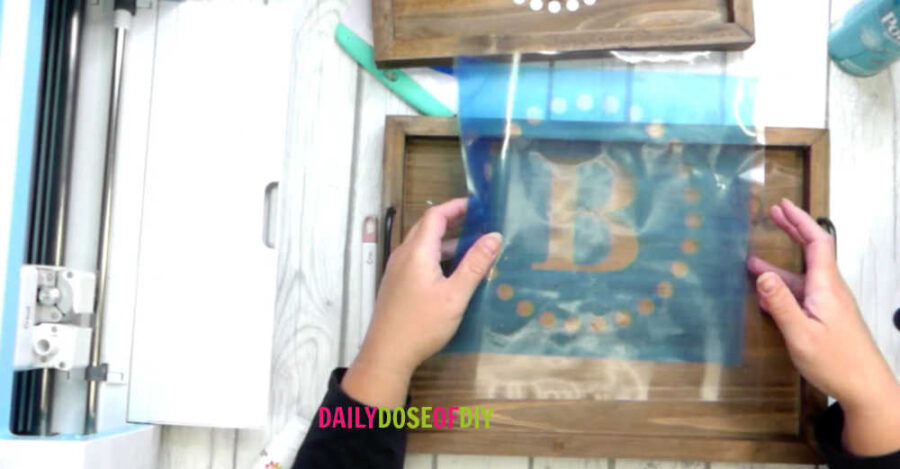
The benefit to making your stencil border close to the size of your tray is that it’s really easy to center. Once you have it centered scrape down the stencil from the center to the outer edges and then remove the transfer tape.
Painting Your Monogram Project
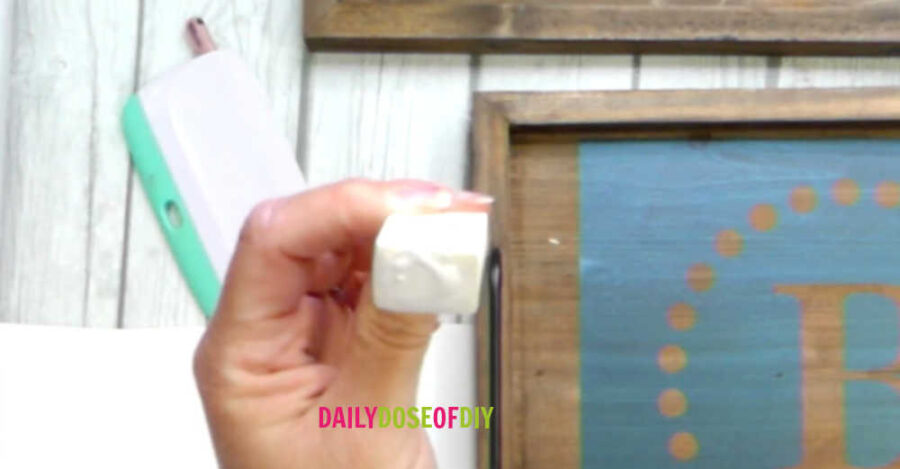
Now we’re ready to paint our monogram. Squeeze a little paint onto a paper plate and dip the end of your sponge into the paint. Then dab most of the paint back off of your sponge. If you can see globs of paint on your sponge you can too much paint and your stencil may bleed.
See tips for painting stencils without bleeds here
Next dab the sponge onto your stencil. You should have a very thin coat of paint. You will need to do 2-3 coats to get full coverage. But since we’re using so little paint you’ll be able to do the second coat as soon as the first coat is finished.
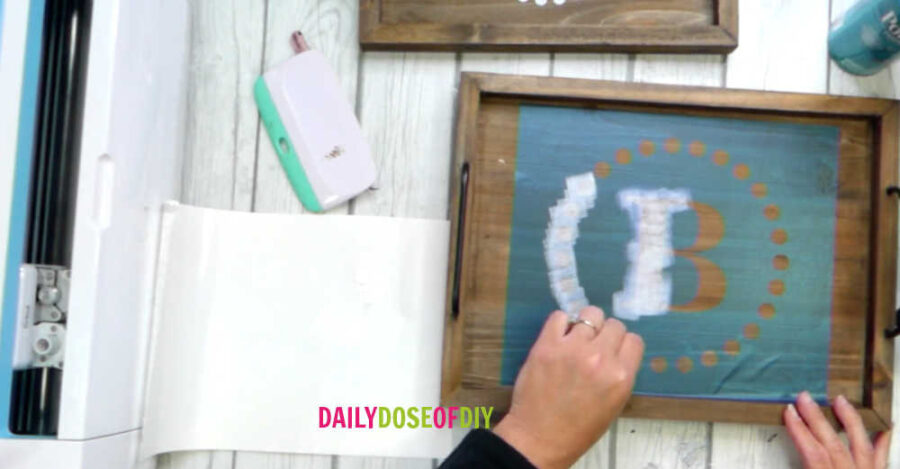
After you’ve finished painting remove the stencil. Use your weeding tool to help you get the centers of the letters and other design elements off.
Once the paint has completely dried give it at least two coats of polycrylic finish to protect your monogram and make it food safe.
There is my very first project using Cricut’s new monogram maker. Tell me in the comments what you are going to monogram first, I need ideas for my next creation!
Thank you for following along with this step-by-step tutorial and learning the easier way to make monograms with your Cricut.

Chris Butler has helped thousands of crafters learn how to use their Cricut machine without feeling overwhelmed. She is a best selling author and an up and coming designer. For fun Chris enjoys designing SVG Files, hanging out with her family (preferably at the lake), traveling, and volunteering at her church. She is a wife and mom of two crazy fun kids.
Leave a Reply