This post may contain affiliate links for your convenience. If you make a purchase through one of my links I will earn a small commission at no additional cost to you.
Last Updated on November 13, 2022 by Chris Butler
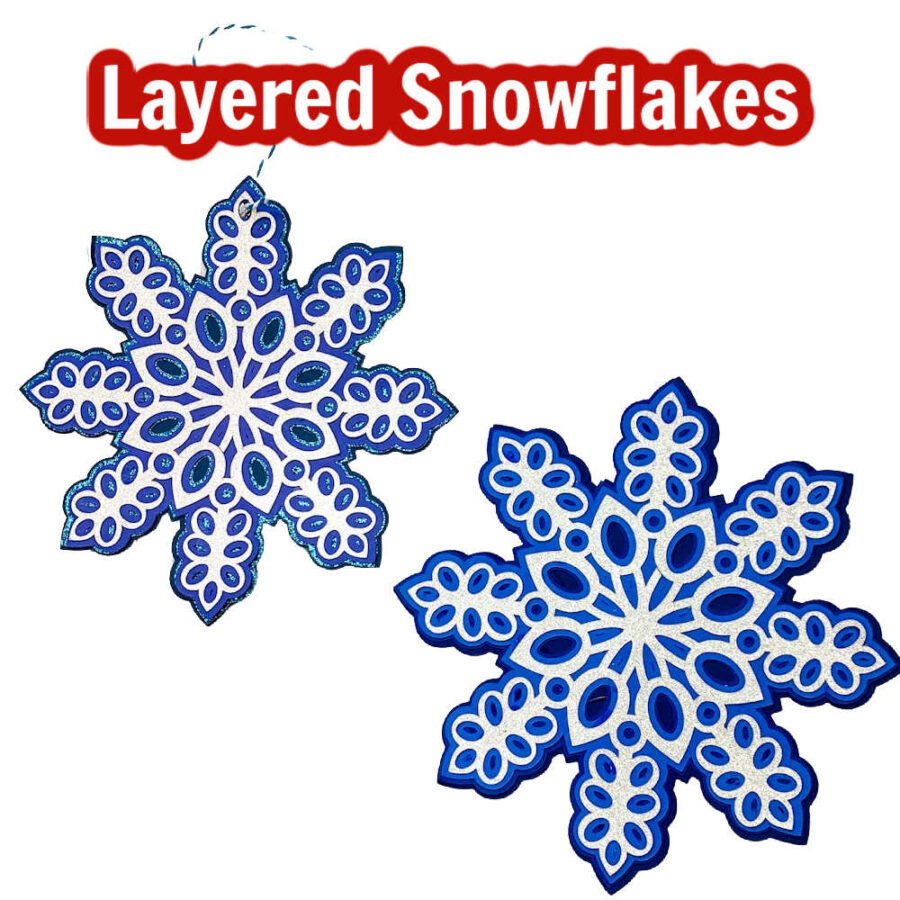
It’s Day 5 of the Christmas Craft Kickoff 2022, and today we’re making layered paper snowflakes. Crafting doesn’t get much easier than this, but the best part is that these snowflakes are absolutely stunning as Christmas ornaments.
They look ah-mazing hanging on the Christmas Tree.
If you don’t want to use them as ornaments, I’ve got an SVG file without the hanger on it. You can use your snowflakes for cards, or any holiday craft you want!
Want to know more about the Christmas Craft Kickoff? View all 14 of our Christmas Paper Craft Projects here
Let’s get started!
Quick Links to Information in This Post
Supplies for Layered Paper Snowflakes
- (4) Sheets of 65lb Cardstock (Regular or Glitter in Your Choice of Colors) – https://amzn.to/3Eho4sE
- Fine Tip Glue
- String or Ribbon
- Cricut Cutting Machine and Tools – https://amzn.to/3Un4Gjq
- Blue Cut Mat or Well-Used Green Mat
- SVG File for the Layered Paper Snowflakes – More Details Below
Layered Paper Snowflakes Step-by-Step Video Tutorial

Step 1: Download the SVG File and Upload it to Design Space
For help downloading SVG Files and uploading them to Design Space see this post.
The free SVG cut file for the Layered Paper Snowflake was available until 11/13 at 9am and has now expired.
This Layered Snowflake SVG is part of our Christmas Craft Kickoff 2022. You can grab all 14 projects and get instant access to 30+ SVG Files, Printable Assembly Instructions, and videos!

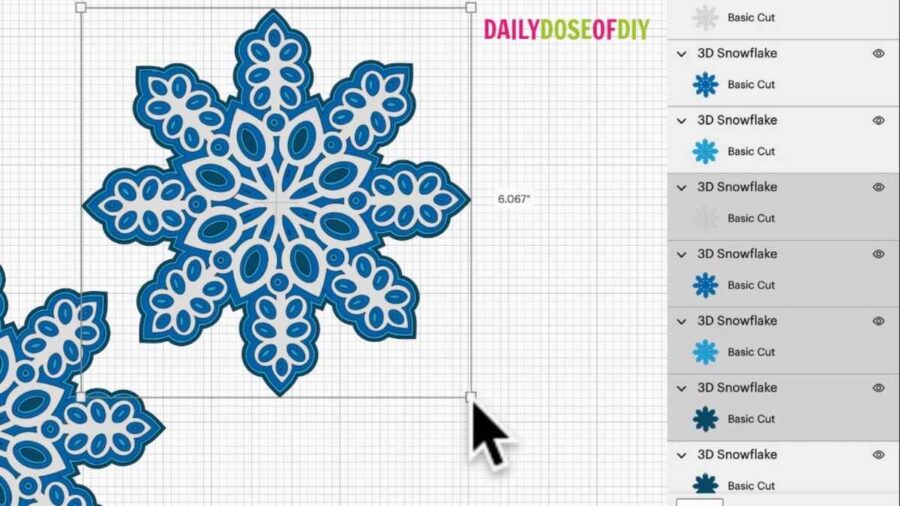
When you add the paper snowflake SVG onto your canvas in Design Space you’ll see two designs. One has a hole to add a string for hanging. The other does not. You can make both options or click ungroup and delete the design you don’t want.
If you want to resize the snowflake, make sure every layer is selected and resize them all together by clicking and dragging the corner node.
When you’re ready, click ‘Make it’. You shouldn’t need to change anything on the mat screen, so click ‘Continue’.
If you have a Cricut Explore, turn your dial to cardstock for normal cardstock or custom to set your material to glitter cardstock. If you’re using a Cricut Maker, select your material on the cut screen.
Step 2: Cut the Layered Paper Snowflakes
To cut the snowflakes, place your cardstock onto your mat in the same direction shown on the mat in Design Space. Place the mat into your Cricut and press the flashing ‘C’ button to load it.
To remove your cardstock from the mat I recommend flipping the mat over and peeling it away from the cardstock. This will prevent your design from curling or tearing.
Make sure that all of the inside pieces of the snowflake have been removed. If they are stuck, use your fingers or your weeding tool to remove them.
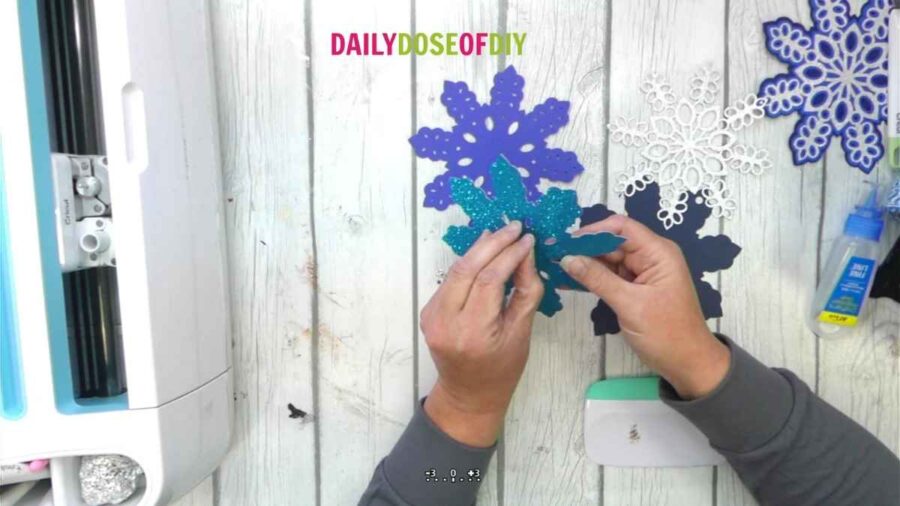
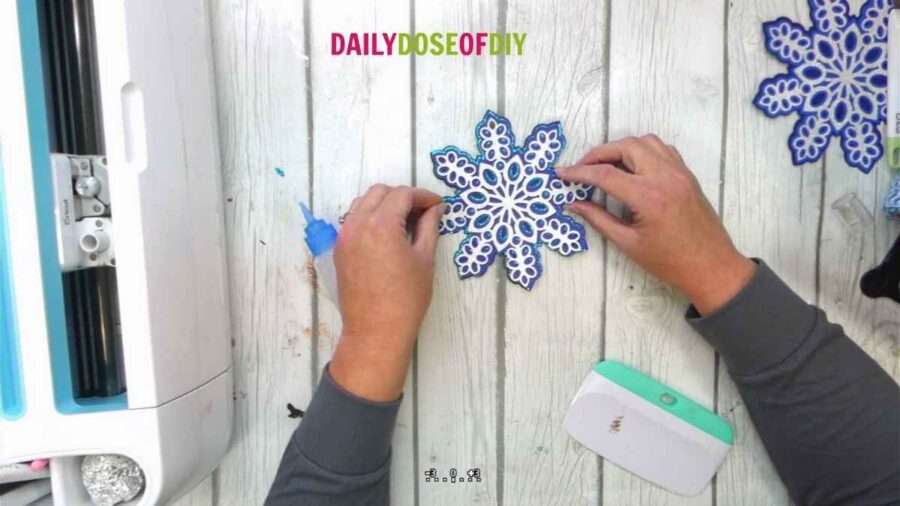
Step 3: Assemble the Snowflakes
Start by stacking all of the snowflake layers in order. Once you’ve done that, flip the stack over. You should be looking at the back of the snowflake.
Now, take the bottom layer of the snowflake and place it face up on your worktable. This will be your base.
Put a layer of fine tip glue on the back of the next layer, then flip it over and place it carefully onto the base. If you’re making the ornament, be sure that the holes at the top line up for every layer.
The reason I like to use liquid glue on the snowflakes is so I can adjust each layer to be exactly where I want it after placing it down.
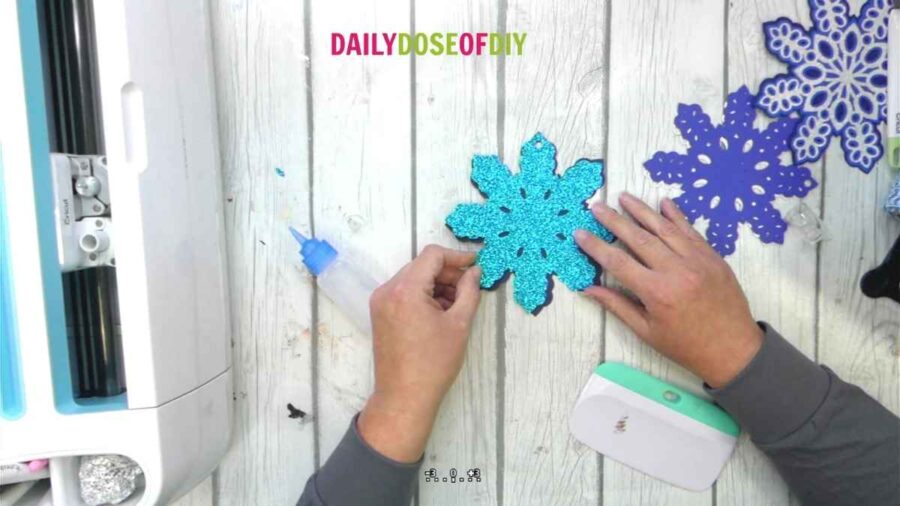
Once you’ve got the placement right, make sure the whole layer adheres well. Give it a moment to dry and then go to the next layer.
Repeat the same process for the 3rd and 4th layer of the snowflake, being careful the line up each layer as you go.
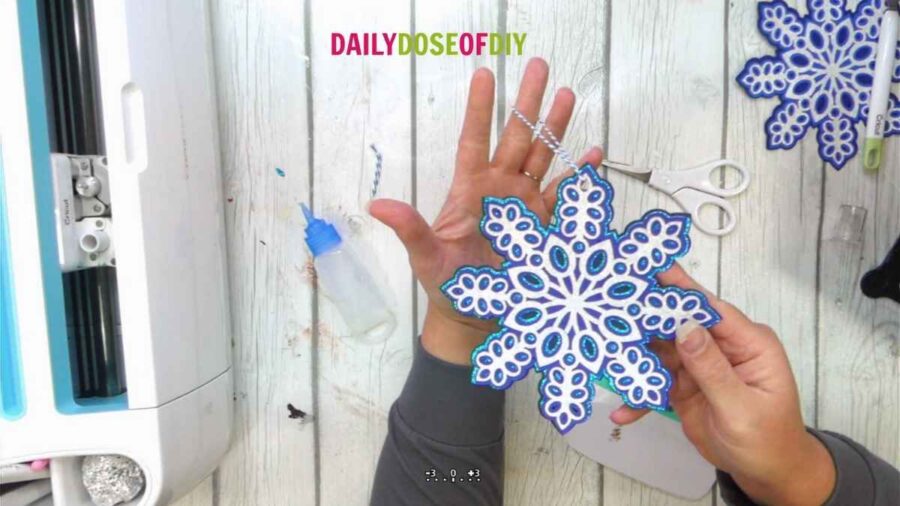
If you’ve chosen to make the ornament, the last step is the cut a piece of string, thread it through the top hole and tie it off.
And that’s it! I can guarantee this is one of the easiest Christmas crafts you’ll ever make, but the outcome is stunning!
I hope you’re enjoying all of our Christmas crafting fun! Come back tomorrow for Day 6 of the Christmas Craft Kickoff 2022.
More Easy Christmas Crafts to Make:
DIY Christmas Gift Card Holders
3D Layered Ornaments -3 Designs!

Chris Butler has helped thousands of crafters learn how to use their Cricut machine without feeling overwhelmed. She is a best selling author and an up and coming designer. For fun Chris enjoys designing SVG Files, hanging out with her family (preferably at the lake), traveling, and volunteering at her church. She is a wife and mom of two crazy fun kids.
Leave a Reply