This post may contain affiliate links for your convenience. If you make a purchase through one of my links I will earn a small commission at no additional cost to you.
Last Updated on November 28, 2022 by Chris Butler
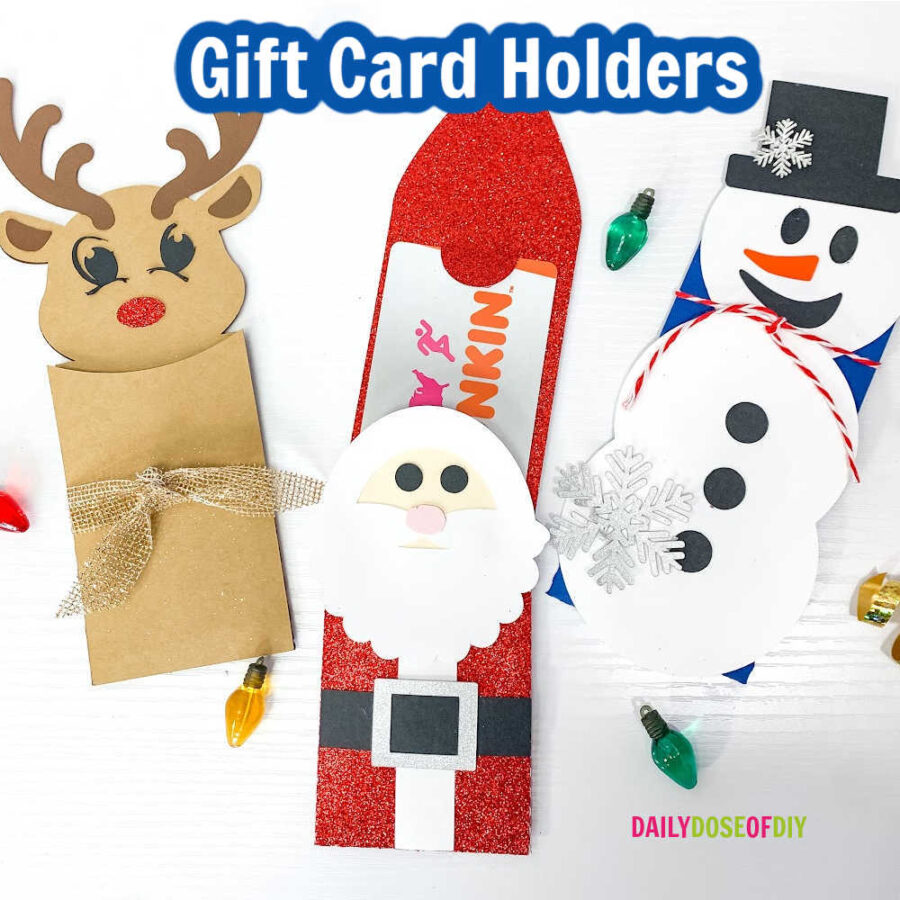
Hello, Crafty Friends, and welcome to Day 1 of our 14-Day Christmas Craft Kickoff event! Today we will be making some adorable Christmas gift card holders. The best part about these (besides how cute they are) is that they make amazing gifts, because who doesn’t love a gift card? You’ll have the best gift this holiday season.
Also, an added bonus for this project is that if you have a bunch of cardstock scraps laying around, this is the perfect project to use them on! A lot of the pieces are small and can easily be cut from your scraps!
Quick Links to Information in This Post
Some More Info About the Christmas Kickoff Event
The Christmas Craft Kickoff 2022 is a 14-day event with new and exciting holiday-inspired crafts for you to keep or give as a gift. Each day there will be a new blog post, YouTube video, and SVG file available for free for 24 hours. Or you can purchase an All-Access Pass to gain lifetime access to over 30 SVG files, ad-free videos, and printable instructions for each of the 14 crafts.
Supplies to Make Christmas Gift Card Holders
- 65lb Cardstock (Variety Color Pack)
- Glitter Cardstock (Optional) – https://amzn.to/3zTNGsM
- Fine Tip Glue – https://amzn.to/3NOlZax
- Quick Dry Tacky Glue (Optional)
- Gift Cards
- Ribbon & Other Embellishments (Optional)
- Cutting Machine & Tools – https://amzn.to/3t98d8X
- SVG File for Christmas Gift Card Holders – More Details Below
DIY Christmas Gift Card Holder Step-by-Step Video Tutorial

Step 1: Download the SVG File and Upload it to Design Space
For help downloading SVG Files and uploading them to Design Space see this post.
The free SVG file for the Christmas Gift Card Holders has expired. But you can still grab it with our Instant Access Pass. This will give you all 14 projects, 30+ SVG Files, Printable Assembly instructions, and ad-free videos.

These gift card holders are ready to be cut as soon as you have them in Design Space. If you’d like to change any of the colors before going to the mat, you can ungroup the design and change what you’d like. Otherwise, click ‘Make It’.
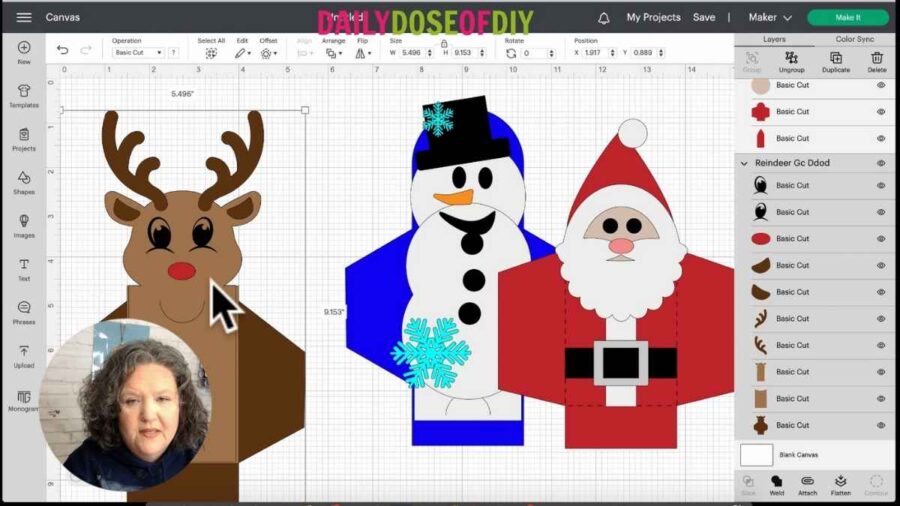
When you’re on the mat screen, Cricut will put each color on a different mat and default to a material size of 12″x12″. If you’re using 8.5″x11″ cardstock, change the material size from the dropdown on the left, then click ‘Continue’.
For a Cricut Explore you can set your dial to Cardstock. If you have a Cricut Maker set your material to cardstock (or medium cardstock if you have issues with pressure like I do).
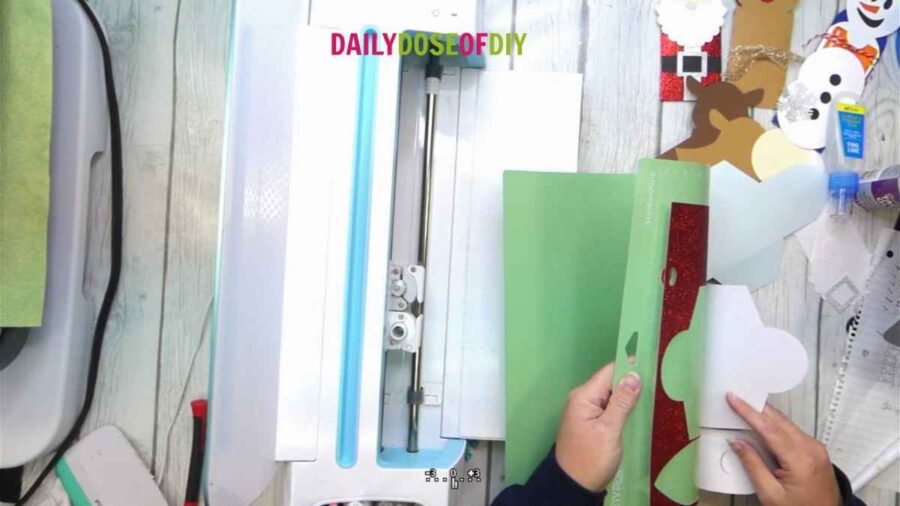
Step 2: Cut the Gift Card Holder Designs
If you will be making all 3 designs at the same time you should have 11 mats (maybe more or less if you decided to change any colors).
A tip to make the cutting process go a bit faster is, if you have 2 mats, load the second mat with the color of cardstock that Cricut will cut next. As soon as one mat finishes, you can load the next!
If you are using glitter cardstock you may have to change your material setting in between mats. Don’t worry, it’s easy! If you have a Cricut Explore you’ll need to turn your dial to custom.
On the right side of Design Space there will be a drop-down arrow for your material. Click that, then from the top of the menu select ‘Browse All Materials’. Type in glitter in the search bar, select glitter cardstock, then click ‘Done’. And you’re all set. To change it back, follow the same steps for medium cardstock.
When the cuts are done unload the mat. Flip the mat over and peel it away from the paper. The bigger pieces usually just pop right off. For the small pieces you may want to use your spatula tool to get them off if they’re stuck.
Step 3: Assemble the Gift Card Holders
Before you start assembling the gift card holders, sort all of the pieces for each holder to be in a separate pile. If you can’t figure out which piece belongs to which design, take a look in Design Space to figure it out.
All of the gift card holders have a larger piece with three flaps. Each flap has a perforation line where it folds. Start by folding the bottom flap in and running a line of glue on top of the flap.
If you’re using glitter cardstock, this is where you should use tacky glue or a heavy-duty glue!
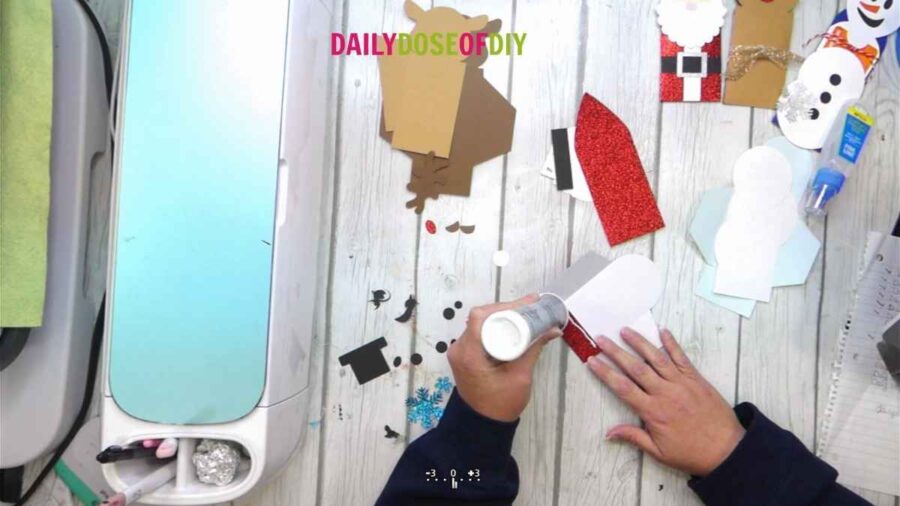
Then, fold one of the side flaps in and run a line of glue along the top of that flap. And finally, fold the last side flap down. Try to hold the flaps together while placing your fingers or your spatula tool into the pouch. This will ensure that the pouch doesn’t get glued shut.
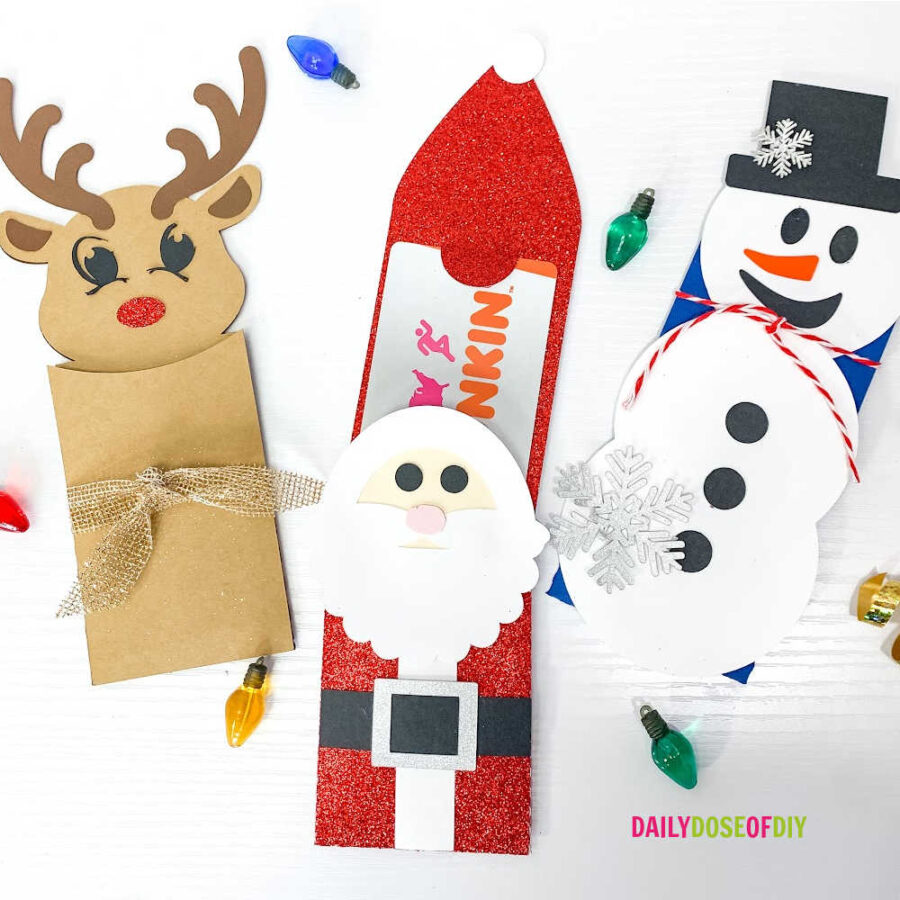
There will be another larger piece that has two semi-circle tabs on it. This is where you insert the gift card. These tabs should hold the gift card in snugly, but you can add tape to either the front or back to make sure it doesn’t slip out.
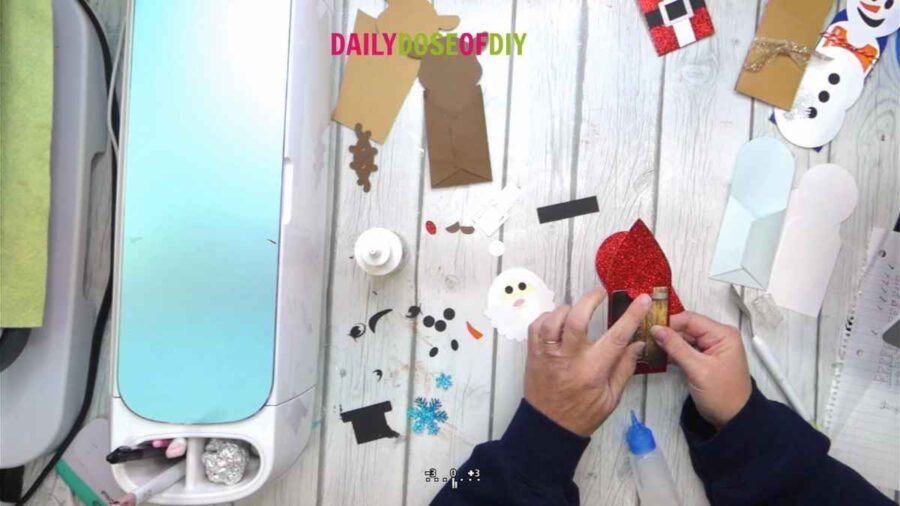
Now, put the gift card insert into the pouch. For Santa, the folded flaps should be in the back. For the snowman & reindeer, the flaps will be in the front.
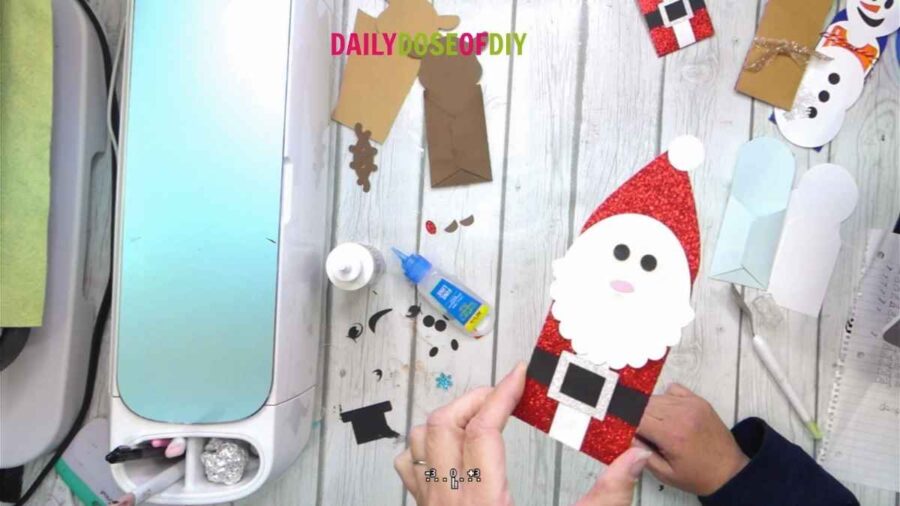
Step 4: Assembling the Santa Card Holder
To finish assembling the Santa gift card holder we will need to make his face. Glue the flesh toned circle to the back of the beard with your fine tip glue.
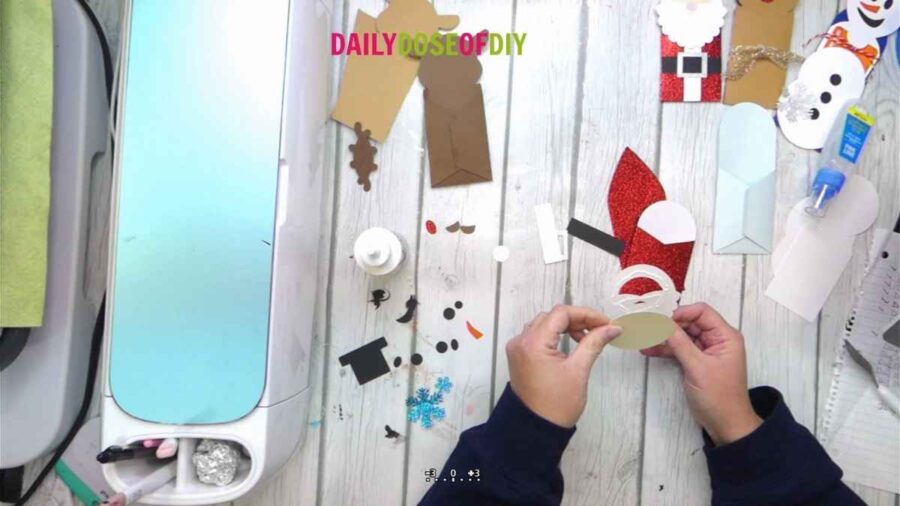
Then, turn the face over and add the little pink nose and the two round black circles for his eyes.

Now you can add the face to the gift card pouch. Align the round face to the front of the rounded gift card pouch and glue it in place.
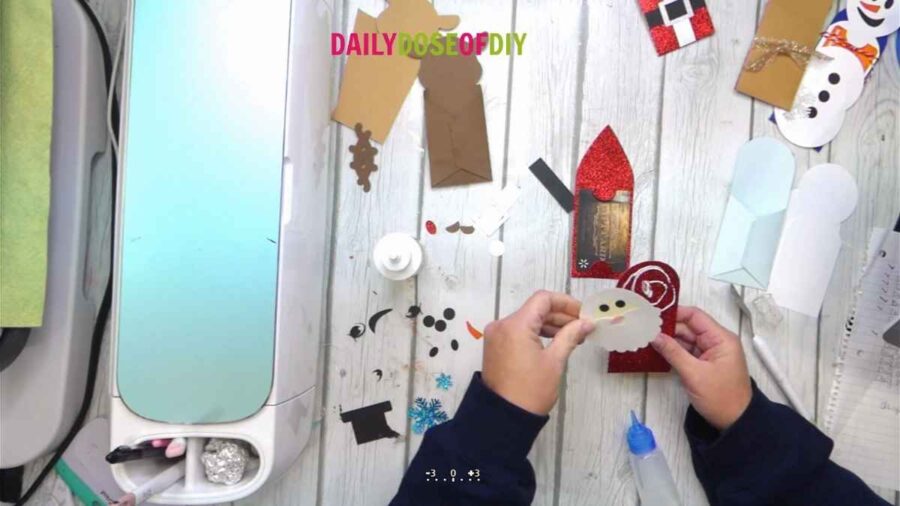
To finish, add the pieces that make Santa’s clothes. First, add the white strip vertically in the center, making sure that the top goes under the beard.
Then add the black strip horizontally for his belt. The square piece goes on top of the belt to make a buckle.
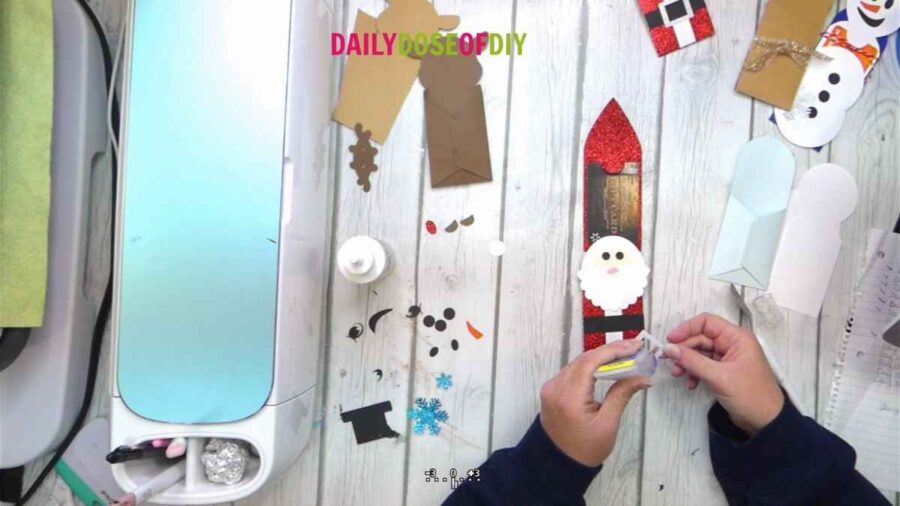
And finally, you’ll add the round white ball to the tip of his hat. And Santa is complete! Isn’t he so cute?
Step 5: Assembling the Snowman & Reindeer Card Holder
The rest of the assembly for the snowman and reindeer are much the same. Start with the folded flaps on the assembled pouch facing up. We will put glue on the front of the flaps to add the circular body of the snowman and the rectangle body of the reindeer.
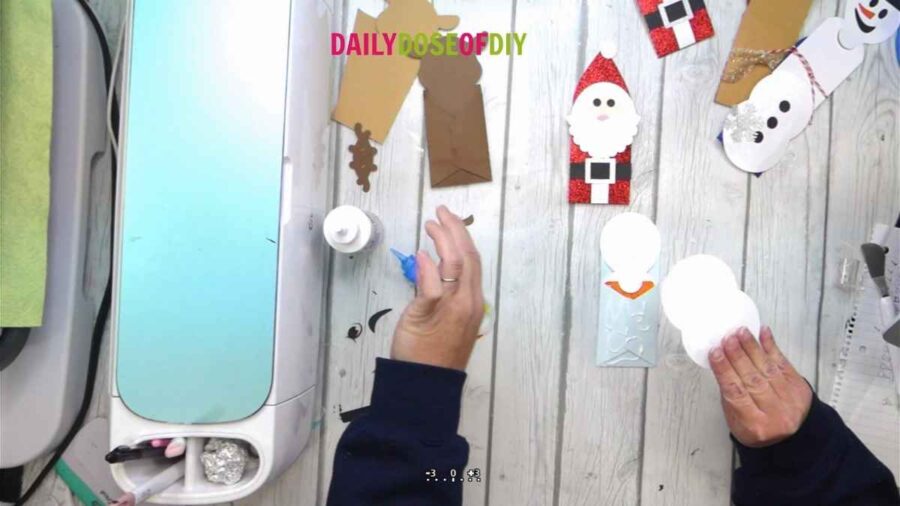
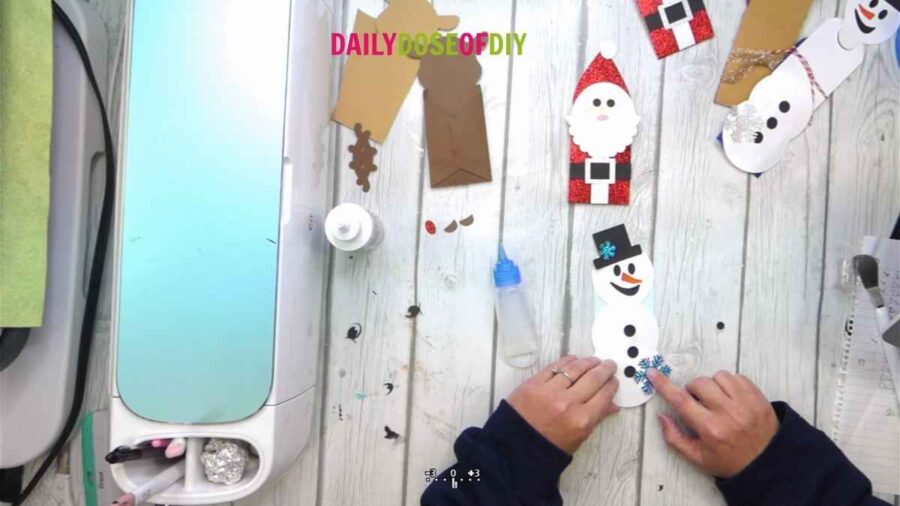
To finish the snowman, you will add the hat to the top circle that is on the pouch insert. His eyes, nose, and mouth will also be glued to the top circle.
Then, to the body you’ll add 3 buttons, some snowflakes, and any other embellishments you’d like to add.
To finish the reindeer, you’ll start by adding his ears and antlers, followed by his eyes and nose. I also like to tie a little ribbon around his body as a cute embellishment.
And now you’re finished! These are the cutest little gift card holders that will make the perfect gift.
Thanks so much for crafting with me and making these DIY Christmas Gift Card Holders.
Here are more Christmas Crafts You Will Enjoy:
3D Paper Ornaments – Three Designs!
Nativity Scene Christmas Lantern
Check out All 14 of our Christmas Kickoff Crafts
Happy Holidays!

Chris Butler has helped thousands of crafters learn how to use their Cricut machine without feeling overwhelmed. She is a best selling author and an up and coming designer. For fun Chris enjoys designing SVG Files, hanging out with her family (preferably at the lake), traveling, and volunteering at her church. She is a wife and mom of two crazy fun kids.
I can’t download the card holders. It just takes me to the access pass purchase. How can I download this file and the rest of the Christmas 2022 files?
I mean to download them each day, not all at once.
Check your email! The download link goes to your email.