This post may contain affiliate links for your convenience. If you make a purchase through one of my links I will earn a small commission at no additional cost to you.
Last Updated on October 25, 2023 by Chris Butler
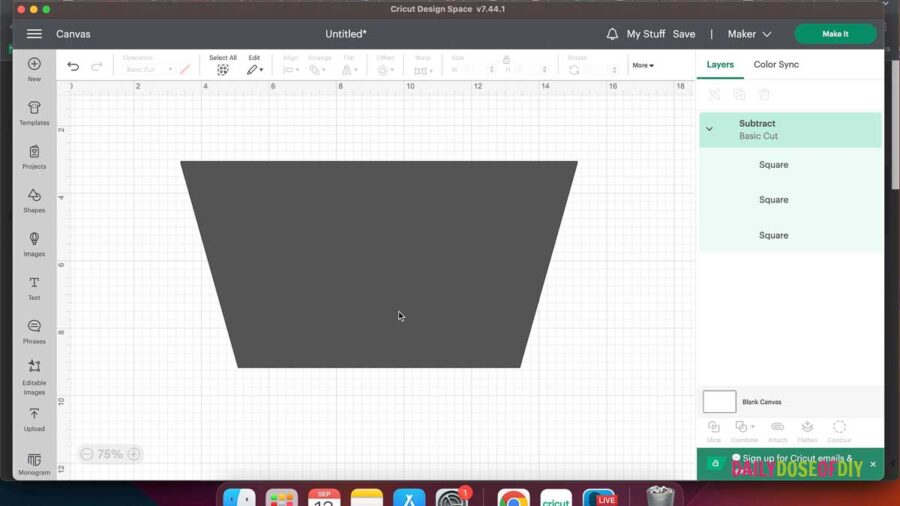
Today I will guide you through creating a tapered tumbler template in Cricut Design Space. Most Cricut users don’t think it’s possible to make tapered tumbler templates in Design Space, but it totally is!
Tapered tumblers are popular for personalizing and making great gifts or promotional items. With the help of Cricut Design Space you can easily create your own custom designs.
And you can use your custom template to make both sublimation wraps or vinyl wraps for blank tumblers.
Let’s get started.
Supplies You’ll Need
- Awesome Tapered Tumblers – I Love the Double Wall Tumblers from Save a Cup
- Cricut Design Space
- Vinyl or Sublimation Designs
- Permanent Adhesive Vinyl – I’m using HTVRont Holographic and I also used Oracle 651 Matte Black
- Transfer Tape
- Cricut Machine and Weeding Tools (I’m using my Cricut Maker)
- Craft Knife
- Measuring Tape
How to Measure Tapered Tumblers to Make a Template
The first thing you need to do is measure your Tumbler. Wrap the measuring tape around the top (widest) point of your cup and record the measurement.
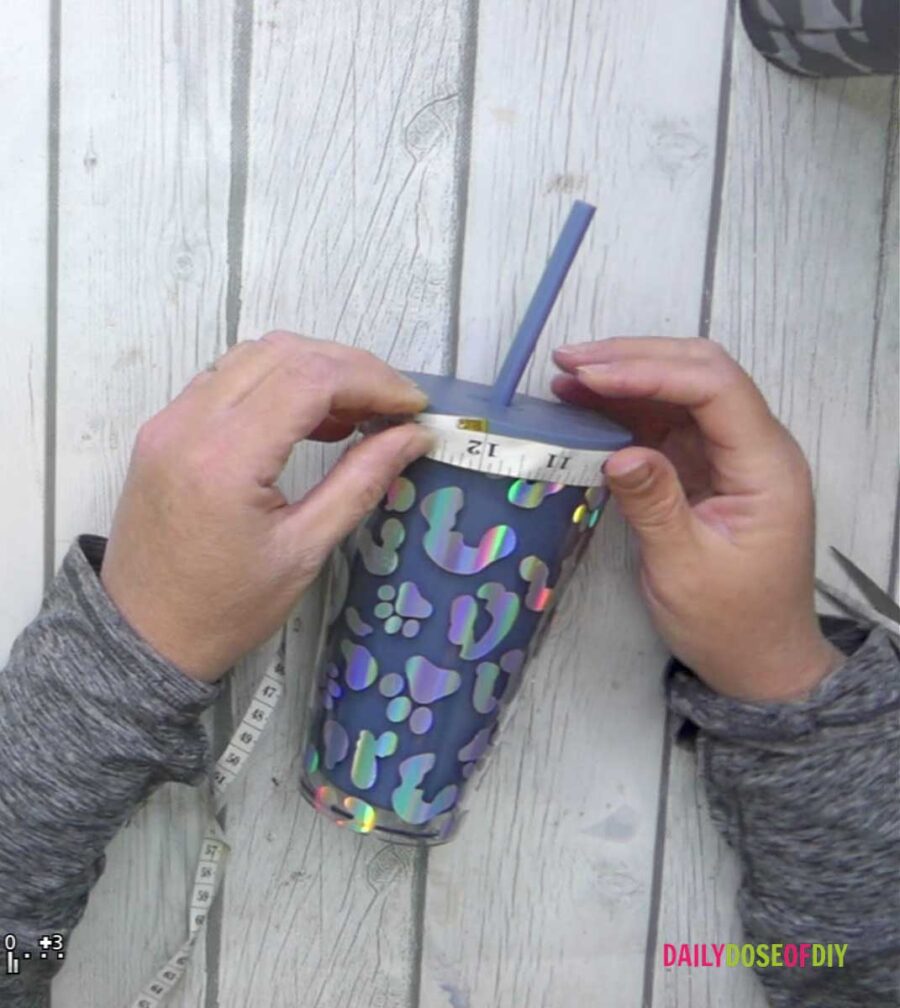
Next measure the bottom (skinniest part) and record that measurement.
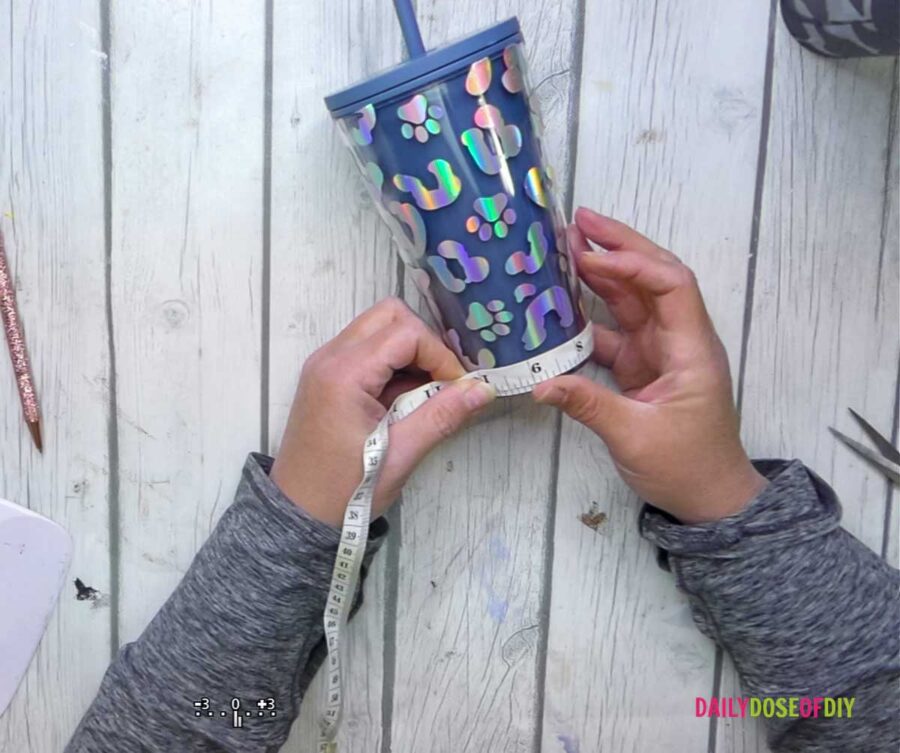
Finally measure the height of your tumbler. I am making a 16 oz tumbler template today, for ,my double wall tumbler. But this method will work no matter the size of your tumbler.
Step-By-Step Video Tutorial
The video will show you both how to make a tapered template for vinyl wraps and how to wrap a tapered tumbler. Keep scrolling for the full step-by-step written instructions.
Making a Full Wrap Template in Cricut Design Space
To start, open Cricut Design Space and create a new project. Then, follow these steps:
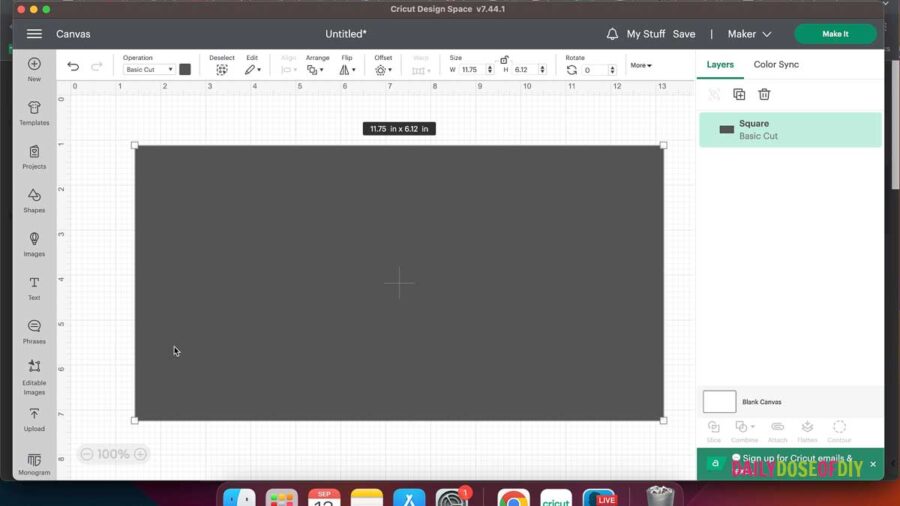
- Select the “Shapes” menu and choose the square shape.
- On the top menu, click the unlock button and change the width to the top measurement of your cup and the height to the height of your cup.
2. Go to the “Shapes” menu again and make another square
3. Click the unlock button on the top menu and change the width to the bottom measurement of your cup. The height doesn’t matter.
4. Change the color of the second rectangle to something different.
5. Butt the top of your second rectangle to the bottom of your first rectangle.
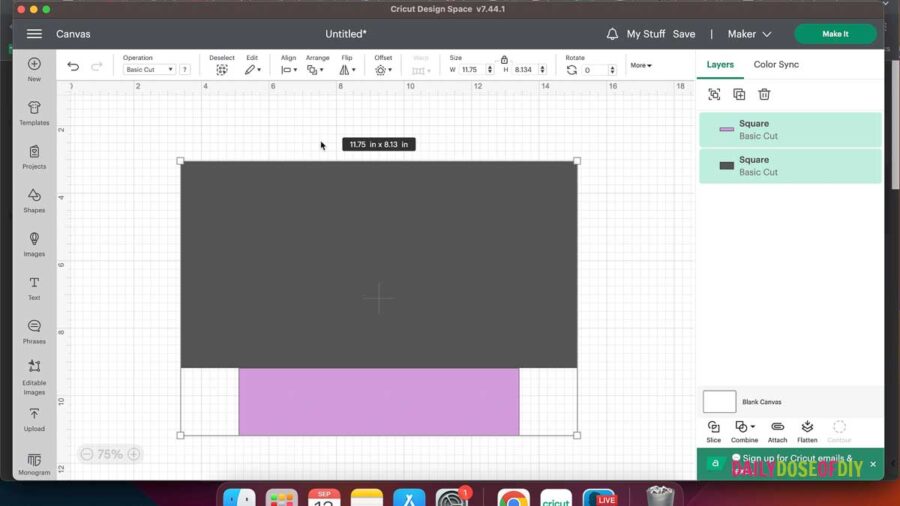
6. Select Both Rectangles and on the top menu click “Align” Center Horizontally.
7. Now duplicate the second rectangle by selecting the rectangle and click Control C to copy and Control V to paste (CMD C and CMD V on a mac)
8. Change the color of your duplicated rectangle to something different.
9. Rotate the duplicate rectangle to match the angle of the top corner of the original rectangle and the top corner of the bottom rectangle. Use the curved arrow to spin the rectangle around until it aligns with the top corner of both the top and bottom rectangles.
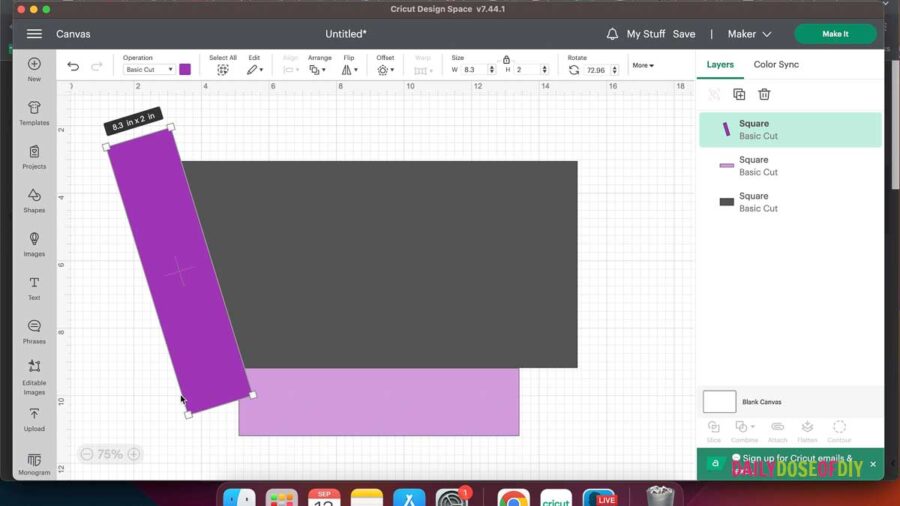
10. Once you have the angle right, make a duplicate of the angled rectangle by selecting it and then Control C and Control V
11. Slide the duplicated rectangle over and go to the top menu and select “Flip” and then “Flip Horizontally”
12. The angle on the duplicated and flipped rectangle should be perfect, you only need to put it in place so it lines up with the top corner of the top rectangle and the top corner of the bottom rectangle.
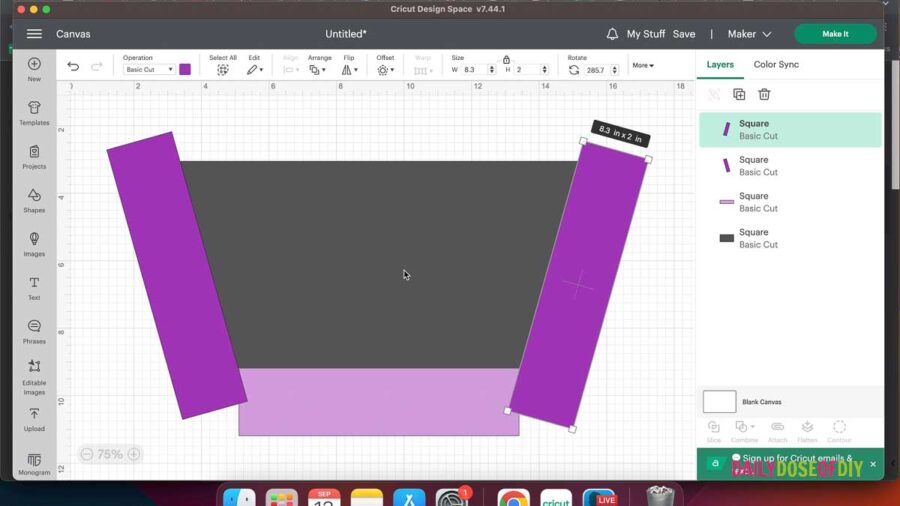
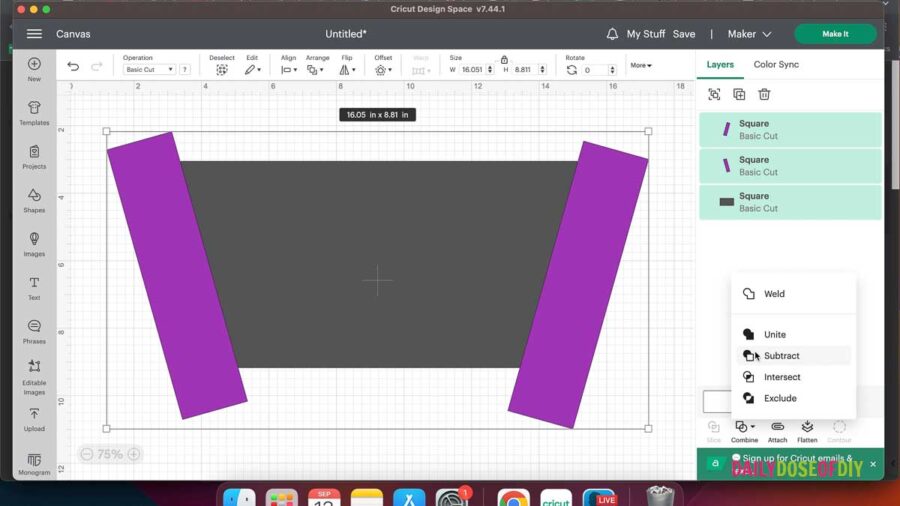
13. Now delete your bottom rectangle.
14. Select all three rectangles and on the bottom menu click on the “Combine Menu” and then click “Subtract. Now you have a template that will fit your cup.

Saving Your Template
From here you want to save the template so you can make future tumbler wraps without having to start from scratch. Go to the top menu and click save and name your template and save.
After you add a design to your template be sure to click “Save As” and name it something different if you want to save it.
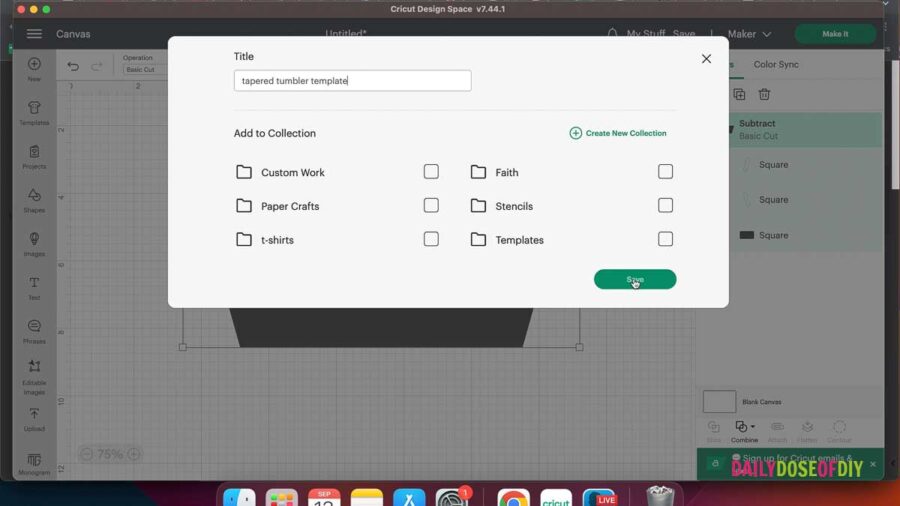
Adding a Design to Your Tapered Template For Vinyl
Now that you have your template, it’s time to add a design to your template. You can use your template to make sublimation tumblers or vinyl wrap tumblers.
- Create or import your design into Cricut Design Space. I am using a Cricut design under “Images” on the left menu. I searched Animal Print and chose the cheetah dog print design.
- Position your design within the template shape, making sure it fits nicely. For sublimation designs you want your design to go over the edges of the template (see below)
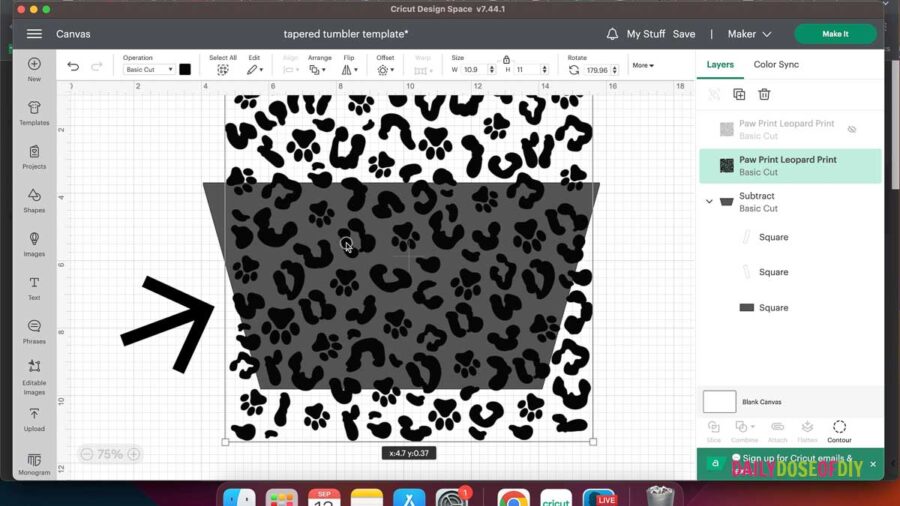
3. If you’re making a vinyl wrap make sure not many of any elements go over the left or right edge. We’ll need to remove them later. Once the design is in place make a duplicate of the design and then hide it from the layers menu.
4. Select both your design and the template shape.
5. Go to the “Combine Menu” and Click “Intersect” This should leave your design in the shape of the template.
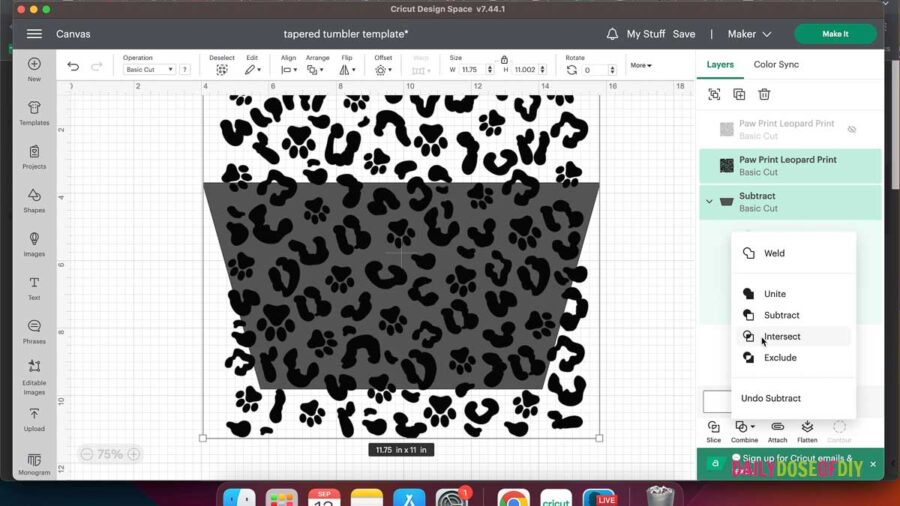
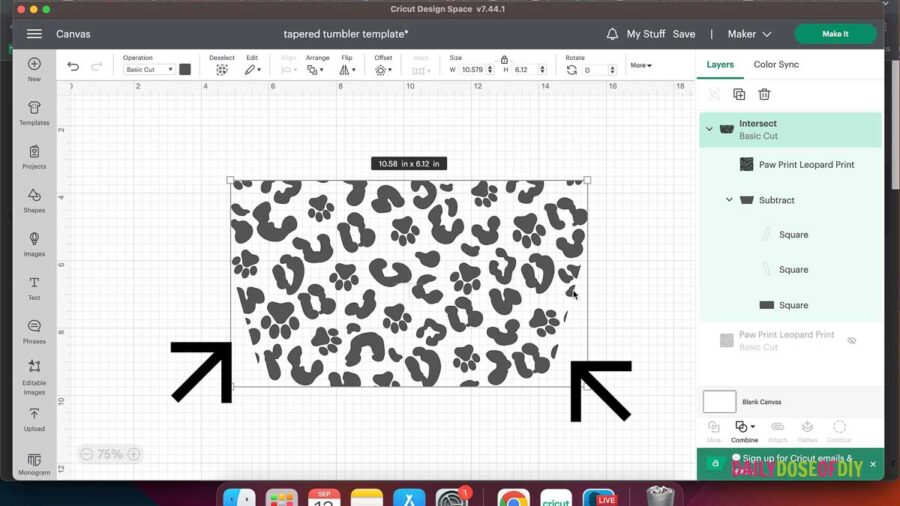
6. For vinyl wraps, If there are any pieces of the design that got cut off along the left or right side of the template you can use the “Shapes” menu to add circles and position them over the cut-off pieces. Then, select everything and use the “Actions” menu to “Subtract” the circles from the design.
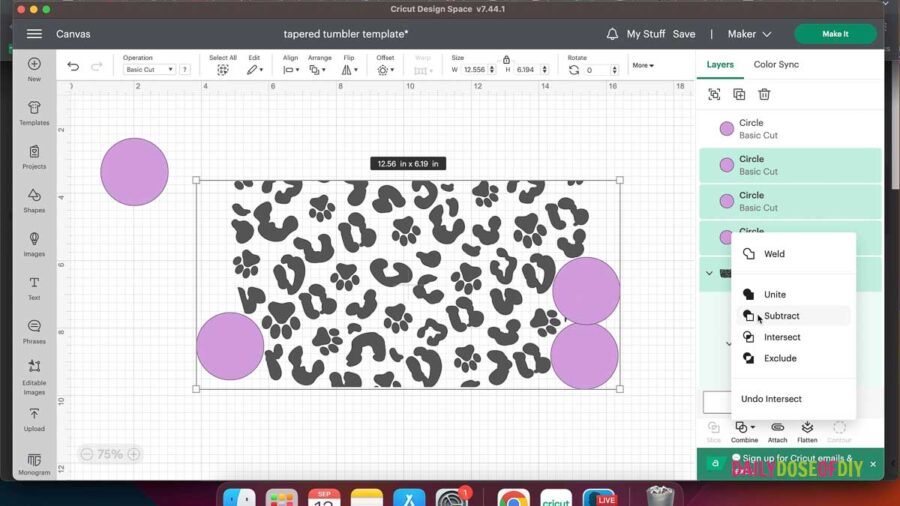
7. Repeat this process until all the cut-off pieces are removed and your template is ready to cut.
See this post for tips and tricks for wrapping your tapered tumbler with vinyl.
Adding A Sublimation Design to Your Tapered Template
Understand that some tapered tumblers will be larger than the 8.5×11 standard paper size. So get the measurements of your tumbler before proceeding, unless you have a printer capable of printing larger sheets of sublimation paper.
- You will need to upload your sublimation design into Design Space. Sublimation designs should be PNG files, not SVGs.
- Once uploaded, select complex image and then continue. On the next screen click apply and continue. And finally select the print then cut image and then click upload.
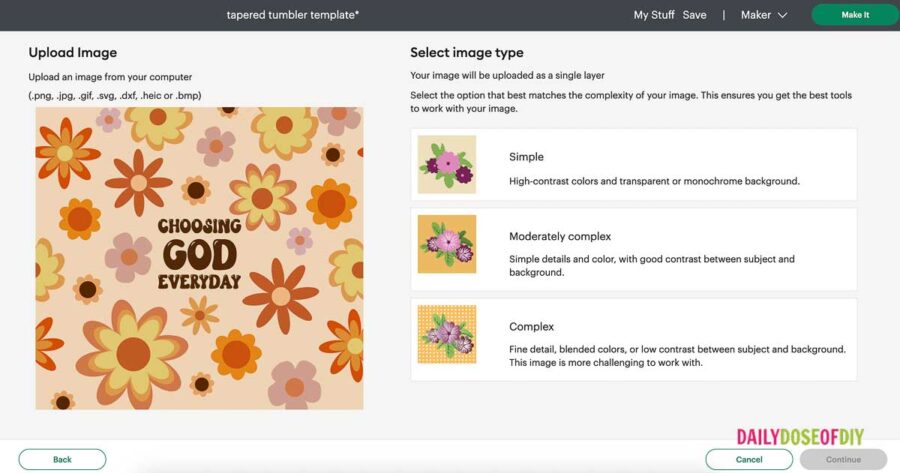
3. On the next screen select your design and then click add to canvas.
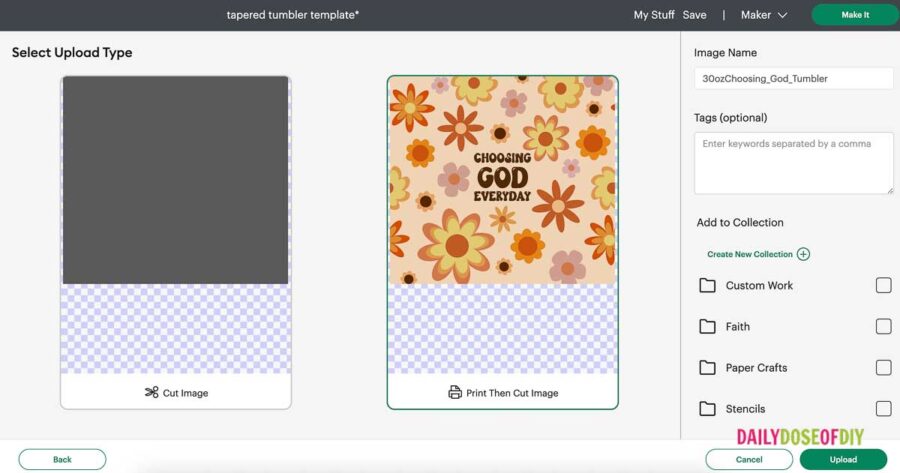
4. Once the design is on the canvas reduce the size to match the width of your template. You may need to select your design and then on the top menu click “Arrange” > “Send to Back” to get your sublimation design behind your template.
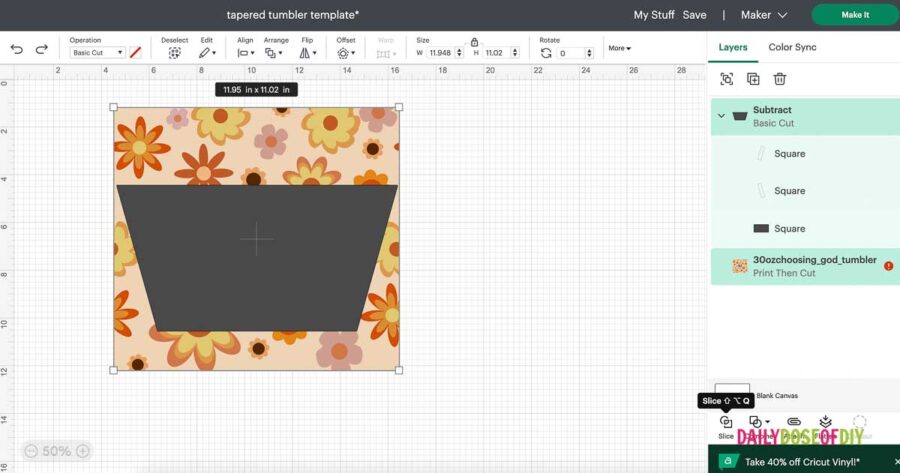
Once the size is reduced and in place select both the template and the design and then on the bottom menu click “Slice”
After the slice has occurred separate the pieces. You can delete the template and the other piece. Don’t forget to click Save on the top menu and then “Save As” to save your new design. Failing to do so could lose your original template.
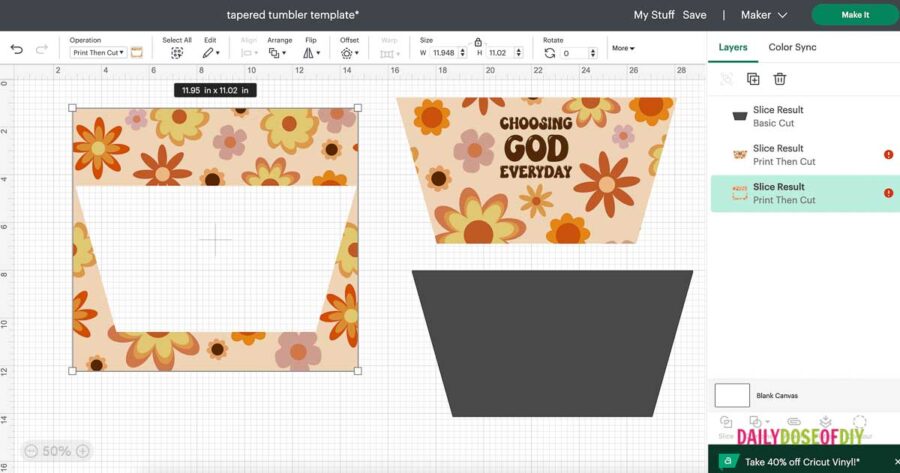
And there you have it! You now know how to create a tapered tumbler template in Cricut Design Space and use it for vinyl and sublimation designs. Remember to check out Save a Cup for some adorable tumblers and great discounts.
Learn how to wrap tapered tumblers with a vinyl wrap here.
I hope you found this tutorial for making a tapered tumbler template in Cricut Design Space helpful! Happy crafting!
More Tutorials You Need
How to make Sublimated Designs in Cricut Design Space
How to Sublimate Tumblers without a Cricut Mug Press
How to Wrap Tapered Tumblers with Vinyl Designs

Chris Butler has helped thousands of crafters learn how to use their Cricut machine without feeling overwhelmed. She is a best selling author and an up and coming designer. For fun Chris enjoys designing SVG Files, hanging out with her family (preferably at the lake), traveling, and volunteering at her church. She is a wife and mom of two crazy fun kids.

Leave a Reply