This post may contain affiliate links for your convenience. If you make a purchase through one of my links I will earn a small commission at no additional cost to you.
Last Updated on April 20, 2023 by Chris Butler
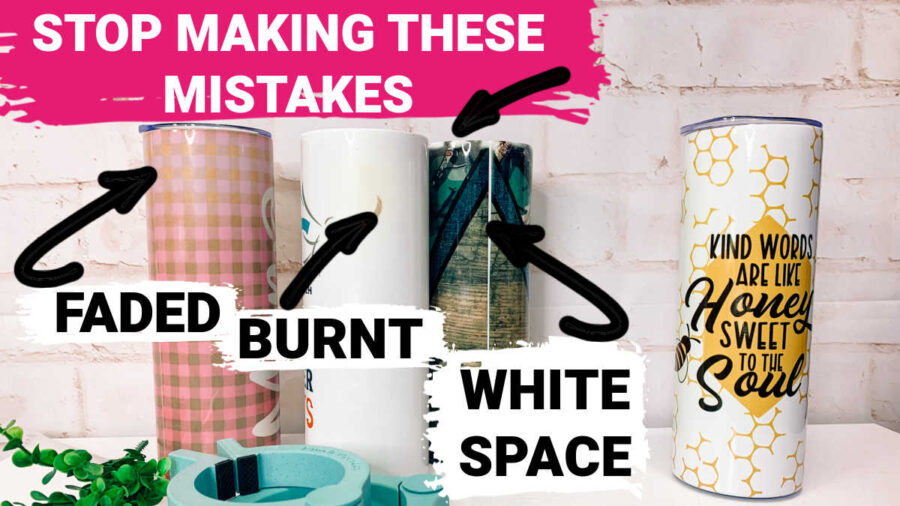
Have you seen the amazing sublimation tumblers? The colors are so vibrant, and they never fade, it’s no wonder sublimation is taking the crafting world by storm!
Today you’ll learn how to sublimate a tumbler with this step-by-step tutorial and tips to get spectacular results. And be sure to watch the video with mistakes to avoid when sublimation tumblers. This same process will also work for sublimation mugs.
New to sublimation? Check out everything you need to get started on my Sublimation for Beginners post.
Lets get started:
Quick Links to Information in This Post
Supplies Needed for Sublimation Tumblers
- Sublimation Printer – I use an Epson eco tank for my sublimation printing – https://amzn.to/3MKT6xy
- Hippoo Sublimation Paper – https://amzn.to/43CNFac
- Hippo Sublimation Ink – https://amzn.to/40cgXJu
- Skinny Tumbler for Sublimation – I like these 20 oz tumblers from Hippo – https://amzn.to/3o7GFl8
- Toaster or Convection Oven – https://amzn.to/3Kxd8c4
- Shrink Wrap Sleeve (This comes with the recommended tumblers)
- Heat Gun or Blow Dryer
- Heat-Resistant Tape – https://amzn.to/3GLsN6A
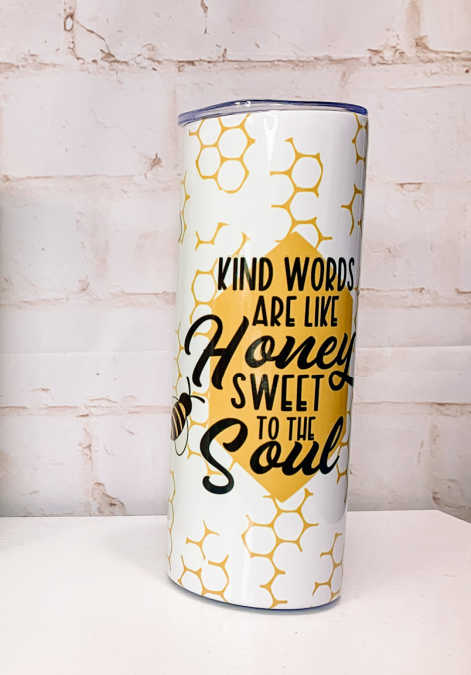
- Sublimation Designs – Use my free Kind Words are Sweeter than Honey Tumbler Sublimation Design (details below)
- Alcohol Wipes – https://amzn.to/40fTo2y
- Heat Resistant Gloves -Optional but recommended
- Perfect Pinch Tool – https://www.plymouthcreativeproducts.com/
Sublimation Designs
I have a tumbler sublimation design you can use to make 20-ounce skinny tumblers. It’s in my free resource library. Just click the button below, fill out the simple form and we’ll send the link right over. You’ll also find more free sublimation designs and SVG files in the library.
All of my free SVG files and Designs are kept in a library for your convenience. Simply CLICK HERE to get access. We will send you the link and password right away and you’re free to use all the resources you want in the library.
Already have the password? (It’s at the bottom of every email) Enter the Library Here
You can also purchase designs on places like Etsy. Make sure you are getting designs for the same size tumbler that you have as there are many different sizes out there.
Or making your own designs is an option too! See how to make sublimation designs in Cricut Design Space.
Heat Sources for Sublimating Tumblers
There are different techniques you can use to sublimate tumblers. Some people use the Cricut Mug Press to sublimate the top half of the tumbler and then flip it around and sublimate the bottom half. You can also use a tumbler heat press like the ones found here.
They even make a sublimation oven. But those options are a little pricey. I am using a regular toaster oven for my skinny sublimation tumblers. A countertop convection oven will work as well.
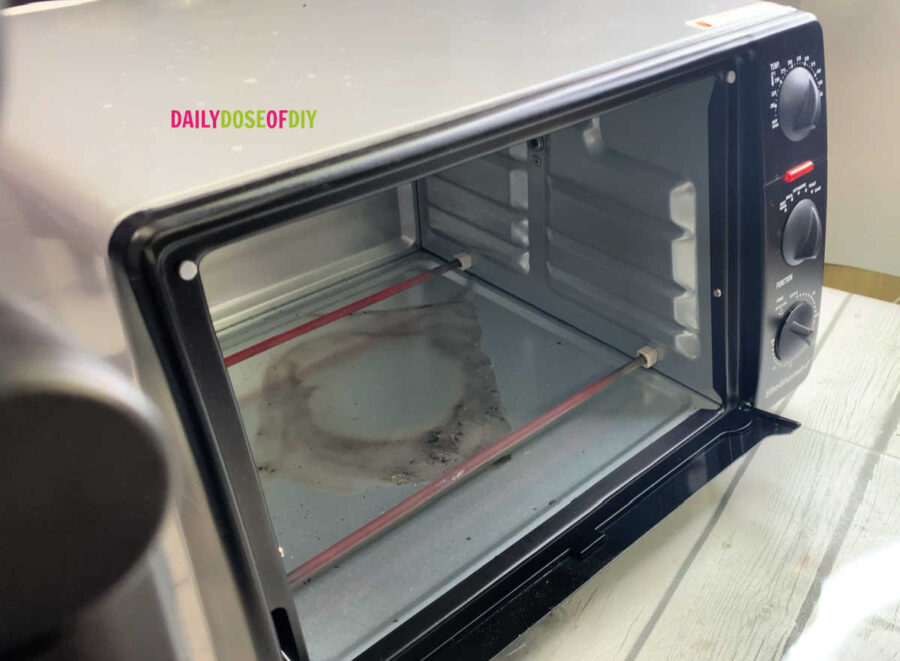
It’s not recommended to use your kitchen oven. However, I used mine for my Cricut infusible ink tumblers. I don’t think a one-time project will hurt much, but you definitely don’t want to use it over and over.
Sublimation Ink, Paper, and Blank Tumblers
You’ll want to make sure you’re using high-quality sublimation blanks. My favorite sublimation tumblers are these found on Amazon. They come with the lid, straw, straw cleaner, the rubber bottom, and sublimation shrink wraps. (woohoo one less thing to buy!)
The same goes with ink and paper. Using high quality supplies will get you the best results. I like Hiippoo for both my ink and paper. The paper states it has a 98% success, but I haven’t had a fail yet in over 500 sublimation projects.
Mistakes to Avoid when Sublimating Tumblers Video
I have a video over on my Youtube channel that’s worth watching. I cover the most common mistakes when sublimation tumblers and how to avoid them. Watch below and don’t forget to subscribe!

How to Sublimate Tumblers
Step One Print your Sublimation Transfers
Don’t forget to mirror before you print your design. That’s such a common mistake and one I tend to make more often than I like to admit. You’ll want to print using the setting premium matte paper and the highest print quality for the best transfer.
I also want to note that moisture and sublimation are not friends. If it’s a super humid day your sublimation paper will retain extra moisture and could cause your ink to run.
Once your sublimation design is printed, trim off the excess paper so it’s ready to apply to your tumbler. You will need one side trimmed right up to the design edge.
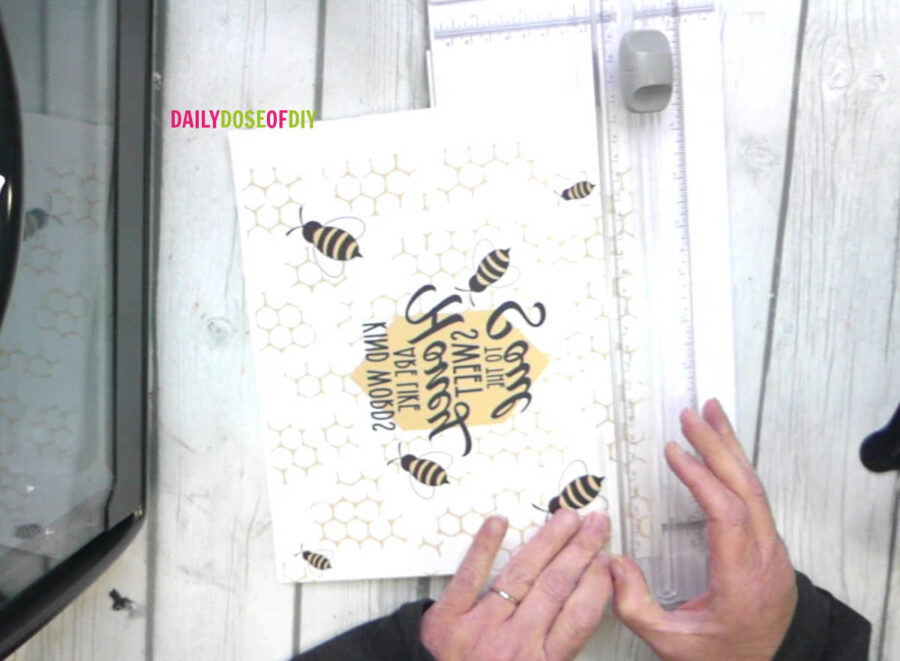
You’ll also want the top and bottom trimmed up as well. Extra paper can give you air pockets when fitting the design around the tumbler.
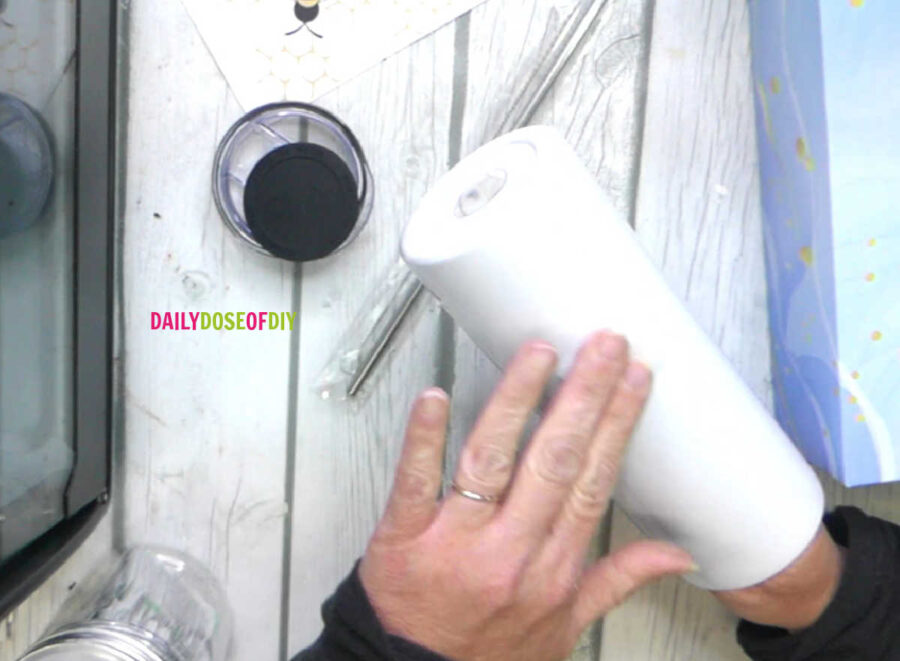
Step Two: Clean Your Tumbler
Now is a good time to start pre-heating your oven. While that’s warming up we’re going to clean the tumbler.
Don’t skip this step! I use an alcohol wipe to clean the entire tumbler. You need to remove the oil from your fingers and any residue. After it’s dry use a lint roller and roll over the tumbler to remove any lint.
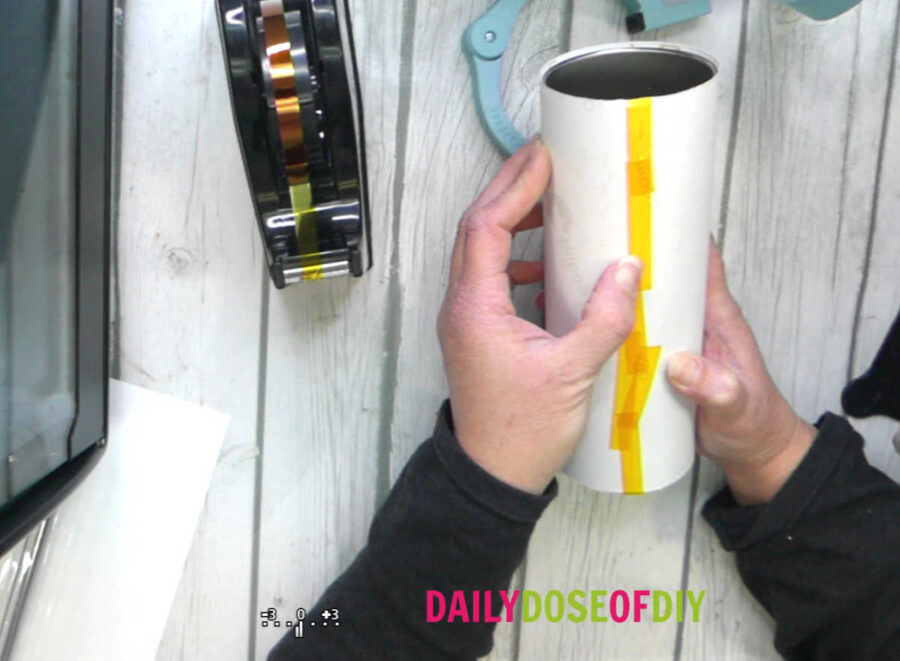
Step Three: Apply Your Sublimation Design to the Tumbler
Now we can apply the design to the tumbler. Make sure your tumbler is completely dry first! Again any moisture will cause your ink to “bleed”
If you’re using a full wrap design, I find it easiest to lay your design on a table with the design side up. Then line it up from the top or the bottom of the tumbler to get it straight.
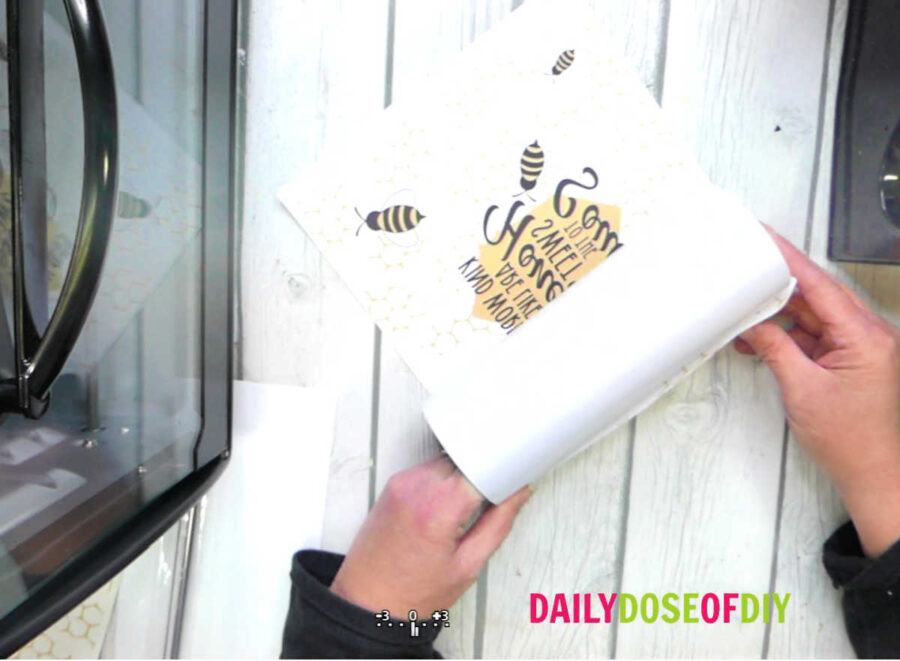
Hold the edge of the design (make sure it’s the edge that was trimmed right up to the design) in place and roll the tumbler until the design sheet goes all the way around. You should have a small overlap on the edges.
A common mistake is having the wrong edge against your tumbler. Make sure it’s the side that was completely trimmed to the design edge or you’ll end up with a gap at the seam.
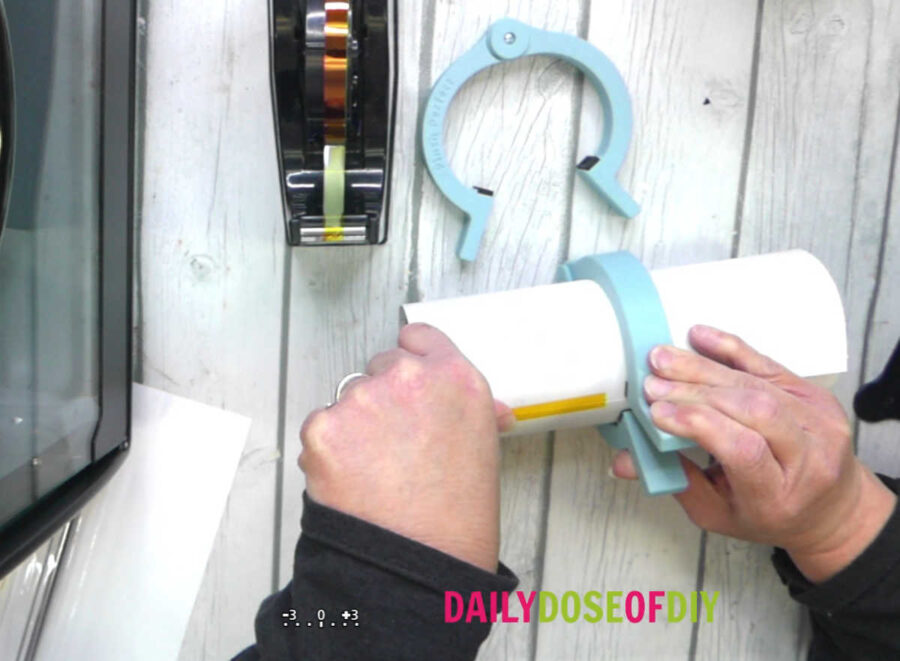
The next part is sometimes tricky because things can slip and you’ll wish you have three hands. This is where having the pinch-perfect tool comes in handy. It’s the best way to hold your design in place and give you that extra hand you wished you had!
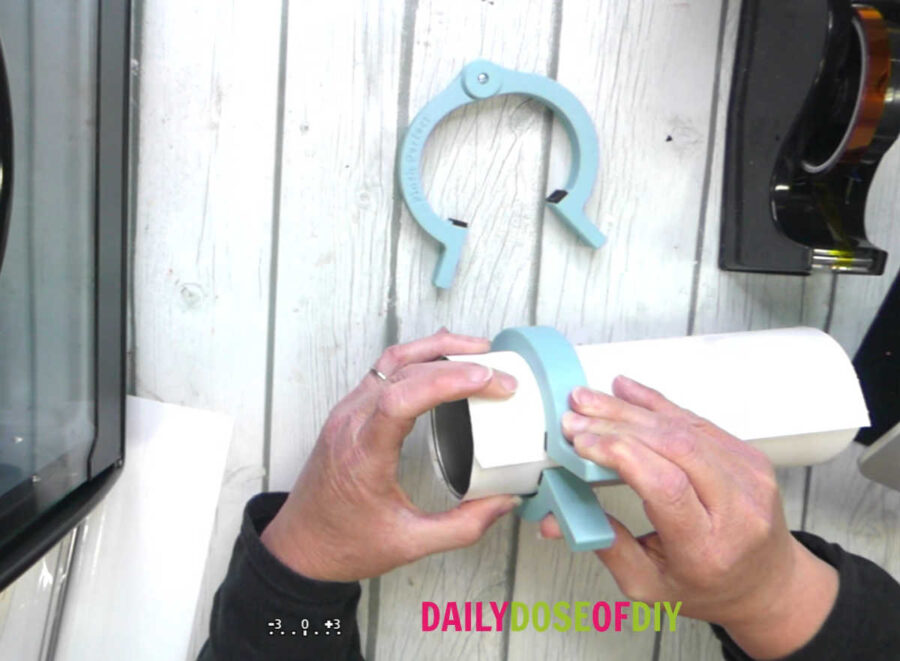
It also holds tight to help remove those pesky air pockets.
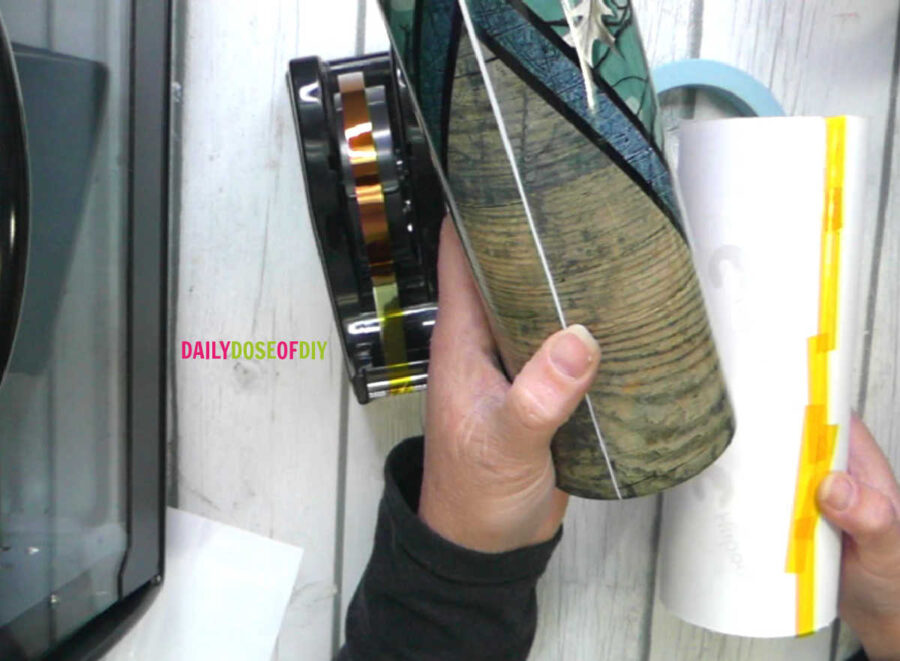
I use the pinch-perfect tool to hold everything in place while I get my heat tape in place. Start by adding heat tape to the seam. And then add heat tape to the top and bottom as well.
Go back and make sure the entire seam is taped. If you want your design to wrap around the bottom edge it’s also a good idea to tape around the whole bottom as well. The shrink wrap will help some, but if you have a lot of excess paper on the bottom, you might end up with some white space.
Once the design is taped, use your fingernail or a butter knife and run down both seems. First down the seam that is taped. And then you’ll be able to feel the inside seam as well. It’s important to do that seam to get a clean transfer.
This will help remove air and make sure your seam is truly seamless.
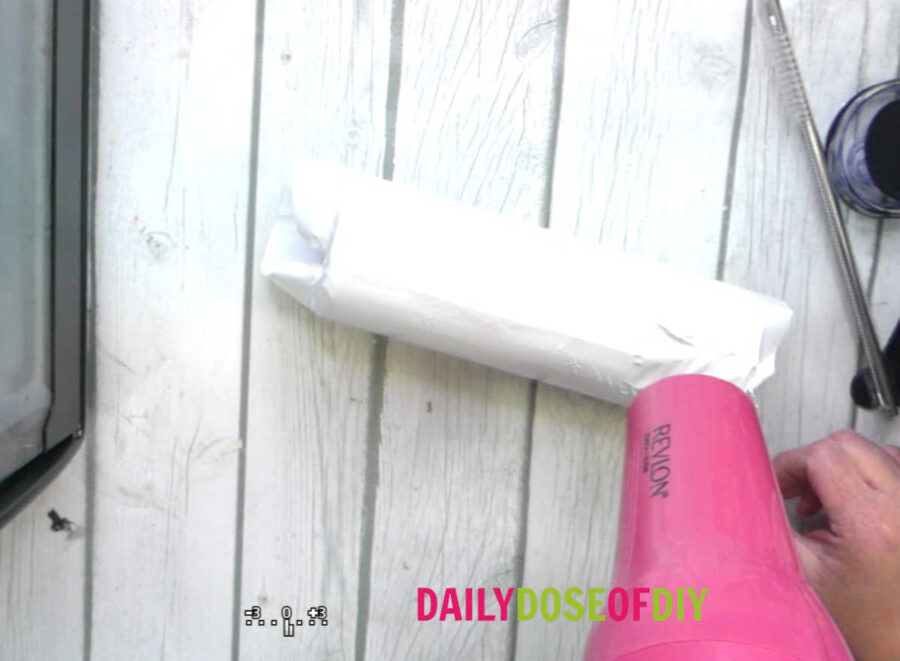
Next, grab your shrink wrap and place the tumbler inside. Use a heat gun or a hair dryer to shrink the tube tightly around the tumbler. Make sure you get the top and bottom areas well.
Do I Need to Shrink Wrap my Tumbler?
No, you don’t, but it will help.
If you don’t have the shrink wrap sleaves you can wrap enough tape around the tumbler. Wrap a piece of the heat tape around the tumbler on the top, the middle, and toward the bottom. In addition to that tape all around the bottom and the top. Make sure the entire seam is taped as well.
I have made many perfect tumblers this way. But the fact is the sleeves are cheaper in the long run than using all that tape. And the tape wrapped around one area can cause an air pocket above or below the tape line.
Step Four: Bake Your Tumbler
Pre-heat your oven to 355 Degrees.
The fact is not all ovens are the same. If you have an oven thermometer, it is best to use one. These small ovens can lose heat quickly and heat unevenly. The back of the oven tends to have a higher temperature than the front of the oven.
However, a thermometer is probably unnecessary once you know your oven’s quirks. I like to live on the wild side, and I don’t use one. Just know if you don’t have one, you might have a little more trial and error getting the timing right. I’ll show you exactly what to look for when your tumbler is done.
Heat-resistant gloves will also make this easier, but I just use a regular oven mitt and tongs. Sometimes we can survive with less.
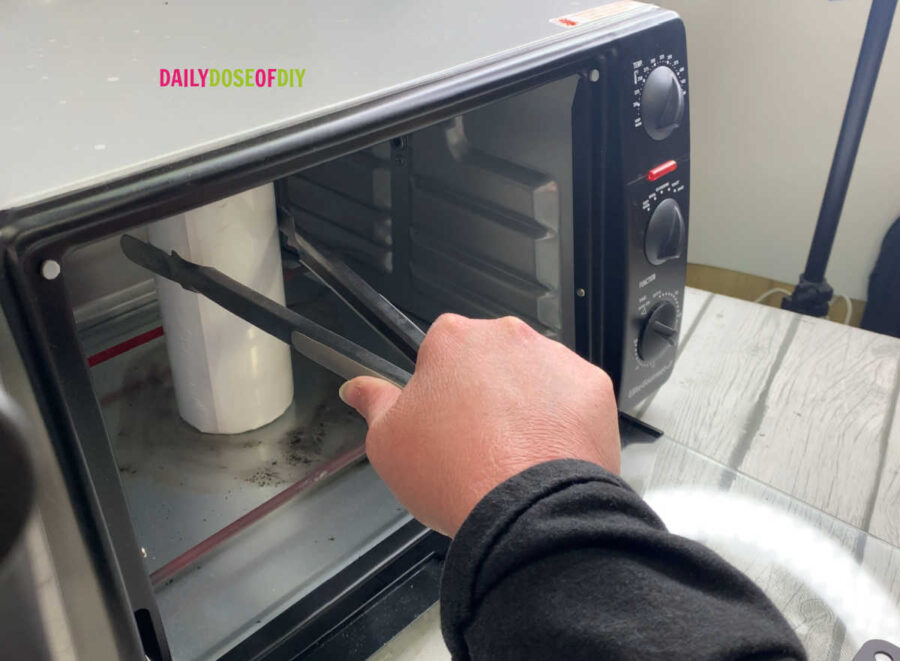
Place your tumbler in the center of the oven and set your timer for two minutes. At two minutes, you want to rotate your tumbler 1/4 of a turn.
The heating elements are in the front and back of the oven and we want to make sure each side is heated evenly. After turning the tumbler set your time for another two minutes and rotate your tumbler 1/4 turn again.
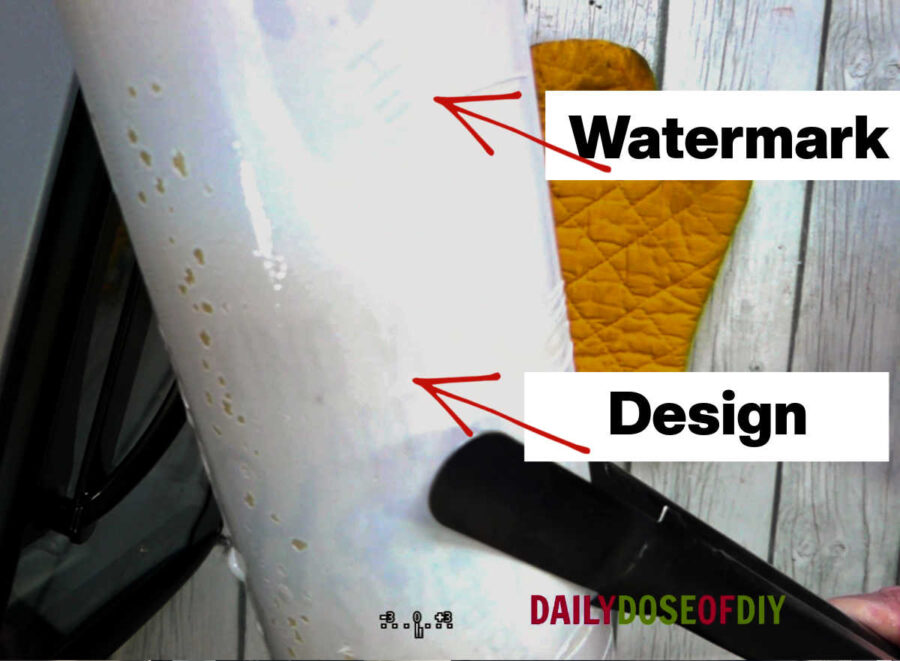
Repeat at least one more time. Most tumblers will be done in the 6-8 minute range. After the tumbler has been in the oven six minutes, watch it closely.
You’ll first notice that the watermarks from your sublimation start showing through. This means your tumbler is almost done.
You’ll know is all the way done when you start to see your design show through the paper.
Step Five: Unwrap Your Tumbler
Once your design shows through the paper, remove your tumbler from the oven. Set aside and allow to cool completely. (approximately 10 minutes)
When the tumbler is cooled, begin removing the shrinkwrap and sublimation paper. Enjoy your beautiful new tumbler!
Sublimating Tumblers FAQs
How long does it take to sublimate a tumbler in a convection oven?
Most tumblers will be done in 6-8 minutes.
Do you have to seal sublimation Tumblers
No you do not, the sublimation design doesn’t need to be protected and will last many years.
Are sublimated tumblers dishwasher safe?
Absolutely! You may wash your sublimated tumblers in a dishwasher.
More Sublimation Crafts and Tips:
Beginners Guide to getting started with Sublimation
How to Make Sublimation Designs in Design Space
How to Sublimate on Microfiber Kitchen Towels
How to Bleach and Sublimate Shirts

Chris Butler has helped thousands of crafters learn how to use their Cricut machine without feeling overwhelmed. She is a best selling author and an up and coming designer. For fun Chris enjoys designing SVG Files, hanging out with her family (preferably at the lake), traveling, and volunteering at her church. She is a wife and mom of two crazy fun kids.
Leave a Reply