This post may contain affiliate links for your convenience. If you make a purchase through one of my links I will earn a small commission at no additional cost to you.
Last Updated on October 9, 2023 by Chris Butler
Today let’s discuss the best way to use sublimation heat transfer vinyl (HTV) to create custom designs on cotton shirts. While sublimation works best on 100% polyester white shirts, using white HTV allows us to achieve vibrant colors on darker-colored shirts and cotton fabrics.
We will walk you step-by-step through cutting and applying the sublimation HTV using a Cricut machine. So let’s get started!

Quick Links to Information in This Post
Why Use Sublimation Heat Transfer Vinyl?
The Sublimation process is a chemical reaction between sublimation ink and 100% polyester fabric that allows the ink to bond with the fabric. This means that sublimation cannot be done on cotton shirts, and the lower the polyester count, the more faded the sublimation transfer will be. The poly-cotton blends are super soft, but you will not get vivid colors if you sublimate on them.
Additionally, sublimation does not print white ink, so using white HTV is a great way to incorporate white colors into your designs and to sublimate on darker-colored shirts and cotton fabrics.
Benefits of Using White HTV for Sublimation
- White Colors: Sublimation does not print white ink, so using white HTV allows us to achieve white colors in our designs. This is especially useful when working with colored fabrics like black shirts.
- Sublimation on Dark Shirts: Sublimating on dark fabrics is typically not possible because the ink does not show up well. However, by using white HTV, we can sublimate on dark shirts and achieve vibrant colors.
- Sublimate on Cotton Shirts: Sublimation ink will not bond to cotton, as mentioned it works best on 100% white polyester fabrics. By sublimating on white HTV we can get vibrant colorful designs on any shirt.
Supplies Needed:
- White HTV (Heat Transfer Vinyl) for Sublimation – (glossy) https://amzn.to/3FbslO2 (matte) https://amzn.to/3ZPtC6B
- Sublimation Paper –
- Sublimation Printer with Sublimation Ink – See this post for getting started with Sublimation Printing
- Sublimation Design – Grab my free Designs, all located in a library for your convenience – more details below
- You can also order already printed sublimation transfers from places like Etsy if you don’t have a sublimation printer.
- Heat Resistant Tape – https://amzn.to/3Fafcok
- Weeding Tools
- Parchment Paper
- Heat Press (an iron won’t work; you need a high heat press for sublimation) – https://amzn.to/3ZMAK3K
- Cutting Machine – Any Cricut or Silhouette Cutting Machine will work. I’m using my Cricut Maker –https://amzn.to/3LUZeCm
To grab the freee sublimation designs for this craft fill out the simple form below.
All of my free SVG files and Designs are kept in a library for your convenience. We will send you the link and password right away, and you’re free to use all the resources you want in the library.
Already have the password? (It’s at the bottom of every email) Enter the Library Here
I’m using HTVRont’s auto heat press and it’s a game changer if you do a lot of heat pressing crafts. Read my full review on the HTVRont auto heat press here.
Recommended Sublimation HTV Brands
When choosing HTV for sublimation, it is important to avoid certain brands that are not suitable for this process. Cricut brand and Siser Easyweed are not recommended for sublimation. The good news is you can use HTV brands like HTVRont, most White Glitter HTV works well including Siser white glitter vinyl, as does Siser Mystic white.
Step-by-Step Video
Keep scrolling for the written instructions.

Prepare the Cut Design in Cricut Design Space
The first thing you will need to do is to print your sublimation design. If you’re new to sublimation see this post for step-by-step instructions for getting set up and printing sublimation designs.
To cut the sublimation design, we will be using a Cricut machine. Here are the steps to follow:
- Upload the Design: In Cricut Design Space, upload the sublimation image by going to “Uploads” and selecting the PNG image file. Choose the “Simple” option and click “Continue.”
- We are using the sublimation design as a cut file, so on the next screen choose the CUT image. It should be a blacked-out shape.
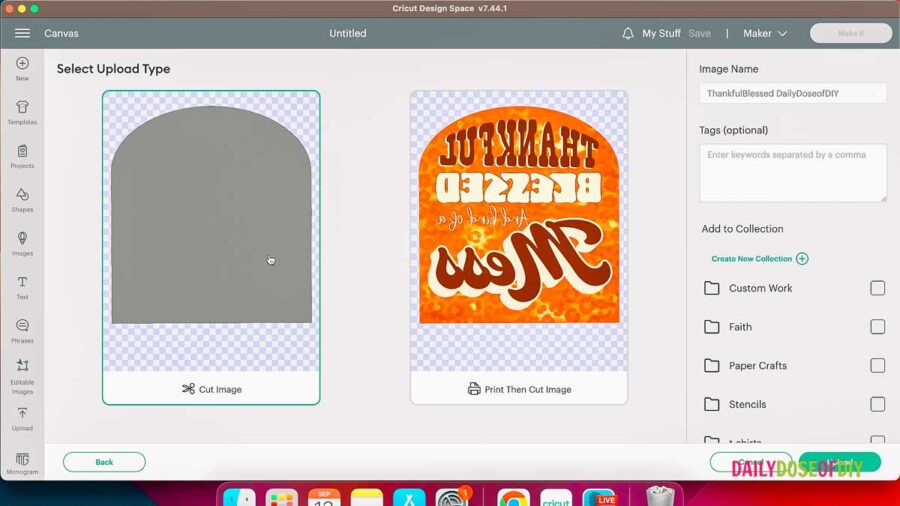
- Click continue and then select your design and add it to the canvas.
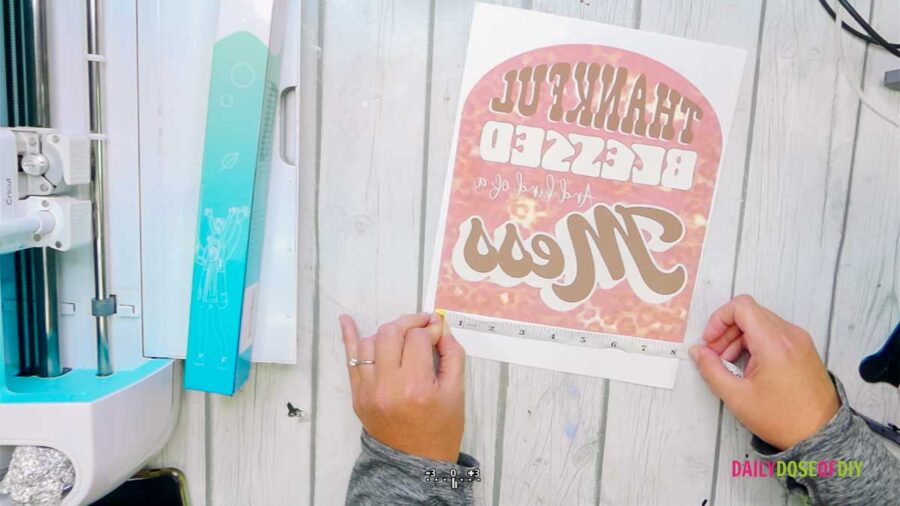
- Adjust the Size: The design may appear too large in Design Space. Resize it to match the size of your sublimation design. The easiest way to do this if you don’t the the size is to measure it will a tape measure.
- Create a Copy: Make a copy of the design by pressing “Ctrl + C” to copy and “Ctrl + V” to paste. (CMD C and CMD V on Mac) Change the color of the copy to differentiate it from the original.
- Align the Copies: Place the copy over the original design and reduce its size slightly. Select both copies of the shape and go to the top menu and select “Align” > “Center.
- Ensure there is a good margin between the two of at least 1/8 of an inch.
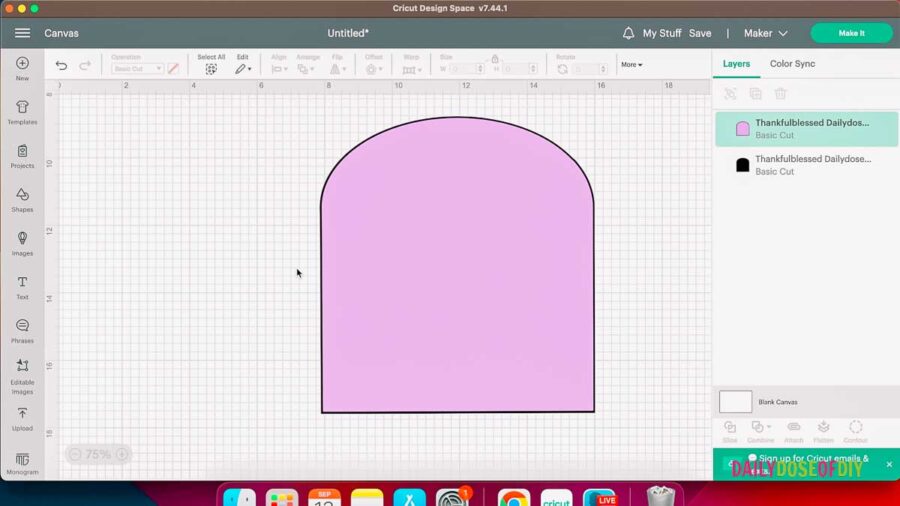
- Delete the Original Shape: Select and delete the original shape. The smaller copy is what we will use to cut the HTV
- Click the make it button.
- On the mat screen be sure to click mirror image on.
- For Cricut Explore, set the dial to “Vinyl.” For Cricut Maker, select “Vinyl” from the list of materials. We are not using the HTV or Iron on Vinyl setting; be sure to choose regular or matte adhesive vinyl for the cut setting on Cricut.
Cutting the Sublimation HTV
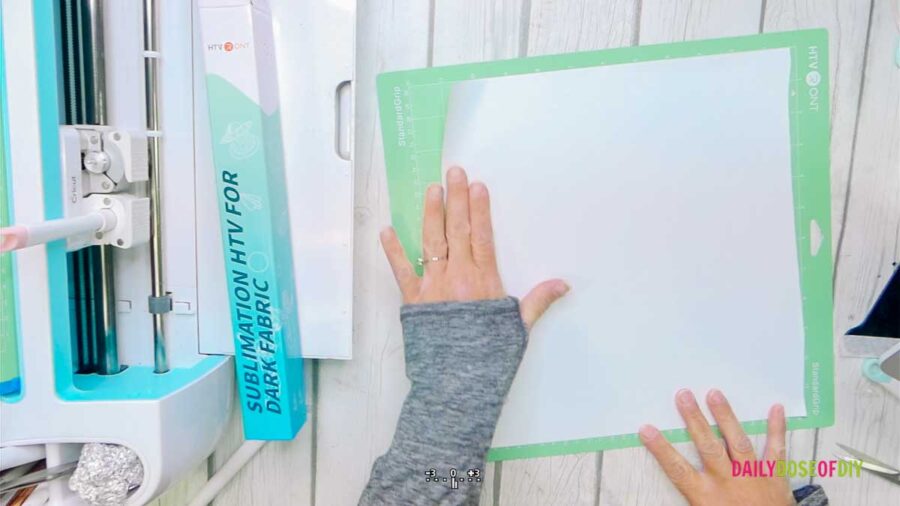
- Prepare the Mat: Place the sublimation HTV on a cutting mat with the carrier sheet facing down. Make sure the vinyl side is facing up.
TIP: If you have a hard time figuring out which side is the vinyl use your weeding tool to poke a small corner. If your weeding tool poke through and you can lift the vinyl off the carrier sheet, that side goes up.
- Load the Mat: Load the mat into the Cricut machine and press the “go” button.
- Weed the Vinyl: Once the cutting is complete, unload the mat and use a weeding tool to remove the excess vinyl from the carrier sheet.
Applying the Sublimation HTV to the Shirt
The next step is to Pre-heat your heat press to 390 degrees.
- Pre-Press the Shirt: Pre-press the shirt to help remove any moisture and wrinkles from the fabric.
TIP: I like to fold my shirt in half for the pre-press. This will give you a press line down the center of your shirt and makes it easier to center the design.
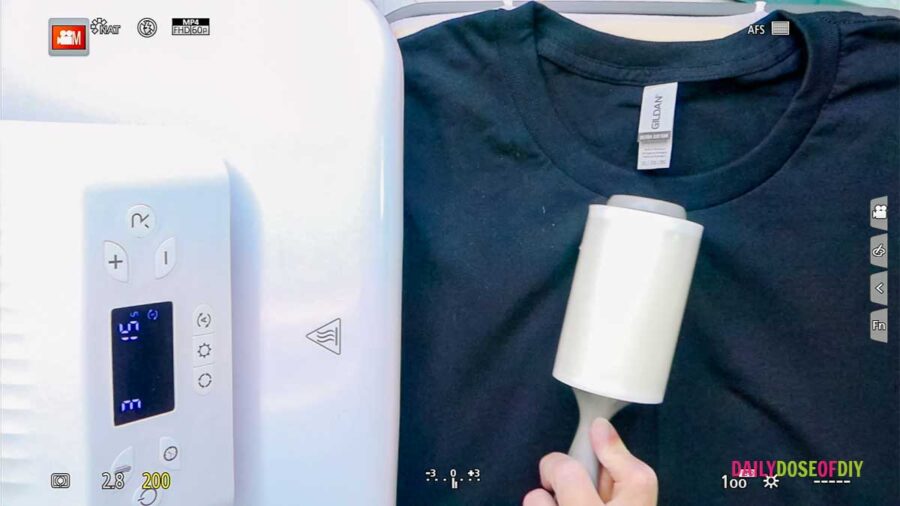
After the pre-press unfold the shirt and and use a lint roller to remove all the fuzzies.
- Center the HTV: Place the sublimation HTV on the shirt, aligning it with the center line created during the pre-press. You want the top of the HTV to be about 2 inches down from the bottom of the collar.
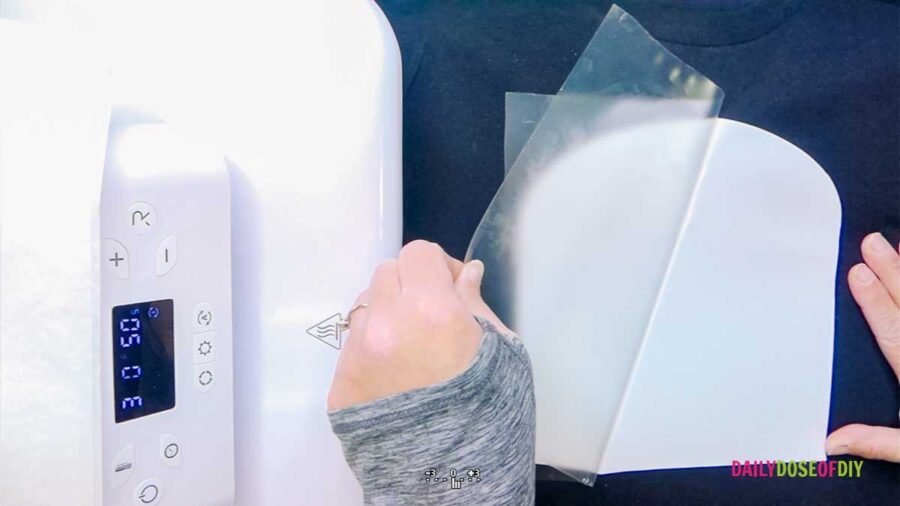
- Heat Press the HTV: Place a piece of parchment paper or a Teflon sheet over the HTV to protect the heat press plates. Press the HTV at 390 Degrees for 15 seconds.
- Remove the Carrier Sheet: Allow the HTV to cool down slightly before removing the carrier sheet. Once it’s cool to the touch, peel off the carrier sheet.
Applying the Sublimation Design to the HTV
2. Once your sublimation design is printed, place the sublimation design face down on top of the HTV, making sure it aligns properly.
3. . Secure the Design: Use heat resistant tape to secure the design in place.
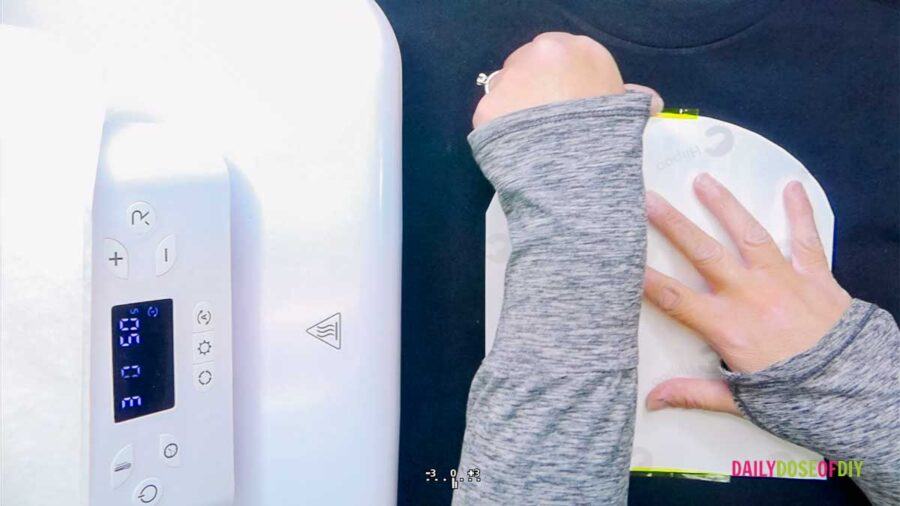
4. . Heat Press the Design: Place a piece of parchment paper over the design to protect the heat press plates. Press the design at 390 degrees for 50 seconds.
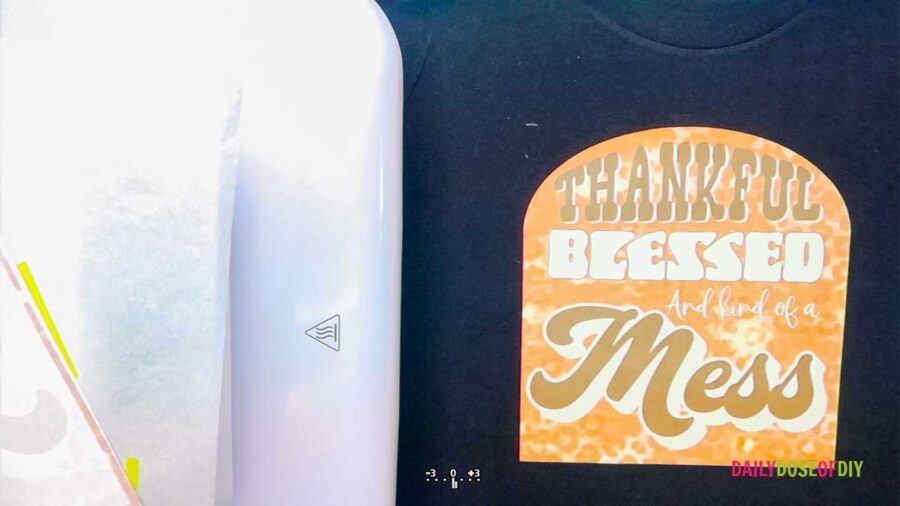
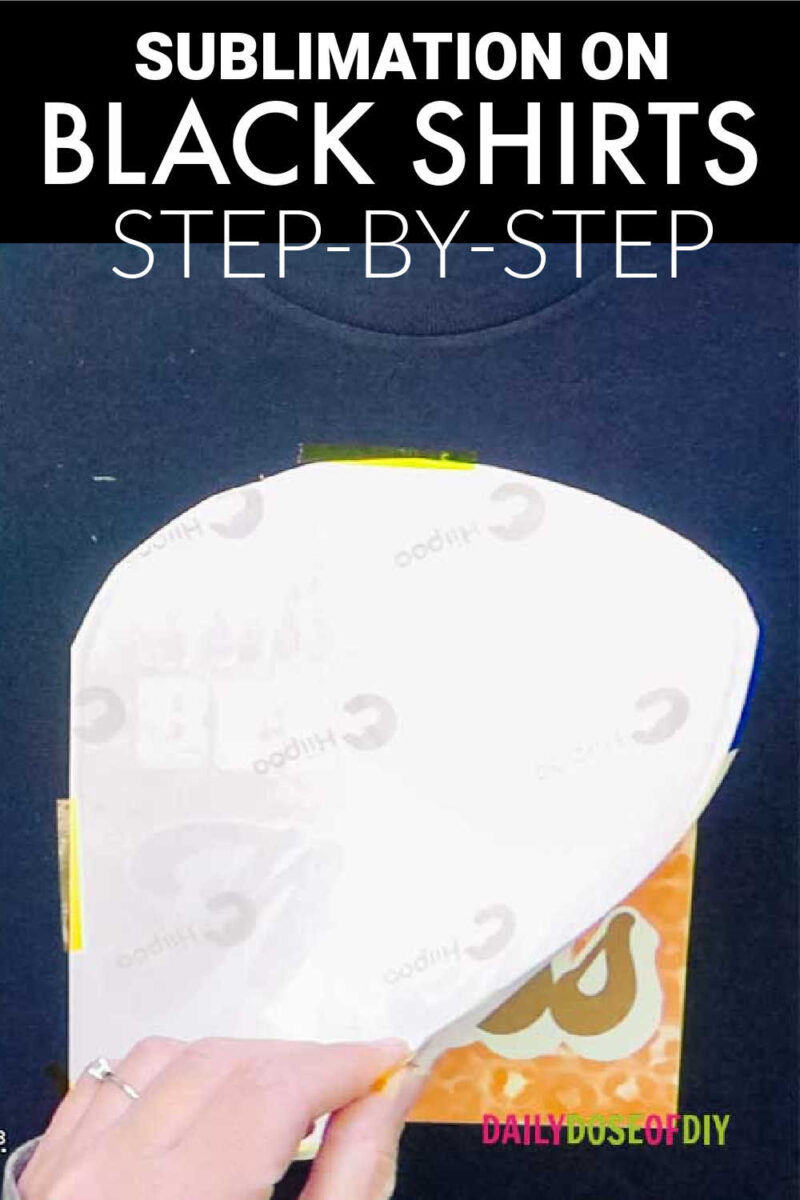
5.. Remove the Transfer: Allow the design to cool down before removing the sublimation transfer. Once it’s cool to the touch, carefully peel off the transfer to reveal the final sublimated design.
Take a look at the vibrant design we achieved on a black cotton shirt with sublimation.
Caring for Sublimated Shirts
For best results to ensure the longevity of your sublimated shirts, follow these care instructions:
- Wait 24-48 hours after making your shirt before washing it.
- Turn the shirt inside out before washing.
- Wash in cool water with a mild detergent.
- Tumble dry on low heat or hang to dry.
- Avoid using bleach or harsh chemicals.
- Do not iron directly on the sublimated design.
The sublimation colors will stay vibrant forever and last longer than your shirt. Eventually the vinyl will crack and peel, but with proper care it will last a long time.
Using sublimation heat transfer vinyl is a great way to achieve vibrant colors on darker-colored shirts and cotton t-shirts. By following the steps outlined in this article, you can create custom sublimation designs on cotton fabrics using white HTV and a Cricut machine. Remember to choose the right HTV brand, properly cut and apply the HTV, and care for your sublimated shirts to ensure long-lasting results. Happy crafting!
More Sublimation Tutorials You Need
How to Sublimate Kitchen Towels
How to Bleach Shirts for Sublimation – TWO WAYS!
Sublimate Tumblers in an Oven – Tips and Tricks
Sources:

Chris Butler has helped thousands of crafters learn how to use their Cricut machine without feeling overwhelmed. She is a best selling author and an up and coming designer. For fun Chris enjoys designing SVG Files, hanging out with her family (preferably at the lake), traveling, and volunteering at her church. She is a wife and mom of two crazy fun kids.
Thank you for this tutorial. I have a sublimation printer, ink and paper and have never used it. I think I’m going to give it about now. Thank you