This post may contain affiliate links for your convenience. If you make a purchase through one of my links I will earn a small commission at no additional cost to you.
Last Updated on November 28, 2023 by Chris Butler
Let’s make a light-up 3D Christmas Shadow box! I adore shadow boxes; they are elegant but cozy Christmas decor that will brighten up your home. Keep this shadowbox for yourself or if you’re already in the giving mood, these will make great gifts and Christmas decorations.
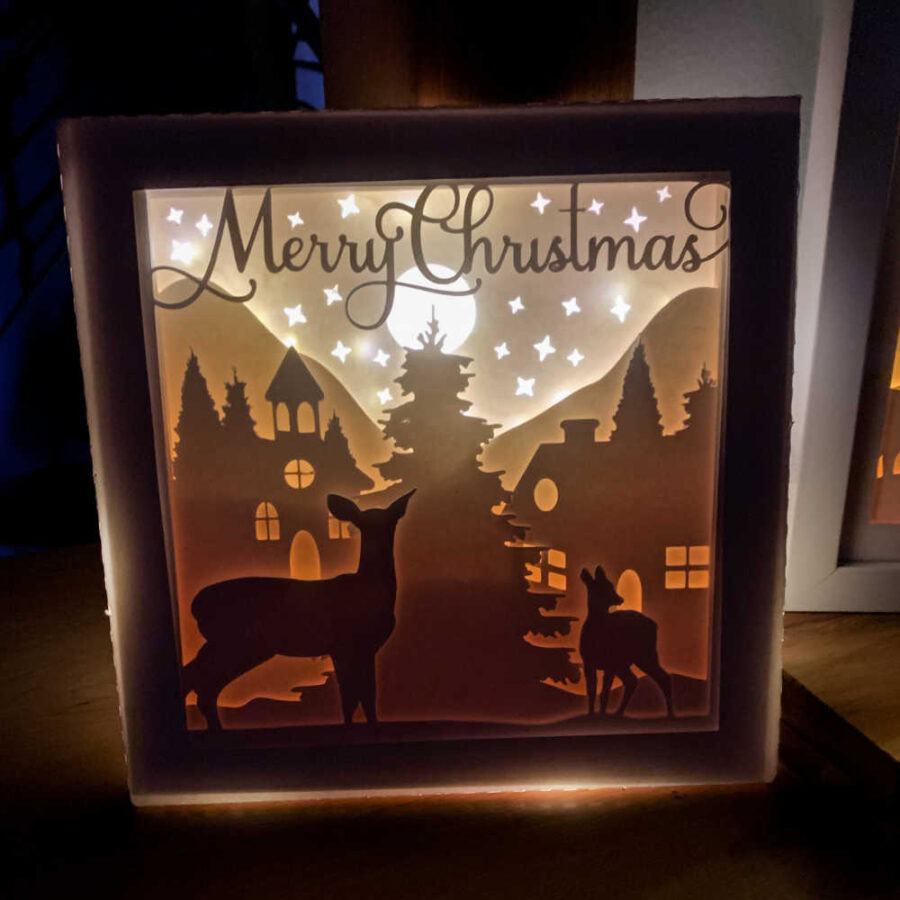
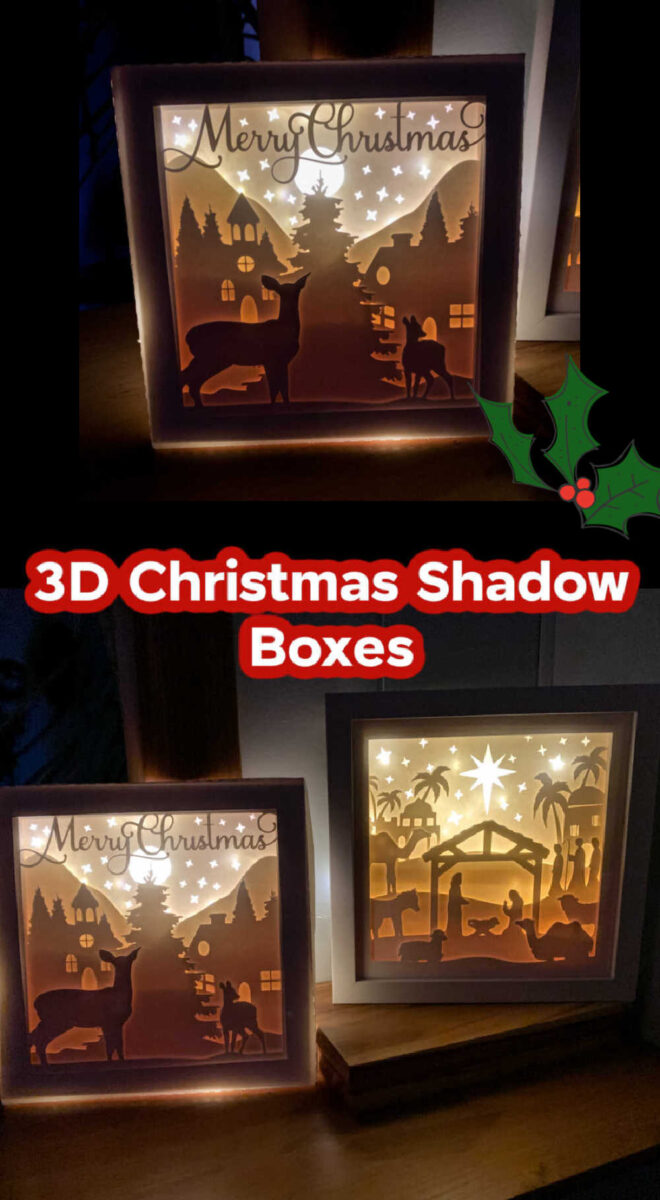
I’ve made two designs that you can choose from: a nativity scene, or a winter scene that says ‘Merry Christmas’ across the top. The great news is that you don’t have to choose. You can make them both! They are the perfect addition to your holiday decor.

It’s the best time of year to make Christmas crafts, so let’s get to it:
Quick Links to Information in This Post
Supplies for DIY Christmas Shadow Box Craft
- 8.5″x11″ Heavy Duty Cardstock (110 lb) OR 12″x12″ If You’re Making Your Shadowbox Frame – https://amzn.to/3O8iNqK
- Foam Tape –https://amzn.to/3g1DUhL
- Scissors
- Masking Tape
- LED Fairy Lights – https://amzn.to/3O2dbhE
- Vellum or Tissue Paper
- 8″x8″ Shadowbox (Optional) – https://amzn.to/3hGsfFy You can also find them at Michaels Stores or Hobby Lobby
- Acetate Sheets (Optional If Making Your Own Frame) – https://amzn.to/3O3tMBw
- Cutting Machine & Tools + Craft Knife
- Shadowbox SVG Bundle: Includes Two Designs + Frame – https://www.dailydoseofdiyshop.com/d4y5s
I prefer to make the shadow boxes with white paper but you can use different colors if you wish.
3D Shadowbox Step-by-Step Video Tutorial

Step 1: Download the SVG File and Upload it to Cricut Design Space
For help downloading SVG Files and uploading them to Design Space see this post.
The 3-d papercut SVG template file for the 3D Christmas Shadowbox can be purchased here https://www.dailydoseofdiyshop.com/d4y5s
Or Grab the all-access pass here and get instant access all 14 projects, 25+ SVG Files, step-by-step videos, and printable instructions.
If you plan to use a store-bought shadowbox, the SVG file is sized for an 8×8 Shadow Box and is ready to go. You can click ‘Make It’.
For the Shadow Box Frame:
If you are making your shadowbox frame out of cardstock, be sure to select both cut files for the shadowbox frame and the design you will use. Ungroup the layered shadow box design and delete the solid square. This piece isn’t necessary when making your own frame.
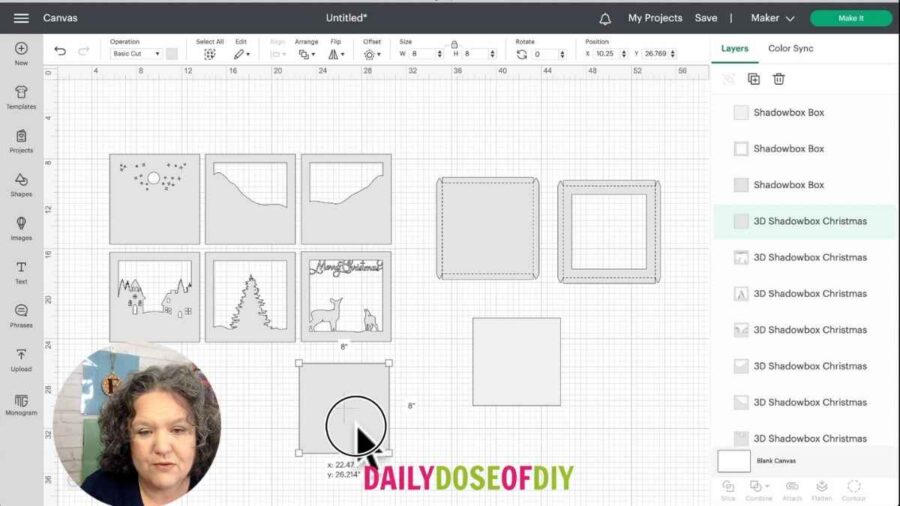
You can also delete the solid square in the frame design if you don’t plan to use the acetate sheet as a covering.
For heavy-duty cardstock, I recommend setting your Explore dial to custom and selecting poster board from the materials.
Step 2: Cut the Shadowbox Layers & Frame
Put the cardstock on your cut mat, place it into your Cricut, and push the green flashing ‘C’ button to load the mat.
For help downloading SVG Files and uploading them to Design Space see this post.
To get your cardstock off the mat, flip it over and peel the mat away from your design. If any small or intricate pieces get stuck, you can use your spatula to gently pry it away from the mat.
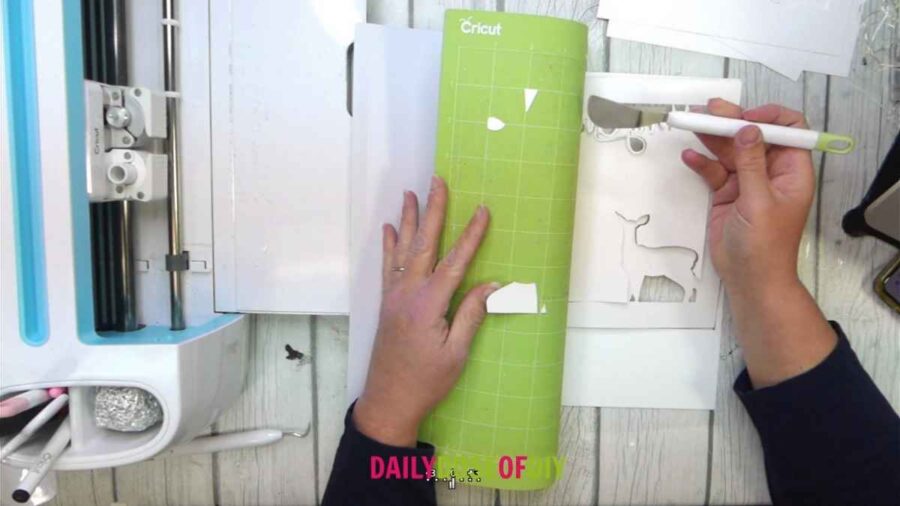
Once all of your layers have been cut, stack them in order. If you can’t remember the order, you can check it on Design Space.
Step 3: Assemble the Shadow Box Template Layers
Once the layers are stacked in order, flip the top layer over and place foam tape around the sides.
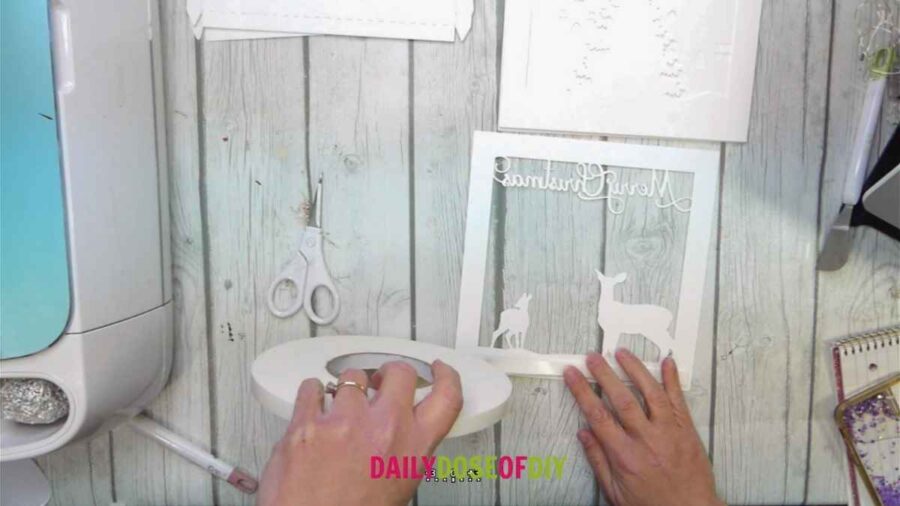
Remove the backing from the tape, line up the first layer to the second layer, then lay it down and press firmly to adhere the tape.
Repeat this process for the rest of the design layers.
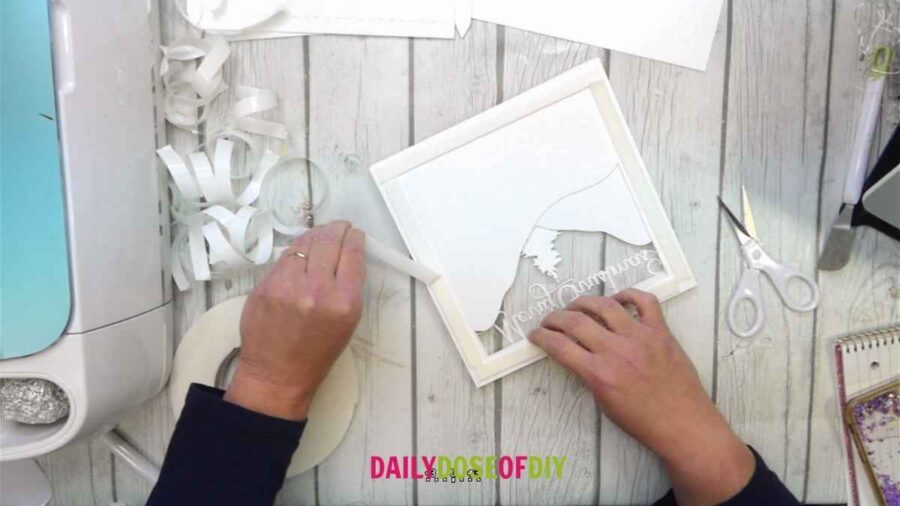
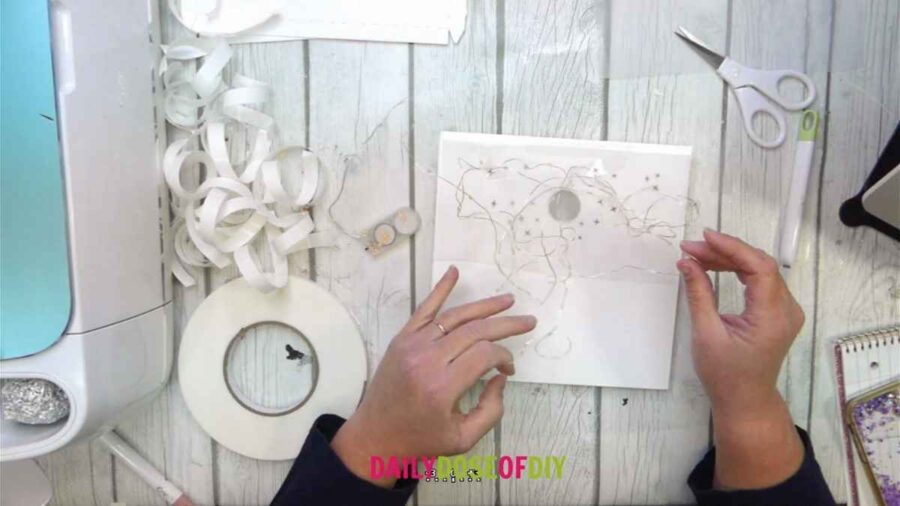
Once you’ve reached the back, cut a piece of vellum or tissue paper to fit over the open areas. For the ‘Merry Christmas’ scene this would be the moon and star shapes.

Next you can grab your fairy lights and tape them down to the back of the shadow box design. I like to tape a few lights directly over some stars and around the moon. Don’t place the lights or wire over the open area if possible. Leave some of the wire to stretch down to cover the rest of the square.
Leave some of the wire to stretch down to cover the rest of the square.
Step 4: Assemble the Shadow Box Frame
First, if you’re using the acetate sheet, glue it to the open section of the front frame. Then fold up the sides along the perforation lines.
Fold the triangles on the corner in, place a bit of glue on it and glue it to the neighboring side tab.
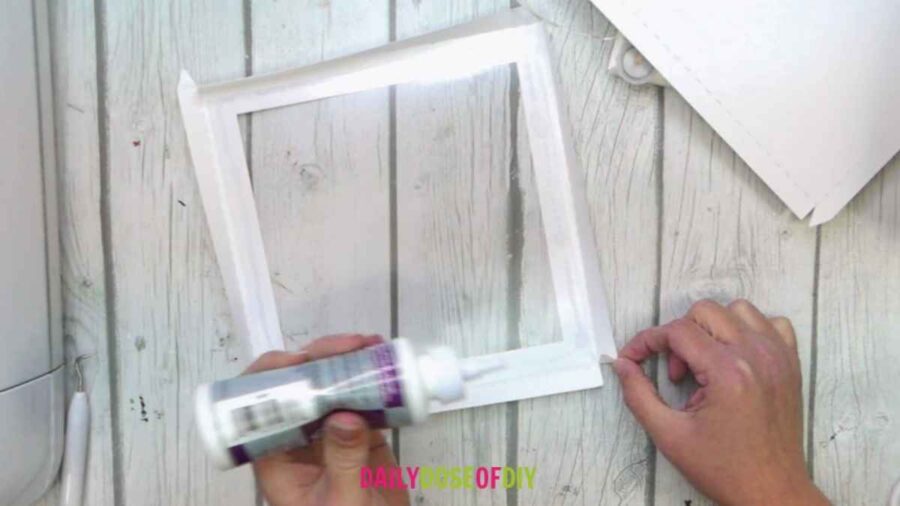
Repeat this process for the bottom frame.
Step 5: Put Your Christmas Shadow Box All Together!
When the frame is dry, pick up your layers and place it inside of the box. Run the end wire of your fairy lights on the bottom of the shadow box, with the light switch on the outside.
If you are using a store-bought shadow box, put the solid white layer that you cut over the lights, so it covers the back of the frame. This will help reflect the light into your box.
Add the top of the frame, stand your shadowbox up, and enjoy your beautiful work! These look amazing next to a lit-up Christmas Tree and the good news – it will last year after year.
Thanks for crafting with me today and making Christmas Shadow Boxes! This great little light box adds a warm glow to rooms that you can enjoy all Christmas season.
Here are more Christmas Decoration Paper Crafts You’ll enjoy:

Chris Butler has helped thousands of crafters learn how to use their Cricut machine without feeling overwhelmed. She is a best selling author and an up and coming designer. For fun Chris enjoys designing SVG Files, hanging out with her family (preferably at the lake), traveling, and volunteering at her church. She is a wife and mom of two crazy fun kids.
Leave a Reply