This post may contain affiliate links for your convenience. If you make a purchase through one of my links I will earn a small commission at no additional cost to you.
Last Updated on August 28, 2023 by Chris Butler
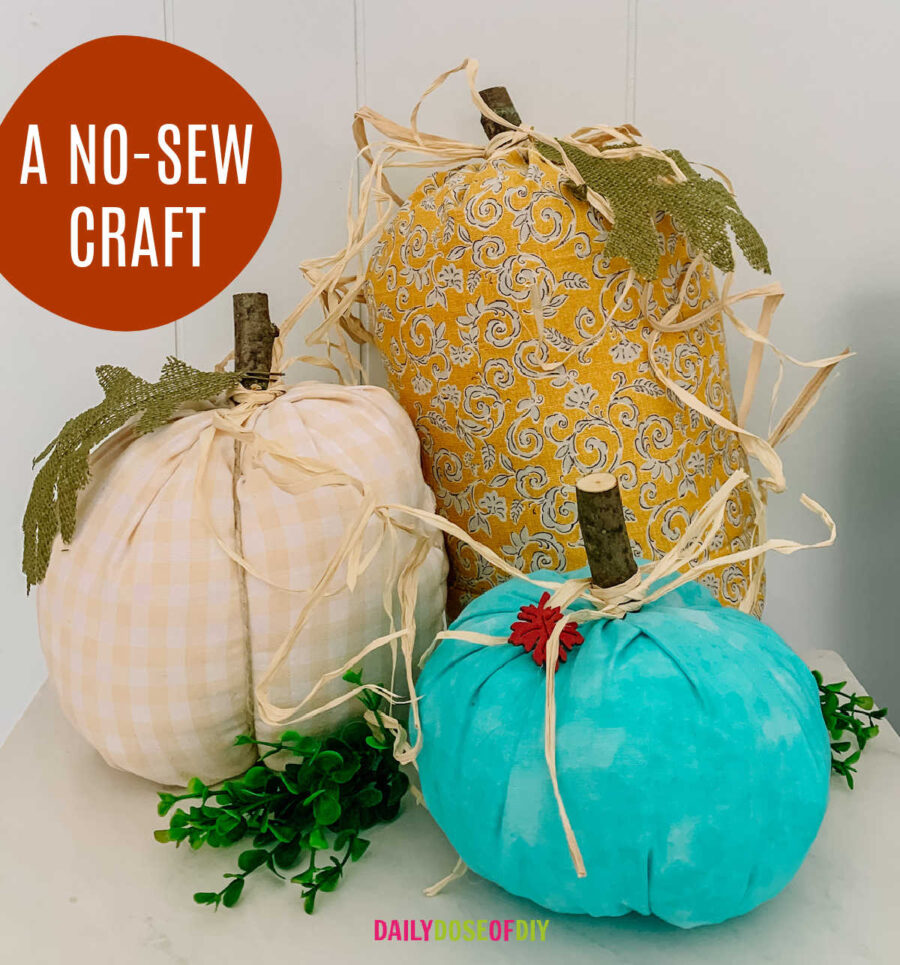
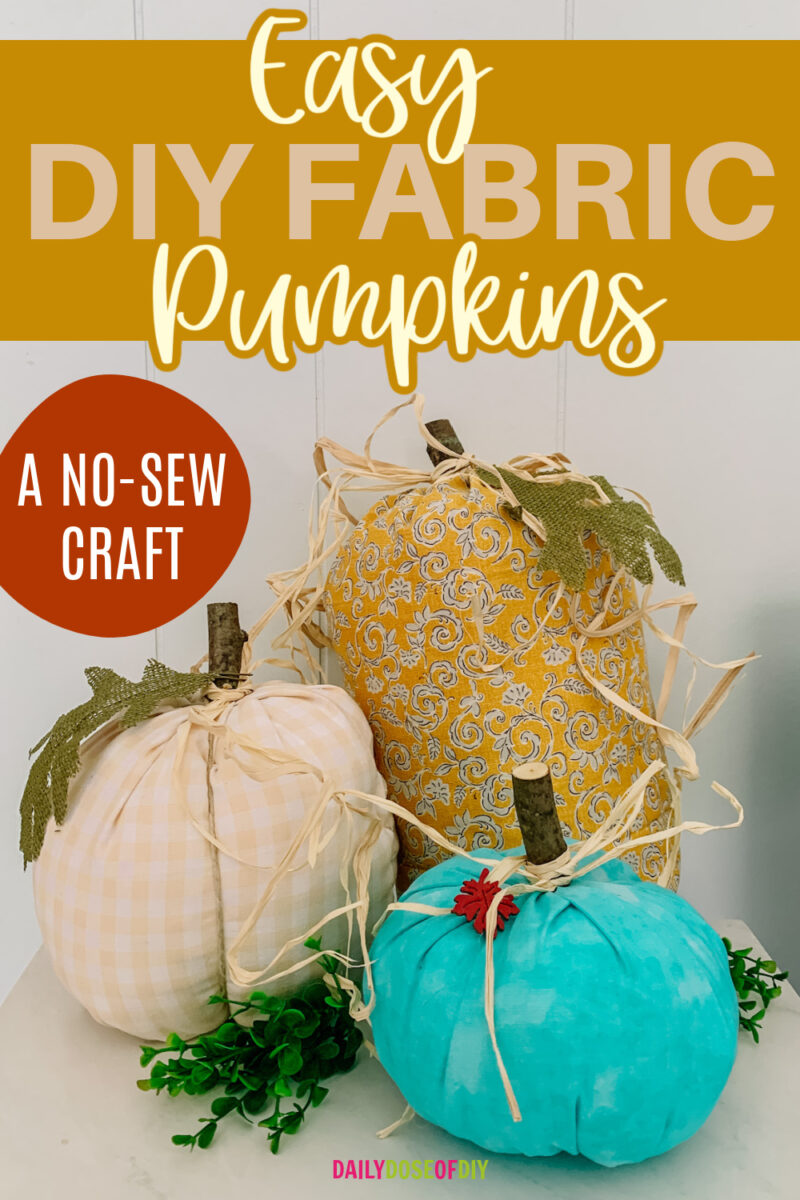
Are you ready to make adorable DIY fabric pumpkins? The best part is this is a no-sew craft, so you don’t have to drag out your sewing machine or search for that elusive needle and thread.
These will be the easiest DIY fabric pumpkins you’ll make! And it’s the perfect way to use up scrap fabric and an easy way to decorate for the Fall season.
Let’s jump right in and make your very own fabric pumpkins.
Quick Links to Information in This Post
Supplies Needed for No Sew Fabric Pumpkins
- Hot Glue Gun
- Scrap Fabric
- Embroidery Floss or Twine
- Rubber Bands
- Scissors or Rotary Cutter
- Fiber Fill
- Cut Branch, Wine Cork, Cinnamon Sticks, or something for the Pumpkin Stem
- Optional Embellishments – Ribbon, Raffia, Tags, Leaves etc.
If you don’t have scrap fabrics, I’ve found quilters fat quarters work well for this craft. You can make 2 small pumpkins per quarter and they’re super cheap to buy! (you can often find them at thrift stores)
You can also use old sweaters or flannel shirts as well. All sorts of different fabrics will work, but stay away from stretchy fabrics like t-shirt material.
Fabric Pumpkin Pattern
- The small pumpkin I made is with a 22×9-inch piece of fabric.
- The medium-sized pumpkin is 22×12 inches
- And the large pumpkin is 20×16 inches
Related: Easy Buffalo Plaid Pumpkin Centerpiece for Fall
Easy Fabric Pumpkins Video Tutorial

How to Make Easy DIY Fabric Pumpkins
Step One: Measure and Cut your Fabric.
For my fabric pumpkins pattern, I used the following sizes:
- The small pumpkin is with a 22×9-inch piece of fabric.
- The medium Pumpkin is 22×12 inches
- And the large pumpkin is 20×16 inches
It’s fun to make different sizes and then you’ll have your own little pumpkin patch!
There’s really no reason for a “real” pattern. Just measure your fabric and mark where you want to cut it. Cut along your marks with scissors or a rotary cutter.
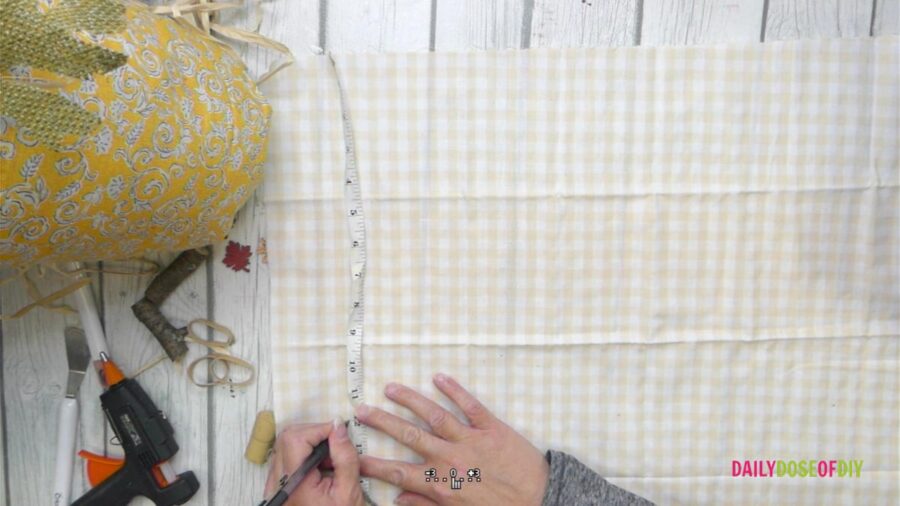
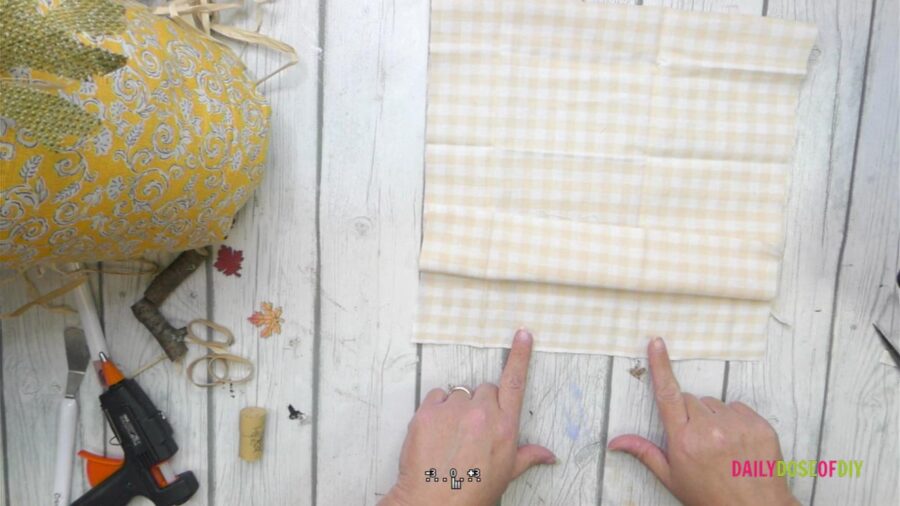
Once your fabric is cut, fold it in half with the design on the inside and the short sides together.
Step Two: Glue the Side Seam
Next, fold back a flap from the short side and add a strip of hot glue to the left and right sides. You need to leave a gap of about 2-3 inches in the center. Fold the end flap back onto the glue and use a spatula to press the sides together so you don’t get burned.
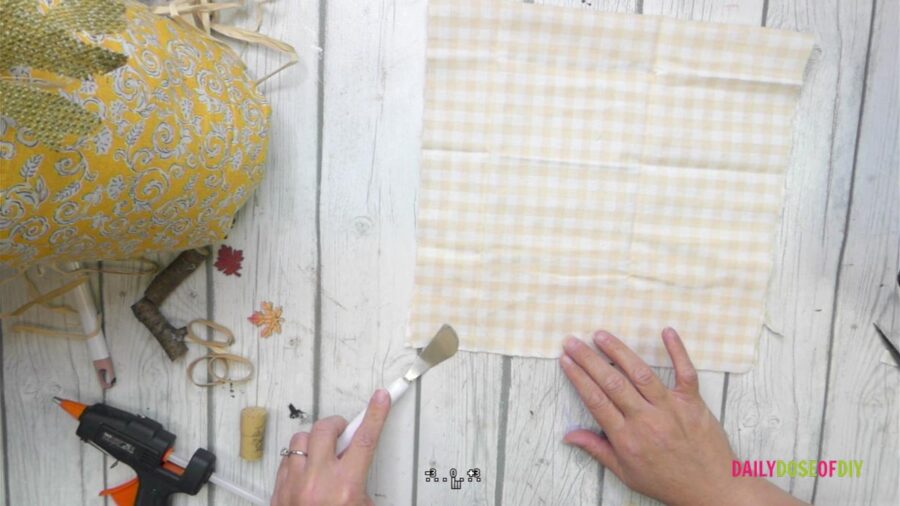
Give the glue a few minutes to dry.
You should have the short edges glued together with a gap in the middle, and the long edges still open at this point.
Related: Paper Fall Luminaries You Have to Make
Step Three: Make the Bottom of Your Pumpkin
After the glue is dry grab one of the ends with the seam and match it up to the opposite edge of the fabric. Smooth it down and make it flat. We are going to form the bottom of the pumpkin. Pinch the two sides of the center together, (This is where the seam is) and fold in the loop on the left side. This will create two additional loops. Fold them in as well.
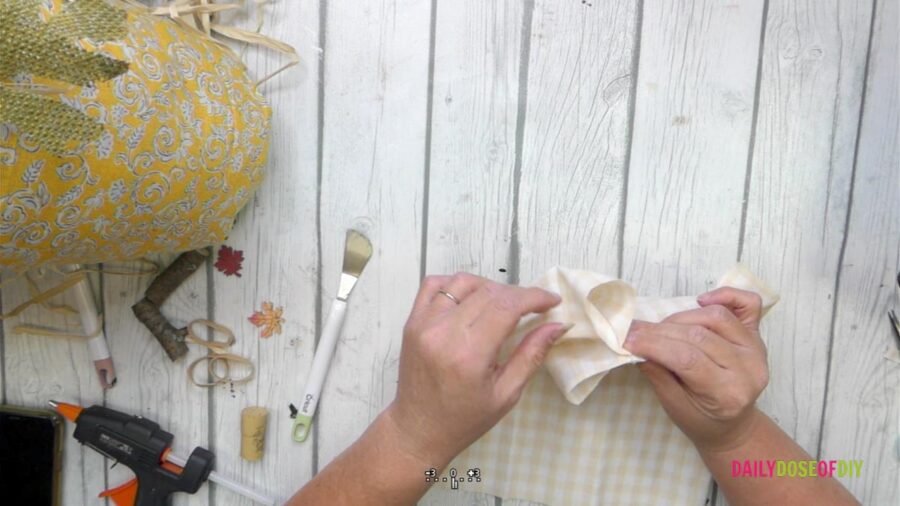
Place what you have gathered in your left hand while holding it tightly and repeat the same process on the right side. Fold in the loop, and the the next two loops. When you’re done it should look like this:
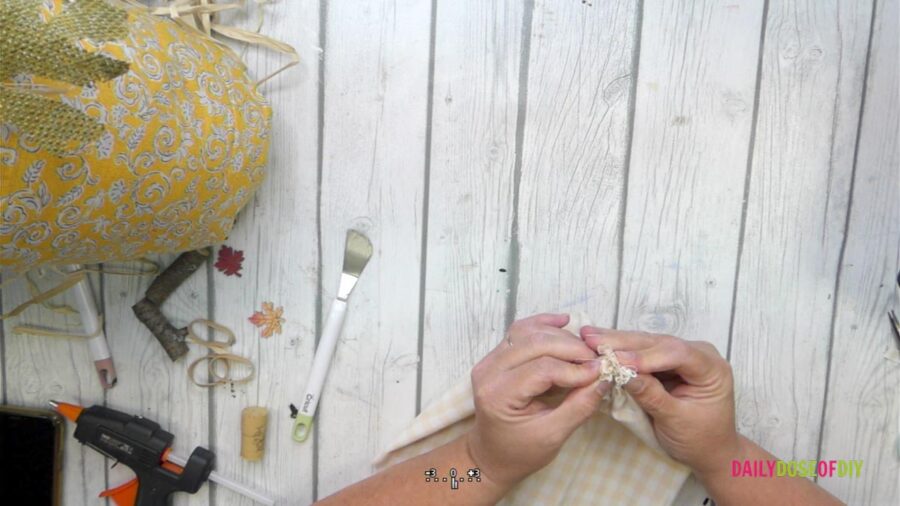
Now take your rubber band and wrap it tightly around your gathered edge. Once it’s wrapped tight add a strip of hot glue all the way around the rubber band and the fabric. Add a bunch of hot glue to the edges of the fabric as well for good measure.

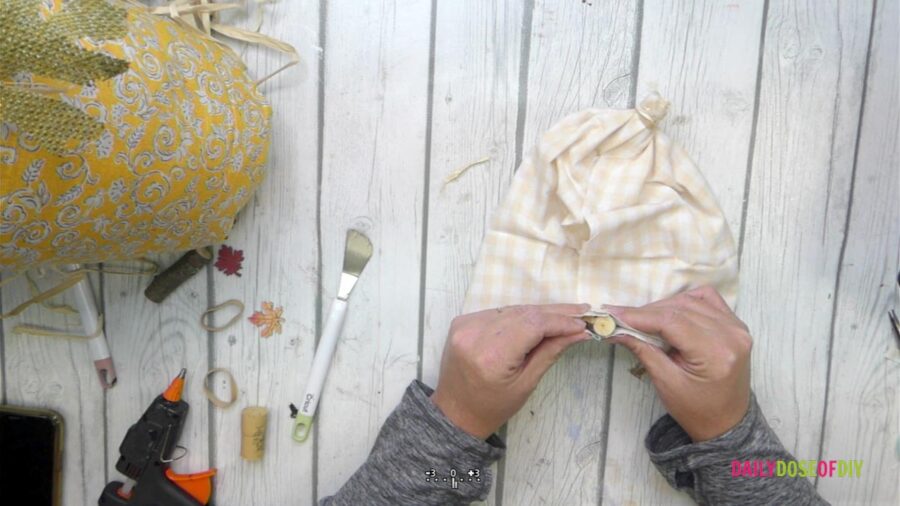
With this much hot glue it will take a few minutes to dry. But you should be able to stand it up so we can work on the top of the pumpkin. Just make sure it doesn’t glue itself to anything.
Step Four: Make the Top of the Fabric Pumpkin
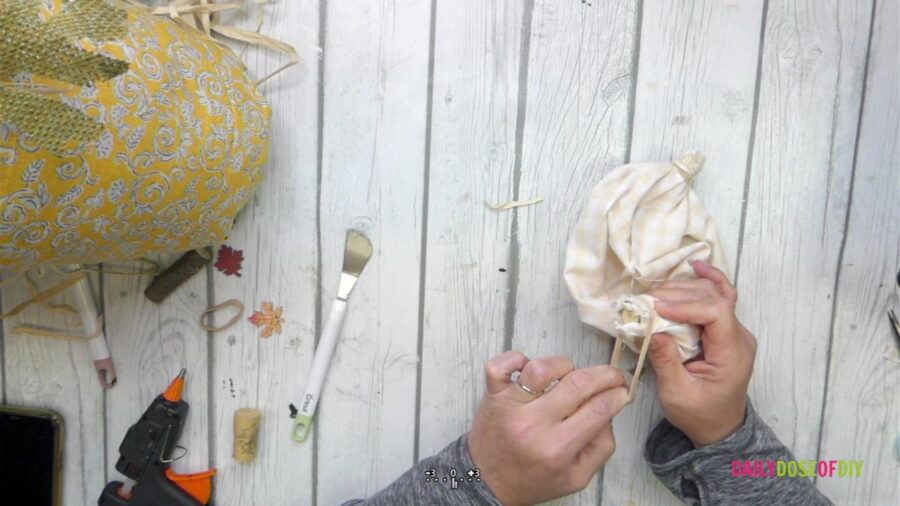
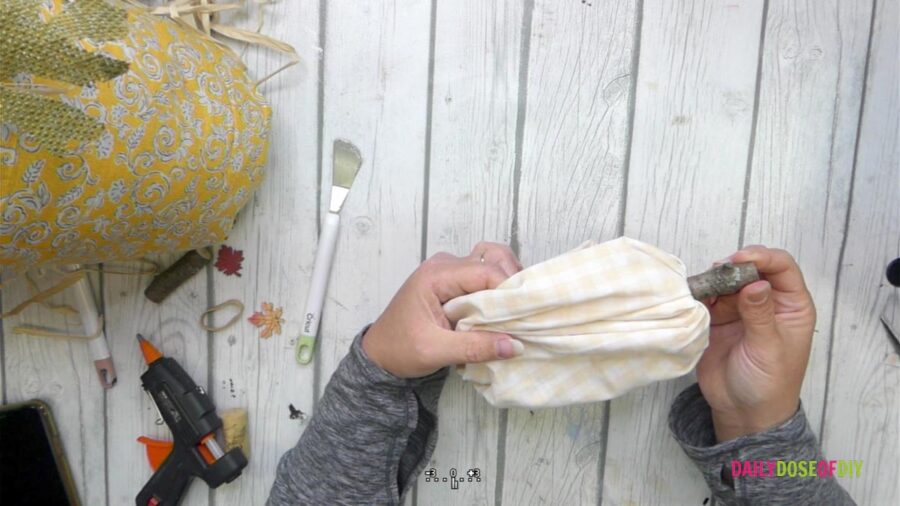
The top of the pumpkin is made much the same way as the bottom, but we’re going to add the stem in first. I’m using a piece of a branch for my stem. Place your stem in between the two pieces of fabric in the center. The bottom of the stem should line up with the top edge of the fabric. The majority of the stem is on the inside of the fabric. Pinch the two sides of the fabric to the stem with your right hand.
With your left hand start gathering the fabric together by folding in the loops as you did with the bottom. This part is a little more difficult because you’re holding the stem as well as the gathered fabric, but if you take your time it’s a piece of cake.
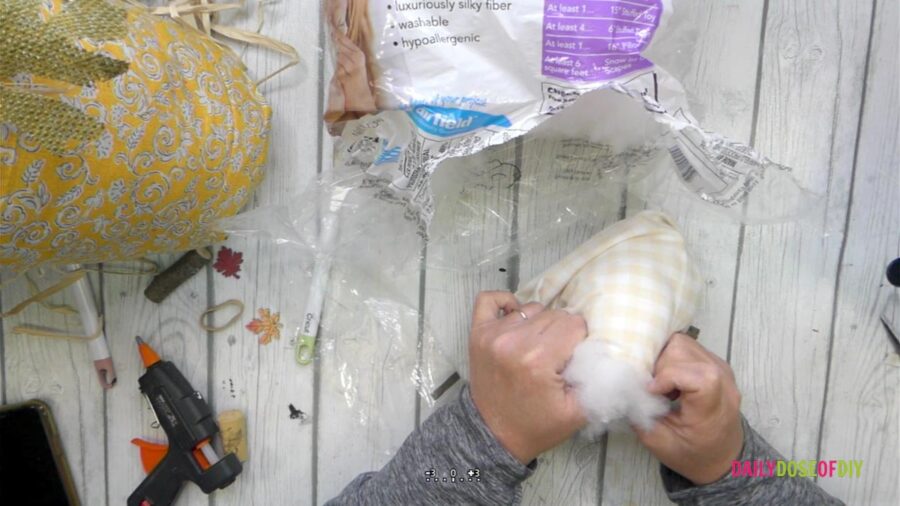
Once the left side is gathered, gather the right side of the fabric together with the stem. After it’s all gathered secure the fabric tightly to the stem with a rubber band. And once again hot the all around the rubber band and hot glue the top edges of the fabric to the stem.
Stand the end up so the glue doesn’t touch anything and give it a good 5-10 minutes to set.
Step Five: Stuff Your Pumpkin
Once the glue has dried find the opening you left in the side seam. Use that opening to turn the pumpkin inside out. Once finished, your stem should now be on the outside along with the fabric pattern.
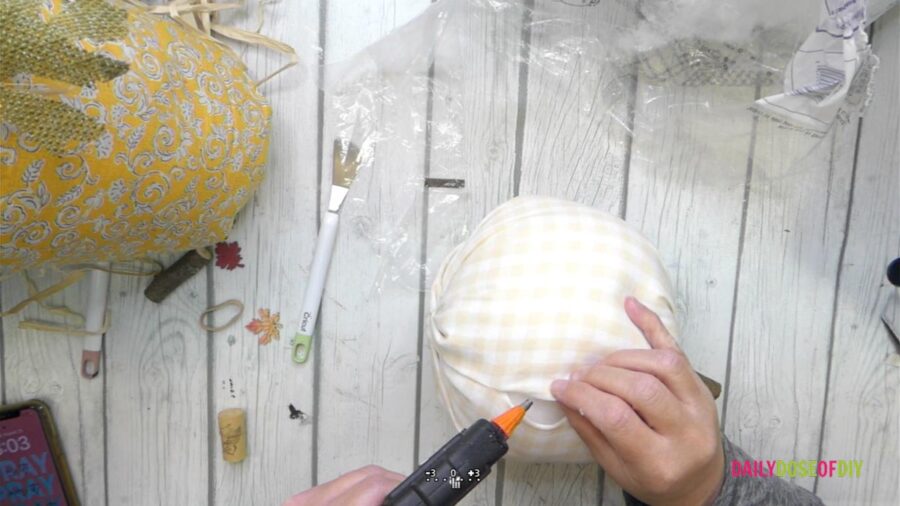
Use your fabric fill and stuff your pumpkin through that same hole. If you are not going to add floss or twine when the pumpkin is finished you can add stuffing until it takes the shape you want.
But if you are going to add the string to give it the look of real pumpkins you need to stuff that baby full. And then stuff it some more. After you’ve added a bit of stuffing double check the top and bottom of the pumpkin to make sure it it holding. If any edge pieces of the fabric escaped, hot glue them down.
Step Six: Close the Seam on the Side of the Pumpkin
Once your pumpkin is thoroughly stuffed it’s time to close the seam. Gluing one small section at a time is the easiest way to do this. Add some hot glue to a small section of the raw edge of fabric. Give it a few seconds to cool down and then pull the opposite side of fabric over it and pinch them together. If the glue is still too hot to touch, use your spatula tool or press the edges together.
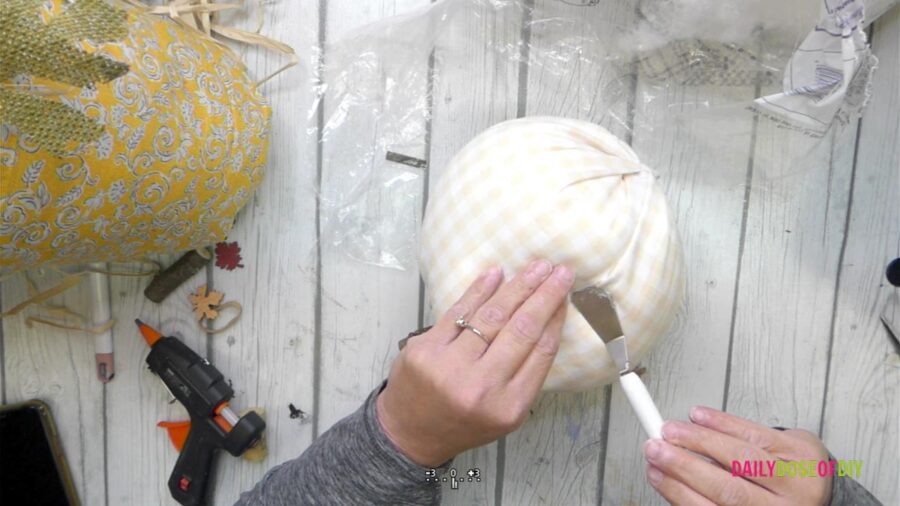
Keep going down the seam until it’s glued together.
If you have an over-stuffed pumpkin, we’ll run the twine up this seam to hide the raw edges. If your pumpkin is not so over-stuffed, you’ll have room to fold in the seams before you glue them together.
Step Seven: And Twine and Embellishments to Your Pumpkin
To add twine or floss to your pumpkin, cut off a piece that will go around your pumpkin 5 times. Start on the bottom center of the pumpkin and make sure the twine will run up the side seam. When you get the the top of the pumpkin wrap it around the stem so that the twine is now 90 degrees to the other side and pull taught.
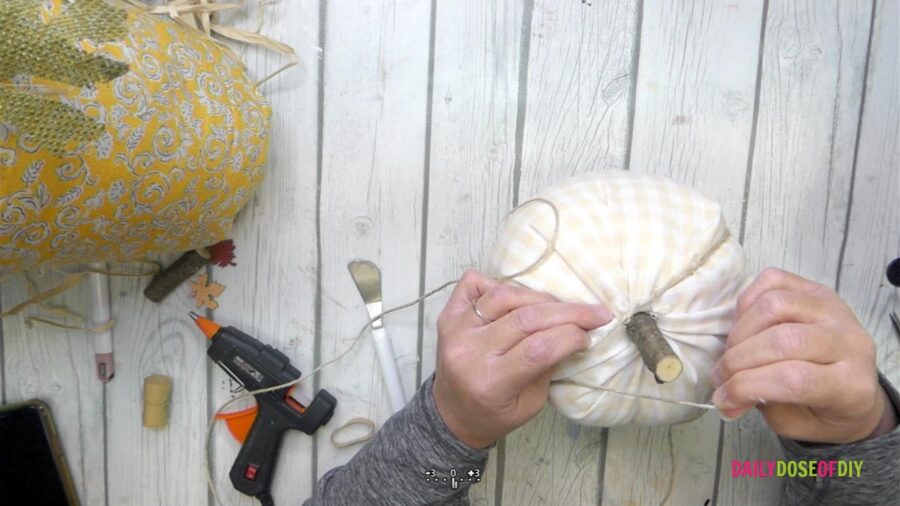
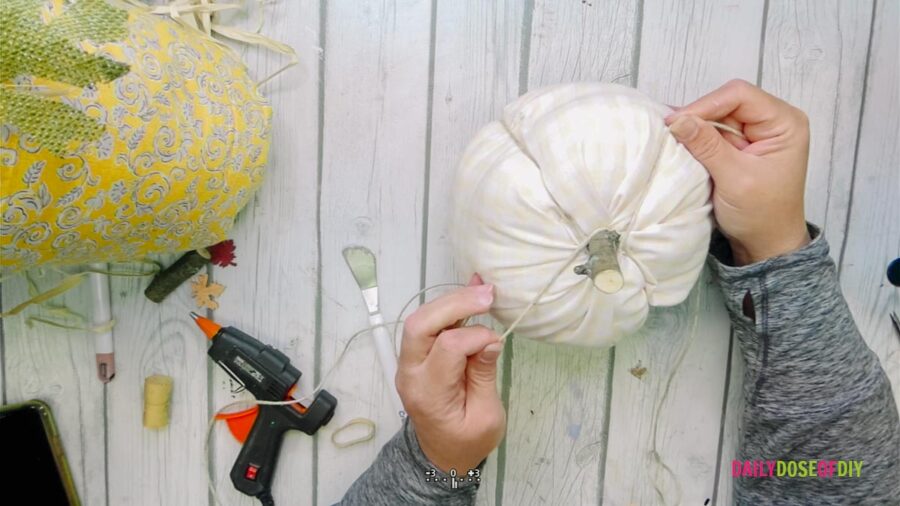
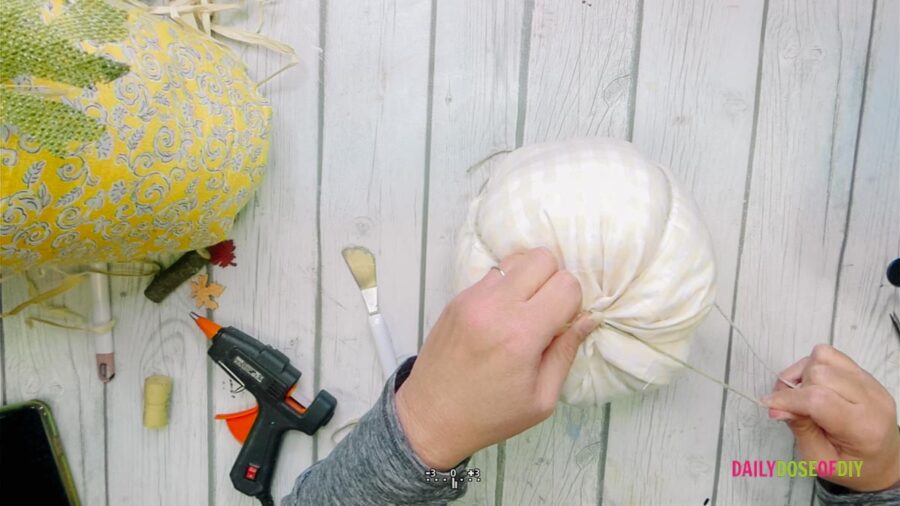
Run the twine down the side of the pumpkin back to the bottom and tie it in the center. Pull tightly until your pumpkin plumps up and then knot it off, Cut the excess twine from the bottom.
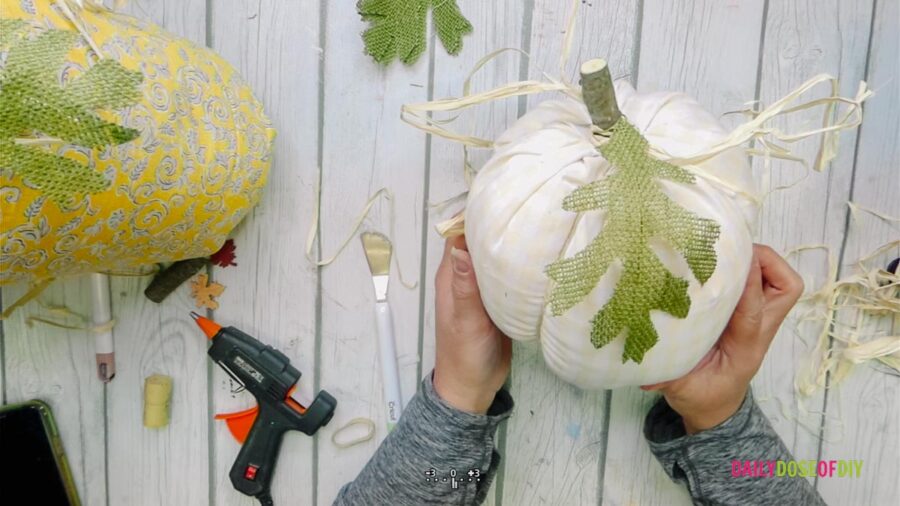
Now you can add ribbon, leaves and other fun embellishments to your simple fabric pumpkins. I tied raffia around the stem of mine. On my smaller sized pumpkin I glued on some wood leaves and on the larger pumpkins I added burlap leaves. I found the embellishments at Dollar Tree so be sure to check there if you need some Fall home decor pieces.
Thanks so much for crafting with me today and making cute stuffed pumpkins!

Chris Butler has helped thousands of crafters learn how to use their Cricut machine without feeling overwhelmed. She is a best selling author and an up and coming designer. For fun Chris enjoys designing SVG Files, hanging out with her family (preferably at the lake), traveling, and volunteering at her church. She is a wife and mom of two crazy fun kids.
Leave a Reply