This post may contain affiliate links for your convenience. If you make a purchase through one of my links I will earn a small commission at no additional cost to you.
Last Updated on December 19, 2023 by Chris Butler
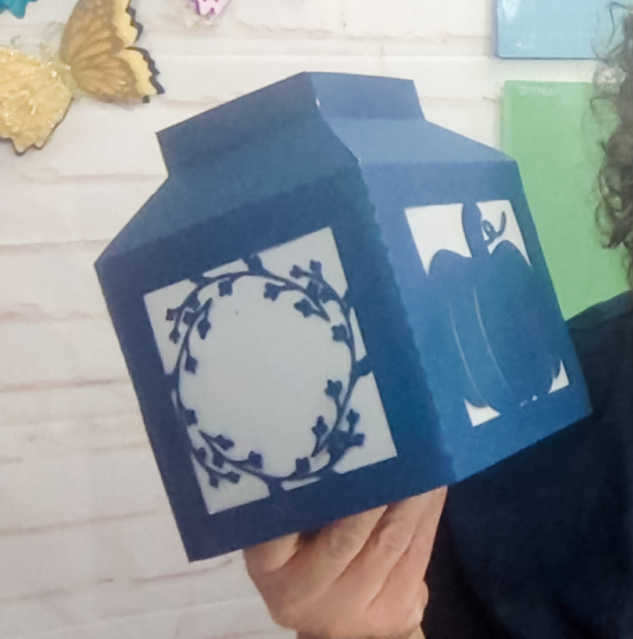
Today we are going to make some beautiful Fall luminaries. This is a super easy Fall craft and it will make your home or deck feel nice and cozy on those crisp cool Fall evenings.
DIY luminaries make great table decorations and centerpieces, and I even like to put them on the bathroom counter to add a nice warm glow.
The good news is you don’t need many supplies, making it a very economical way to decorate your home. And this is a great craft to have the kids do too. A younger kiddo can assemble the lanterns, and older kids should be able to do the cutting.
Related: Make a Nativity Scene Paper Luminary
Let’s get started:
Quick Links to Information in This Post
Fall Luminary Craft Supplies Needed:
- Cardstock medium weight in your choice of colors (It will fit on 8.5×11) – https://amzn.to/3Sgg8Mo
- Vellum Paper – https://amzn.to/3xAu9MP
- OR Tissue Paper
- Craft Glue
- Cricut Cutting Machine
- LED Candles or Lights – https://amzn.to/3Bu1w5j
- Free Fall Luminary SVG File – All free SVGs are in my free resource library.
All of our free SVGs and Designs are kept in a library for your convenience. Fill out the simple form and we’ll send you the link and password to access the SVG files right away.
Already have the password? Enter the Library HERE
Please don’t use real candles in a paper luminary, that’s a disaster waiting to happen!
Fall Luminaries Craft How To Video

How to Make Fall Luminaries
Start by grabbing the SVG file and uploading it to Design Space. If you need help downloading and uploading SVG files, see this post.
Once it’s uploaded into Design Space, you don’t need to change anything if you’re using vellum paper. If you are going to use tissue paper, just ungroup the design and delete the two vellum panels.
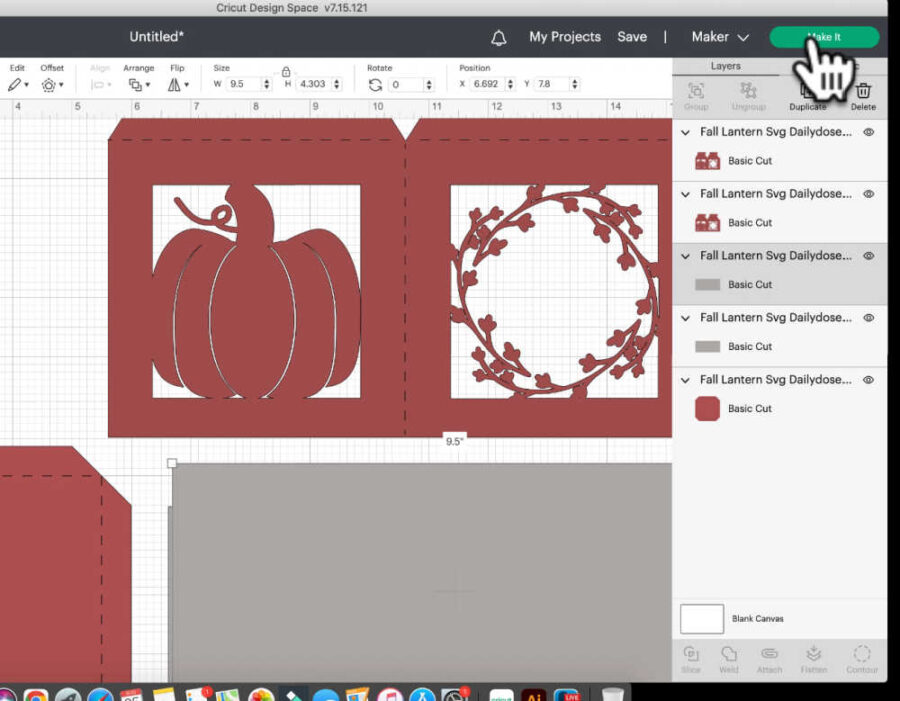
I’ve added perforations to the design to make it easy to fold, so there’s no need to add score lines.
Click the make it button on the top right side of Design Space and that will take us to the mat screen.
Related: Easy No Sew Fabric Pumpkin – Must See!
On the mat screen, you may need to change the material size to 8.5 x 11. Particularly if you’re cutting the vellum. (Unless you have 12×12 vellum sheets, do they even make those?)
Also, pay attention to what direction Cricut has placed the design on the mat so that you know how to load your paper. They tried to confuse me by making the vellum sheets vertical and the lantern pieces horizontal!
Removing the Design From the Cut Mat
After the design is cut, flip over the cutting mat and remove it from the piece of paper. This will help keep your paper from tearing and curling.
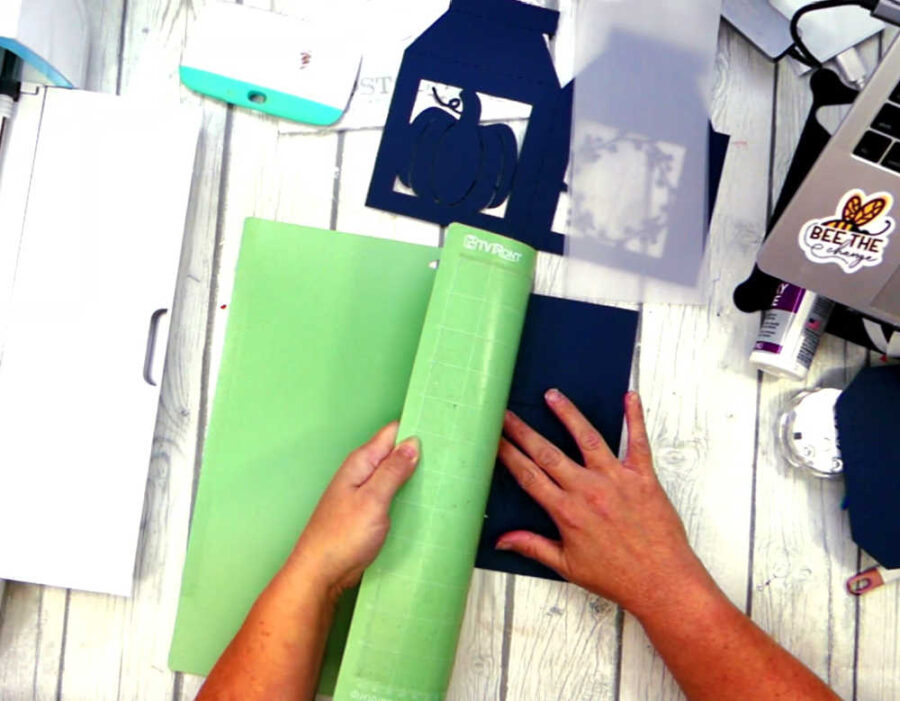
There may be a few places you need to remove the extra pieces of paper from the design, especially from the fall leaves.
Every Cricut cuts differently, my Maker tends not to have enough pressure. If that’s the case with you too, you might need an x-acto knife or your weeding tool to set them free.
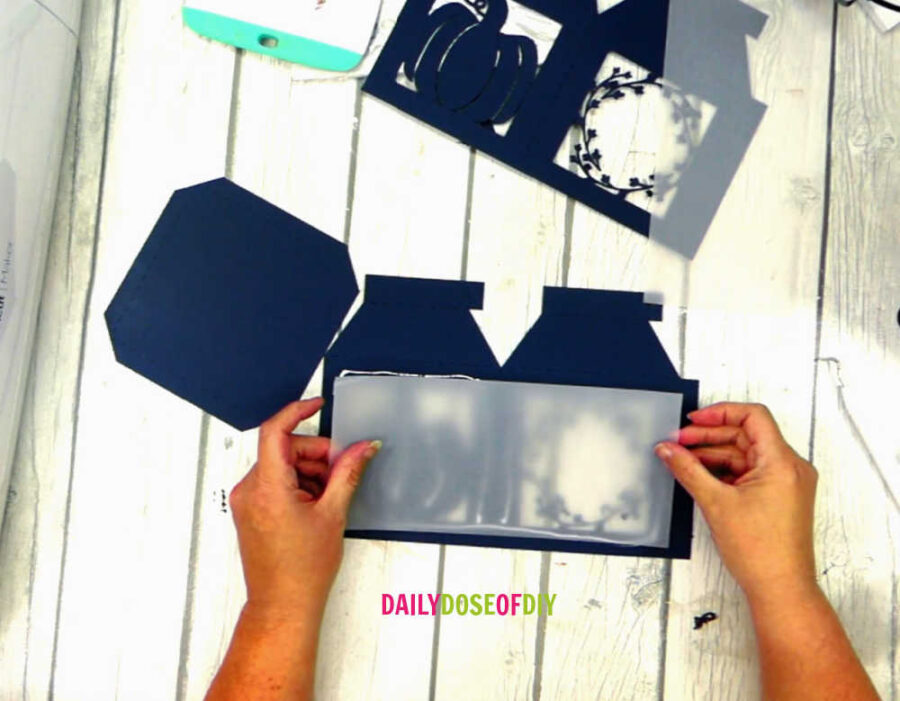
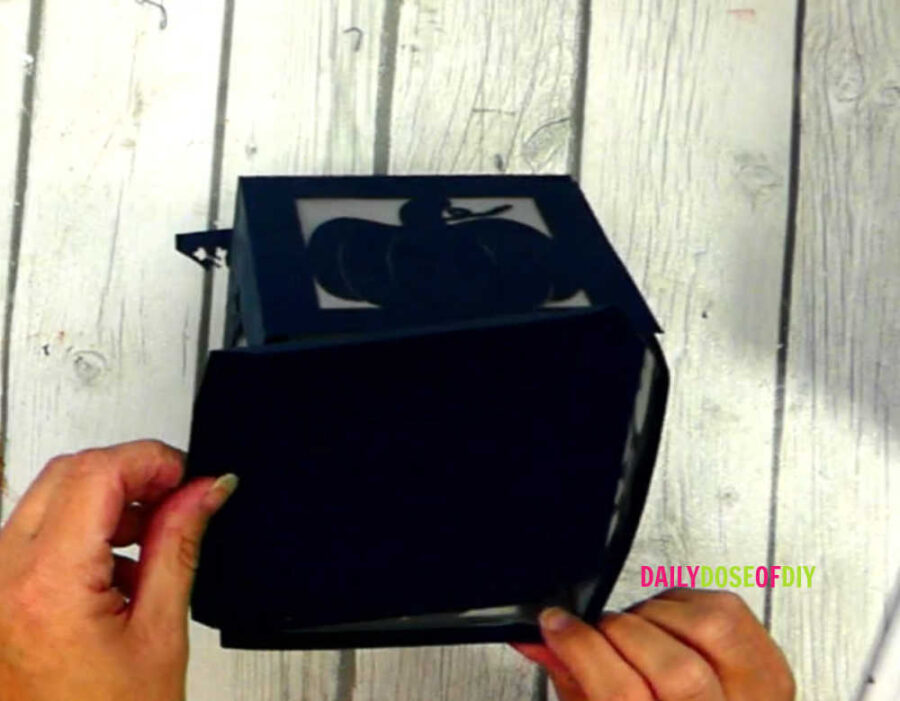
Assembling Your Fall Luminary
Start with applying glue all around the edges and down the middle of each panel. Also add some glue to the pumpkin and the fall leaves. Place the vellum paper on the panel, making sure each side is glued.
Next fold along all of the perforation lines. The line on the top of the lantern will be folded “out” while the rest are folded “in”
Once that is done add a line of glue to the end tab of one of the panels. Line the two panels up and glue them together. Now you have one long panel.

Place another line of glue on the end tab and bring the two ends together to glue them.
The top of the lantern has a glue tab for each side. Place a dot of glue on each tab to connect the sides together.
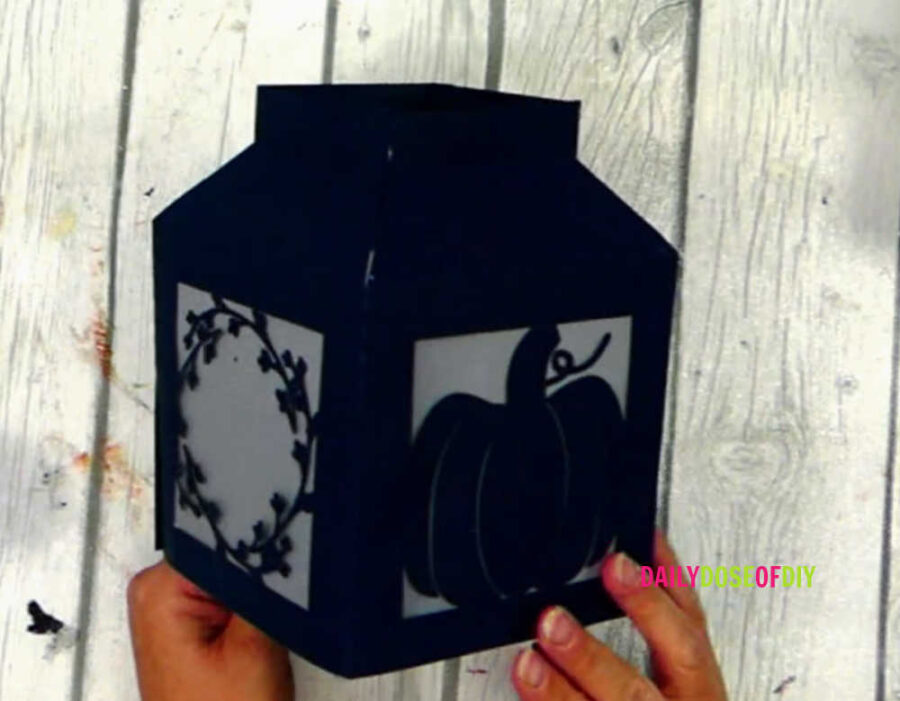
Next we’re ready to add the base. While this is optional, it does help keep your luminary sturdy and square. I’ve found it easiest to glue one side at a time. So fold in all the tabs of the base and add glue to one tab.
Slide the base into the bottom of the lantern and line up the tab that is glued. Hold it for a few seconds so it stays in place. Then work your way around gluing each tab of the base.
Now we’re ready for LED lights!
Place your light in the center of the luminary and turn it on. These LED lights come with a remote, and you can change the colors of the light to match your mood.
The end result is amazing! Paper lanterns are such a great way to cozy up a place and add some spruce to your home decor.
Fall Luminary Template
Don’t forget to get the free template for this craft.
To grab the free SVG for this craft fill out the simple form below
All of my free SVG files and Designs are kept in a library for your convenience. Simply CLICK HERE to get access. We will send you the link and password right away and you’re free to use all the resources you want in the library.
Already have the password? (It’s at the bottom of every email) Enter the Library Here
More Fun Fall Crafts:
Make an Adorable Pumpkin Centerpiece
Personalized Pumpkin Centerpieces
Craft Projects You May Enjoy:

Chris Butler has helped thousands of crafters learn how to use their Cricut machine without feeling overwhelmed. She is a best selling author and an up and coming designer. For fun Chris enjoys designing SVG Files, hanging out with her family (preferably at the lake), traveling, and volunteering at her church. She is a wife and mom of two crazy fun kids.
This is so darn cute! Can’t wait to make it! Thanks so very much for sharing your talent with us!