This post may contain affiliate links for your convenience. If you make a purchase through one of my links I will earn a small commission at no additional cost to you.
Last Updated on August 15, 2023 by Chris Butler
Hey there crafty friends! Do you love those giant vertical Welcome signs on front porches? They even look great in entryways and halls.
The good news is they don’t take all that long to paint and the wood is pretty cheap too! I grabbed a 6-foot board from Lowes for just under seven dollars.
So today I’m going to show you how to make your very own Welcome sign. There’s also a video available below if you prefer to watch.
Plus you can get the free SVG file for the stencil I used to make my Welcome sign. This will make it so much easier for you. The hard stuff like making sure everything lines up is already done.
Let’s get to it:
PIN IT

Quick Links to Information in This Post
Vertical Welcome Sign Supplies Needed
*Wood Board 1″ x 10″ x 6*Sand Paper
*Oracle Stencil Vinyl (Amazon usually has a great price here)
*Transfer Tape – I use clear contact paper from Walmart
*24 Inch Long Cut Mat
*Paint and or Stain +brushes
*Exterior Finish (if keeping sign outside)
*Embellishments -Optional
*A Cutting Machine (I use Cricut -Explore or Maker will both work)
*The Free Welcome Stencil SVG File –Available in my free resource library, more details at the bottom of the post.
Make a Vertical Welcome Sign with your Cricut Video

How to Make a Welcome Sign for Your Front Porch
Let’s start with our board. You’ll want to sand any rough or splintery places first. After you’re finished sanding use a cloth to remove any dust.
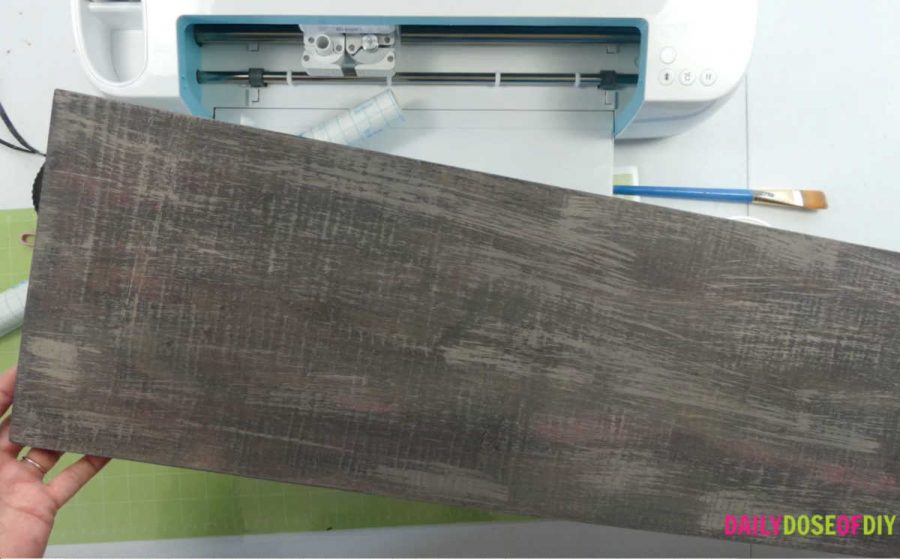
Next paint or stain your board the color you want for your background. You can use any type of paint or stain for this. I use SeaPaint most of the time. If you want a quick way to give your boards a stained and weathered look see this post.
Keep in mind you’ll have to give the sign a couple of coats of polyurethane for exterior use when the sign is completely finished if you plan on keeping it outside.
After you’re finished painting your base coat, set it to the side to dry completely. Now we can start working on our stencil.
Vertical Welcome Stencil
I have a free SVG library where I keep all of my SVG files. To grab your stencil now just fill out that simple form below. The link and password will fly to your inbox and you’ll be all set.
All of my free SVG files and Designs are kept in a library for your convenience. We will send you the link and password right away, and you’re free to use all the resources you want in the library.
Already have the password? (It’s at the bottom of every email) Enter the Library Here
The SVG files are all in alphabetical order in the library, so scroll down to the W’s and click on the Welcome Vertical Sign. The download will automatically start.
If you need help with downloading SVGs and uploading them into Design Space please see this post.
I sized the stencil for a 10″ wide board. Keep in mind that when you buy a 10″ wide board it is actually only 9 1/4″ wide. I’m not sure why that is? But that is why the stencil is 9 1/4 inches wide.
It is also sized for a six-foot long board and I gave six inches space at the top and the bottom of the stencil. So the stencil spread out is going to be nine and a quarter inches wide by 60 inches long total.
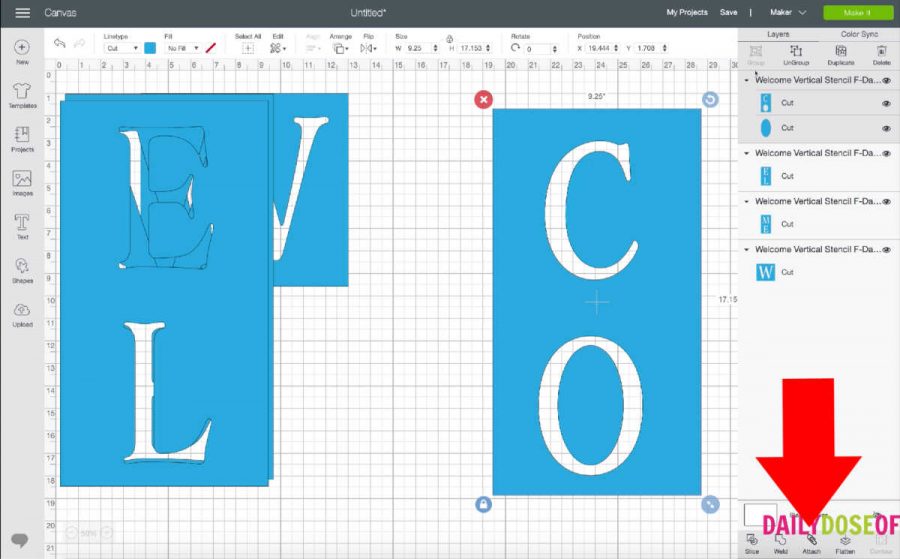
To fit the stencil on a 24-inch cut mat I grouped 2 letters together, with the ‘W’ being the only single letter.
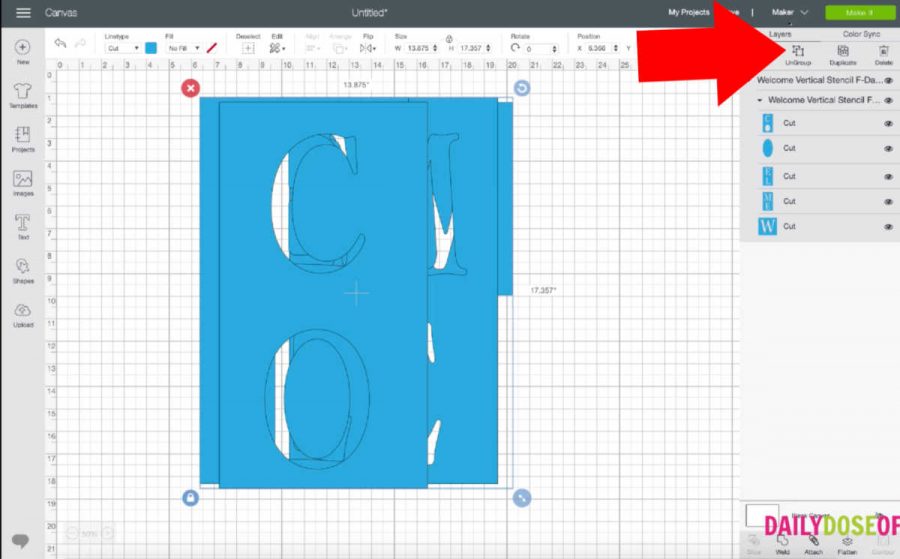
The first thing you will want to do is click the ungroup button on the top right of the layers menu. Since it is already sized for you, you won’t have to do much to do to get it ready. But there is one little issue with the stencil you need to know about.
After it’s ungrouped I’ll need you to find the C and O part of the stencil and if you look over in your layers menu you’re gonna see for some reason the center of the O would not stay attached in the design. I spent hours trying to find a solution, but I don’t know why Cricut thinks it shouldn’t be together.
So I’m just going to need you to select your C-O stencil and then click the attach button for me on the bottom right of your layers menu. That will attach the center and now Cricut will cut it together as it’s supposed to.
After that, you are ready to click the make it button.
Make sure your machine is set to cut vinyl.
Cutting the Welcome Sign Stencil
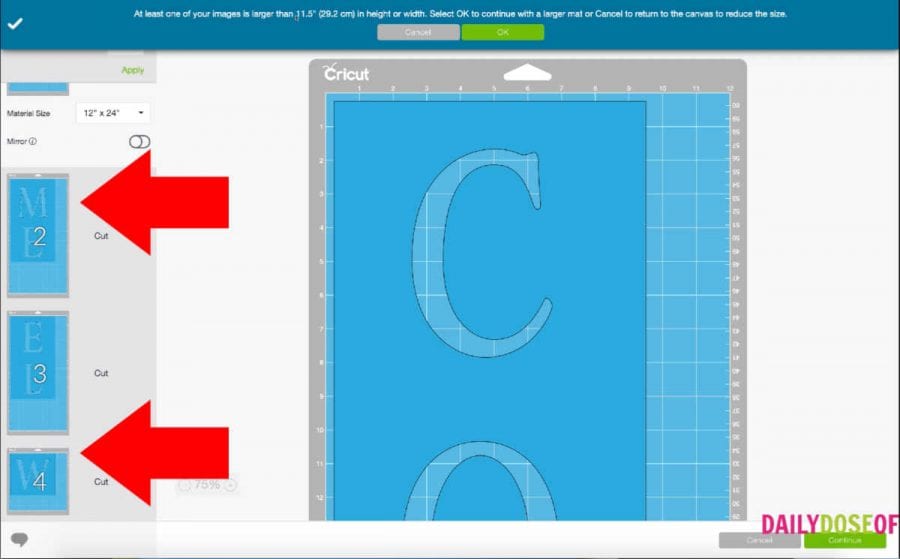
So we will need to cut three pieces of our stencil vinyl 18″ long and one piece of vinyl 9″ long.
And be sure to check your cut mat screen so you’ll know when the letter ‘W’ will be cut. You don’t want to load your cut mat with the smaller piece of vinyl when Cricut is planning on cutting one of the longer ones.
Line up the stencil vinyl with the top left of your 24-inch cut mat and smooth it down.
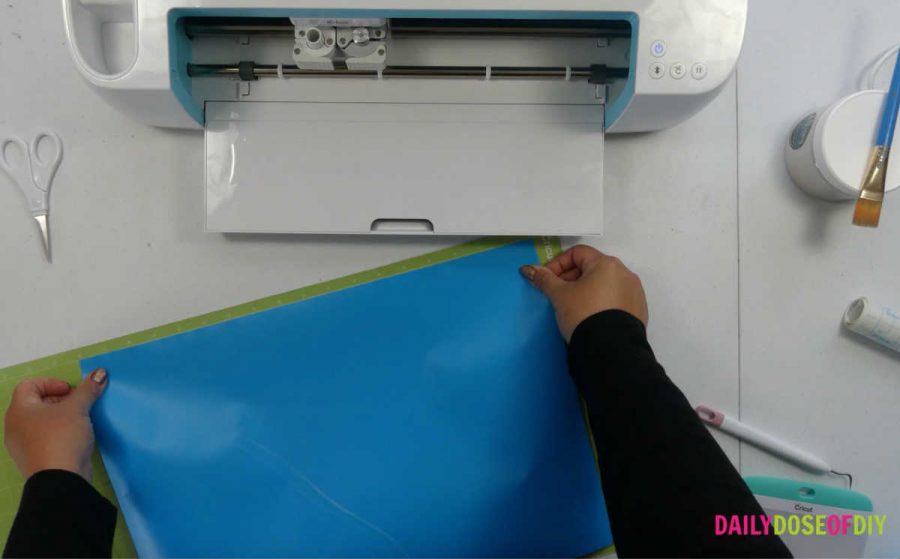
Next, load your mat into your Cricut cutting machine and click the go button. After the first piece of your stencil has finished cutting remove it from the mat. Be sure to flip the mat over and peel the mat off of your stencil to reduce curl and damage to your vinyl.
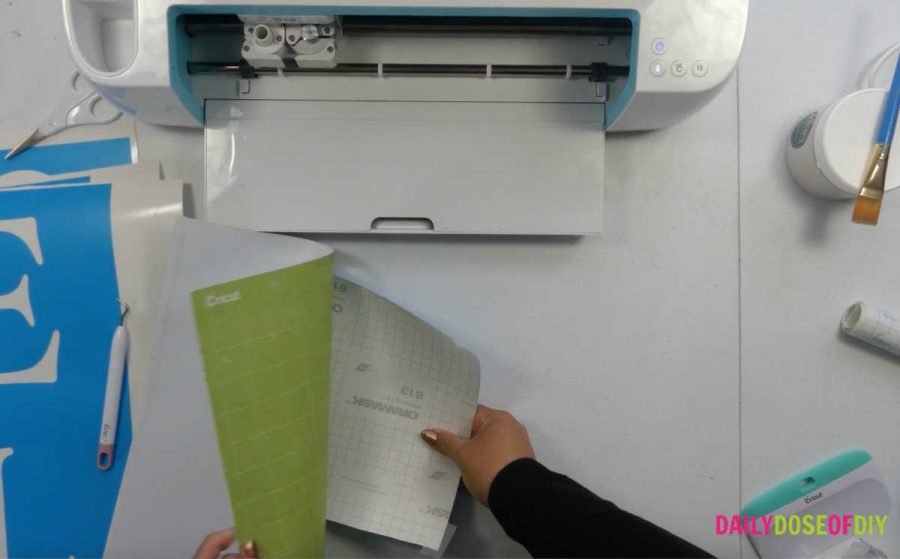
Repeat this process for all four pieces of the Welcome sign stencil.
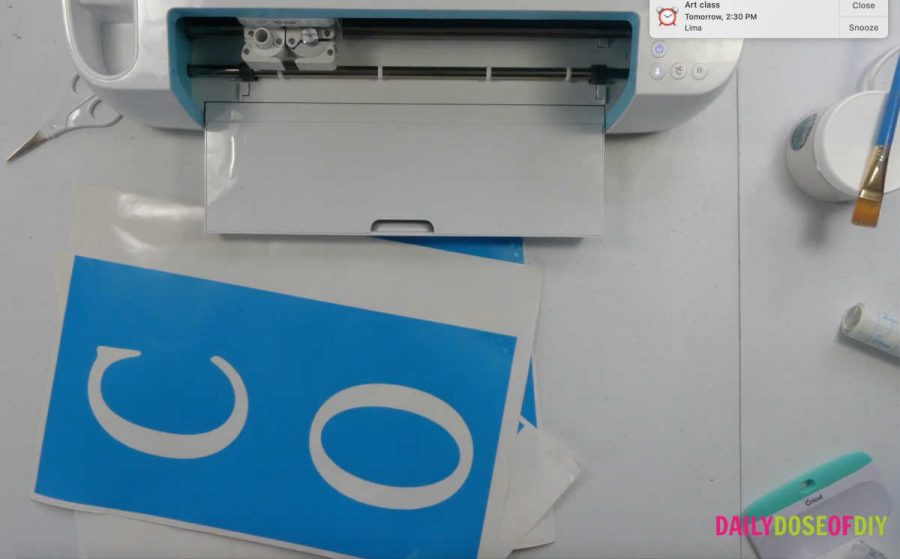
After the pieces are cut, you’ll need to weed the vinyl. Weeding is when we remove vinyl pieces that are not needed from our design.
A stencil is the opposite of a vinyl decal. You’ll want to remove the letters and leave the centers of the letters.
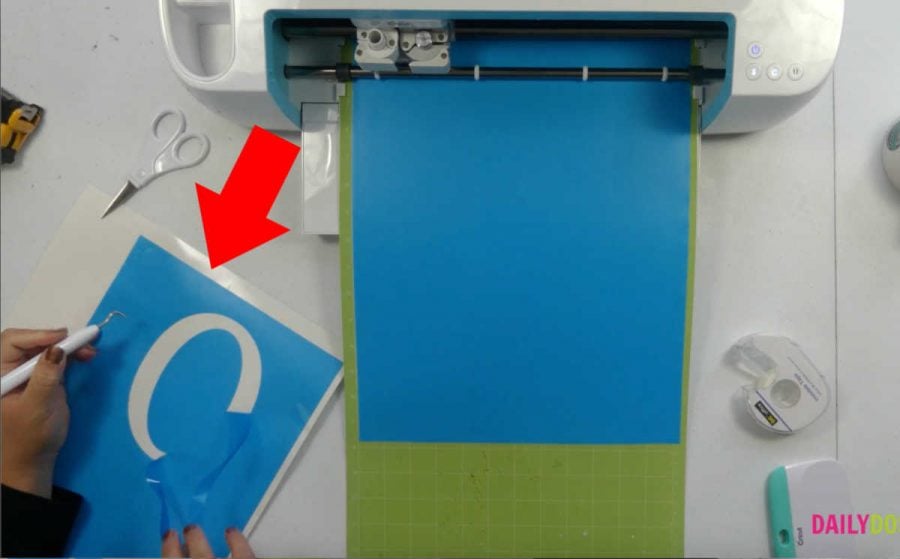
The stencil is the exact width of our board so there will be extra material to pull off around the edges too.
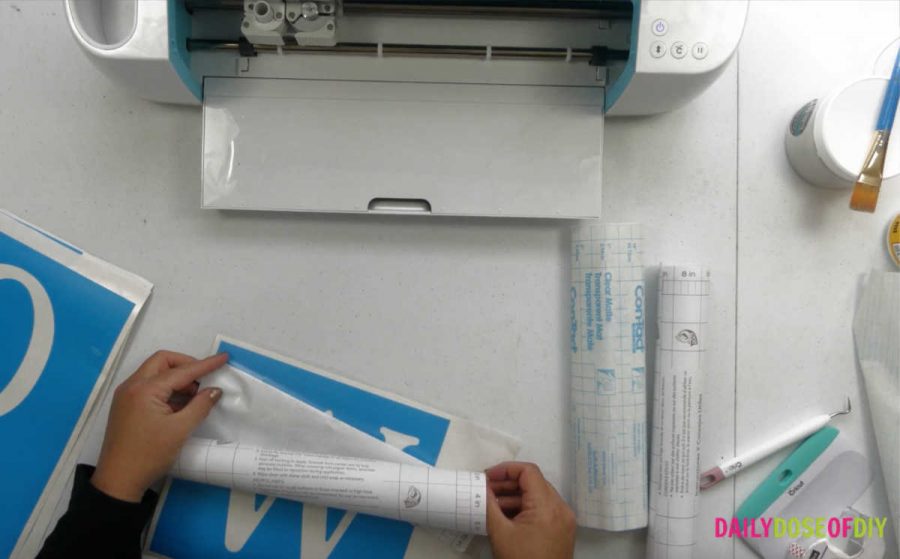
Here’s one of the pieces after it’s weeded and ready for transfer tape.
Applying Transfer Tape to Your Stencil
Next, cut your transfer tape slightly longer than the stencil pieces. For transfer tape, I just use clear contact paper from Walmart. It’s usually cheaper and it’s just the right amount of sticky.
I’ll show you an easy way to get your transfer paper on quickly.
Start with pulling back just one edge of the backing from your transfer tape and folding it over. Now stick that end to one end of your stencil like so . . .
Now you are going to peel the rest of the backing off with one hand while smoothing down the center of the tape with your other hand. This all happens at about the 11-minute mark in the video if watching will help.
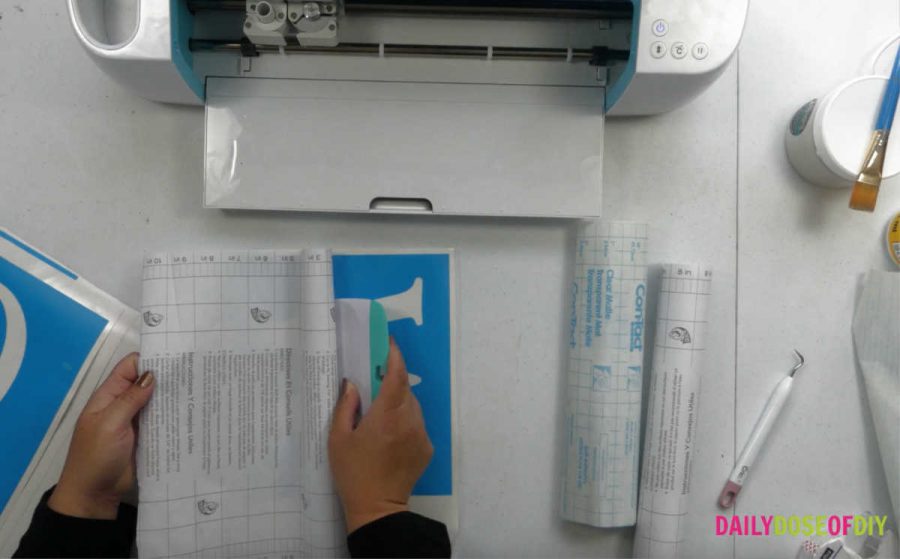
After the back is off, use your scraper tool to go from the center out to the edges and rub really hard so the stencil sticks to the tape. We call this burnishing.
Repeat that process for all four of your stencil pieces and then we’ll be ready to put the stencil on the board.
Related: How to Easily Apply Transfer Tape without Bubbles or Wrinkles
Transferring the Stencil to Your Board
On a 6 foot long piece of wood, there will be a margin of 6 inches at the top and bottom. Use a measuring tape to mark 6 inches from the top so we know where to start the stencil.
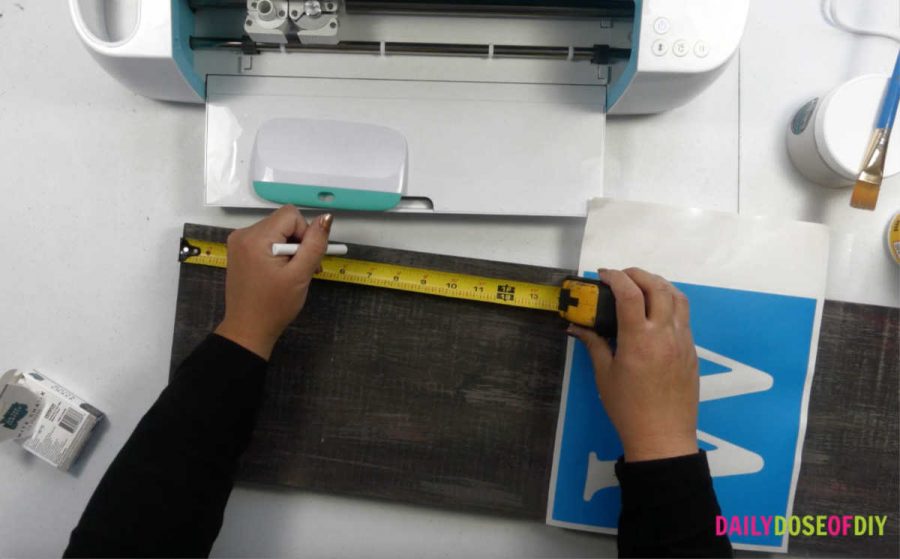
Place the top edge of your ‘W’ stencil on the six-inch marks. Line the rest of the stencils up with a slight overlap and make sure you have 6″ left on the bottom of your board. If you don’t double-check that your board is 6 feet long.
I put stencils on pretty much the same way I do transfer tape. Peel the backing off the top edge of the stencil and fold the paper back.
Make sure the two sides of the stencil line up with the sides of your board. And make sure the top lines up with the marks you made when measuring.
Once it’s lined up press down to get the stencil to stick to the board.
Slowly peel the backing off while at the same time smoothing down the top center of the stencil. Once the backing is off, burnish really well with your scraping tool from the center to the edges.
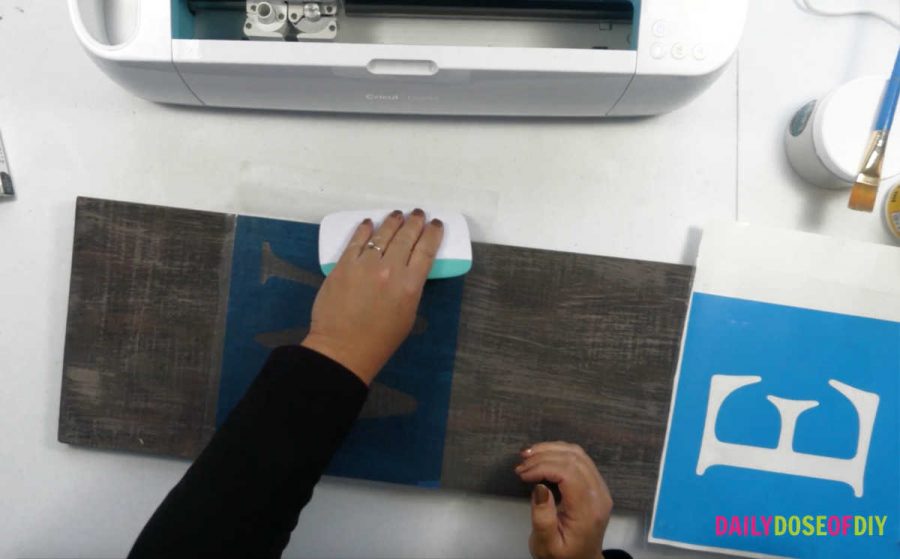
After it’s burnished really well slowly pull off the transfer tape. If there are parts of the stencil that won’t stick to the board, try scraping down that area again.
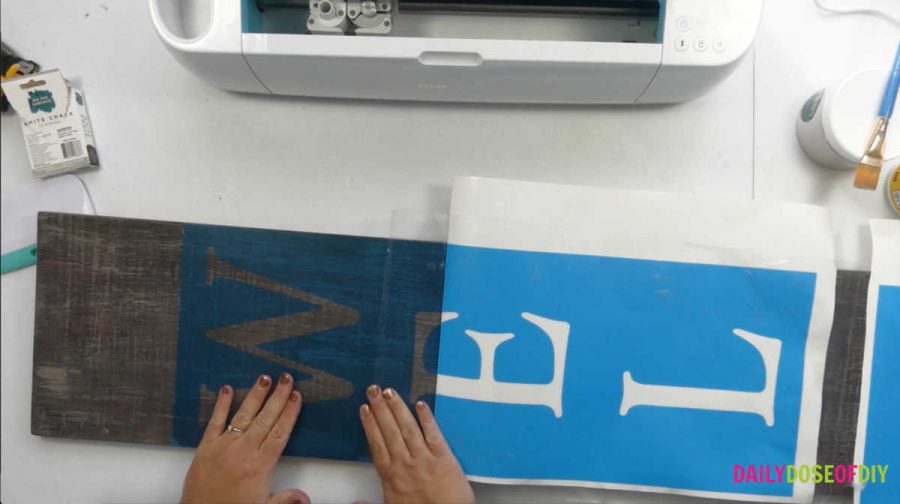
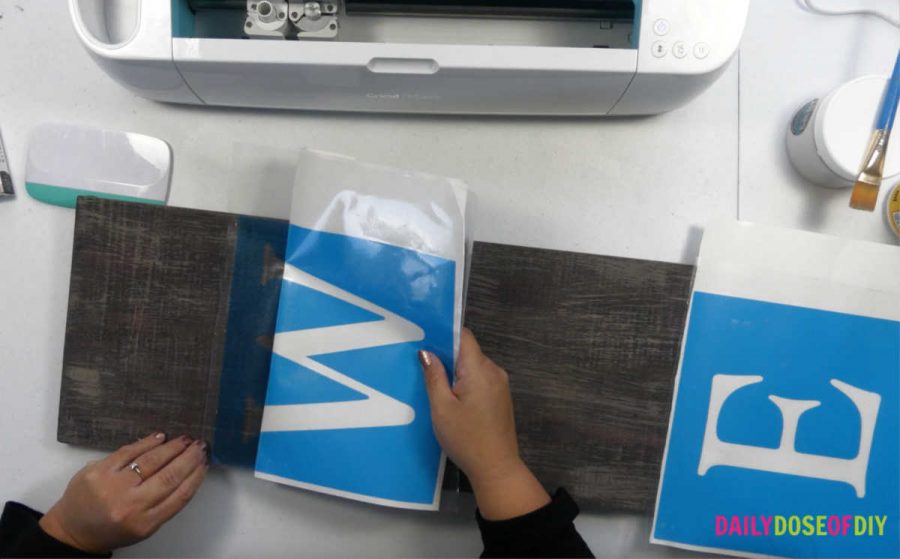
Now grab the E L stencil and remove the backing from the top of it. Line the sides up with the sides of your board and just slightly overlap the top with the bottom of the W stencil.
Repeat the process of putting down the stencils, burnishing and pulling off the transfer tape until you get to the end.
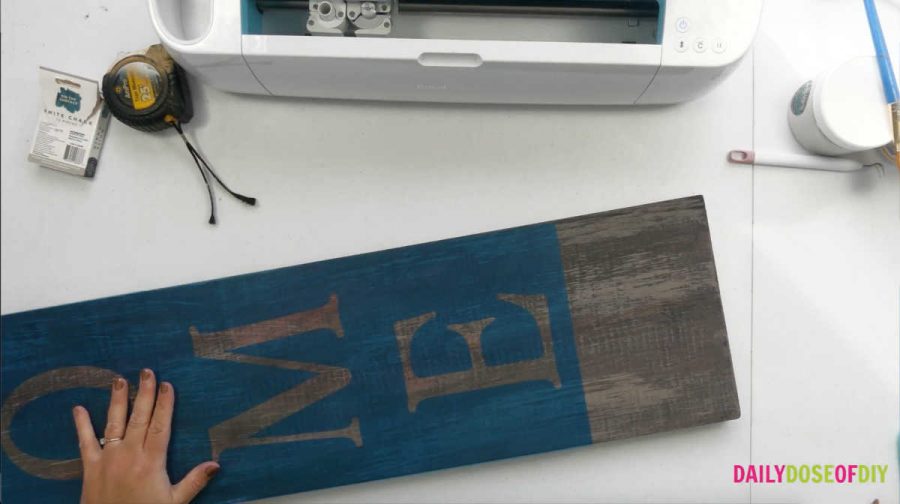
After all of the stencils are on we can get ready to paint.
Painting Your Vertical Welcome Sign
If your board is rough you may want to seal your stencil with mod podge or your base coat. I give all of my tips and tricks for painting a stencil without bleeds over on this post.
I decided to take the chance and not seal this stencil. Most of the time if your base board is smooth enough you can get away with just using super light coats of paint. And painting multiple layers.
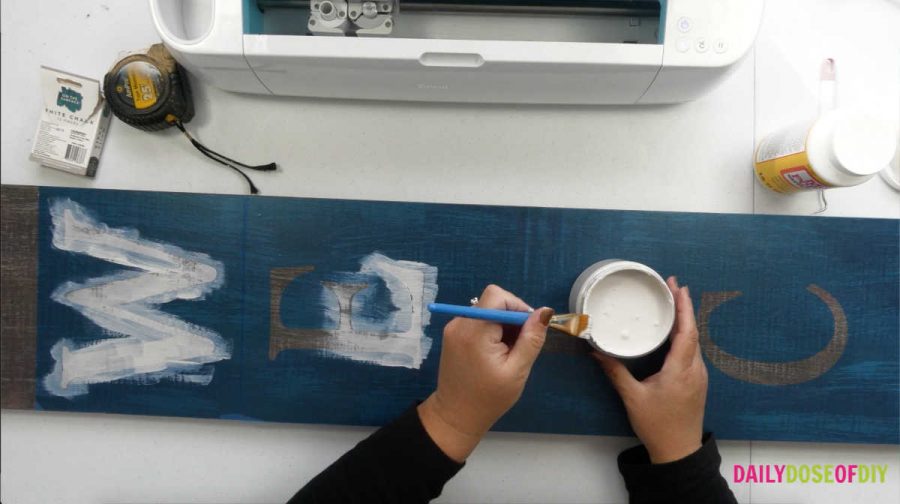
I did two light coats of paint for this stencil and then waited for it to dry before peeling it off.
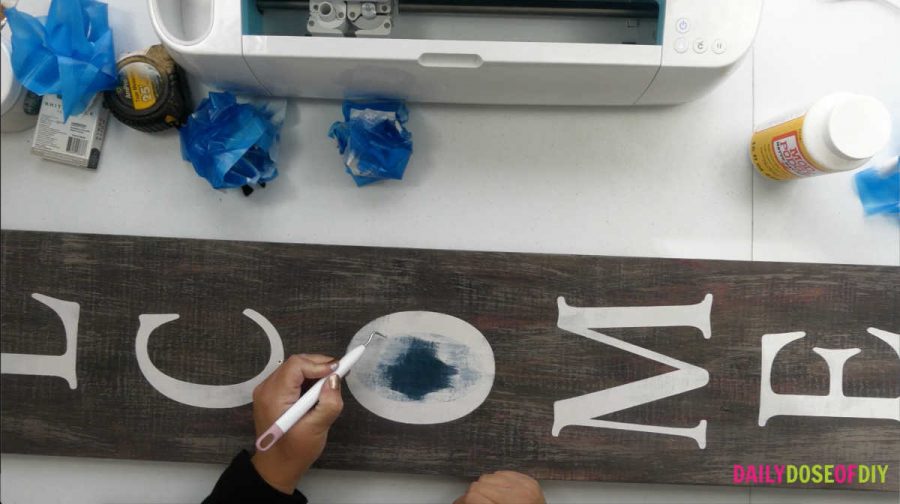
You can use your weeding tools to help you get the centers of letters or any part of the stencil that is stuck. Just be careful not to stab it into the wood or you will leave a mark.
Part of the reason I gave a 6″ margin at the top and bottom is to add embellishments if you wish.
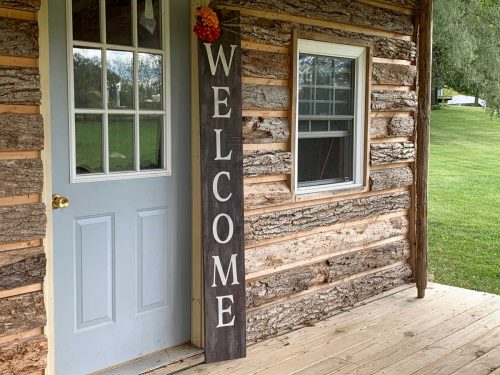
If you are going to make them seasonal, I recommend that you tie or staple them on so you can easily change with the seasons.
Get the FREE Welcome Sign Vertical Stencil
I keep all of my SVG files in a resource library for subscribers to my weekly newsletter. When you fill out the simple form below the link and password will fly right to your inbox.
All of the files are listed in alphabetical order in the library.
All of my free SVG files and Designs are kept in a library for your convenience. We will send you the link and password right away, and you’re free to use all the resources you want in the library.
Already have the password? (It’s at the bottom of every email) Enter the Library Here
Thanks so much for crafting with me to day and making a vertical welcome sign.

Chris Butler has helped thousands of crafters learn how to use their Cricut machine without feeling overwhelmed. She is a best selling author and an up and coming designer. For fun Chris enjoys designing SVG Files, hanging out with her family (preferably at the lake), traveling, and volunteering at her church. She is a wife and mom of two crazy fun kids.
Where do you get your boards? Are they heavy or light weight. What kind of wood is it made from?
Thanks for the tutorial.
I got mine from Home Depot for $8. They have different lengths and widths.
What kind of white paint did you use??
SeaPaints
The issue with “O”: weld the eye of “O” with the rest to make them one object. It’s the “Weld” command instead of “Attach”.
Thank you so much for this. This will be my first time using a stencil. How would I adjust this for a 5 foot board?
This is a great idea for a welcome sign! I love the free SVG file too!
Love this!
Looking forward to making my welcome sign.
Thank you!