This post may contain affiliate links for your convenience. If you make a purchase through one of my links I will earn a small commission at no additional cost to you.
Last Updated on March 27, 2024 by Chris Butler
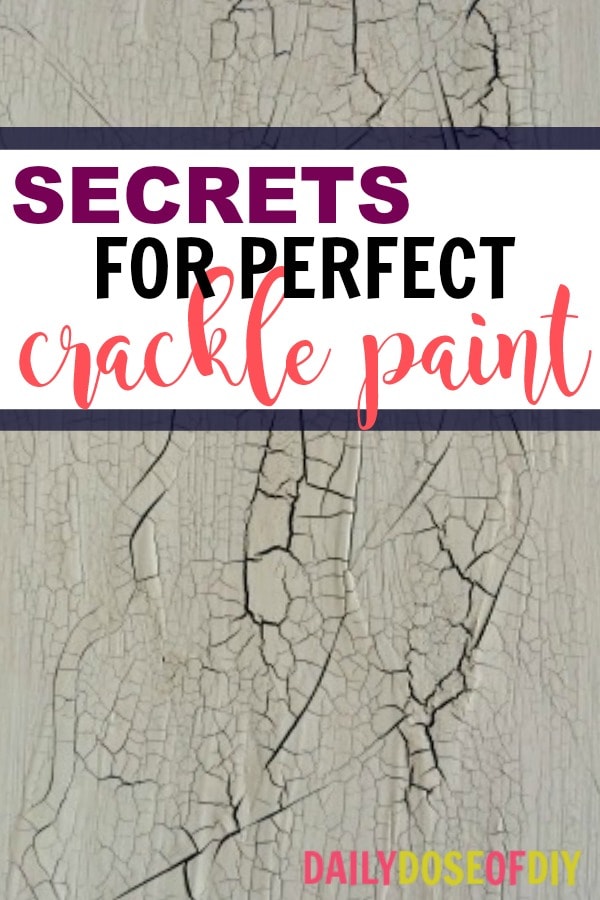
I’ve been asked several times about how you can make paint crackle with glue. I did this Wooden Rustic Christmas Gift Boxes tutorial a few months back with this technique, and have had some emails since then asking for more details.
There are several crackle glazes you can buy that range in price from $10-$25+ dollars, But all you really need is a bottle of glue. Regular Elmer’s or Wood Glue will work.
This is the only technique I use to make crackle paint, it works every time without fail. My favorite way to do it is with chalk paint. However this works great with latex too. The only paint I don’t like using it with is regular acrylic. I’ll show you some pictures with acrylic further down.
Let’s get to it.
Quick Links to Information in This Post
Supplies to Make Paint Crackle With Glue
- Chalk Paint (dark grey or black, plus your top color)
- Glue (Elmers or Wood Glue)
- Scrap Wood (for a practice run)
- Paintbrush
- Hair Dryer (optional but recommended)
How You Can Make Paint Crackle With Glue
I recommend starting with a scrap piece of wood to practice before you do that amazing piece of furniture you have. So grab your scrap piece of wood and paint it with dark grey or black. It doesn’t have to be perfect full coverage, but you need to paint the whole piece. This is what will show through when your top coat crackles.
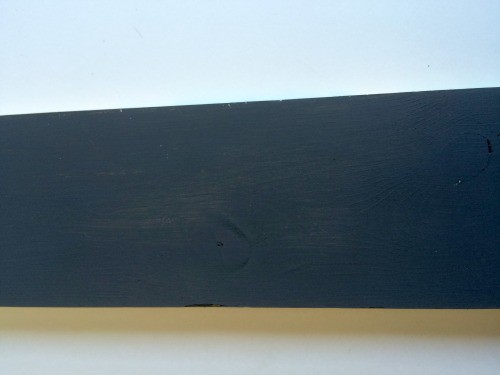
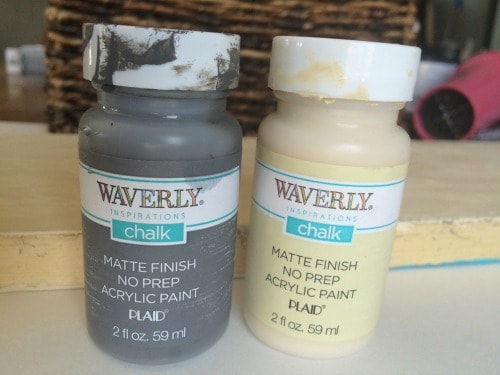
By the way, for this tutorial I am using Waverly Chalk Paint from Walmart. My dark color is Elephant and my top color is Cashew. So this technique works for both high end and cheap chalk paints.
Applying the Glue for Crackle Paint
After your basecoat is good and dry we are going to paint on the glue. I start with just squirting a good bit all over the board. If you are doing a large piece of furniture you will want to do this part in manageable sections. Timing is key.
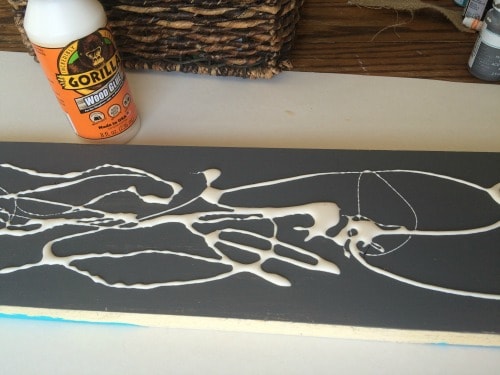
Today I am using Gorilla Wood Glue. I have also used Elmers many of times, I just happen to be out at the moment. And wood glue tends to be a little bit easier to work with.

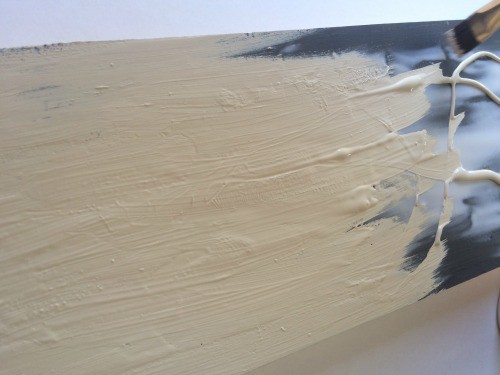
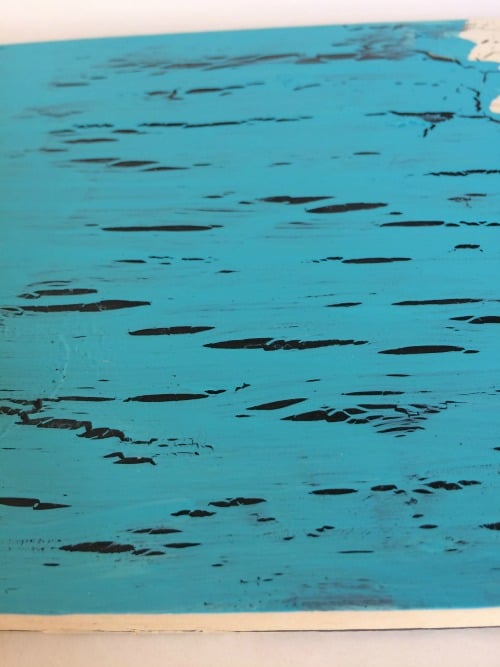
The next step is to take your paint brush and start smearing the glue all around. You want the whole section covered with a relatively thick layer. The thicker the glue the bigger the “crackle” and the thinner the glue the smaller the “crackle”
As you can see I have some thinner areas and some that are thicker. This makes it look more realistic when it’s all done.
Now for the perfect timing and why I recommend a hair dryer. We need a skin to form on top of the glue as it does when it’s starting to dry so we can apply the next layer of paint easily. We don’t want the paint to mix with the glue, but the glue can’t completely dry or we won’t get any crackle.
A hair dryer easily manages this. Just a minute or so with the hair dryer over the thicker areas will get that skin to form quickly.

Applying the Crackle Layer of Paint
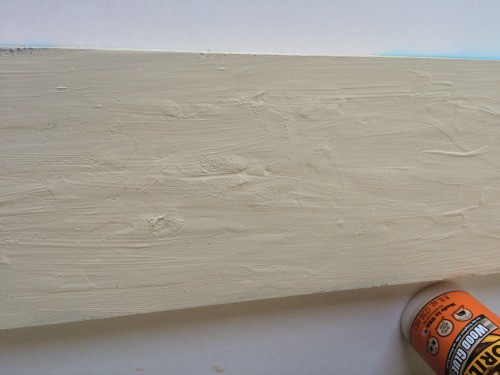
Now we get to paint our final color that will crackle! I pour a bit of paint all over the board and lightly use my brush to drag the paint across. You don’t want to apply a lot of pressure with your brush and break the skin of the glue.
As you can see the part I have painted doesn’t look all that great. You can see the bumps of the glue and some brush strokes. But all of that goes away once it’s dry. That’s why I like using chalk paint the best.
You can break out the hair dryer again on a low setting if you want to speed up the drying time. As the glue dries under the top coat of paint, it causes the paint to shrink and crackle. It’s a beautiful thing!
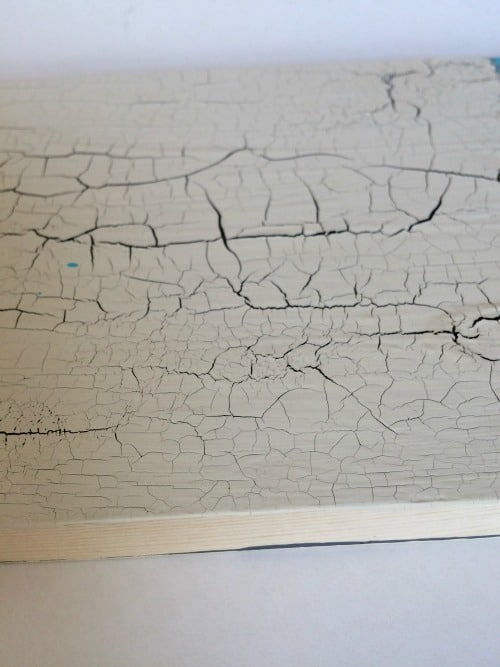
The thin layer of glue is those small lacy cracks spaced close together. And the deep farther spaced cracks are where the glue was a really thick layer.
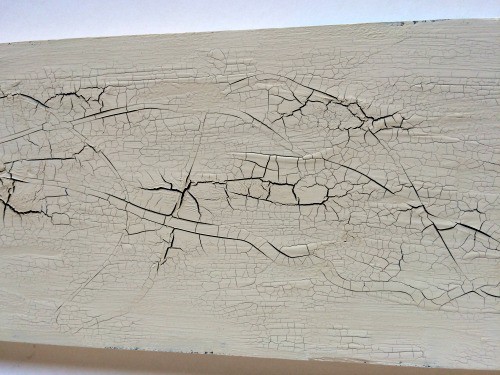
You can see on this section that some paint didn’t crackle, that is where the glue dried before I could get the paint on. That’s why I think it’s important to do a practice piece. You will get the feel for how the different thicknesses of glue will affect the crackle.
Here is a sample I did with regular acrylic paint. As you can see, it just doesn’t work as well. You don’t get the lacy effect, and it just doesn’t look right in my opinion. But it does ok for some projects.
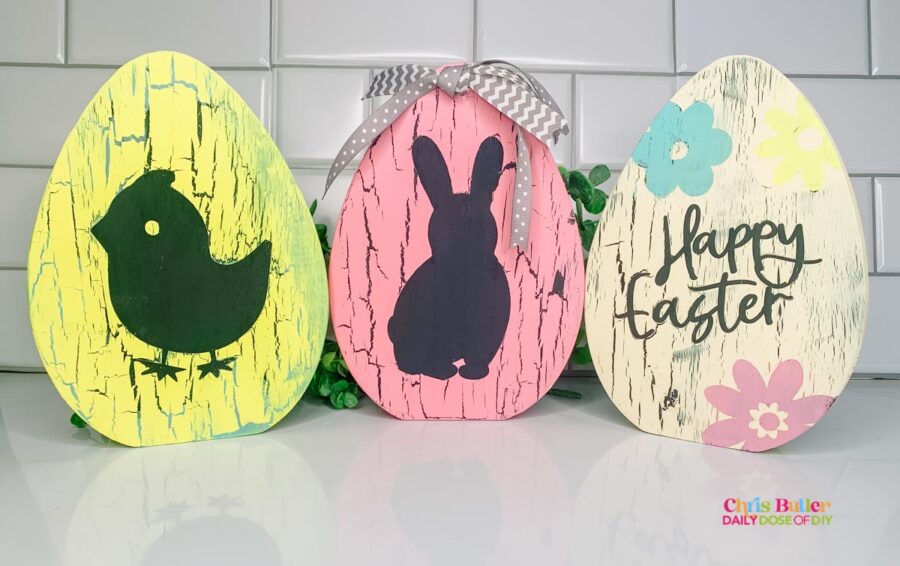
Check out the Rustic Easter Eggs I made using acrylics and the PVPP method here.
I have however used the glue method on latex paint and it worked just as beautifully as the chalk paint.
That’s it! Now you know the secret to getting perfect crackle paint. Have fun practicing, I can’t wait to see some of your finished projects! Snap a pic and hit the tried it button on the Pinterest Pin to show off your work.


Chris Butler has helped thousands of crafters learn how to use their Cricut machine without feeling overwhelmed. She is a best selling author and an up and coming designer. For fun Chris enjoys designing SVG Files, hanging out with her family (preferably at the lake), traveling, and volunteering at her church. She is a wife and mom of two crazy fun kids.
This crackle method works ! I practiced on a small piece first and they both turned out great! I used the hair dryer and tried it outside when it was hot. The outside piece dried pretty quickly and I had to work quickly. The dryer method is more controlled. Thanks so much!!
Glad to hear it Mary!
Do you need to put polyurethane on top to keep it from chipping off?
No, you don’t have too
Is there anything you can top coat with that will preserve cracked finish from wearing/chipping off? I want to use this technique for the edge trim on a stained wood bench top. It will receive a fair amount of wear (bumps/dings,etc). Thanks.
You can buy spray sealer in the can. It helps to stop wear and tear🤗
I guess your Jesus doesn’t love me, I ended up with a hot mess and a ruined project.
Jesus loves everyone! He never promised life would be easy tho. I’m sorry you ended up with a mess.
I have also had hot messes, if this is a practice piece, or a manageable piece try sanding with sander, or apply damp wet rags in spots allowing paint to soften, or running under water And peel it off in sections. It is easy to suggest ideas without seeing, I’m sure u solved the problem good luck.
I was wondering about top.coat too.
Is.this just downloaded not used?
Does.it chip off of jandled?
I meant decoration
Not downloaded
This is absolutely gorgeous and sounds easy my question is….will it crackle enough to peel off or is it smooth despite the look?
It’s still quite smooth. Some of the big cracks you might feel a bump, but it’s not really peeling.
Can I do this on canvas? Also can I put a resin top coat over it to seal and protect it?
Hi, I am doing a large wooden wardrobe that I want to distress. It is currently stained varnished wood that I have sanded to take away the sheen. Can I paint the Elmer’s glue over the original finish then top with latex glue to get the crackle without putting a coat of paint under the glue?
I’m hoping to be able to let the dark original color to come through! Thanks
Hi Cathy! Yes if you sanded the sheen off it will work
Is there a way to consistently get small crackle that is less dramatic?
Less glue. Thin layer. I don’t like it too dramatic either
Hi Chris 🙂
my name is Ela and I’m from Poland .
I don’t speek english well but I want to THANK YOU for sharing this project!
It’s really great!
Now I’m going to try it.
Thank you!
Have a nice day 🙂
Big kissssss
Dziękuję 🙂
Ela
Thanks Ella! Nice day to you too!
Okay, I have painted on the base coat, the glue, and the topcoat. I now have a lovely crackled finish. I want to decoupage a photo onto the wood, so will mod podge serve as a suitable finish for the photo and the crackle finish?
Yes, that should work great. Sounds like it’s going to be gorgeous!
I have a mural on my stairway which I want to look old. I usually would just rub it down with a shoe polish as done in the past. But was thinking a crackle finish would be different. A coat of glue when finished then a light coat of a light brown should do right? I think maybe a trial run would be best. A lot of work in the mural.
I would love to do this technique to an 18″ round plywood piece for a door hanger I have in mind. Once crackled, I’d like to glue a wooden cutout “hi” on it. Would the cutout stay on or would the peeling effect make the cutout fall off?
Looks great by the way!
It should stay, are you using wood glue or something else?
I’m using wood glue. Just didn’t know if the “peeling” paint is so loose that the glue wouldn’t grab.
Hi! Does this crackle technique work with milk paint also?? Ready to try it soon on a piece my husband is building! 🔨 🖌️
Hi
I’ve just bought some lovely wooden shelves with but when I brought it home it looks more yellow than I hoped. It’s already been cackle painted with a metal under tone. I’d like to repaint it white but keep the cackled look revealing the metal colour underneath. Can I simply repaint it and hope that the cracks will show through?? Or do I have to start the whole process again? Many thanks
What kind of spray sealer do you use? You would not use was over chalk paint?
Sorry let me retype (should wear my glasses when I do this) Do you not use wax to finish on chalk paint? I am new to this and been reading some use wax and some prefer spray sealers – I would love to get your opinion specially for a piece that will be touched a lot (like a vanity).
What is your preference of spray sealers?
Thank you!
I have old wood shutters that I want to put inside beside my double window in my den. The shutters are already an old light yellowish color and I wanted to use coffee bean chalk paint or I have a dark brown. Will dark over light look ok?
Hi Sharon, my guess would be yes. but you might want to practice on a scrap piece of wood. maybe find a close yellow for the base. Make sure you are happy with the look before using your good shutters.
Hi can I use this technique on my cabinets in kitchen they are currently painted a bright white I wanted to use wood glue but did not sure if there’s a clear top coat I can use on top to crackle ?
Does this only work on real wood items? I have some picture frames I’d like to do this to but they’re either plastic or some type of mdf board or resin.
Will this wok with out the black base coat of paint?
What I am trying to do is get the cracked look on a transparent material so light will shine through the cracks.
Can you use this technique with chalk spray paint?
I’m going to try it I will let you know if it works!
Thanks for this great info. I guess I have to make a trip back to Michael’s to return that $24 bottle of crackle medium I bought today!!
I have 2 old leaded glass window frames from my grandparent’s hunting lodge. they probably have 10 layers of paint on them. The paint itself is already crackled from age, however, they are not painted on the sides of the frame where they fit into the window. Should i remove all of the paint or just sand it down? i’m sure that it is leaded paint so i will need to be safe.
I have tried a practice piece of wood in which this process worked beautifully.
Thanks for your help in advance!
Rosie
So would it be ok if I use a cream color on bottom and my dark color in top?
Can the top coat be sprayed on with a paint sprayer to help speed up larger pieces before the glue dries too much?
Absolutely loved this idea.!! Crackle medium is way to expensive .I was going to just distress to wood doors for head boards but tried this instead. For me it was really easy and quick! Thank you for sharing !!!
Would this work with enamel paint?
Thank!
i want to use this on dolls for a creepy look. will this work? i have plastic and Porcelain dolls. tanks!
What a beautiful piece of wood. I have a special piece of wood that I’ve been trying to figure out what to do with. I’m Def going to be giving this my best shot. I’ll probably be outside this evening working on it ☺️. Thanks so much for the great share.
once you do the crackle with glue. can you do it over the top if you dont have enough cracks